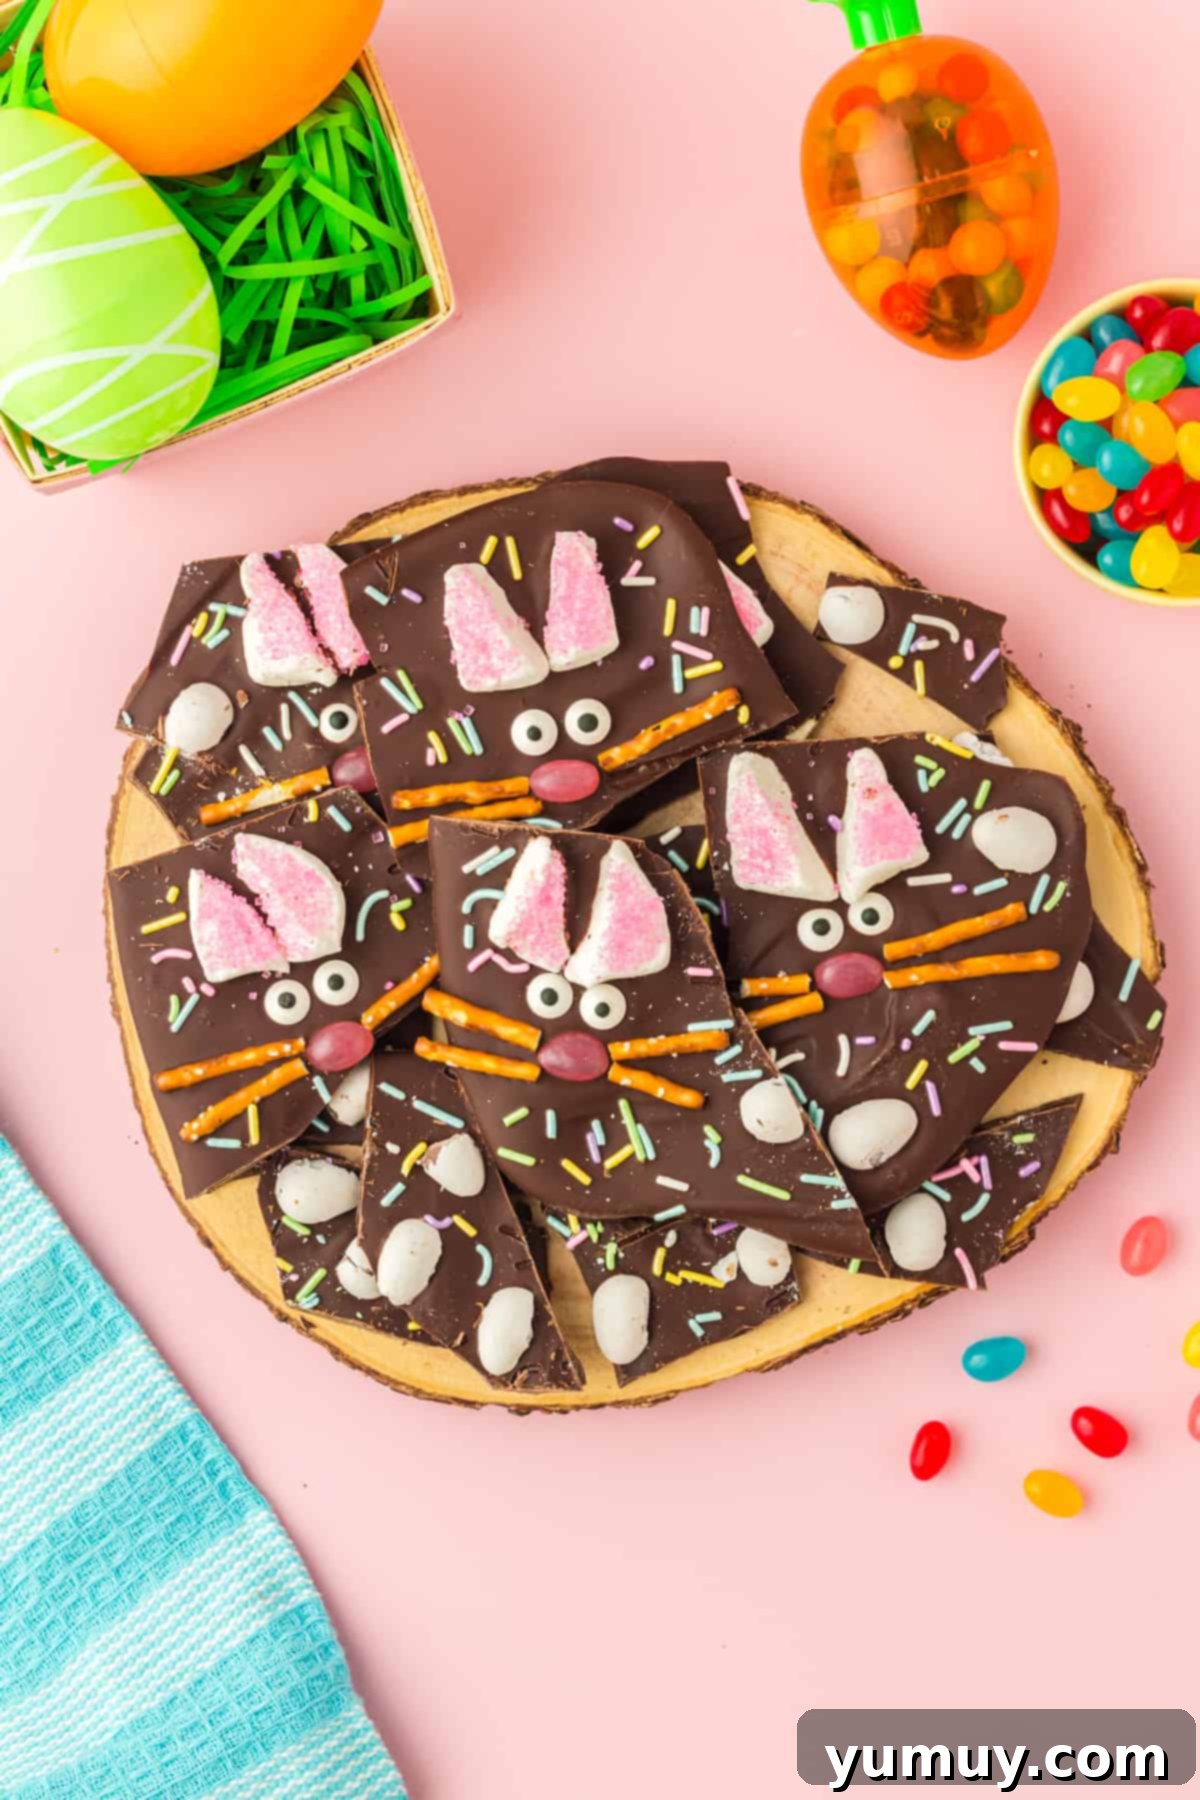
Delicious Easter Bunny Bark: An Easy & Fun Holiday Treat
Easter is a time for joy, celebration, and, of course, delightful treats! If you’re looking for a simple yet stunning dessert that both kids and adults will adore, our Easter Bunny Bark recipe is precisely what you need. This enchanting chocolate bark, adorned with charming bunny faces and vibrant sprinkles, is not just a treat for the taste buds but also a fantastic edible craft that can keep little hands happily busy for hours. It’s the perfect blend of sweet and salty, crunchy and chewy, making it an irresistible addition to any Easter gathering or a wonderful gift for friends and teachers.

- Pin this recipe for later!
Irresistible Easter Chocolate Bark: A Festive Delight
This Easter Bunny Bark isn’t just a treat; it’s a centerpiece! It’s beautifully designed to capture the whimsical spirit of Easter with its vibrant colors and adorable bunny faces. While I personally love using semisweet chocolate for its rich, balanced flavor, this recipe is incredibly versatile and works wonderfully with dark, milk, or even white chocolate. The playful combination of fluffy marshmallow ears, chewy jelly bean noses, and crunchy pretzel whiskers creates a delightful texture contrast that keeps every bite exciting. To add an extra layer of festive charm, I sprinkle crushed candy-coated chocolate eggs and a generous handful of colorful pastel sprinkles, making each piece a miniature work of art. Imagine these cute chocolate creations gracing your Easter dessert table – they’re guaranteed to bring smiles and be the talk of the holiday!


5 from 1 vote
Easy Easter Bunny Bark Recipe
Craft delightful Easter treats with this simple recipe for bunny bark, featuring rich semisweet chocolate, fluffy marshmallows, sweet jelly beans, whimsical candy eyes, and savory pretzel sticks. Perfect for a fun holiday activity and a delicious dessert!
Prep Time: 20 minutes
Chill Time: 4 hours
Total Time: 4 hours 20 minutes
Yields: 10 pieces
Print Recipe
Ingredients
- 2 teaspoons pink sanding sugar
- 5 large marshmallows
- 12 ounces semisweet Baker’s chocolate chopped*
- 20 candy eyes
- 10 pink jelly beans
- 20 thin pretzel sticks
- ½ cup candy coated chocolate eggs broken into pieces
- 2 tablespoons pastel colored sprinkles (learn how to dye sprinkles here)
Equipment
- Kitchen Scale (optional)
- Baking Sheet (10×15-inch jelly roll pan recommended)
- Microwave-safe Bowl
- Spatula
- Sharp Knife
- Cutting Board
Instructions
Prepare Your Workstation: Line a 10×15-inch jelly roll pan or baking sheet with wax paper or parchment paper. This non-stick surface is crucial for easily removing your finished bark. Set this prepared pan aside.

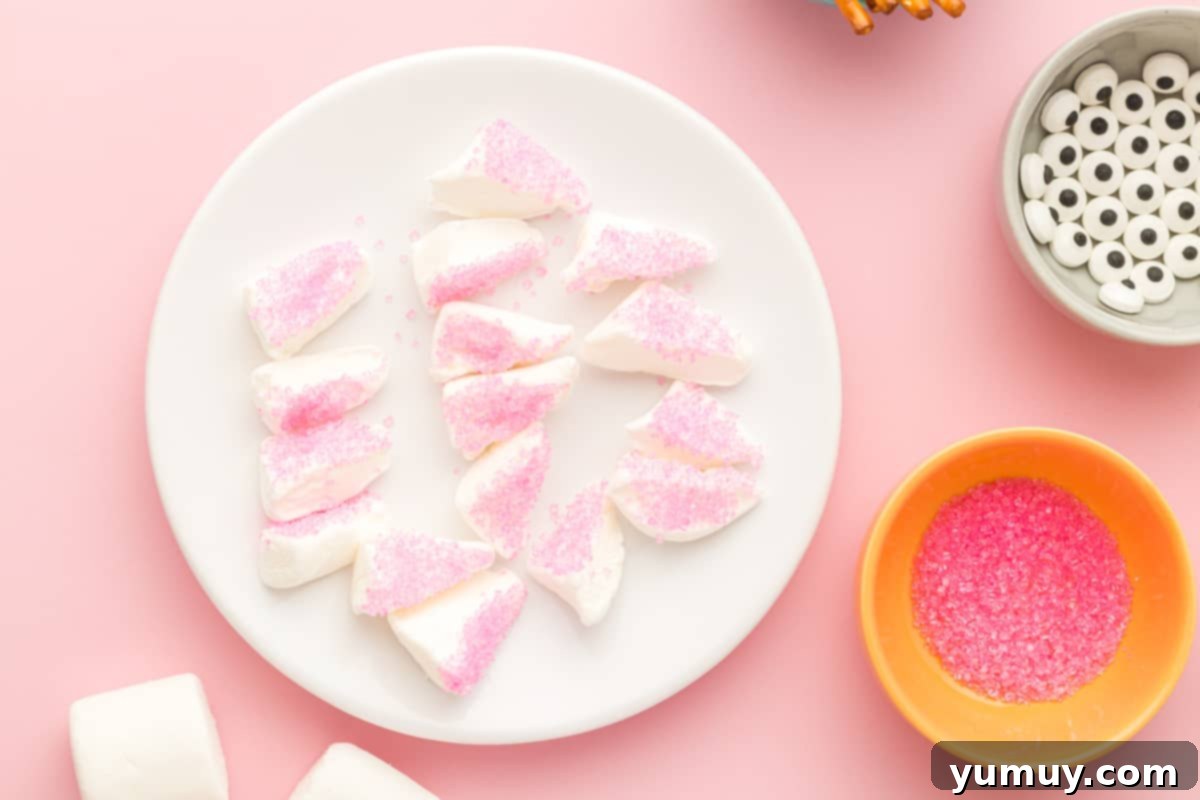
Craft the Bunny Ears: Pour 2 teaspoons of pink sanding sugar into a small, shallow bowl. Take the 5 large marshmallows and carefully cut them into 20 triangular shapes. These will form your bunny ears. Dip one of the sticky, cut sides of each marshmallow triangle into the pink sanding sugar, creating a vibrant pink inner ear. This adds a charming detail to your bunny bark.
Melt the Chocolate: Place the 12 ounces of chopped semisweet Baker’s chocolate into a microwave-safe bowl. Begin melting the chocolate in the microwave on high heat for 30 seconds. Remove the bowl, stir thoroughly with a spatula, and continue heating in 15-30 second intervals, stirring well after each, until the chocolate is completely melted and smooth. Be careful not to overheat, as chocolate can seize.

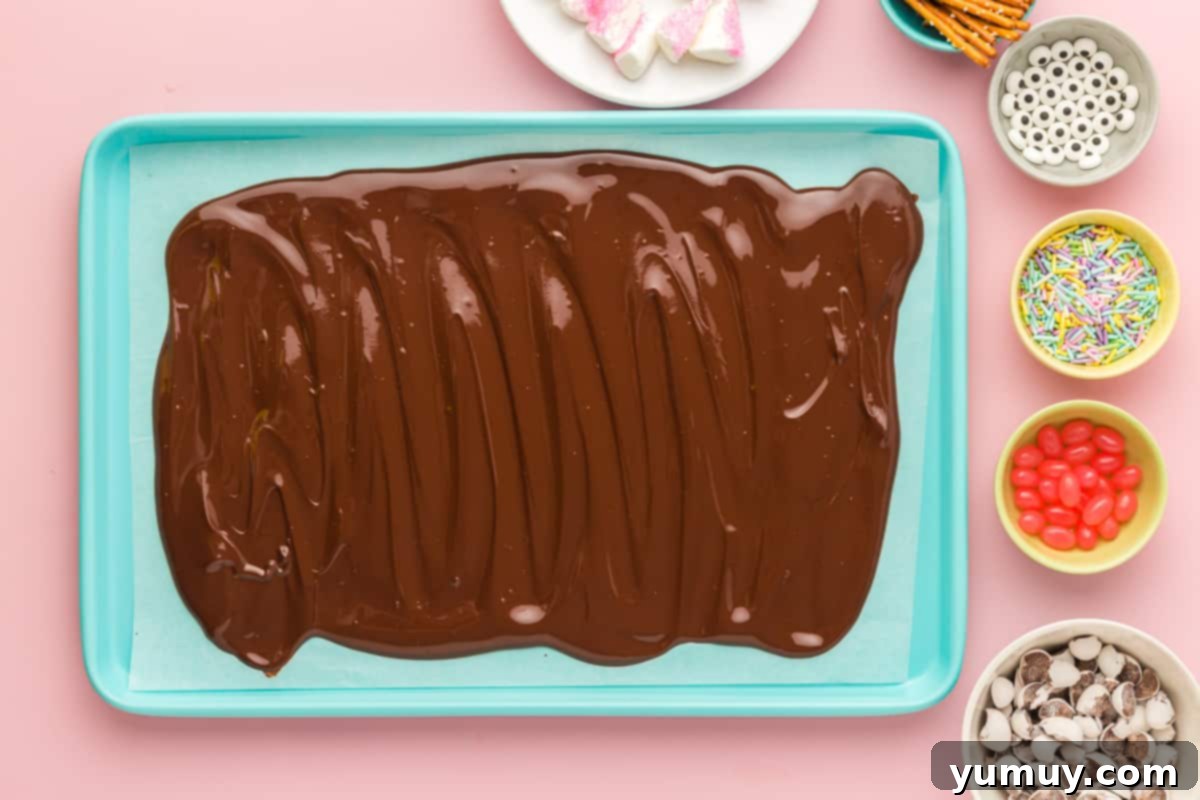
Spread the Chocolate Base: Using your spatula, carefully spread the melted chocolate evenly over the prepared baking sheet. Aim for a rectangular shape, leaving a small margin from the edges of the pan to ensure consistent thickness and prevent thin, brittle edges.

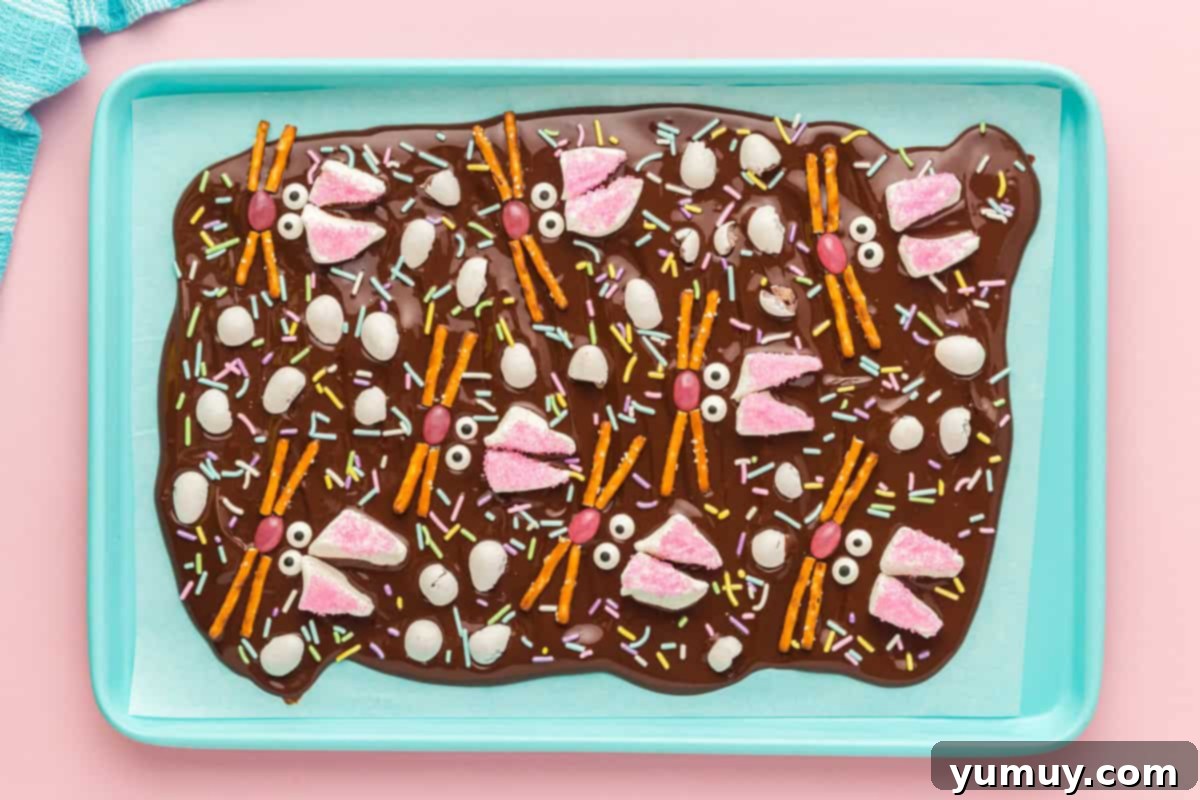
Assemble Your Bunnies: This is where the fun really begins! While the chocolate is still melted, start arranging your bunny faces. Place the marshmallow ears (pink side up) in pairs. Below each pair of ears, add two candy eyes, followed by a pink jelly bean for the nose. Break the 20 thin pretzel sticks in half to create 40 smaller pieces, and arrange two on each side of the jelly bean nose for whiskers. Ensure there is enough space between each bunny to allow for clean cuts later without overlapping.
Add Festive Toppings: Scatter the broken candy-coated chocolate egg pieces around the assembled bunnies on the melted chocolate. Be mindful of where you plan to cut the bark into individual pieces later; try to avoid placing hard chocolate egg chunks directly on future cut lines, as they can make slicing difficult. Finally, sprinkle the 2 tablespoons of pastel-colored sprinkles liberally over the entire surface of the bark for a truly festive finish.

Chill to Perfection: Carefully transfer the baking sheet to the refrigerator and allow the chocolate bark to chill and set completely for a minimum of 4 hours. For best results, overnight chilling is ideal.
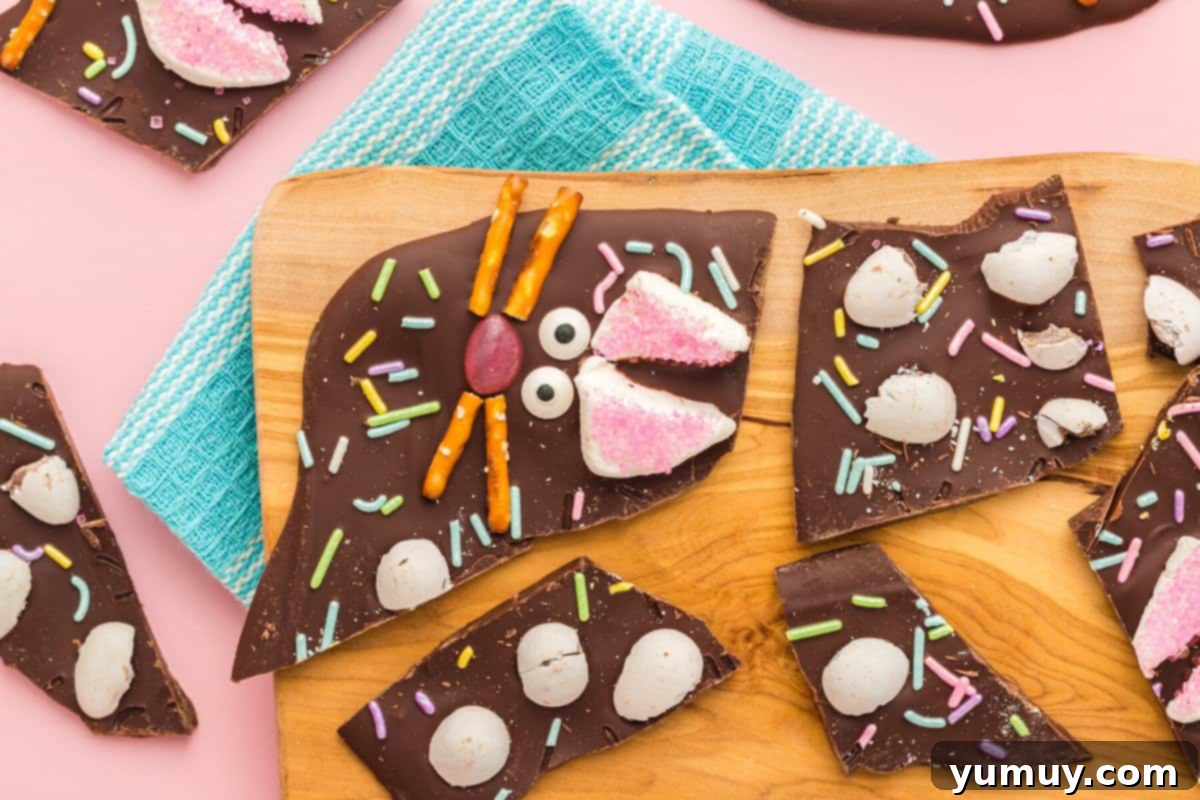
Cut and Serve: Once the bark is fully set, remove the baking sheet from the refrigerator. Transfer the entire sheet of wax paper with the bark onto a large cutting board. Use the sharp tip of a very sharp knife to lightly score tiny marks where you intend to cut each bunny section. For the cleanest cuts, run your knife under hot water, wipe it dry, and then carefully slice through the chocolate around each bunny. This warm knife technique helps prevent the chocolate from cracking. Cut along your marked lines, serve your adorable Easter Bunny Bark, and enjoy this delightful creation!

Notes & Tips for the Perfect Bunny Bark
- Chocolate Choice: While semisweet chocolate is recommended, feel free to use your favorite! Milk, dark, or white chocolate all make excellent bases. For a varied look, you could even create layers with different chocolates.
- Marshmallow Size Matters: Always opt for large marshmallows for the bunny ears. Mini marshmallows won’t provide the right shape or presence needed for this design.
- Customization is Key: Don’t limit yourself to pastel sprinkles! Get creative with other festive toppings like mini chocolate chips, crushed cookies, or different colored jelly beans for varied bunny noses.
- Pretzel Whiskers: Thin pretzel sticks work best for whiskers, providing that perfect salty crunch. Breaking them cleanly in half before placing helps achieve a uniform look.
- Cutting with Care: The most crucial step when cutting is patience. Work slowly and precisely. The hot knife technique is essential for smooth edges and to avoid breaking the chocolate, especially around the delicate bunny features. Ensure your cuts avoid any hard candy-coated egg pieces, as they are challenging to slice through and can cause cracking.
- Kids in the Kitchen: This is a fantastic recipe for involving children! They can help arrange the marshmallows, candy eyes, jelly beans, and sprinkles. It’s a great way to make lasting holiday memories.
Storage Instructions
Store your Easter Bunny Bark in an airtight container at room temperature, in a cool, dark place, for up to 1 week. It’s generally not recommended to freeze chocolate bark with marshmallows and pretzels, as the pretzels can become stale and soggy, and the marshmallows may dry out or alter in texture upon thawing.
Nutrition Facts
Calories from Fat 153
Author: Becky Hardin
Did You Make This?
We love seeing what you’ve made! Tag us on social media at @easydessertrecipes for a chance to be featured.
How to Make Easter Bunny Bark: A Step-by-Step Guide for Creative Fun
Creating this delightful Easter Bunny Bark is an incredibly rewarding experience, especially when shared with family. Here’s a detailed, easy-to-follow guide to bring these adorable treats to life, perfect for bakers of all skill levels.
Step 1: Gather Your Ingredients and Prepare Your Pan
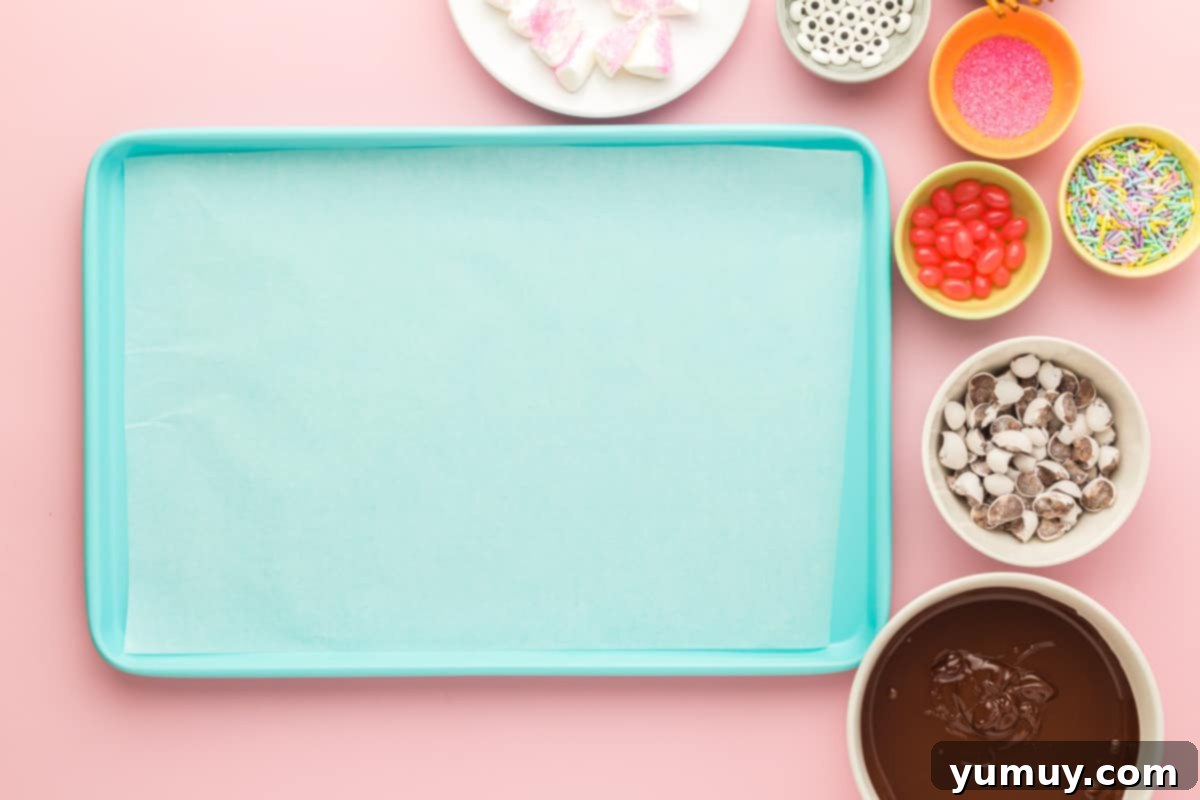
Before you begin, ensure all your ingredients are laid out and ready. This helps streamline the entire process. Line a 10×15-inch jelly roll pan or baking sheet with a sheet of wax paper or parchment paper. This non-stick foundation is essential for a clean release of your finished chocolate bark. Set it aside for later use.
Step 2: Craft the Adorable Bunny Ears
Pour about 2 teaspoons of vibrant pink sanding sugar into a small, shallow bowl. This will be the charming pink center of your bunny ears. Take 5 large marshmallows and, using clean kitchen shears or a sharp knife, carefully cut each marshmallow into four small triangular shapes. Each marshmallow will yield four ears, giving you a total of 20 ears. Dip the freshly cut, sticky side of each marshmallow triangle into the pink sanding sugar. The sugar will adhere easily, creating the perfect rosy tint for the inside of the bunny ears. Arrange them on a separate plate for easy access.
Step 3: Perfectly Melt Your Chocolate Base
Place 12 ounces of finely chopped semisweet Baker’s chocolate into a microwave-safe bowl. Melting chocolate requires a gentle approach to prevent it from seizing or burning. Start by microwaving on high for 30 seconds. Remove the bowl and stir the chocolate thoroughly with a spatula, even if it doesn’t look fully melted. Continue heating in short 15-30 second intervals, stirring vigorously after each, until the chocolate is completely smooth, glossy, and free of any lumps. Once melted, immediately pour the chocolate onto your prepared baking sheet. Using a spatula, spread the melted chocolate evenly into a rectangle, ensuring a uniform thickness across the surface. Try to avoid spreading it too thin at the edges.
Step 4: Assemble Your Adorable Bunny Bark
This is the most creative part! Work quickly while the chocolate is still soft and pliable. Begin by carefully placing the prepared marshmallow bunny ears onto the chocolate base, ensuring the pink sugary side faces up. Position them far enough apart to create distinct bunny heads, keeping in mind where you’ll be cutting later. Follow with 20 candy eyes, placing two above each marshmallow ear set. Then, add 10 pink jelly beans below the eyes to form the cute bunny noses. For the whiskers, take the 20 thin pretzel sticks, break each in half, and arrange two halves on either side of each jelly bean nose. Repeat this process until all 10 bunnies are formed on your chocolate canvas. Finally, scatter ½ cup of broken candy-coated chocolate egg pieces and 2 tablespoons of pastel sprinkles randomly over the remaining melted chocolate. Remember to strategically place the hard chocolate egg pieces, avoiding future cut lines to ensure easy slicing.
Step 5: Chill and Perfectly Cut Your Bark
Once all your bunnies are assembled and toppings are added, carefully transfer the baking sheet to the refrigerator. Allow the bark to chill for at least 4 hours, or ideally overnight, to ensure it sets completely and becomes firm. When you’re ready to cut, remove the baking sheet from the refrigerator and transfer the entire sheet of wax paper (with the set bark) onto a large, sturdy cutting board. To achieve clean, smooth cuts without cracking the chocolate, here’s a professional trick: use the sharp tip of a very sharp knife to lightly perforate small marks where you plan to cut. Before making each cut, run the knife under hot water for a few seconds, then wipe it completely dry. The warm blade will glide through the chocolate, creating precise, smooth cuts around each bunny. Serve your beautifully crafted Easter Bunny Bark and savor every delightful, festive bite!
More Fun Easter Recipes to Try!
Easter Bunny Bait
Easter Rice Krispie Treats
Easter Truffles
Birds Nest Cookies
Browse All Easter Recipes
