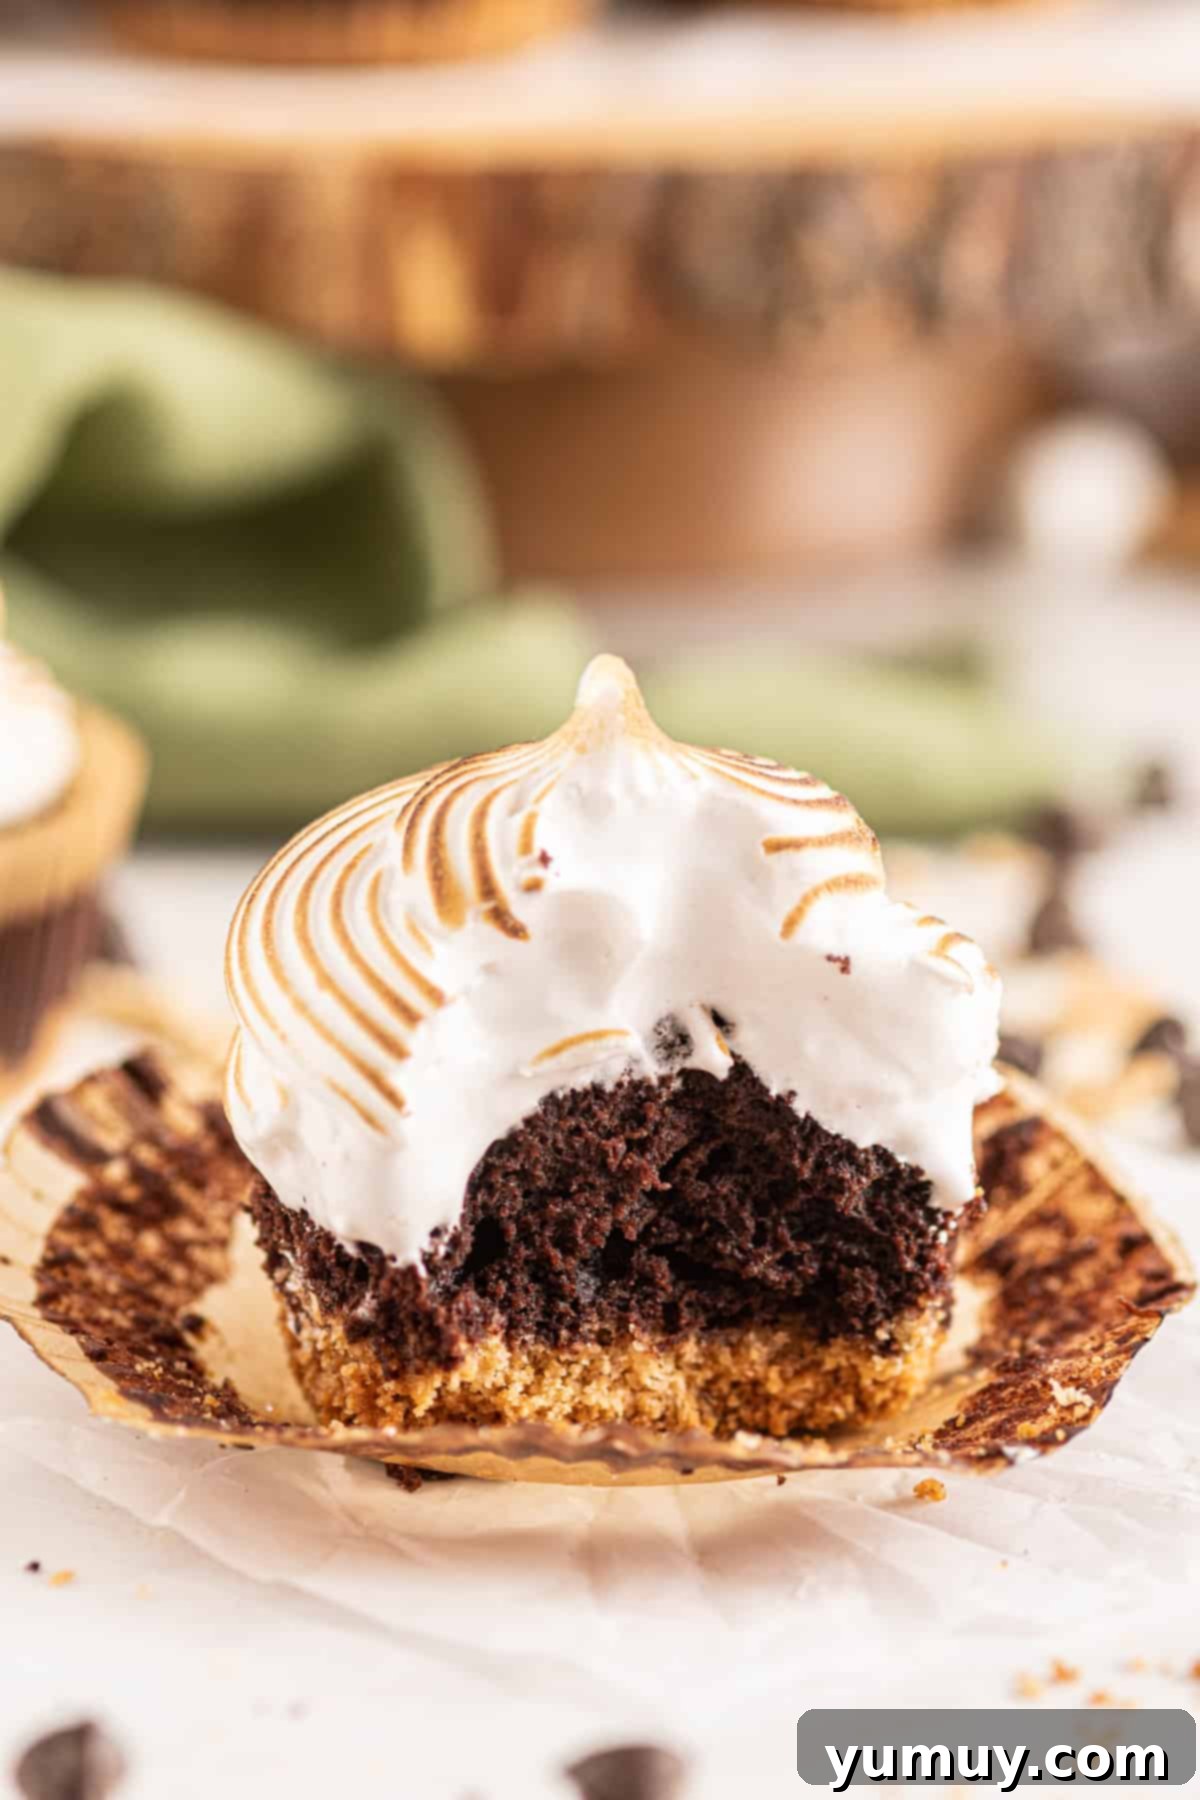
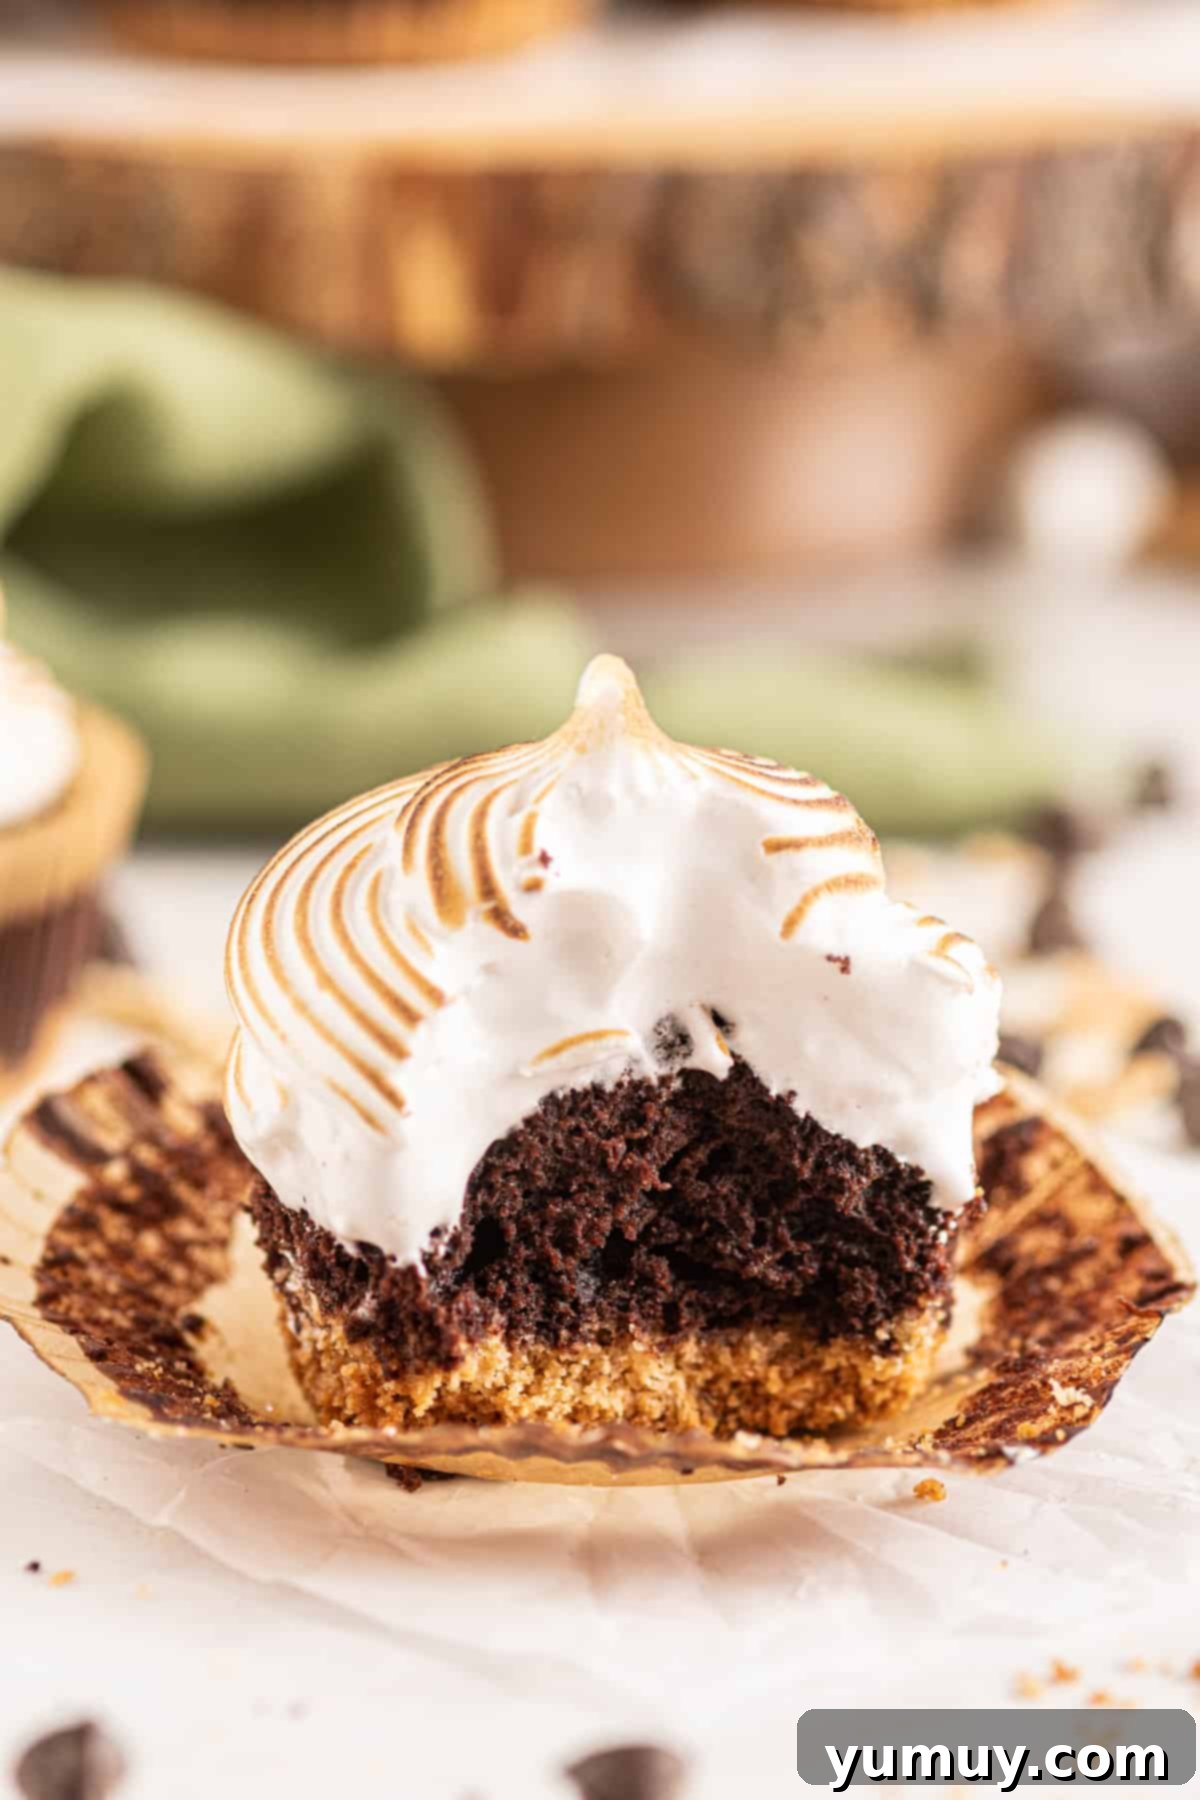
Craving the classic taste of s’mores but without the hassle of building a bonfire? Look no further! These incredibly fluffy s’mores cupcakes bring all the nostalgic flavors of a campfire treat right into your kitchen. Imagine sinking your teeth into rich chocolate cupcakes, perfectly baked on a crunchy graham cracker crust, and crowned with a light, airy, and beautifully toasted marshmallow meringue. This recipe transforms a beloved outdoor snack into an elegant, easy-to-make dessert that’s perfect for any occasion, from casual gatherings to sophisticated parties. Forget the burn permits and sticky fingers – these cupcakes offer a refined s’mores experience that’s surprisingly simple to create, even for novice bakers. It’s truly one of the best boxed cake mix ideas for a show-stopping dessert!
- SavePin this recipe for later!
The Anatomy of a Perfect S’mores Cupcake: Chocolate, Graham Cracker, and Meringue
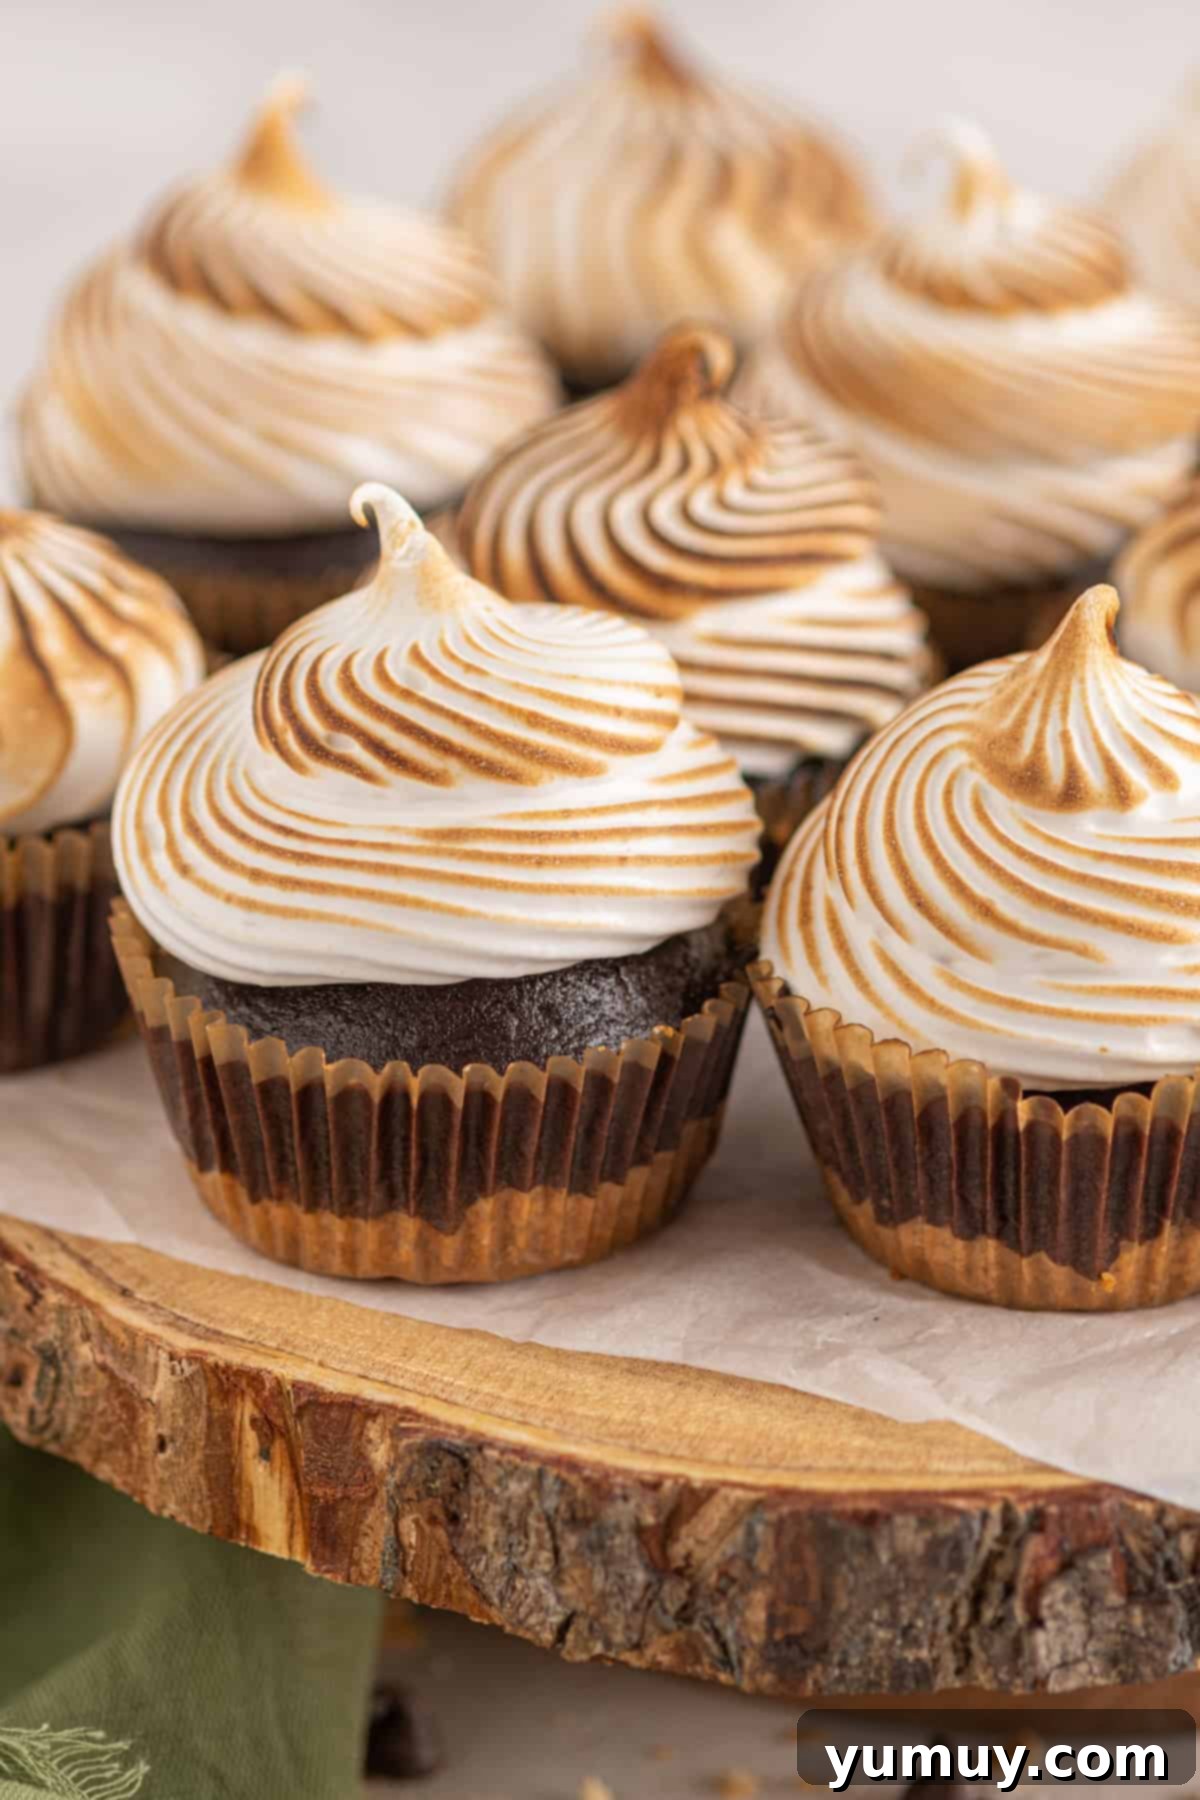
Crafting these delectable s’mores cupcakes is a journey of delightful layers, each contributing to the iconic flavor profile. We start with an incredibly simple, yet perfectly crunchy, 3-ingredient graham cracker crust, providing that unmistakable base texture. To make the process even more enjoyable, we utilize a chocolate cupcake recipe made from a convenient box cake mix. This clever shortcut allows you to focus your energy on perfecting the star of the show: the irresistibly fluffy marshmallow meringue topping. Many find meringue intimidating, but I’m here to assure you it’s surprisingly straightforward and utterly rewarding for the extra touch of homemade elegance it brings. The grand finale? A quick pass with a kitchen torch gives the meringue a beautiful, golden-brown toast, reminiscent of marshmallows roasting over an open flame, completing the authentic s’mores experience in a charming cupcake form.
Mastering Meringue: Essential Tips for Fluffy Peaks
Achieving a perfectly stable and fluffy marshmallow meringue is key to these s’mores cupcakes. The most crucial factor lies in whipping your egg whites to stiff peaks. If your egg whites aren’t whipped adequately, your frosting may become runny and lose its beautiful structural integrity. To ensure consistently excellent results, always start with cold egg whites. Placing them in a cold, meticulously clean bowl is equally important. Even the slightest trace of residual fat or a tiny speck of egg yolk can prevent your egg whites from whipping properly, causing the meringue to fail. Prepare your workspace and ingredients carefully, and you’ll be well on your way to a glorious meringue that holds its shape beautifully.
Irresistible S’mores Cupcakes Recipe
- Save
- Share
Print Recipe
Rate This Recipe
Save Recipe
Ingredients
For the Crunchy Graham Cracker Crust
- 1½ cups graham cracker crumbs (approximately 14 cracker sheets, finely crushed)
- 6 tablespoons unsalted butter (¾ stick, melted)
- 1 tablespoon granulated sugar
For the Rich Chocolate Cupcakes
- 13.25 ounces chocolate cake mix (1 standard box)
- 1 cup water
- ½ cup vegetable oil
- 3 large eggs (at room temperature for best results)
For the Fluffy Marshmallow Meringue
- 4 large egg whites (cold is preferred for initial whipping)
- ¼ teaspoon kosher salt
- ¼ teaspoon cream of tartar (helps stabilize egg whites)
- ¾ cup granulated sugar
- ½ cup marshmallow fluff (optional, for enhanced marshmallow flavor)
Essential Equipment for S’mores Cupcakes
- Kitchen Scale (optional, for precise ingredient measurement)
- Cupcake Tin (12-count)
- Stand Mixer (with whisk attachment, crucial for meringue)
- Piping Bag and Tip Set (for neatly frosting the cupcakes)
- Kitchen Torch (to achieve that perfect toasted marshmallow look)
Step-by-Step Instructions for S’mores Cupcakes
Part 1: Preparing the Irresistible Graham Cracker Crust
- Begin by preheating your oven to 350°F (175°C). Prepare a 12-count cupcake tin by lining each well with paper liners. This will ensure your cupcakes are easy to remove and serve.
- In a medium-sized mixing bowl, combine the graham cracker crumbs, melted unsalted butter, and granulated sugar. Mix these ingredients thoroughly until they are well incorporated and resemble wet sand. This mixture forms the base of your s’mores experience. Divide the mixture evenly among the prepared cupcake liners, pressing it firmly into the bottom of each liner to create a compact and stable crust. A sturdy crust is essential for supporting the cupcake and providing a satisfying crunch.1½ cups graham cracker crumbs, 6 tablespoons unsalted butter, 1 tablespoon granulated sugar

Part 2: Baking the Decadent Chocolate Cupcakes
- While your crust is settling, prepare the chocolate cupcake batter. In a large bowl, combine the chocolate cake mix, water, vegetable oil, and large eggs. Using a whisk or an electric mixer, mix these ingredients until they are just combined and smooth. Be careful not to overmix, as this can lead to tough cupcakes. A few lumps are perfectly fine and often result in a more tender crumb.13.25 ounces chocolate cake mix, 1 cup water, ½ cup vegetable oil, 3 large eggs

- Carefully spoon or pour the chocolate batter into each cupcake liner, filling them approximately ¾ full. This allows ample space for the cupcakes to rise without overflowing, ensuring a perfect dome top.

- Transfer the cupcake tin to your preheated oven and bake for 18 minutes. To check for doneness, insert a toothpick into the center of a cupcake; it should come out clean or with a few moist crumbs attached, but no wet batter.

- Once baked, remove the cupcakes from the oven and immediately transfer them to a wire cooling rack. Allow them to cool completely, which typically takes about 2 hours. This step is crucial; frosting warm cupcakes will cause the meringue to melt.
Part 3: Crafting the Fluffy Marshmallow Meringue Topping
- While your cupcakes are cooling, it’s time to create the show-stopping meringue. Place the 4 large egg whites into the impeccably clean bowl of a stand mixer fitted with the whisk attachment. Begin whisking on low speed for approximately one minute, or until a light microfoam starts to form, characterized by tiny, uniform bubbles.4 large egg whites

- Add the kosher salt and cream of tartar to the egg whites. Continue whisking for another one to two minutes, increasing the speed slightly if needed, until the microfoam has significantly increased in volume and appears more substantial. The cream of tartar acts as a stabilizer, helping the egg whites hold air and form a stronger structure.¼ teaspoon kosher salt, ¼ teaspoon cream of tartar

- Gradually, and very slowly, pour the granulated sugar into the egg white mixture while the mixer continues to whisk on a low to medium-low speed. This slow addition is crucial for the sugar to fully dissolve, preventing a gritty meringue. Continue whisking for about 12 minutes, or until the meringue forms soft, glossy peaks. When you lift the whisk, the peaks should gently flop over.¾ cup granulated sugar
- If using, gently fold in the marshmallow fluff. Then, increase the mixer speed to medium-high and whisk for another 2 minutes, or until stiff, firm peaks have formed. When you lift the whisk, the meringue should stand straight up without drooping. This indicates a perfectly stable meringue ready for piping.½ cup marshmallow fluff

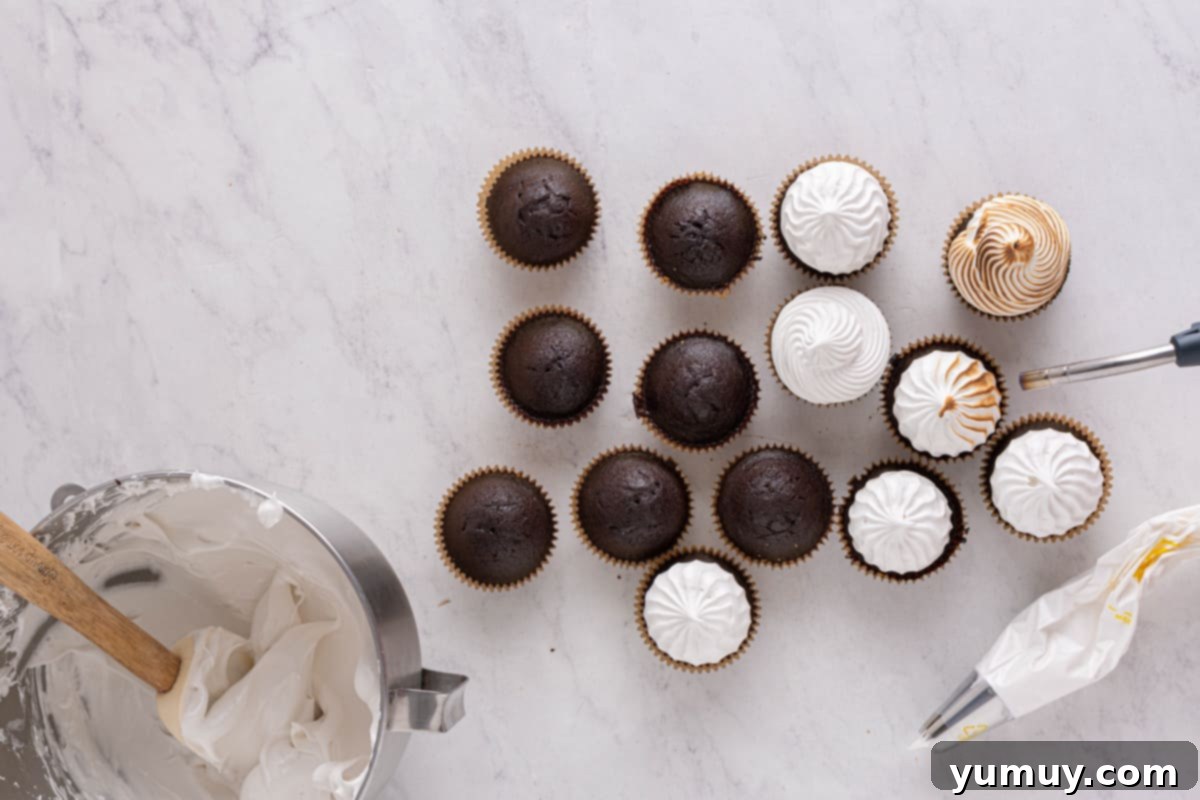
- Transfer the luscious marshmallow meringue into a piping bag fitted with your desired tip (a large star tip works wonderfully for a classic s’mores look). Pipe generous swirls or mounds of meringue onto each completely cooled chocolate cupcake. Get creative with your piping designs!

- For that authentic campfire touch, gently toast the meringue using a kitchen torch set to a medium-low flame. Hold the flame about an inch away from the meringue, moving it continuously to achieve an even, golden-brown char. Be mindful not to keep the flame in one spot for too long, as meringue can burn quickly. Alternatively, you can briefly broil the cupcakes in the oven, watching them very closely.

Chef’s Notes & Expert Baking Tips
Pro Tips for Perfect S’mores Cupcakes:
- Gentle Mixing for Cupcakes: When preparing your cupcake batter, mix it as little as possible after adding the wet ingredients to the dry. Overmixing develops the gluten in the flour, leading to tough and dense cupcakes instead of the desired light and tender crumb. Mix just until ingredients are combined.
- Cooling is Key: Patience is a virtue in baking! Ensure your chocolate cupcakes are completely cooled to room temperature before even thinking about frosting them. A warm cupcake will cause your delicate meringue to melt, resulting in a runny, unappealing mess. This usually takes about 2 hours on a wire rack.
- Meringue Patience Pays Off: Meringue is a bit temperamental, but incredibly rewarding. Do not rush the whisking process, especially when adding sugar. Speeding up can lead to an inconsistent texture, making the meringue less stable and more prone to weeping or deflating later. Whisk on a consistent speed and allow the sugar to fully incorporate.
- No Torch? No Problem! If you don’t own a kitchen torch, you can still achieve that beautiful toasted marshmallow effect. Place your frosted cupcakes on a baking sheet and broil them in the oven for a very short period. Keep a close eye on them – meringue can go from perfectly golden to burnt in a matter of seconds! Stay vigilant to prevent burning.
Storage Solutions: To keep your delightful s’mores cupcakes fresh, store them in an airtight container in the refrigerator. They will maintain their best quality for up to 3 days. If you’re planning to make them ahead or store them for longer, I recommend freezing the plain chocolate cupcakes (without the meringue) in an airtight container for up to 3 months. Meringue tends to weep and lose its texture upon thawing. Thaw the cupcakes overnight in the refrigerator, then prepare and pipe fresh meringue just before serving for the best experience.
Calories from Fat 198
- Share
- Tweet
- Share
- Pin
@easydessertrecipes
for a chance to be featured.
Detailed Visual Guide: How to Make S’mores Cupcakes Step-by-Step
Here’s a more in-depth, visual breakdown of each stage of making these incredible s’mores cupcakes. Follow these precise instructions to ensure every layer – from the crunchy graham cracker crust to the perfectly toasted meringue – is a triumph.
Step 1: Prepare the Crunchy Graham Cracker Crust
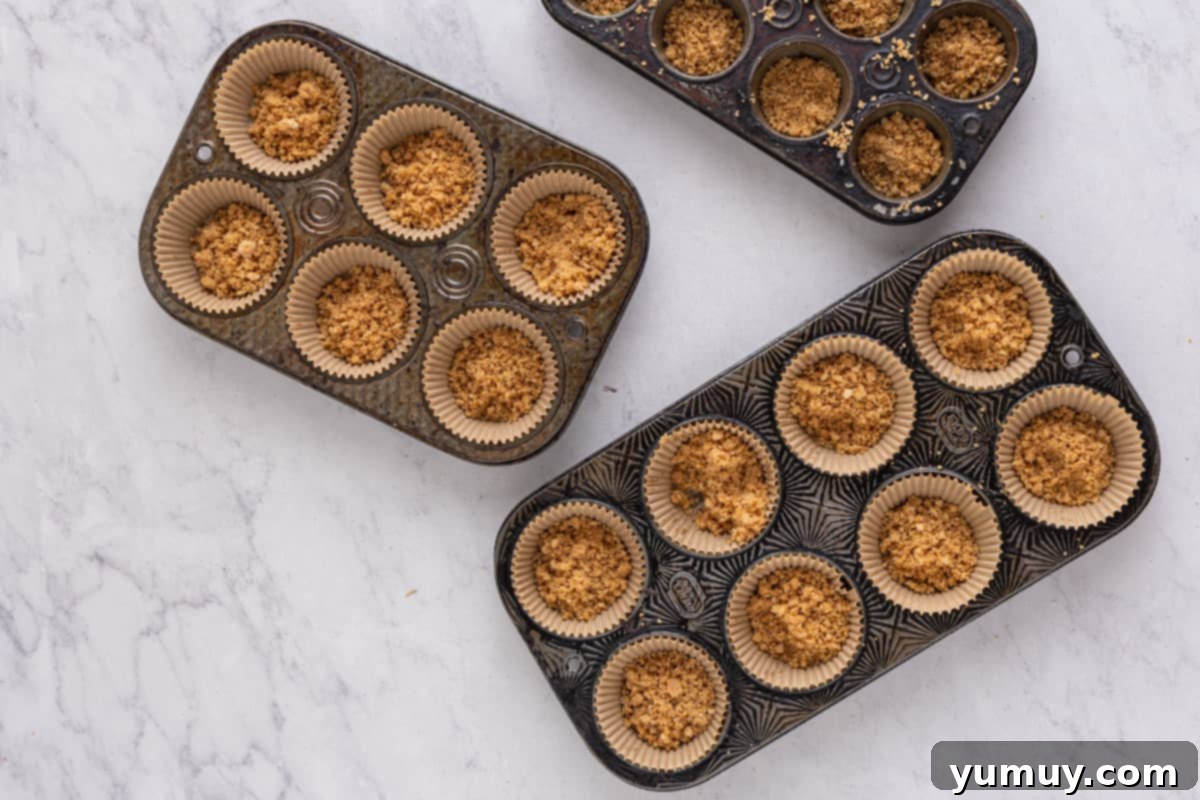
A solid foundation is key! First, preheat your oven to 350°F (175°C). Line a 12-count cupcake tin with paper liners to prevent sticking and make serving a breeze. In a medium bowl, combine 1½ cups of finely crushed graham cracker crumbs (about 14 full cracker sheets), 6 tablespoons of melted unsalted butter, and 1 tablespoon of granulated sugar. Mix until the crumbs are thoroughly moistened and clump together. Divide this mixture evenly among the cupcake liners. Using the back of a spoon or your fingers, press the mixture down firmly and evenly into the bottom of each liner. This creates a compact, sturdy crust that won’t crumble when you bite into your finished cupcake.
Step 2: Mix the Decadent Chocolate Batter
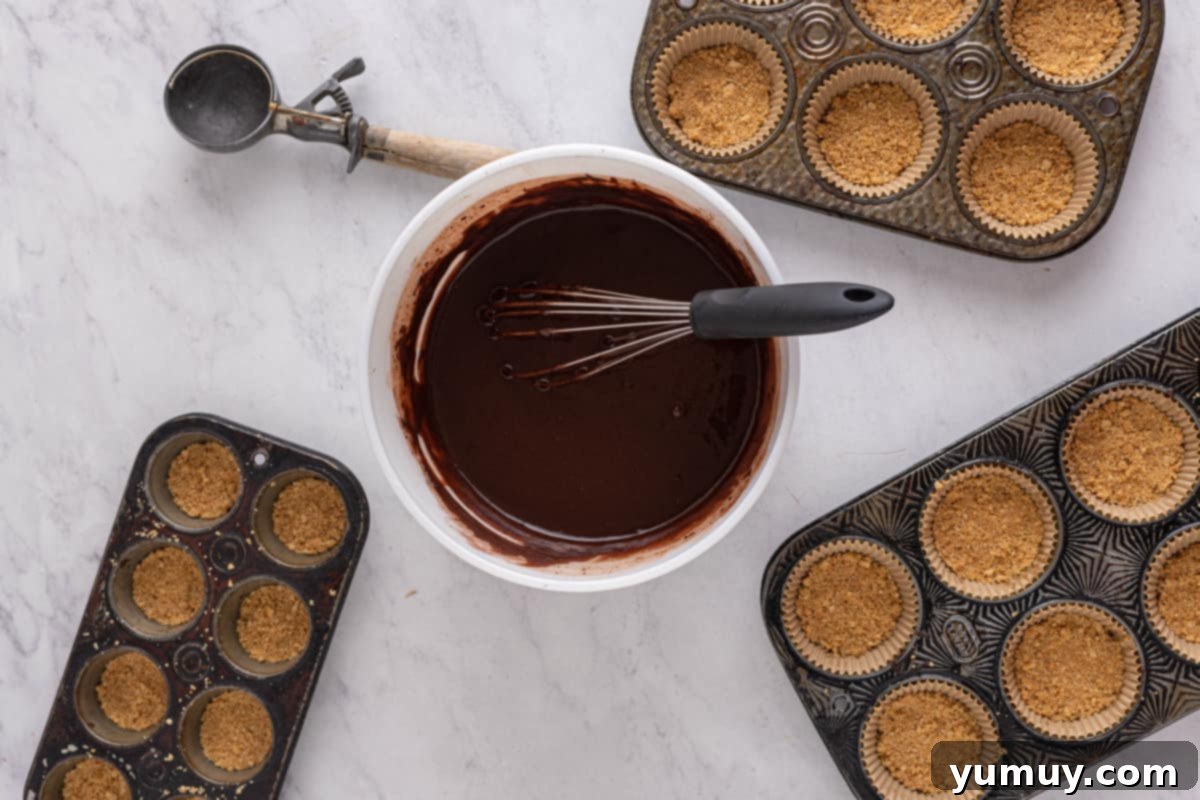
Embrace the ease of a box mix! Once your graham cracker crusts are ready, it’s time to whip up the chocolate cupcake batter. In a large mixing bowl, combine the contents of a 13.25-ounce box of chocolate cake mix with 1 cup of water, ½ cup of vegetable oil, and 3 large eggs (preferably at room temperature for better incorporation). Using an electric mixer on low speed, or a whisk, mix until all ingredients are just combined and smooth. Be cautious not to overmix the batter; overmixing can develop too much gluten, resulting in tougher cupcakes. A few small lumps are perfectly acceptable and can even contribute to a tender texture.
Step 3: Portion and Bake the Cupcakes
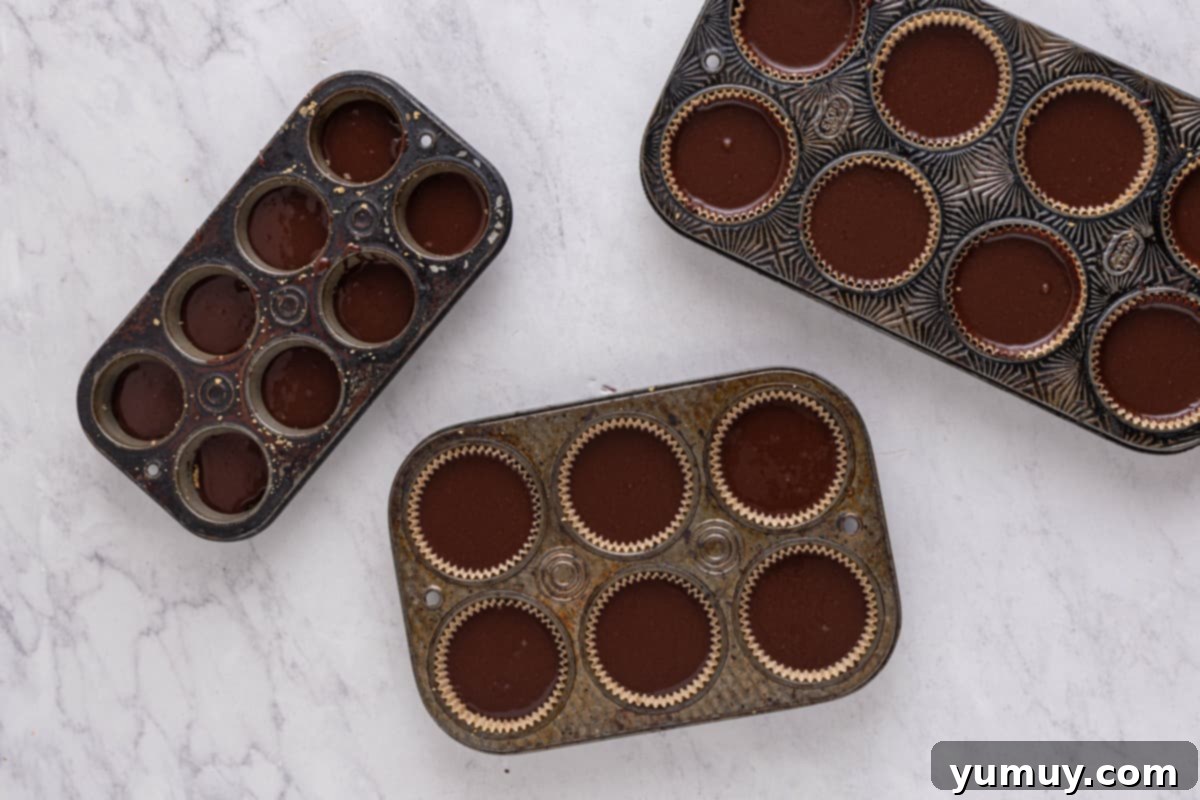
Fill with care for perfect domes! Carefully spoon or pour the prepared chocolate cupcake batter into each liner, filling each one about ¾ full. This ensures that the cupcakes have enough room to rise beautifully without overflowing, creating that appealing domed top that’s perfect for frosting. Place the cupcake tin into your preheated oven and bake for approximately 18 minutes. Baking times can vary slightly, so check for doneness by inserting a toothpick into the center of a cupcake; it should come out clean or with moist, not wet, crumbs attached. Remove the cupcakes from the oven immediately to prevent overbaking.
Step 4: Cool Completely
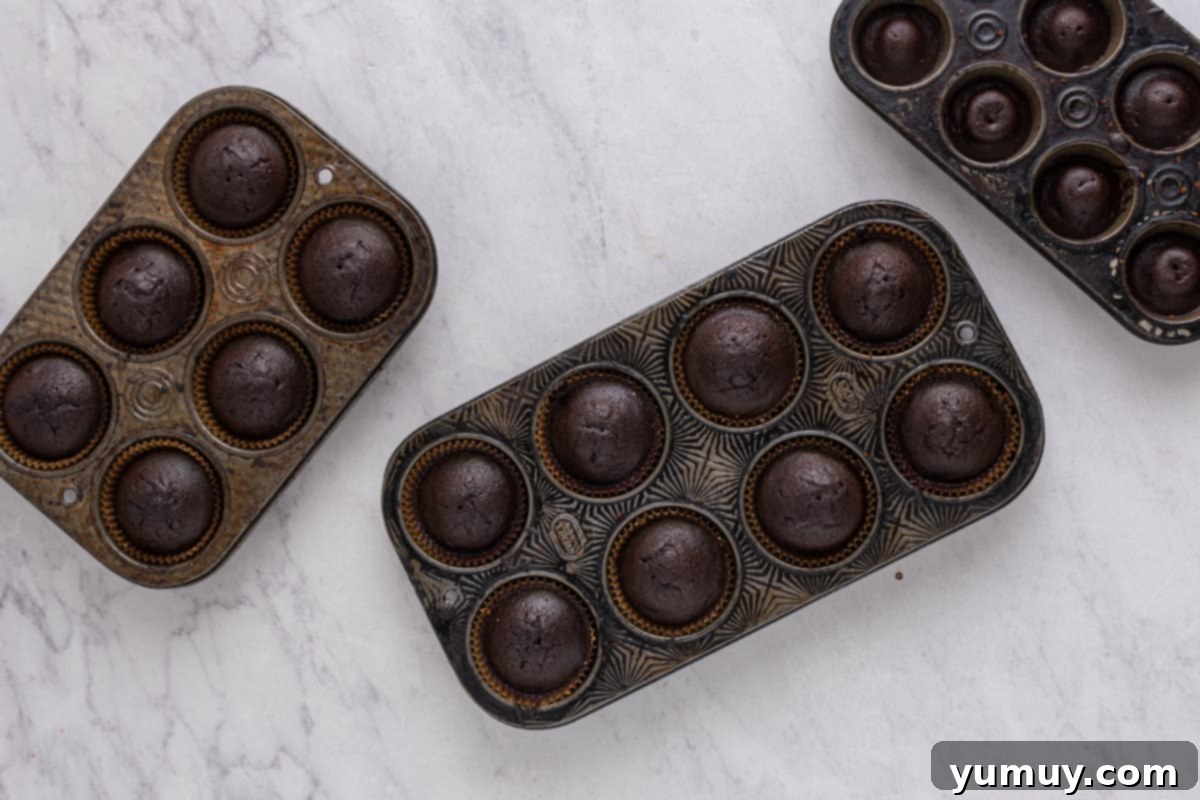
Patience is a virtue for frosting success! After baking, remove the cupcakes from the tin and transfer them to a wire cooling rack. Allow them to cool completely to room temperature. This step is critical and often takes about 2 hours. Attempting to frost warm cupcakes will cause your delicate marshmallow meringue to melt, ruining its beautiful texture and appearance.
Step 5: Whisk the Egg Whites for Meringue
The foundation of fluffy meringue! While your cupcakes are cooling, begin preparing the marshmallow meringue. Place 4 large egg whites into the impeccably clean bowl of a stand mixer fitted with the whisk attachment. Ensure the bowl is free of any grease or oil, as this can prevent the egg whites from whipping properly. Whisk on low speed for about one minute, or until a light microfoam begins to form. At this stage, you’ll see tiny, uniform bubbles covering the surface of the egg whites.
Step 6: Stabilize the Egg Whites
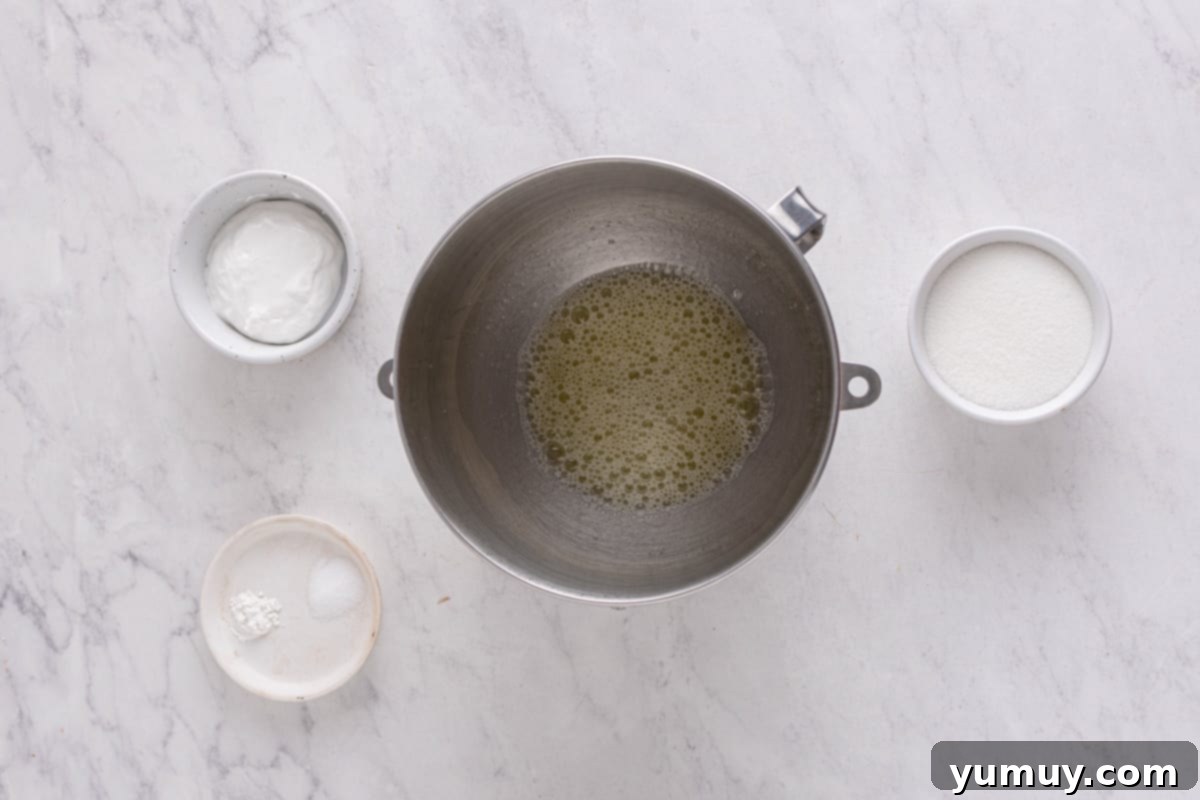
Building strength for perfect peaks! To help stabilize the meringue, add ¼ teaspoon of kosher salt and ¼ teaspoon of cream of tartar to the egg whites. Continue whisking, increasing the speed slightly, for another minute or two. You’ll notice the microfoam increasing significantly in volume and becoming more stable. The cream of tartar is an acidic agent that aids in strengthening the egg white proteins, allowing them to trap more air and hold their shape better, which is essential for stiff peaks.
Step 7: Add Sugar and Marshmallow Fluff
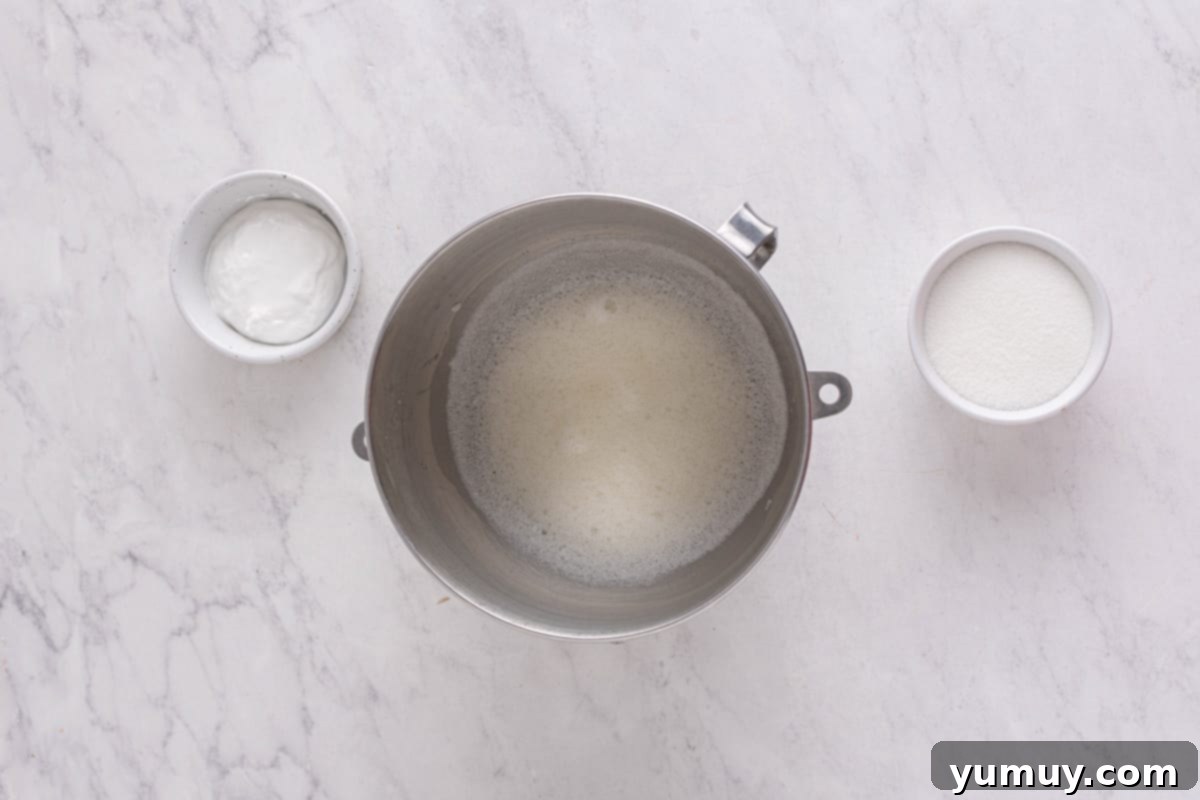
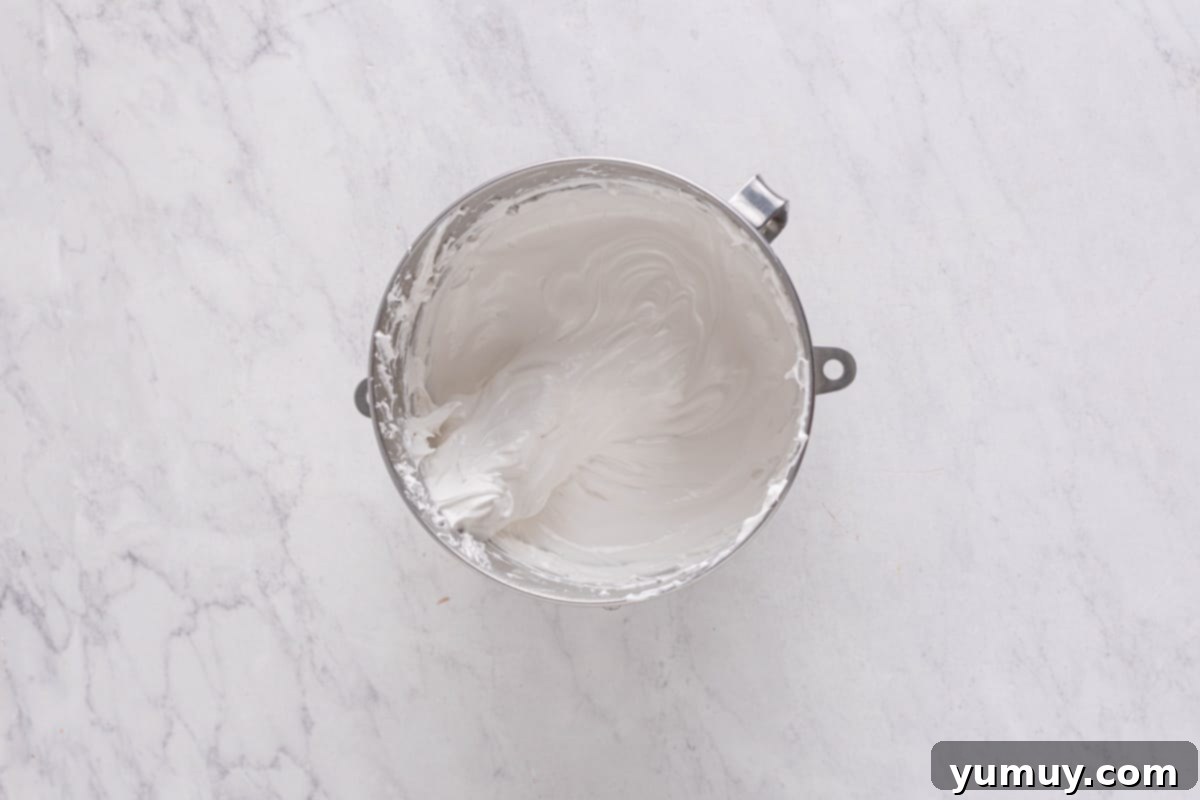
Sweetness and extra fluffiness! With the mixer still running on low to medium-low speed, slowly and gradually pour in ¾ cup of granulated sugar. It’s crucial to add the sugar slowly to allow it to dissolve completely into the egg whites, which prevents a grainy texture in the finished meringue. Continue whisking for a full 12 minutes, or until the meringue has developed soft, glossy peaks. At this stage, when you lift the whisk, the peaks will gently curl over. Now, incorporate ½ cup of marshmallow fluff (if using, for extra marshmallow flavor and stability) and continue whisking for another 2 minutes on medium-high speed, or until stiff, firm peaks have formed. These peaks should stand straight up when the whisk is lifted, indicating a perfect, stable meringue.
Step 8: Frost the Cupcakes
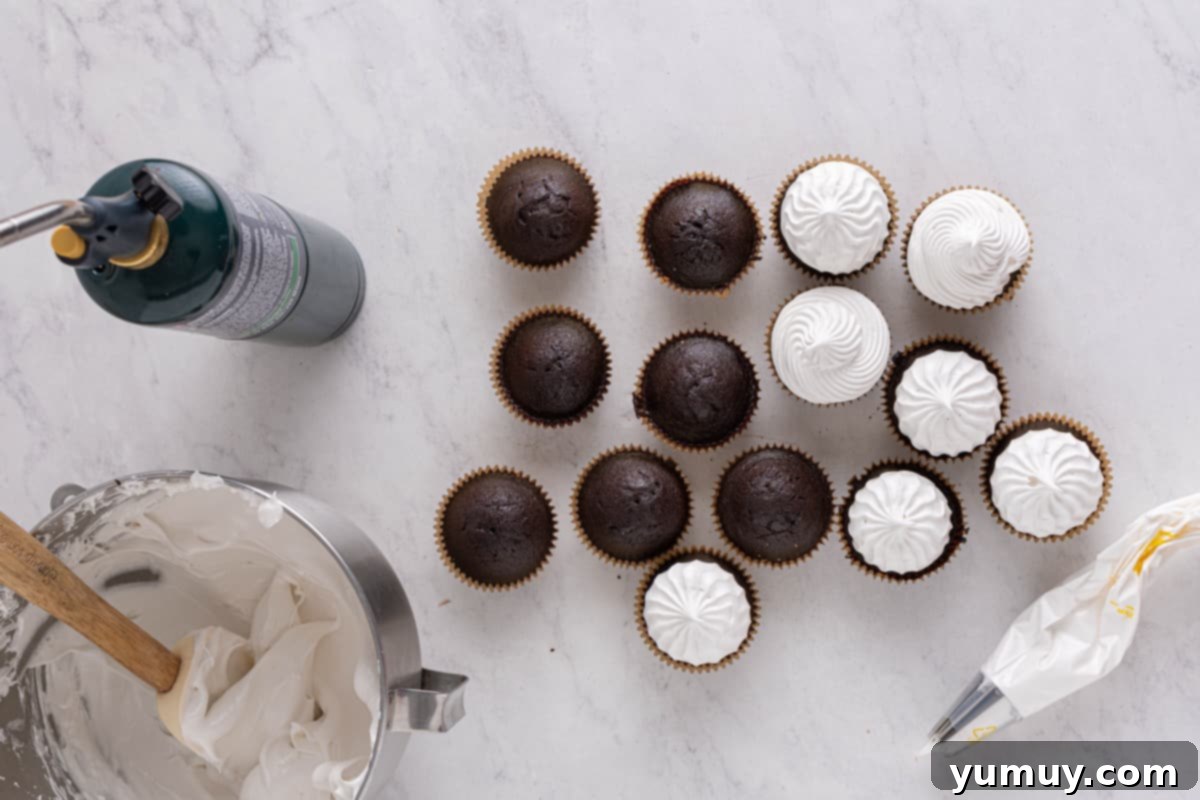
Time for decorative flair! Once your meringue is ready and your cupcakes are completely cool, it’s time to assemble! Transfer the luscious marshmallow meringue into a piping bag fitted with your favorite piping tip. A large star tip creates a beautiful, classic swirl that mimics the look of a toasted marshmallow. Pipe generous swirls or decorative mounds of meringue onto each cooled chocolate cupcake. Don’t be shy – the more meringue, the better the s’mores experience!
Step 9: Torch for That Golden Finish
The essential “campfire” touch! For the ultimate s’mores effect, gently toast the meringue topping. Using a kitchen torch set to a medium-low flame, carefully move the flame about an inch away from the meringue, constantly sweeping it across the surface. This will create a beautiful, golden-brown char on the meringue, mimicking a perfectly roasted marshmallow. Exercise caution and do not linger in one spot for too long, as meringue can burn very quickly. If you don’t have a kitchen torch, you can achieve a similar effect by placing the frosted cupcakes under your oven’s broiler for a brief moment, watching them constantly to prevent burning.
Storing Your S’mores Cupcakes for Freshness
Proper storage is essential to keep your s’mores cupcakes tasting their best. Once assembled and frosted, these delightful treats should be stored in an airtight container. Place the container in the refrigerator, where they will stay fresh and delicious for up to 3 days. However, it’s important to note that meringue can sometimes “weep” or become slightly sticky over time due to moisture. For optimal texture and appearance, these cupcakes are best enjoyed within 24-48 hours of being made.
If you anticipate needing to store these cupcakes for a longer period or wish to prepare them in advance, I highly recommend freezing the unfrosted chocolate cupcakes. Allow the baked chocolate cupcakes to cool completely, then place them in an airtight freezer-safe container or wrap them individually in plastic wrap and then foil. They will keep beautifully in the freezer for up to 3 months. When you’re ready to serve, transfer the frozen cupcakes to the refrigerator to thaw overnight. Once thawed, you can then prepare a fresh batch of marshmallow meringue and pipe it onto the cupcakes, toasting them just before serving. This method ensures that your meringue is always light, fluffy, and perfectly toasted, delivering the best possible s’mores experience.
Frequently Asked Questions About S’mores Cupcakes
Here are answers to some common questions you might have about making and enjoying these delightful s’mores cupcakes:
Can I make these s’mores cupcakes entirely from scratch?
Absolutely! While this recipe uses a boxed cake mix for convenience, you can certainly substitute your favorite homemade chocolate cupcake recipe. Just ensure it yields about 12 standard-sized cupcakes. The graham cracker crust and marshmallow meringue components are made from scratch as written in this recipe.
What can I use if I don’t have a kitchen torch?
No kitchen torch? No problem! You can achieve a similar toasted marshmallow effect by placing your frosted cupcakes on a baking sheet and briefly placing them under a preheated broiler in your oven. Watch them very carefully, as meringue can brown and burn extremely quickly. Keep the oven door slightly ajar and remove them as soon as they reach your desired golden-brown color.
Why did my meringue become runny or fail to hold its shape?
Meringue can be a bit tricky, but common issues include: 1) Residual fat in your mixing bowl or on your whisk attachment. Ensure all equipment is impeccably clean. 2) Even a tiny bit of egg yolk in your egg whites can prevent them from whipping. 3) Not whisking long enough or adding sugar too quickly. Patience is key when making meringue to allow the egg whites to fully stabilize and the sugar to dissolve.
Can I add chocolate chips or other mix-ins to the cupcakes?
Definitely! To enhance the chocolate flavor or add more texture, you can fold ½ cup of mini chocolate chips into your cupcake batter before baking. You could also drizzle a little chocolate syrup or add a piece of chocolate bar on top of the meringue after toasting for an extra indulgent touch.
Are these cupcakes good for parties or special occasions?
Yes, these s’mores cupcakes are perfect for parties! They offer all the fun of s’mores in an easy-to-serve individual portion, without the mess of a campfire. They look impressive with their toasted meringue topping and are always a crowd-pleaser. Just remember to frost and torch them closer to serving time for the best presentation.
Discover More Delicious Cupcake Recipes!
Irresistible Chocolate Chip Cupcakes
Decadent Black Forest Cupcakes
Zesty Orange Creamsicle Cupcakes
Light & Tangy Lemon Cupcakes with Lemon Whipped Cream Frosting
Browse All Cupcake Recipes Here!
