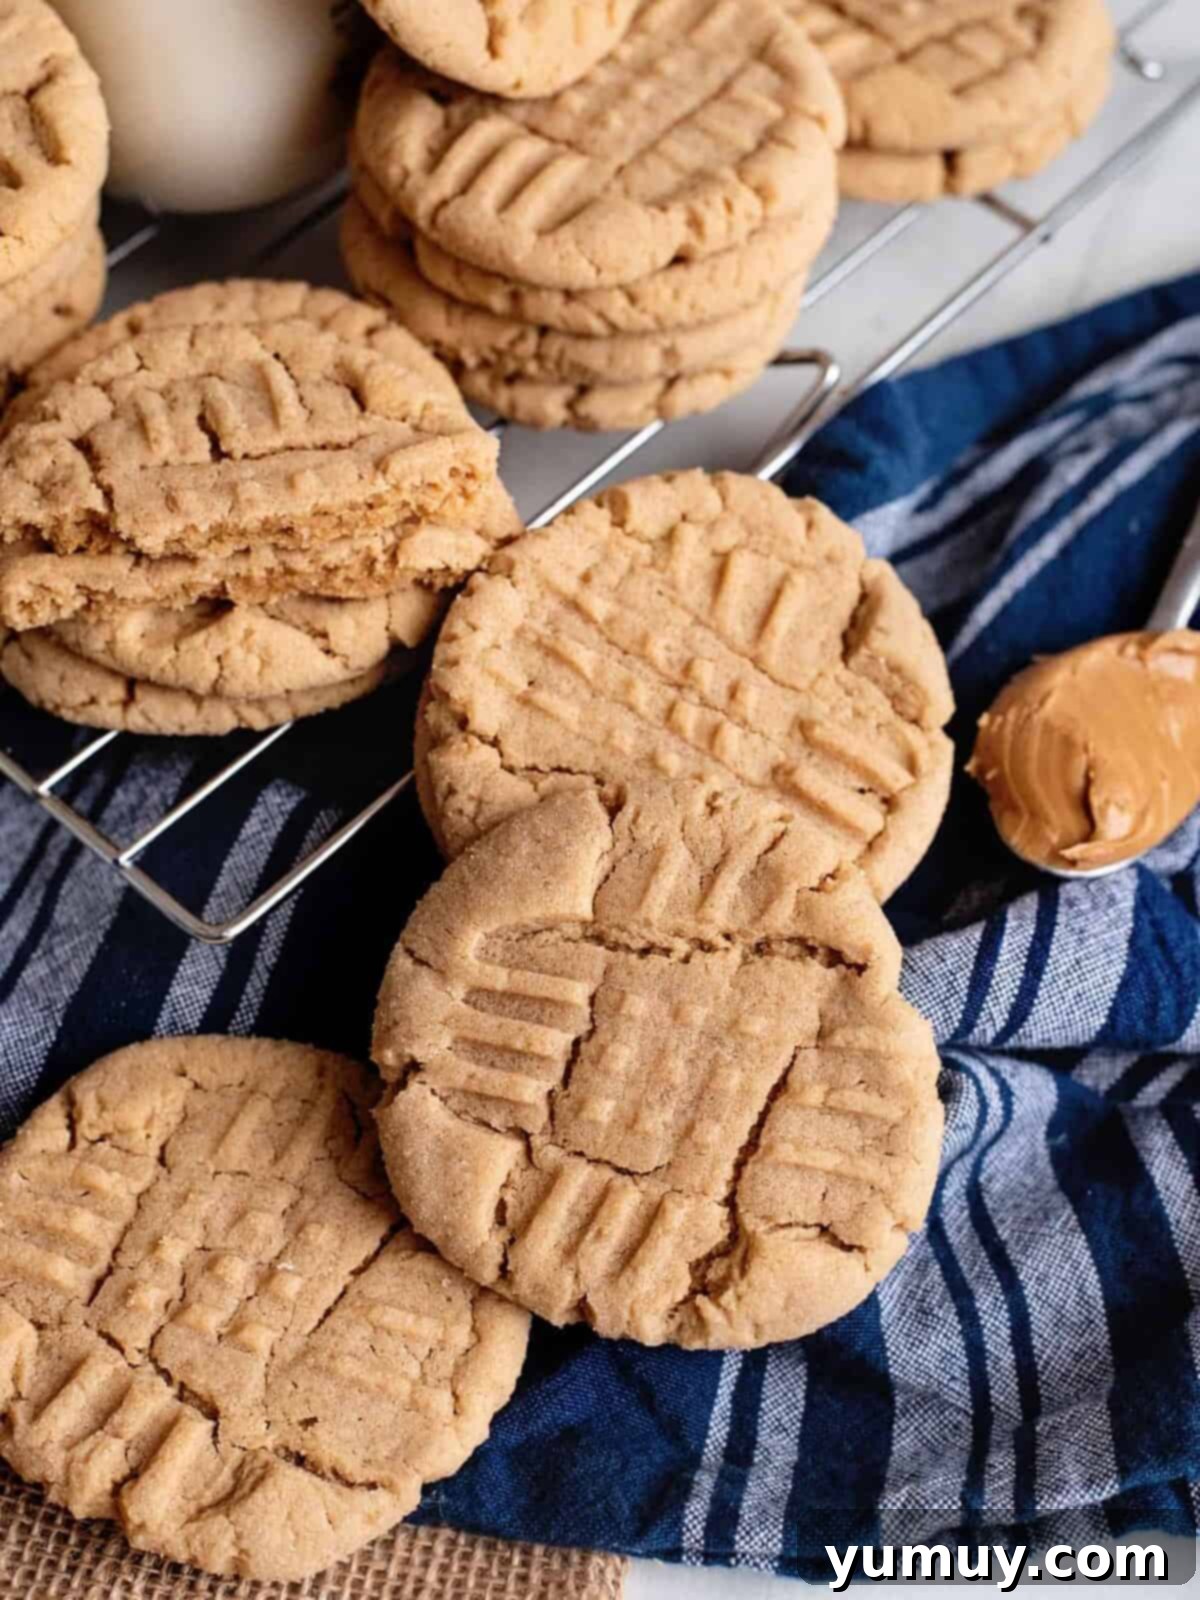
There’s an undeniable magic to a truly perfect peanut butter cookie. That warm, nutty aroma wafting from the oven, the promise of a soft, chewy center, and those iconic criss-cross marks that invite you to take a bite. These aren’t just any homemade cookies; they’re the kind of classic treat that evokes childhood memories, pairs perfectly with a cold glass of milk, and disappears faster than you can say “peanut butter bliss.” If you’ve been on a quest for the ultimate soft and chewy peanut butter cookie recipe that delivers bakery-quality results without the fuss, your search ends here. This easy, no-chill recipe will have you enjoying freshly baked peanut butter cookies from scratch in about 25 minutes, making it an instant family favorite and a go-to for any occasion.
The Secret to Irresistibly Soft and Chewy Peanut Butter Cookies
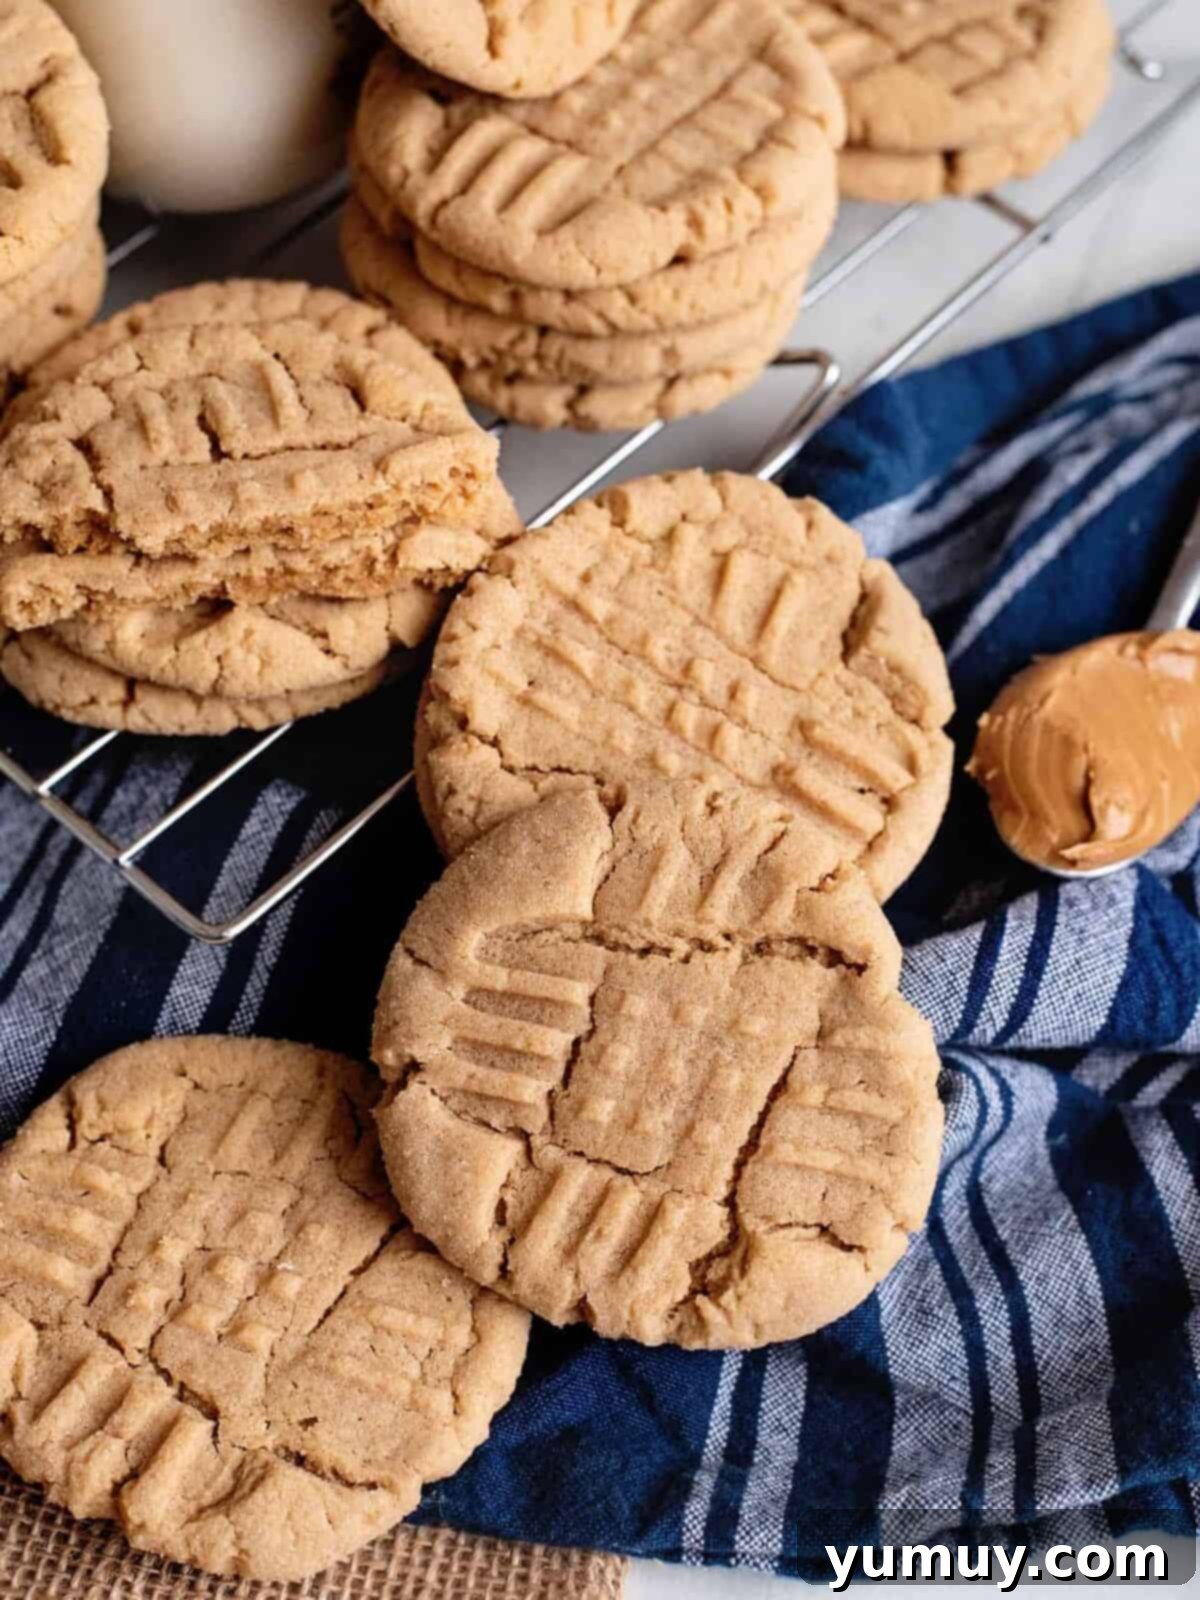
What makes a peanut butter cookie truly exceptional? It’s all about that harmonious balance of rich, nutty flavor and a melt-in-your-mouth texture. This recipe masterfully achieves that by focusing on key ingredients and straightforward techniques. We start by creaming together softened butter, brown sugar, and a generous amount of creamy peanut butter. The brown sugar not only adds depth of flavor but also contributes to the cookie’s moistness and chewiness, ensuring they stay delightfully soft even after they’ve cooled. Unlike many cookie recipes that require lengthy chilling times, our dough is ready to bake almost instantly, making it ideal for those sudden cookie cravings.
A quick roll in granulated sugar before baking creates a delicate, glittering crust that provides a satisfying contrast to the tender interior. This simple step also enhances the visual appeal, making each cookie look as good as it tastes. And, of course, no classic peanut butter cookie would be complete without those distinctive fork marks. These aren’t just for show; they play a crucial role in ensuring even baking and give the cookies that nostalgic, homemade charm everyone adores.
Whether you’re baking for a special gathering, replenishing your cookie jar, or simply treating yourself to a moment of sweet indulgence, these homemade peanut butter cookies are a guaranteed hit. They’re so good, you’ll find yourself making them again and again, cementing their place as a cherished recipe in your kitchen repertoire.
Fan of peanut butter and chocolate together? Don’t miss my Peanut Butter Kiss Cookies for another delightful combination!
Crafting the Iconic Criss-Cross: Tips for Perfect Fork Marks
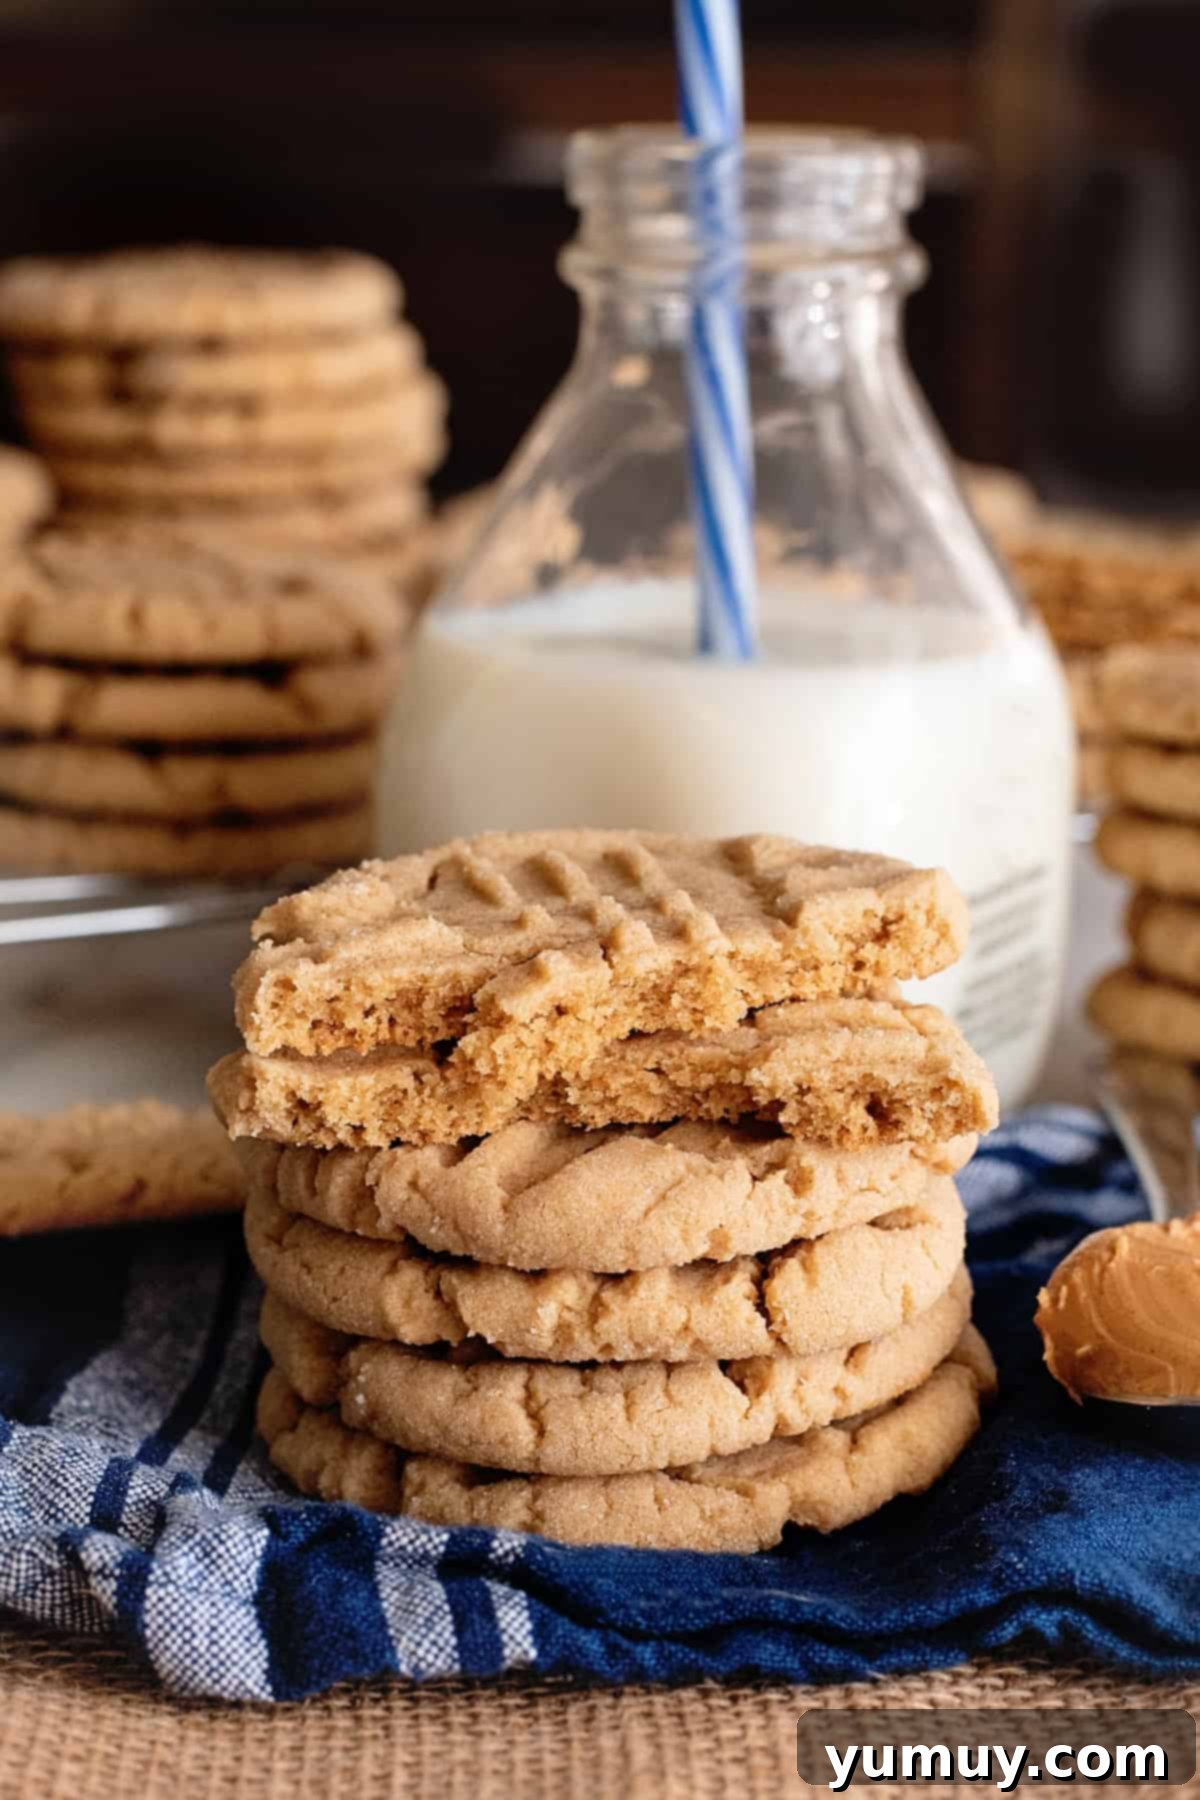
The distinctive criss-cross pattern on top of peanut butter cookies is more than just a charming aesthetic; it’s a functional step deeply rooted in the baking process. Peanut butter cookie dough is inherently denser and richer than many other cookie doughs. Without some form of flattening, these cookies tend to remain too thick in the center, leading to uneven baking – crispy edges and a raw middle. Pressing the dough with a fork helps to flatten it, ensuring the cookies spread uniformly and cook thoroughly from edge to center, resulting in that perfectly soft and chewy texture.
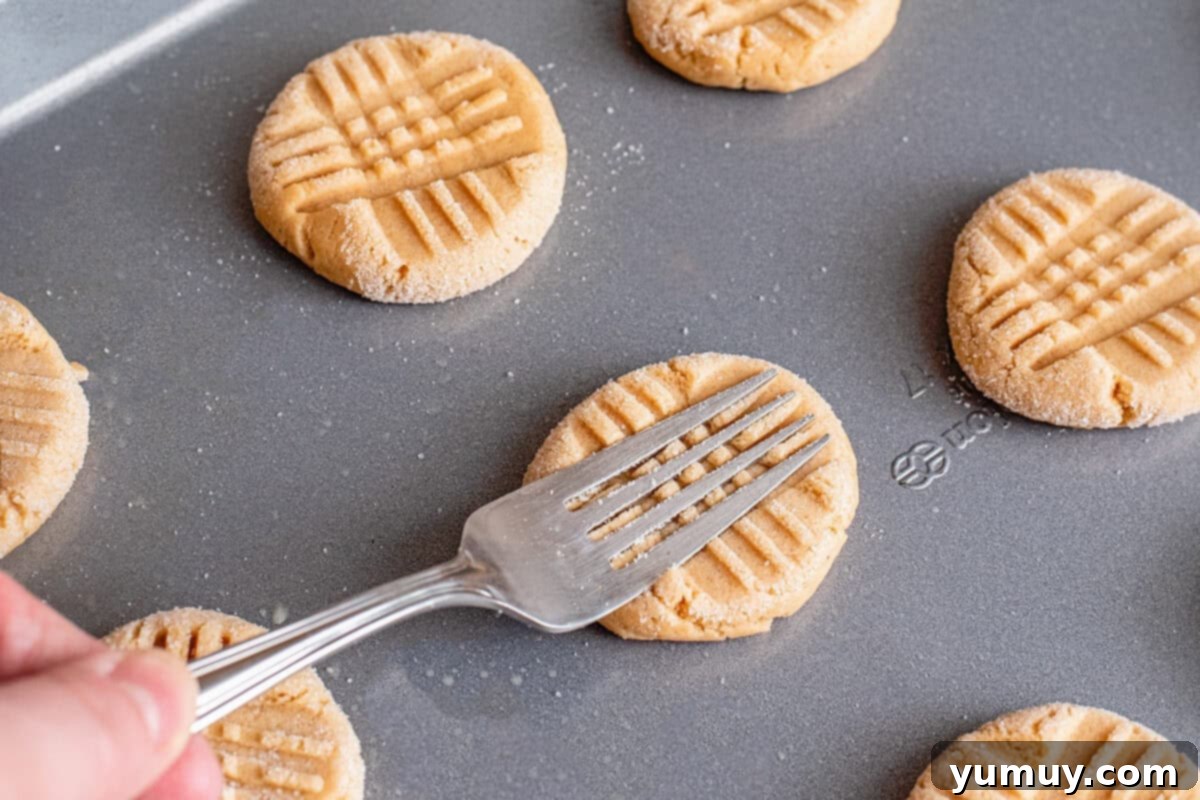
For fork marks that are not only effective but also beautifully defined and hold their shape throughout baking, there’s a simple trick: dip your fork in granulated sugar before each press. This method serves a dual purpose. Firstly, the sugar prevents the fork from sticking to the rich, sometimes sticky, peanut butter dough, allowing for clean, crisp lines every time. Secondly, it adds an extra touch of sugary crunch to the cookie tops, elevating the flavor and providing a delightful textural contrast. This small detail makes all the difference, giving your homemade peanut butter cookies that polished, bakery-worthy appearance that will impress everyone.

Soft & Chewy Peanut Butter Cookies Recipe
15 minutes
minutes
10 minutes
minutes
25 minutes
minutes
24
cookies
Rate
Save
Ingredients
- 1 cup unsalted butter room temperature (2 sticks)
- 1¼ cups creamy peanut butter *
- ½ cup brown sugar
- ½ cup granulated sugar
- 2 large eggs
- 2¾ cups all-purpose flour
- 1 teaspoon baking powder
- ½ teaspoon kosher salt
- 1½ teaspoons baking soda
- ¼ cup granulated sugar for rolling
Equipment
- Kitchen Scale (optional)
- Baking Sheet
- Hand Mixer or Stand Mixer
- Cookie Portion Scoop (optional)
Instructions
- Preheat your oven to 350°F (175°C). Line a large baking sheet with parchment paper to prevent sticking and ensure easy cleanup. Set this aside as you prepare the dough.

- In a spacious mixing bowl, using either a hand mixer or a stand mixer fitted with the paddle attachment, cream together the softened unsalted butter, creamy peanut butter, light brown sugar, and granulated sugar. Beat on medium speed until the mixture is light, fluffy, and well combined, typically for 2-3 minutes. Next, crack in the two large eggs and continue mixing until they are fully incorporated into the butter mixture, scraping down the sides of the bowl as needed. This ensures all ingredients are thoroughly blended for a consistent dough.1 cup unsalted butter,
1¼ cups creamy peanut butter,
½ cup brown sugar,
½ cup granulated sugar,
2 large eggs
- In a separate small bowl, whisk together the dry ingredients: all-purpose flour, baking powder, kosher salt, and baking soda. Ensure they are thoroughly combined to distribute the leavening agents evenly. Gradually add this flour mixture to the wet peanut butter mixture, stirring on low speed until just combined. Be careful not to overmix the dough, as this can lead to tough cookies. Mix until no streaks of flour remain, and the dough comes together.2¾ cups all-purpose flour,
1 teaspoon baking powder,
½ teaspoon kosher salt,
1½ teaspoons baking soda
- Using a medium cookie scoop (approximately 1.5 tablespoons) or a heaping tablespoon, portion out balls of cookie dough. Lightly roll each portion between your palms to form a smooth ball. Pour the reserved ¼ cup of granulated sugar into a small, shallow bowl. Roll each cookie dough ball in the sugar until it’s evenly coated. Place the sugared cookie balls about 2 inches apart on your prepared baking sheet. Take a fork and gently press down on each cookie in a criss-cross pattern. This iconic step not only creates a beautiful design but also helps flatten the dense peanut butter dough, ensuring it bakes evenly and prevents it from being too thick in the center. Repeat this process for all the remaining cookie dough.¼ cup granulated sugar

- Bake the cookies in your preheated oven for 9-10 minutes. Keep a close eye on them; you’ll know they’re done when the edges are lightly golden brown, but the centers still look soft and slightly underbaked. Peanut butter cookies continue to set as they cool, so don’t overbake them if you want that signature soft and chewy texture. Once out of the oven, allow the cookies to cool on the baking sheet for 2-3 minutes. This crucial step allows them to firm up slightly before you attempt to move them. After this initial cooling, carefully transfer the cookies to a wire rack to cool completely. Enjoy warm or at room temperature!

Notes
Tips for Perfect Peanut Butter Cookies:
- Peanut Butter Choice: While creamy peanut butter yields the classic soft texture, don’t hesitate to experiment! Almond butter, cashew butter, or even sunflower seed butter can be substituted for a different flavor profile. Just be aware that the oil content can vary, potentially affecting spread.
- The Fork Marks are Key: As mentioned, the criss-cross pattern isn’t just decorative. It helps flatten the dense dough for even baking. For an alternative look, you could use the bottom of a drinking glass or a textured potato masher for a different impression.
- Flavor Additions: Feel free to customize your cookies! Stir in a cup of your favorite chocolate chips (semi-sweet, milk, or dark are all excellent), white chocolate chips, butterscotch chips, or even chopped nuts for added crunch.
- Sugar Roll: While rolling in granulated sugar adds a lovely sparkle and subtle crunch, it’s entirely optional. The cookies are delicious with or without it.
- Doneness Test: Avoid overbaking! Peanut butter cookies are notoriously tricky because they don’t look fully “done” when they come out of the oven. Look for lightly golden edges and a center that still appears slightly soft. They will continue to firm up as they cool on the baking sheet.
Make-Ahead & Freezing Instructions: You can prepare the cookie dough in advance and store it in the refrigerator for up to 3 days. For longer storage, shape the dough into balls, flatten with a fork, and freeze on a baking sheet until solid. Transfer the frozen dough balls to an airtight freezer-safe bag or container and freeze for up to 3 months. To bake from frozen, simply place the frozen cookie dough balls on a prepared baking sheet and add 1-3 minutes to the total bake time, checking for doneness.
Storage: Once baked and completely cooled, store your peanut butter cookies in an airtight container at room temperature for up to 3 days to maintain their freshness and chewiness. For extended storage, they can be kept in the refrigerator for up to 5 days. For even longer preservation, freeze the baked cookies in a single layer in an airtight container or freezer bag for up to 1 month. Thaw them overnight in the refrigerator or at room temperature for about 30-60 minutes before enjoying.
Calories from Fat 135
Becky Hardin
Did You Make This?
We love seeing what you’ve made! Tag us on social media at @easydessertrecipes for a chance to be featured.
Detailed Steps: How to Make the Best Peanut Butter Cookies
Baking these delightful peanut butter cookies is a straightforward process, perfect for bakers of all skill levels. Follow these detailed steps to ensure perfectly soft, chewy, and flavorful results every time.
Step 1: Prepare Your Workspace and Ingredients
Before you begin mixing, take a moment to gather all your ingredients and ensure they are at the correct temperature. This is crucial for optimal results. For the unsalted butter, aim for room temperature; it should be soft enough to indent with a finger but not melted. You can achieve this by leaving it on the counter for 30-60 minutes, or gently microwaving it in 10-second bursts. While not strictly necessary, bringing your eggs to room temperature can also aid in better incorporation with the other ingredients. Preheat your oven to a precise 350°F (175°C). Line a standard baking sheet with parchment paper. This simple step prevents sticking, promotes even baking, and makes cleanup a breeze. Set the prepared baking sheet aside.
Step 2: Cream the Wet Ingredients for a Smooth Base
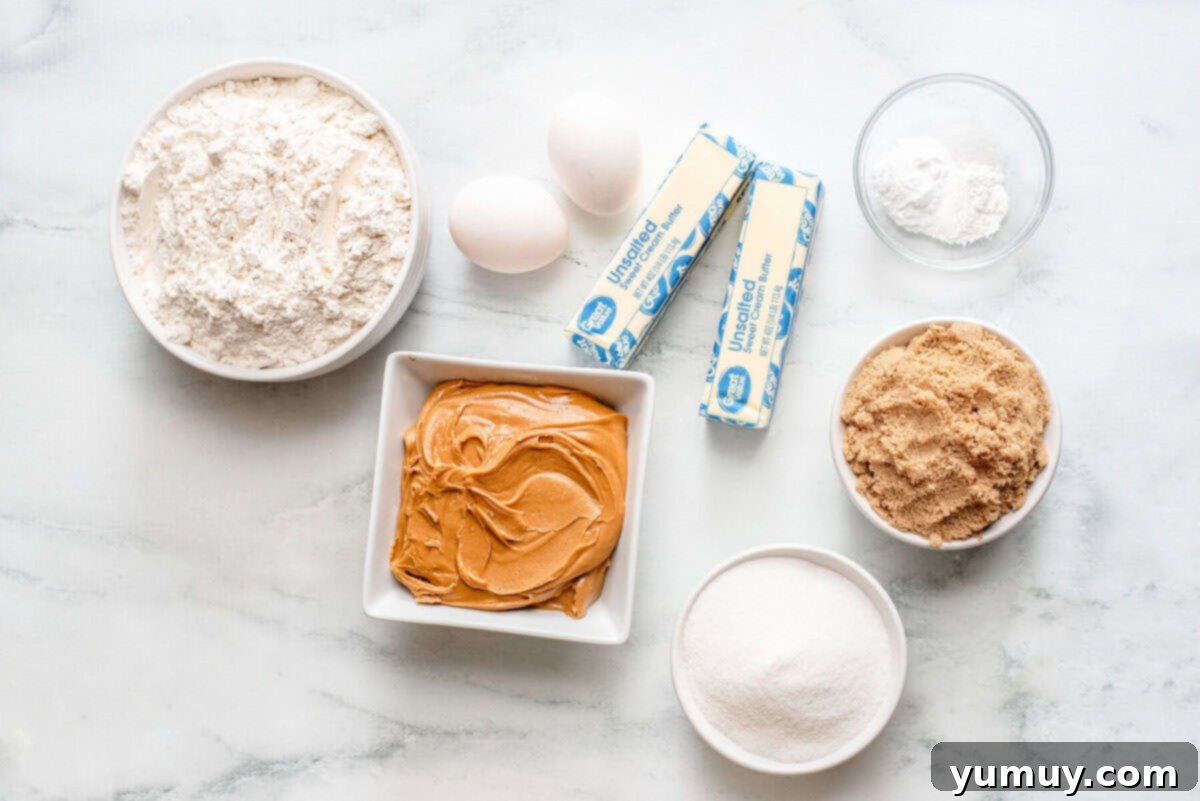
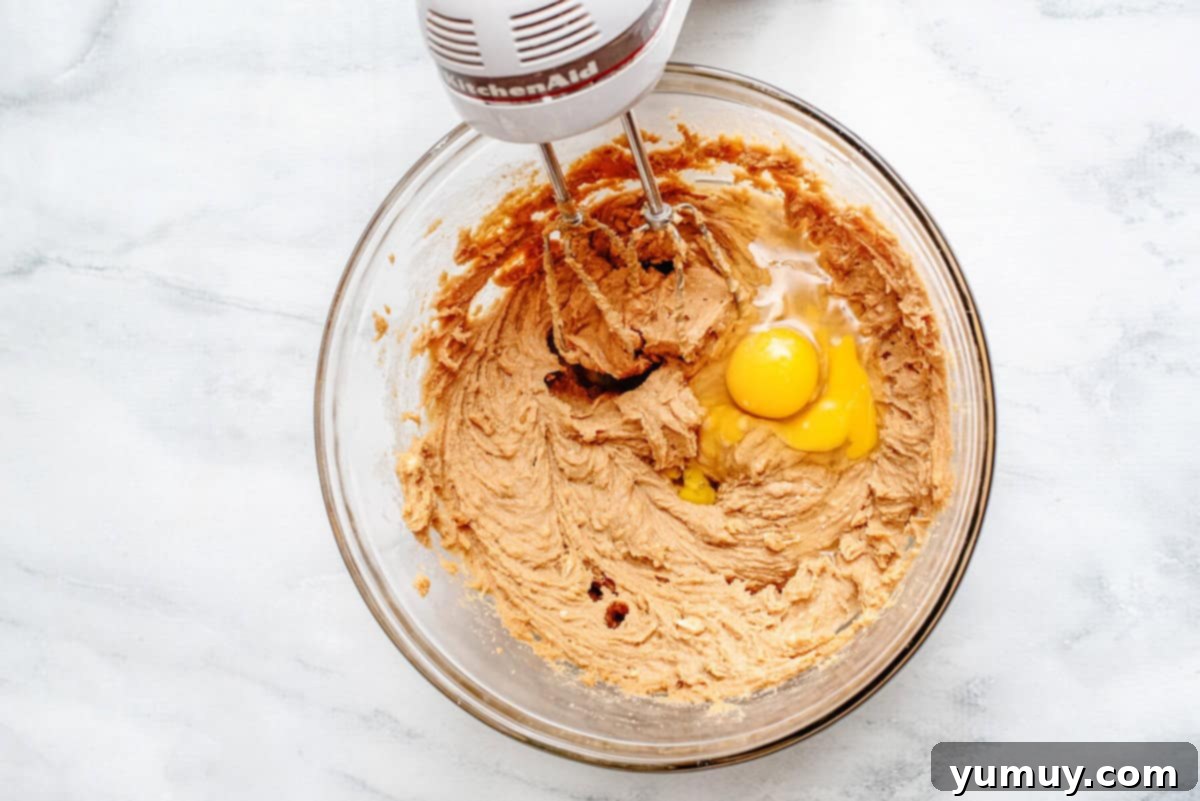
In a large mixing bowl, combine 1 cup of softened unsalted butter, 1¼ cups of creamy peanut butter (ensuring it’s the standard processed variety for consistent results), ½ cup of packed light brown sugar, and ½ cup of granulated sugar. Using either a hand mixer or a stand mixer with the paddle attachment, cream these ingredients together on medium speed. Beat until the mixture becomes light, fluffy, and visibly well combined, which typically takes about 2 to 3 minutes. The creaming process incorporates air, contributing to the cookies’ final soft texture. Next, crack in 2 large eggs. Continue mixing until the eggs are fully incorporated into the mixture. Remember to scrape down the sides of the bowl with a spatula occasionally to ensure all ingredients are evenly blended, preventing any unmixed pockets of sugar or butter.
Step 3: Combine Dry Ingredients and Form the Dough
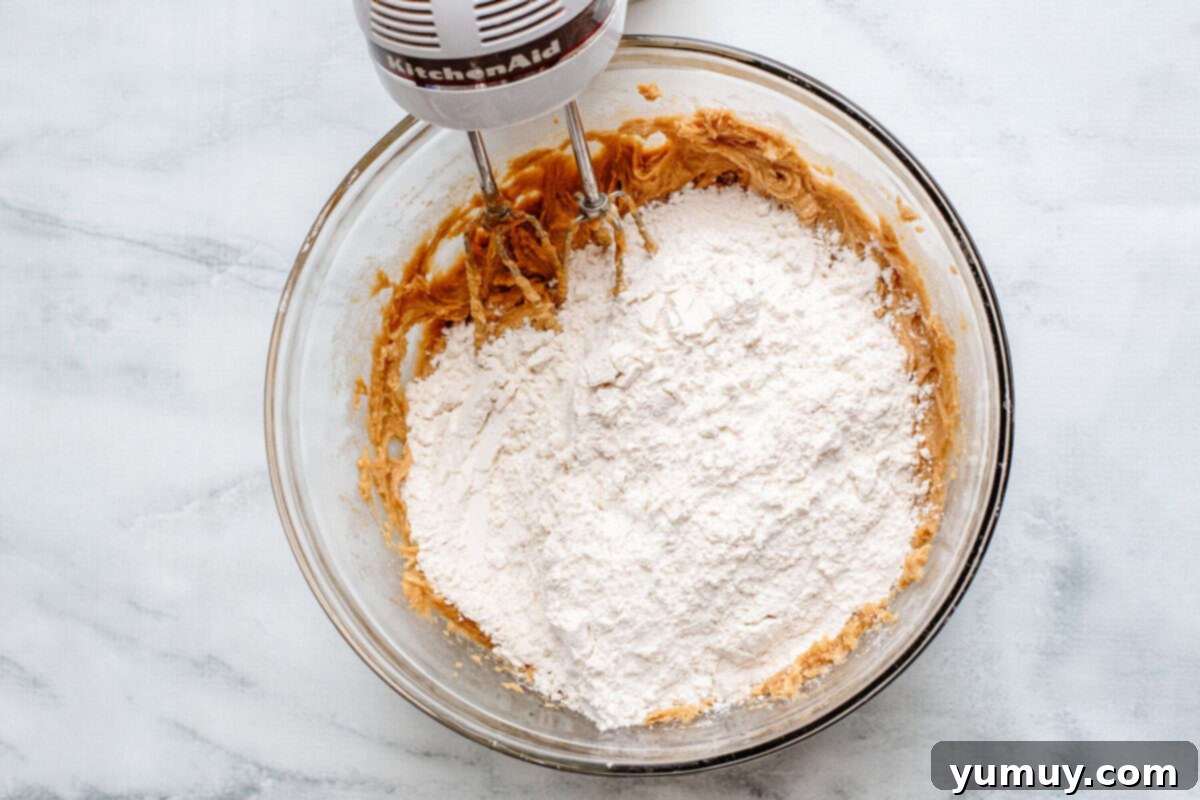
In a separate, smaller bowl, thoroughly whisk together 2¾ cups of all-purpose flour, 1 teaspoon of baking powder, ½ teaspoon of kosher salt, and 1½ teaspoons of baking soda. This dry mixture provides structure and aids in leavening, giving your cookies that perfect rise. Once whisked, gradually add the dry ingredient mixture to the wet peanut butter mixture in the large bowl. Mix on low speed, just until the flour is incorporated and the dough comes together. It’s vital to avoid overmixing at this stage, as overworking the gluten in the flour can result in tough, dense cookies. Stop mixing as soon as no dry streaks of flour are visible.
Step 4: Scoop, Roll, and Create the Signature Criss-Cross
Prepare for shaping your cookies. Using a medium cookie scoop (which helps ensure uniform cookie size and even baking) or a generous tablespoon, scoop out portions of the cookie dough. Gently roll each portion between your palms to form a smooth, round ball. In a separate shallow bowl, place the ¼ cup of granulated sugar designated for rolling. Roll each dough ball thoroughly in the granulated sugar until it is completely coated. This sugar coating adds a delightful sparkle and a subtle crunch to the finished cookie. Place the sugared cookie balls onto your parchment-lined baking sheet, leaving about 2 inches between each to allow for slight spreading during baking. Now for the classic touch: take a fork and gently press down on each cookie dough ball twice, in a criss-cross pattern. This essential step flattens the dense peanut butter dough, promoting even heat distribution and ensuring the cookies bake thoroughly without staying too thick in the center. Don’t forget to dip your fork in the granulated sugar between each press to prevent sticking and achieve clean, defined lines. Repeat this process until all your dough has been shaped and marked.
Step 5: Bake to Golden Perfection and Cool
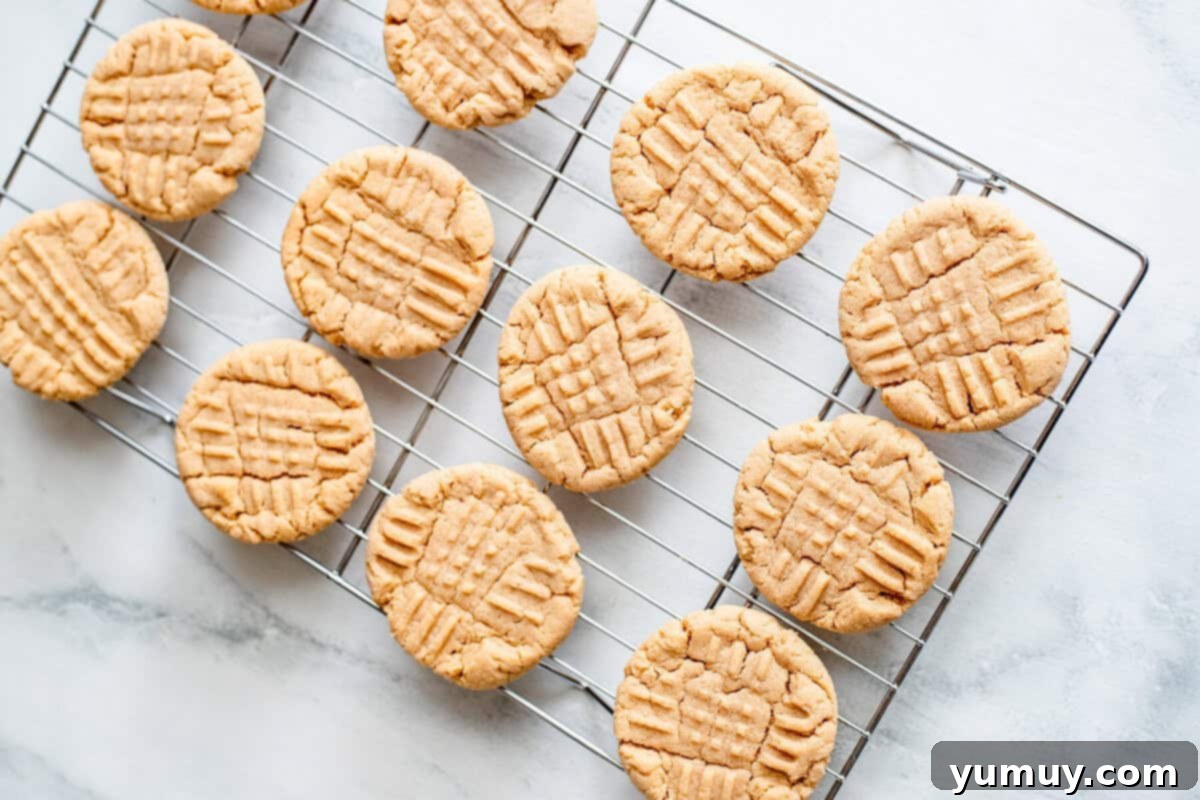
Carefully place your baking sheet, laden with perfectly shaped peanut butter cookies, into the preheated 350°F (175°C) oven. Bake for a precise 9-10 minutes. The key to perfectly soft and chewy peanut butter cookies is not to overbake them. Look for cues: the edges should be lightly golden brown, but the centers will still appear soft and slightly underbaked. This is exactly what you want! The cookies will continue to cook and set as they cool on the hot baking sheet. Once the baking time is complete, remove the sheet from the oven. Allow the cookies to cool on the baking sheet for 2-3 minutes. This crucial resting period gives them time to firm up just enough to prevent them from breaking when transferred. After this initial cooling, gently transfer the warm cookies to a wire rack to cool completely. Resist the urge to stack them while hot, as this can cause them to stick together and lose their crisp edges. Once cooled, savor the irresistible flavor and texture of your homemade peanut butter cookies!
Storage and Shelf Life
To ensure your delicious peanut butter cookies remain fresh and maintain their delightful chewiness, proper storage is key. Once your cookies have completely cooled to room temperature, transfer them to an airtight container. At room temperature, they will stay wonderfully fresh for up to 3 days, perfect for everyday snacking. If you need to extend their shelf life slightly, you can store them in the refrigerator for up to 5 days. For longer-term enjoyment, these cookies freeze beautifully. Simply place them in a single layer in an airtight, freezer-safe container or a heavy-duty freezer bag, separating layers with parchment paper to prevent sticking. They will keep well in the freezer for up to 1 month. When you’re ready to enjoy frozen cookies, allow them to thaw overnight in the refrigerator or at room temperature for 30-60 minutes for the best texture. You can also gently warm them in the microwave for a few seconds for that fresh-out-of-the-oven feel.
Creative Variations to Elevate Your Peanut Butter Cookies
While the classic homemade peanut butter cookie is undeniably perfect on its own, its versatility makes it an excellent canvas for creative adaptations. Over the years, I’ve experimented with many delightful twists. Here are some of my favorite variations to try when you’re looking to add a little something extra to your next batch:
- Peanut Butter and Banana Cookies: For a subtly sweet and incredibly moist cookie, mash one ripe banana and gently fold it into the cookie dough after mixing in the eggs. The banana adds natural sweetness and a unique flavor profile that pairs beautifully with peanut butter.
- Chocolate Chip Peanut Butter Cookies: A match made in heaven! Stir in 1 cup of your preferred chocolate chips (milk chocolate, semi-sweet, or dark chocolate all work wonderfully) to the dough just before adding the dry ingredients. The rich chocolate pockets are a delightful surprise in every bite.
- Peanut Butter Oatmeal Cookies: For a heartier cookie with a satisfying chew, incorporate 1 cup of old-fashioned rolled oats into the dough along with the dry ingredients. The oats add texture and a wholesome appeal, making them perfect for a more substantial snack.
- Peanut Butter and Jelly Thumbprint Cookies: Transform these classic cookies into a nostalgic treat. After rolling the dough balls in sugar and placing them on the baking sheet, use your thumb or the back of a small spoon to create a deep indentation in the center of each cookie. Fill these indentations with your favorite fruit jelly or jam (strawberry and grape are traditional choices) before baking.
- Nutella Swirl Peanut Butter Cookies: For a decadent hazelnut-chocolate twist, once the dough is formed into balls, take a small spoonful of Nutella and lightly swirl it into the top of each dough ball before flattening with a fork. This creates beautiful marbled cookies with an incredible flavor combination.
- Spiced Peanut Butter Cookies: Add warmth and depth by incorporating ½ teaspoon of ground cinnamon and ¼ teaspoon of ground nutmeg into your dry ingredients. These spices complement the nutty flavor of the peanut butter wonderfully.
More Irresistible Cookie Recipes to Try!
Butter Cookies
Brownie Mix Crinkle Cookies
Churro Cookies
Chocolate Pudding Cookies
Browse All Cookies
