Get ready to indulge in the ultimate treat that brings together everything you adore about classic rocky road into a perfectly portable, chewy cookie. These aren’t just any chocolate cookies; they’re an explosion of textures and flavors in every single bite, designed to satisfy even the most intense sweet cravings. Imagine sinking your teeth into a rich, fudgy chocolate cookie base, then discovering pockets of gooey, melted marshmallows, crunchy walnuts, and luscious, melty chocolate chips. Inspired by the nostalgic delight of rocky road fudge, this easy rocky road cookie recipe transforms that beloved dessert into a handheld marvel that’s simple enough for a weeknight bake, yet impressive enough for any special occasion.

Irresistible Chocolate Walnut Cookies with Marshmallows
For a long time, my chocolate marshmallow cookies held a special place in my heart, but these rocky road cookies have taken that love to a whole new level with the added joy of a satisfying crunch. These aren’t just good; they’re the best rocky road cookies, packed with generous amounts of gooey marshmallows, robust walnuts, and smooth semisweet chocolate chips. What makes them truly stand out is the intentional slight underbaking, which locks in that coveted soft, chewy center with an almost fudgy texture that simply cannot be replicated by overbaking. Every homemade rocky road cookie offers a delightful textural contrast that keeps you coming back for more.
The beauty of this chocolate rocky road cookie recipe lies in its incredible versatility. While walnuts are a classic choice, feel free to swap them out for crunchy pecans or toasted almonds for a different nutty dimension. For those who prefer an even richer chocolate experience, dark chocolate chunks can be used instead of semisweet chips. And if you’re looking to add an extra layer of gourmet flavor, consider toasting your nuts lightly before incorporating them into the dough – it really deepens their aroma and taste. No matter how you choose to customize them, these chewy chocolate cookies with marshmallows and walnuts are consistently a crowd-plepleaser, embodying the essence of a truly easy rocky road cookie recipe.

Mastering Marshmallows: Preventing Melt-Out in Your Rocky Road Cookies
One of the initial hurdles I encountered while perfecting this chocolate rocky road cookie recipe was ensuring the marshmallows remained delightfully gooey inside the cookie, rather than melting out and creating a sticky mess on the baking sheet. It’s a common challenge for many bakers, but with a simple trick, you can achieve perfect, soft marshmallow pockets every time. The key is to strategically tuck the marshmallows deep within the cookie dough. After you’ve portioned out your cookie dough balls, take a moment to inspect them. If you see any marshmallows peeking out from the surface, simply grab a small additional piece of cookie dough and gently use it to cover any exposed marshmallow bits. This protective layer of dough acts as a barrier, encasing the marshmallows and allowing them to soften and become delightfully gooey as the cookies bake, rather than spreading into a puddle. This ensures that after your homemade rocky road cookies cool, you’re left with perfectly integrated, soft, and chewy marshmallow surprises.

Rocky Road Cookies Recipe
These soft and fudgy rocky road cookies are loaded with gooey marshmallows, crunchy walnuts, and melty chocolate chips, offering a symphony of textures in every bite!
15 minutes
14 minutes
29 minutes
12 cookies
Ingredients
- ½ cup salted butter room temperature (1 stick)
- ½ cup granulated sugar
- ⅓ cup brown sugar packed
- 1 large egg room temperature
- 1 teaspoon pure vanilla extract optional
- 1 cup all-purpose flour
- ⅓ cup unsweetened cocoa powder *
- ½ teaspoon baking soda
- ½ cup semisweet chocolate chips **
- ½ cup chopped walnuts ***
- ½ cup mini marshmallows ****
Equipment
- Kitchen Scale (optional)
- Hand Mixer or Stand Mixer
- Baking Sheet
- 1-Tablespoon Cookie Portion Scoop (optional)
Instructions
In a mixing bowl, using a hand or stand mixer, cream together the butter and sugars until light and fluffy, about 2-3 minutes.
½ cup salted butter, ½ cup granulated sugar, ⅓ cup brown sugar

Beat in the egg and vanilla extract until well combined.
1 large egg, 1 teaspoon pure vanilla extract

In a separate bowl, whisk together the flour, cocoa powder, and baking soda.
1 cup all-purpose flour, ⅓ cup unsweetened cocoa powder, ½ teaspoon baking soda

Add the dry ingredient mixture to the wet ingredients, mixing until just combined. Be careful not to overmix.

Gently fold in the semi-sweet chocolate chips, chopped walnuts, and mini marshmallows.
½ cup semisweet chocolate chips, ½ cup chopped walnuts, ½ cup mini marshmallows
Wrap the bowl with plastic wrap and refrigerate the dough for at least 1 hour or up to 2 days.
Preheat oven to 350°F. Line a baking sheet with parchment paper.
Drop rounded tablespoons of cookie dough onto the prepared baking sheet, spacing them about 2 inches apart.

Bake in the preheated oven for 10-12 minutes, or until the edges are set but the centers are still soft. The cookies will continue to firm up as they cool.
Allow the cookies to cool on the baking sheet for a few minutes before transferring them to a wire rack to cool completely.

Notes
*It is best to use natural unsweetened cocoa powder for this recipe, as Dutch-processed cocoa powder would require the addition of baking powder due to its acidity level.
**You can experiment with different types of chocolate chips or chunks, such as dark chocolate, milk chocolate, or white chocolate, to create your desired flavor profile.
***You can replace the walnuts with your favorite nuts, such as almonds or pecans, or omit them entirely if you have nut allergies or prefer nut-free cookies.
****You can use regular-sized marshmallows, but you’ll need to chop them into smaller pieces to ensure they’re evenly distributed throughout the cookie dough.
Tips for Perfect Rocky Road Cookies:
- Use the spoon-and-level method to measure both the flour and the cocoa powder. This prevents dry, dense cookies by ensuring accurate measurements.
- Avoid overmixing the cookie dough once the dry ingredients are added. Overmixing develops gluten too much, leading to tough rather than tender cookies.
- For an enhanced flavor, toast your nuts (walnuts, pecans, or almonds) at 350°F (175°C) for 5-7 minutes before folding them into the dough. This brings out their natural oils and deepens their taste.
- When incorporating the mix-ins (chocolate chips, walnuts, marshmallows), use a rubber spatula and fold gently. This prevents breaking them up and avoids overmixing the dough.
- Do not skip chilling the dough! This crucial step helps prevent the cookies from spreading too much in the oven, ensuring they maintain a beautiful, chewy texture and thickness. Chill for at least an hour, or up to two days.
- To prevent marshmallows from melting out and creating a sticky mess, ensure any exposed marshmallows on your cookie dough balls are fully covered with a small piece of dough before baking.
- Watch your baking time carefully. The cookies should have set edges but still appear soft in the center. They will continue to firm up beautifully as they cool, so resist the urge to overbake.
- Allow the cookies to cool on the baking sheet for at least 5-10 minutes after baking before attempting to transfer them to a wire rack. This gives the gooey centers time to set, preventing them from falling apart.
Make-Ahead: This rocky road cookie dough is excellent for meal prep! You can prepare the dough up to the point of chilling and store it in the refrigerator for up to 2 days. When you’re ready to bake, simply scoop and bake as directed. This makes fresh, warm cookies incredibly convenient!
Storage: Keep your baked rocky road cookies in an airtight container at room temperature for up to 4 days to maintain their freshness and chewiness. For longer storage, these cookies freeze beautifully. Wrap them tightly in plastic wrap individually or layer them with parchment paper in a freezer-safe container or bag. They will stay fresh in the freezer for up to 3 months. Thaw at room temperature for a delicious treat anytime!
Calories from Fat 135
Becky Hardin
Why You’ll Fall in Love with This Rocky Road Cookie Recipe
There are countless reasons why these homemade rocky road cookies have become a staple in my kitchen and a favorite among friends and family. First and foremost, the flavor profile is simply unmatched. The deep, rich chocolate base perfectly complements the sweet, mellow notes of the marshmallows and the earthy crunch of the walnuts. It’s a harmonious blend that captures the essence of classic rocky road in every single bite.
Beyond flavor, the texture is what truly sets these cookies apart. They boast a uniquely soft and fudgy center that contrasts beautifully with the slight crispness of the edges. The surprise bursts of gooey marshmallow and the satisfying snap of walnuts provide an exciting experience for your palate, ensuring that each cookie is an adventure in itself. They are incredibly satisfying without being overly dense or heavy.
Another fantastic aspect of this easy rocky road cookie recipe is its straightforward preparation. Despite appearing decadent and complex, the steps are simple and approachable, even for novice bakers. With clear instructions and readily available ingredients, you can whip up a batch of these chewy chocolate cookies with marshmallows and walnuts with minimal fuss. Plus, the dough is incredibly forgiving and actually benefits from chilling, making it a perfect make-ahead dessert option. Whether you’re baking for a party, a casual get-together, or simply treating yourself, these chocolate rocky road cookies are guaranteed to impress and become a treasured addition to your recipe collection.
How to Make the Best Rocky Road Cookies: An Expanded Step-by-Step Guide
Creating these delightful rocky road cookies is a truly rewarding experience. Follow these detailed steps to ensure your cookies turn out perfectly soft, chewy, and loaded with all the good stuff.
1. Cream the Butter and Sugars for a Fluffy Base: Begin by combining ½ cup of room-temperature salted butter (one stick), ½ cup of granulated sugar, and ⅓ cup of packed brown sugar in a large mixing bowl. Using either a hand mixer or a stand mixer fitted with the paddle attachment, beat these ingredients together until the mixture becomes light, fluffy, and noticeably pale in color. This process usually takes about 2-3 minutes. The secret to a tender, airy cookie lies in using room-temperature butter, as it creams more effectively, incorporating air into the mixture. To ensure your butter is perfectly softened, plan ahead and leave it on the counter for 30-60 minutes before you start baking. I highly recommend doing the same with your egg, so it’s ready for the next step and blends seamlessly into the batter.

2. Incorporate the Egg and Vanilla for Depth of Flavor: Once your butter and sugars are perfectly creamed, add 1 large, room-temperature egg and 1 teaspoon of pure vanilla extract to the bowl. Continue beating the mixture until these new additions are fully combined. Just like with the butter, bringing your egg to room temperature allows it to emulsify better with the fats and sugars, leading to a smoother, more uniform cookie dough. The vanilla extract, while optional, adds a wonderful layer of warmth and complexity that truly elevates the overall flavor of these chocolate rocky road cookies.

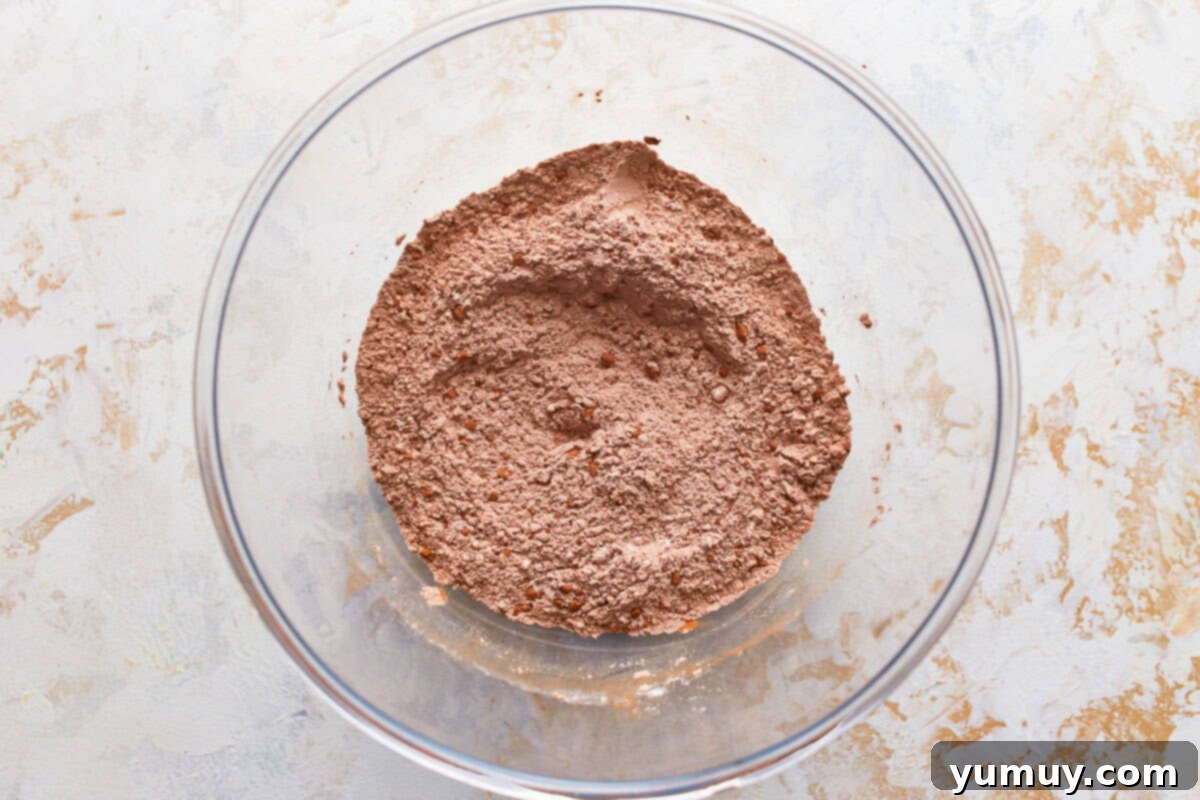
3. Prepare and Whisk the Dry Ingredients: In a separate, medium-sized bowl, whisk together 1 cup of all-purpose flour, ⅓ cup of unsweetened cocoa powder, and ½ teaspoon of baking soda. This step is crucial for ensuring that your leavening agent and flavorings are evenly distributed throughout the cookies. A pro tip for achieving perfectly soft and fudgy cookies is to always spoon and level your flour and cocoa powder. This technique prevents you from accidentally adding too much, which can result in dry, dense, and unappetizing cookies. If your cocoa powder tends to be lumpy, a quick sift before whisking can prevent any dry clumps from appearing in your final dough.
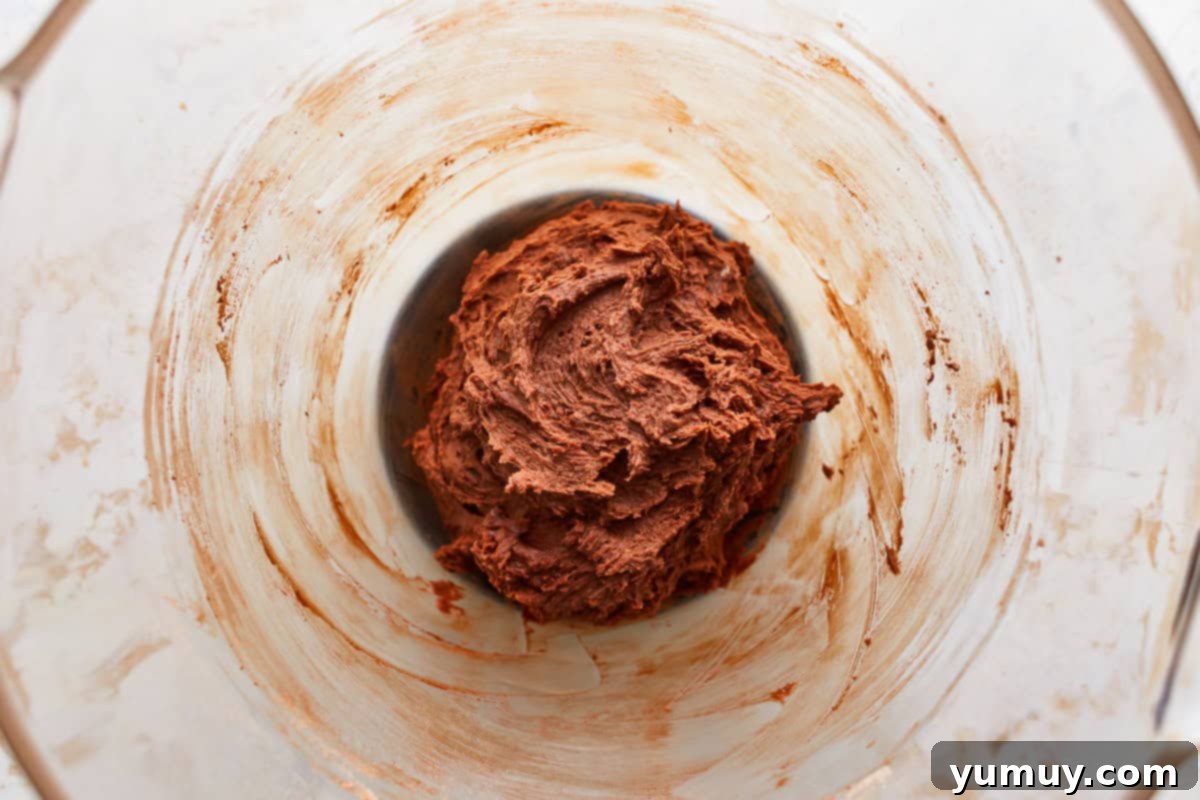
4. Combine Dough and Chill for Optimal Texture: Now, it’s time to bring everything together. Gradually add the whisked dry ingredient mixture to your wet ingredients, mixing carefully until they are just combined. It’s vital to avoid overmixing at this stage; overworking the dough can lead to tough, rather than tender, homemade rocky road cookies. Next, gently fold in ½ cup of semisweet chocolate chips, ½ cup of chopped walnuts, and ½ cup of mini marshmallows. I find that a rubber spatula is the ideal tool for this, as it allows you to incorporate the mix-ins without breaking them up or overmixing the delicate dough. Once everything is folded in, wrap the bowl tightly with plastic wrap and refrigerate the dough for a minimum of 1 hour, or up to 2 days. This chilling step is absolutely essential for these easy rocky road cookies; skipping it will cause your cookies to spread excessively in the oven, resulting in thin, flat cookies instead of the thick, chewy delights you’re aiming for.
5. Portion the Cookie Dough with Precision: When you’re ready to bake your ultimate rocky road cookies, preheat your oven to 350°F (175°C) and line a baking sheet with parchment paper. This prevents sticking and ensures even baking. Scoop rounded tablespoons of the chilled cookie dough onto the prepared baking sheet, making sure to space them about 2 inches apart to allow for proper spreading. For perfectly uniform cookies, a cookie portion scoop is invaluable, but a regular tablespoon will work just fine. Here’s another critical tip for dealing with marshmallows: if you notice any marshmallows exposed on the surface of your scooped dough balls, take a tiny bit of extra dough and gently press it over the exposed marshmallow. This simple trick will help prevent the marshmallows from leaking out and creating sticky puddles on your baking sheet, ensuring they stay gooey inside the cookie where they belong.

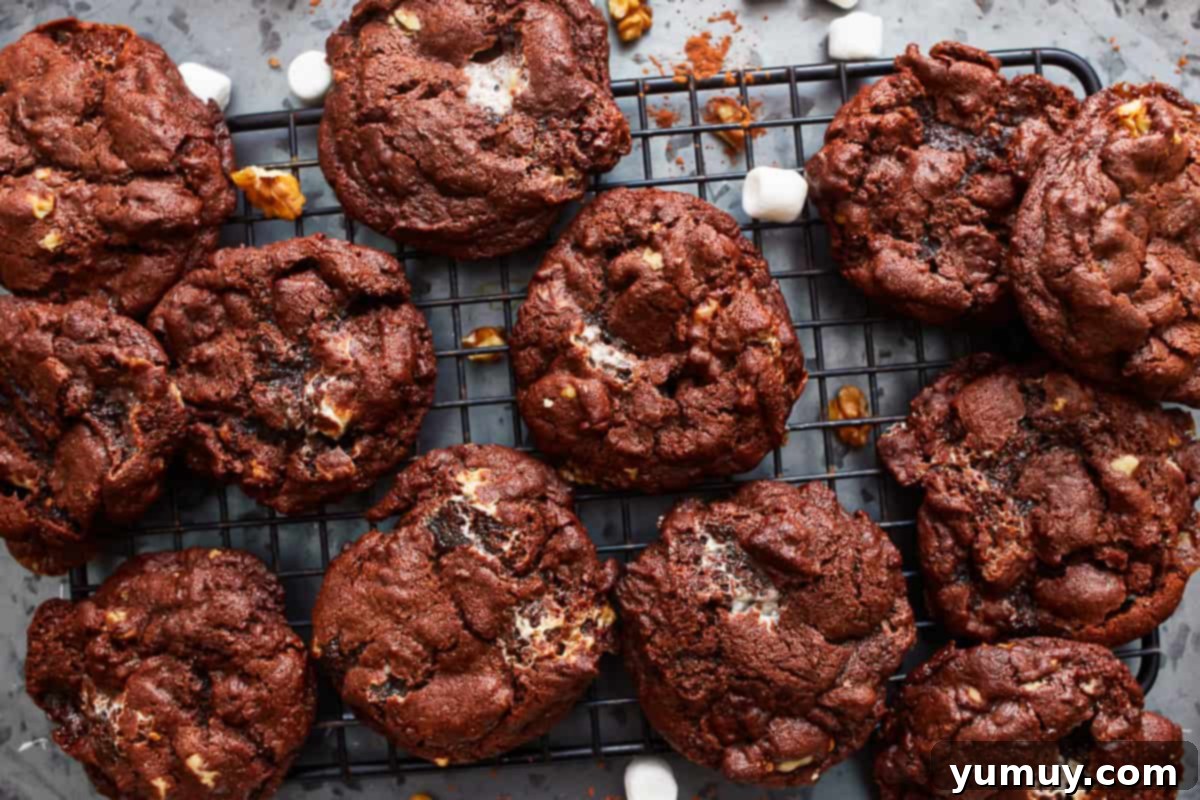
6. Bake to Perfection and Cool Thoughtfully: Bake your rocky road cookies in the preheated oven for 10-12 minutes. The sweet spot for these chewy chocolate cookies with marshmallows and walnuts is when the edges are set and lightly golden, but the centers still appear soft and slightly underbaked. Remember, cookies continue to bake slightly from residual heat even after they’re removed from the oven, so trust the process – they will firm up beautifully as they cool. Once out of the oven, allow the cookies to cool on the baking sheet for a few minutes. This initial cooling time on the hot sheet is essential, allowing the soft, fudgy centers to set and preventing the cookies from falling apart when you transfer them. After this brief rest, gently move them to a wire rack to cool completely. Patience during this step ensures your easy rocky road cookies maintain their perfect structure and delightful texture.
Storage and Freezing Instructions for Freshness
To keep your delicious chocolate rocky road cookies tasting fresh and chewy, proper storage is key. Once completely cooled, store any leftover cookies in an airtight container at room temperature. They will maintain their incredible flavor and soft texture for up to 4 days, making them a perfect grab-and-go treat throughout the week.
If you’re looking to enjoy these homemade rocky road cookies for an extended period, they freeze exceptionally well. To freeze, first ensure the cookies are completely cool. Then, either wrap each cookie individually in plastic wrap or layer them between sheets of parchment paper in a freezer-safe container or heavy-duty freezer bag. This prevents freezer burn and keeps them tasting fresh. Properly stored, these cookies will last in the freezer for up to 3 months. When you’re ready to enjoy them, simply remove them from the freezer and let them thaw at room temperature for a few hours. Freezing is a fantastic way to always have a supply of these ultimate rocky road cookies on hand for unexpected guests or sudden cravings!
Creative Variations and Customizations for Your Rocky Road Cookies
While the classic rocky road cookie recipe is undeniably perfect, one of its greatest strengths is how easily it can be adapted and customized to suit your personal preferences or what you have on hand. Don’t hesitate to get creative with your mix-ins!
- Nuts: Beyond walnuts, try chopped pecans, almonds, or even a mix of your favorite nuts for a unique flavor profile. For an intensified nutty taste, toast the nuts lightly in a dry pan or in the oven for a few minutes before adding them to the dough.
- Chocolate: Experiment with different types of chocolate chips or chunks. Dark chocolate will give a more intense, sophisticated flavor, while milk chocolate will yield a sweeter, creamier bite. White chocolate chips can also add a lovely contrast.
- Marshmallows: While mini marshmallows are recommended for even distribution, you can use regular-sized marshmallows by chopping them into smaller pieces. For an extra touch of flavor, try flavored marshmallows if you can find them!
- Extra Treats: Consider folding in other ingredients for added indulgence. A sprinkle of sea salt flakes on top before baking can enhance the chocolate flavor. A handful of shredded coconut, dried cranberries, or even a few pretzel pieces for a salty-sweet crunch could be delicious additions to your chewy chocolate cookies.
- Spices: A pinch of cinnamon or a tiny dash of cayenne pepper (for a Mexican hot chocolate twist) can add an unexpected depth to the chocolate base.
These simple adjustments allow you to create a truly unique version of these easy rocky road cookies, ensuring that every batch feels fresh and exciting. The possibilities are truly endless!
More Irresistible Cookie Recipes to Try!
Classic Butter Cookies
Decadent Brownie Mix Crinkle Cookies
Sweet & Crispy Churro Cookies
Moist Chocolate Pudding Cookies
Browse All Our Cookie Recipes
