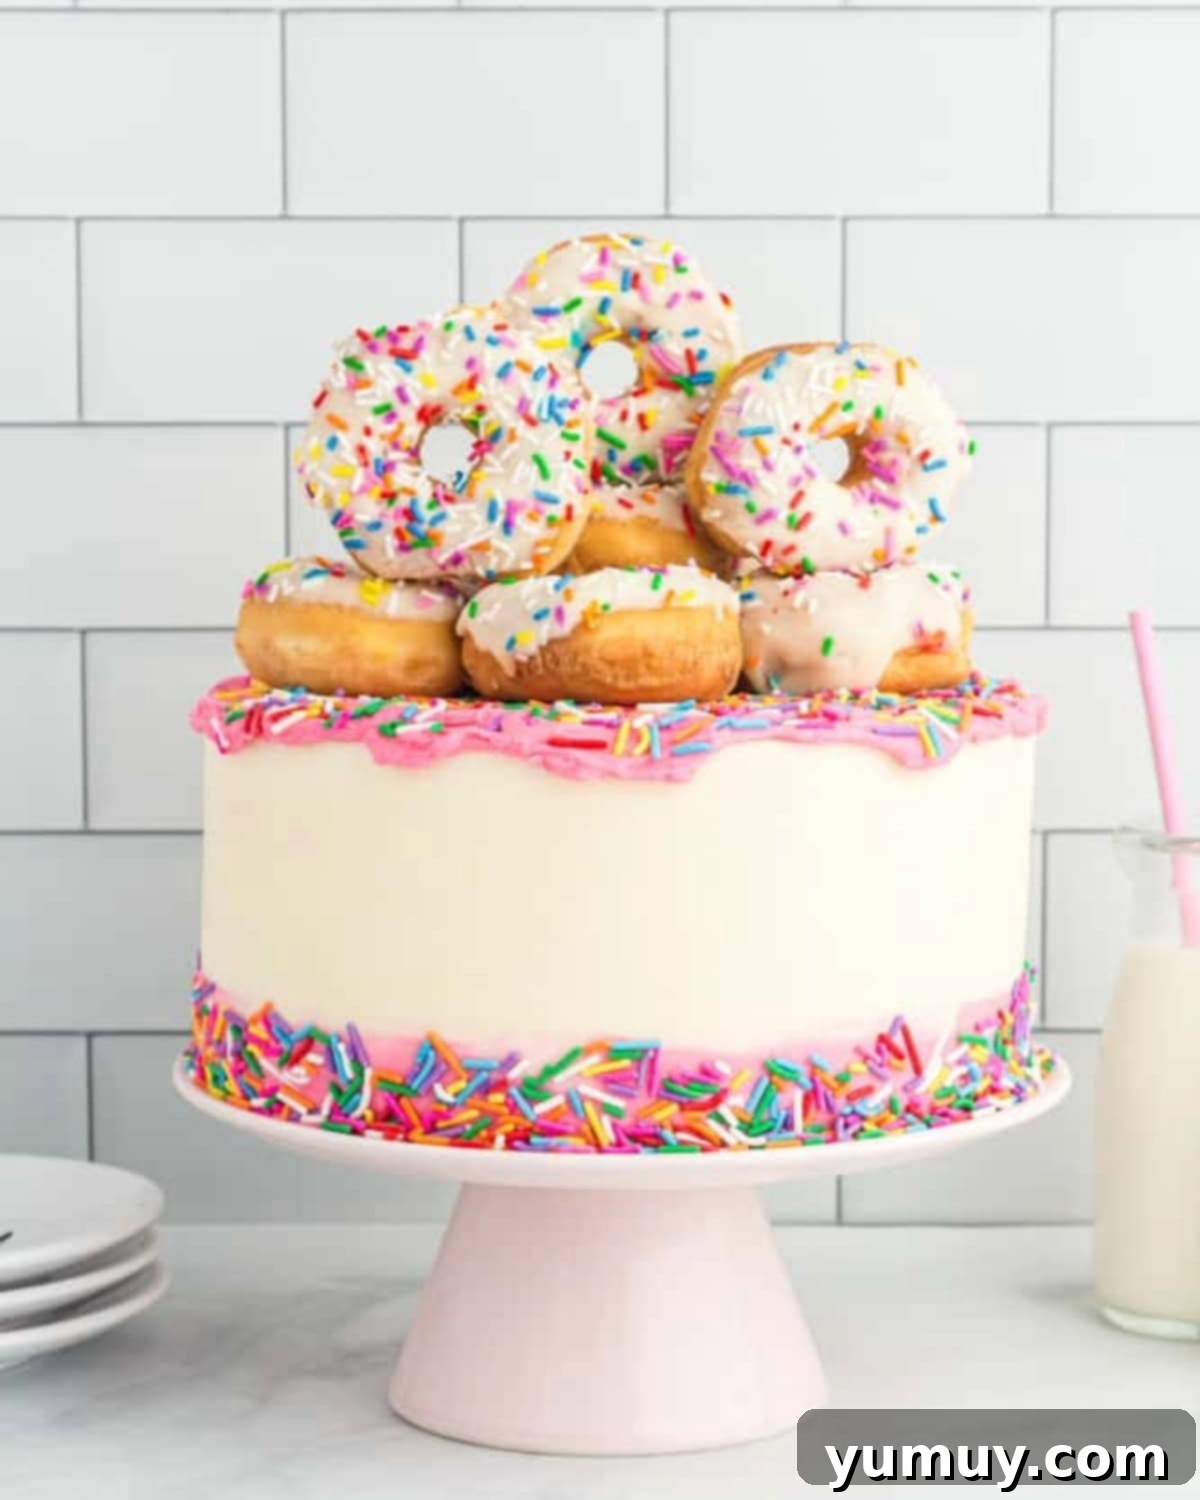
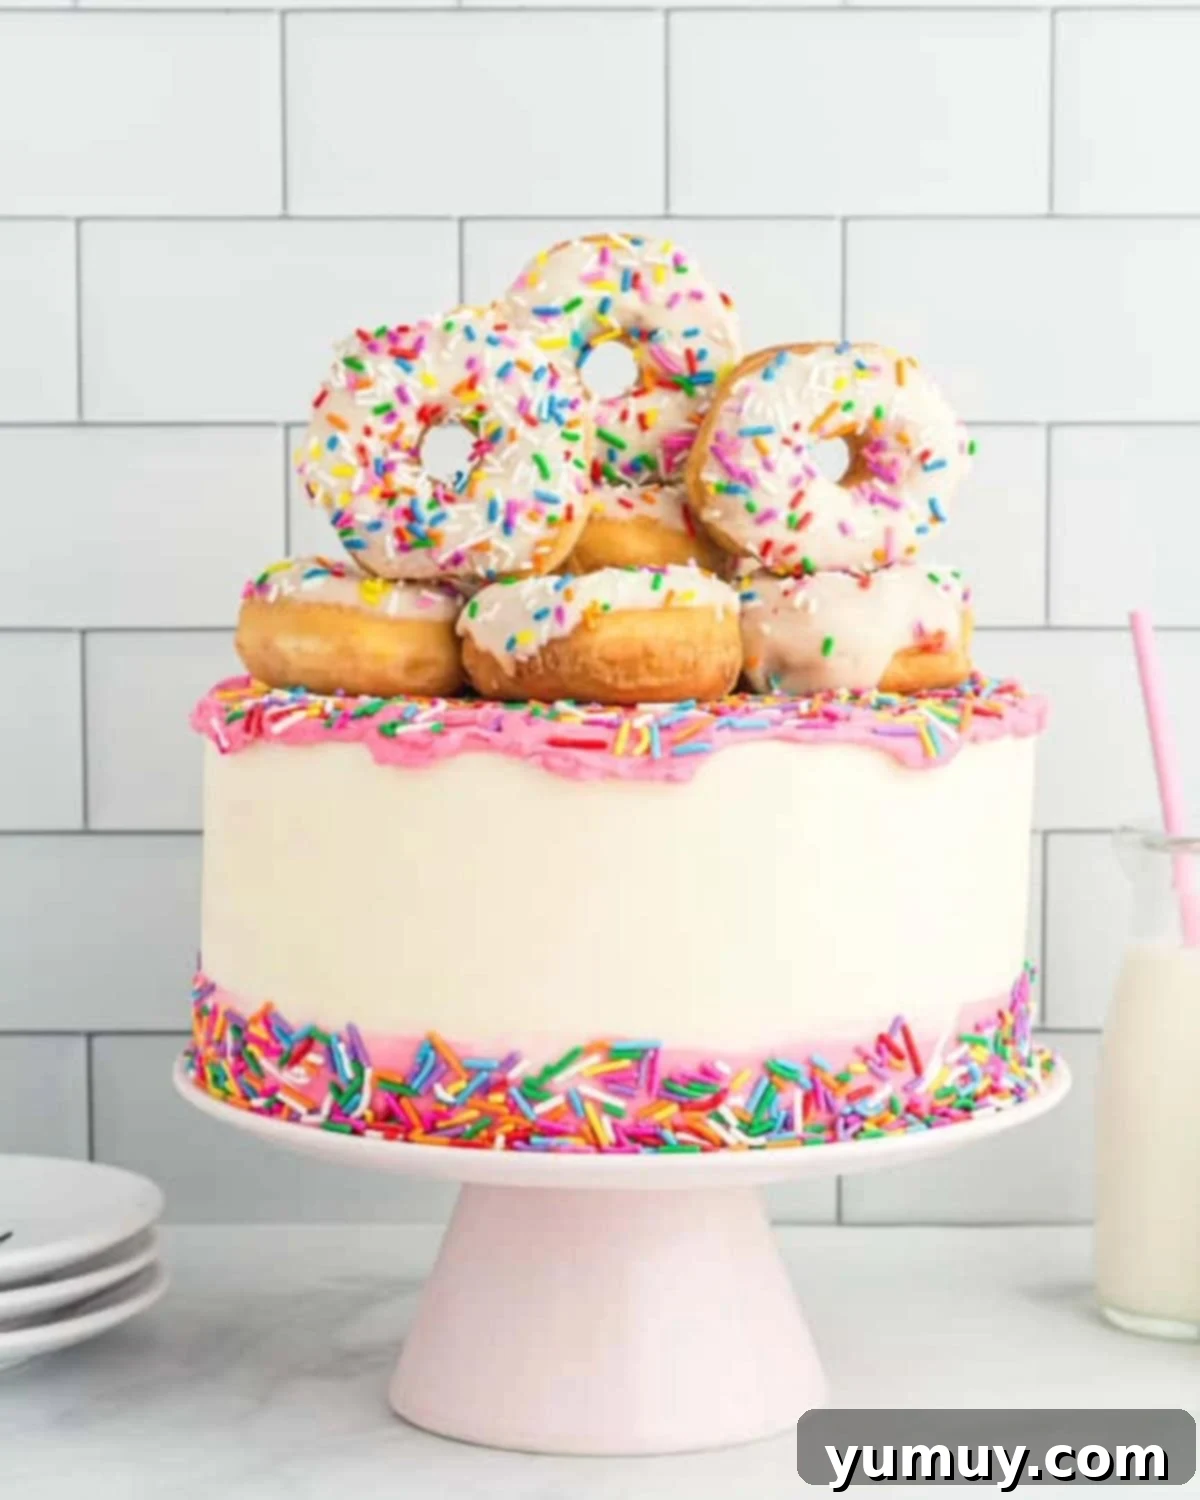
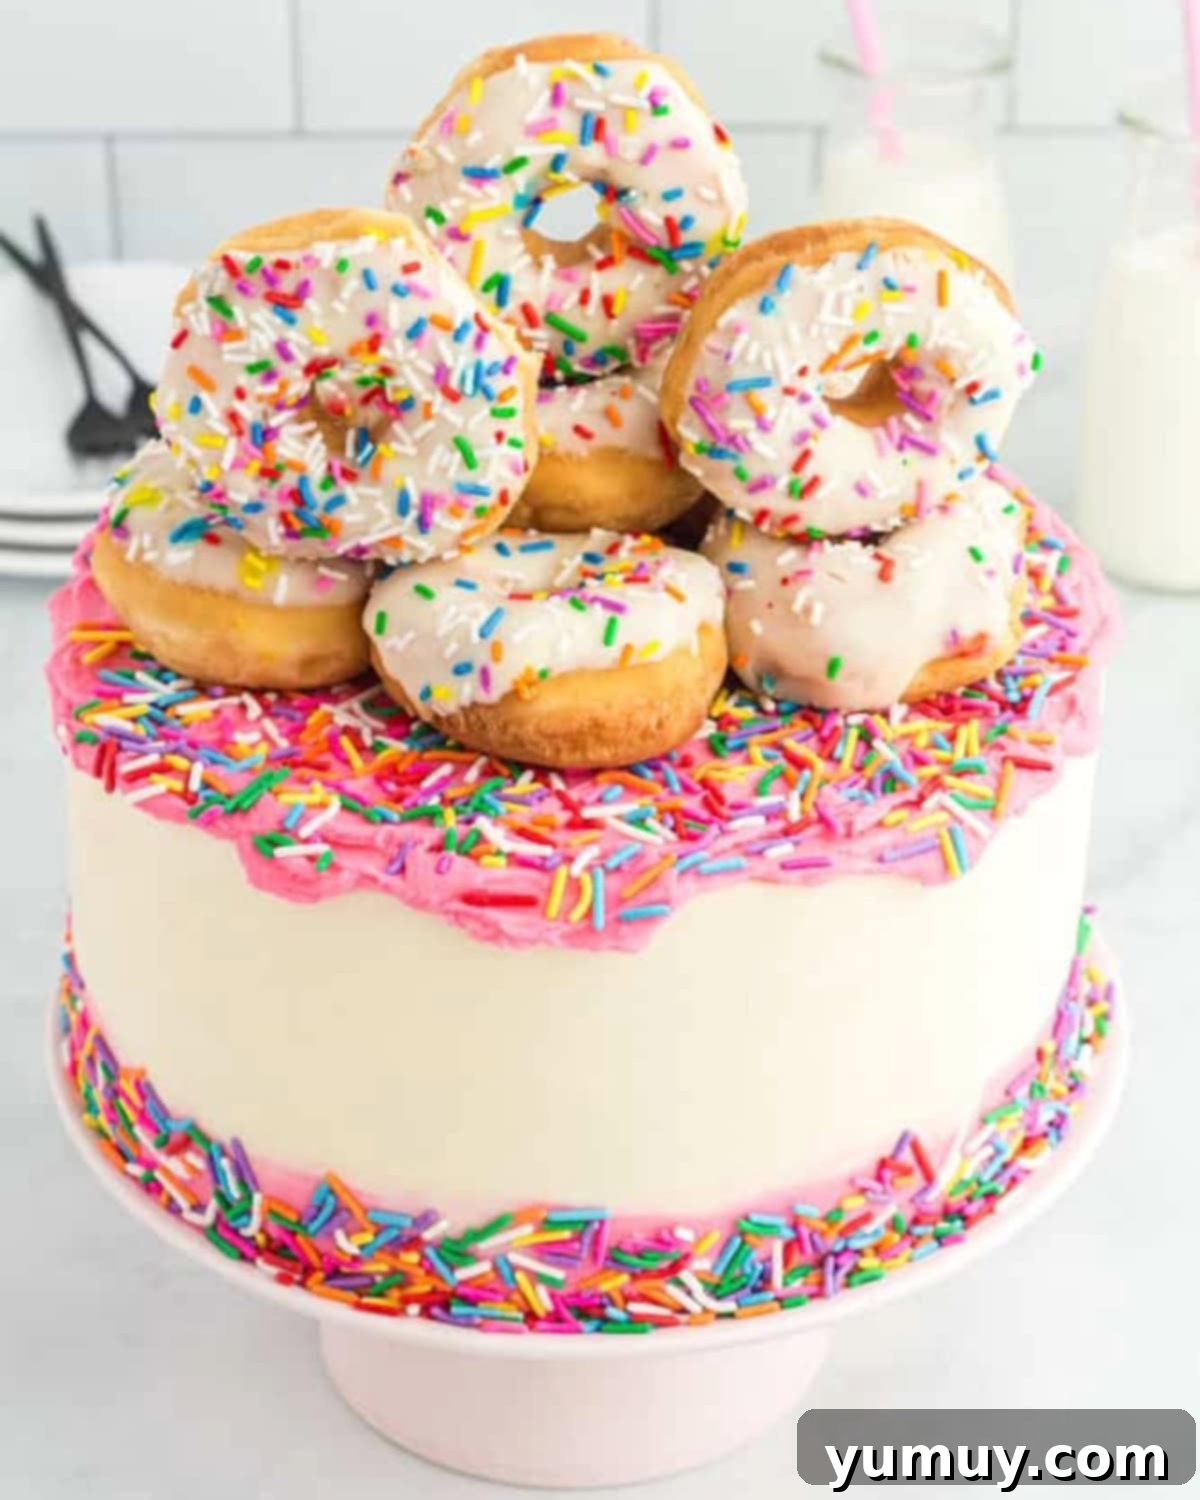
If you’ve ever dreamt of transforming a classic donut into a magnificent cake, our delightful Frosted Donut Cake recipe is your dream come true! This extraordinary dessert captures the comforting essence of an old-fashioned donut, warmly spiced with notes of cinnamon and nutmeg, all while offering the convenience of a cake mix. Beautifully decorated to mimic a real frosted donut, it features creamy vanilla buttercream, vibrant rainbow sprinkles, and is even crowned with actual mini donuts. It’s not just a cake; it’s a show-stopping centerpiece perfect for any celebration.
The Ultimate Frosted Donut Cake: A Celebration of Flavor
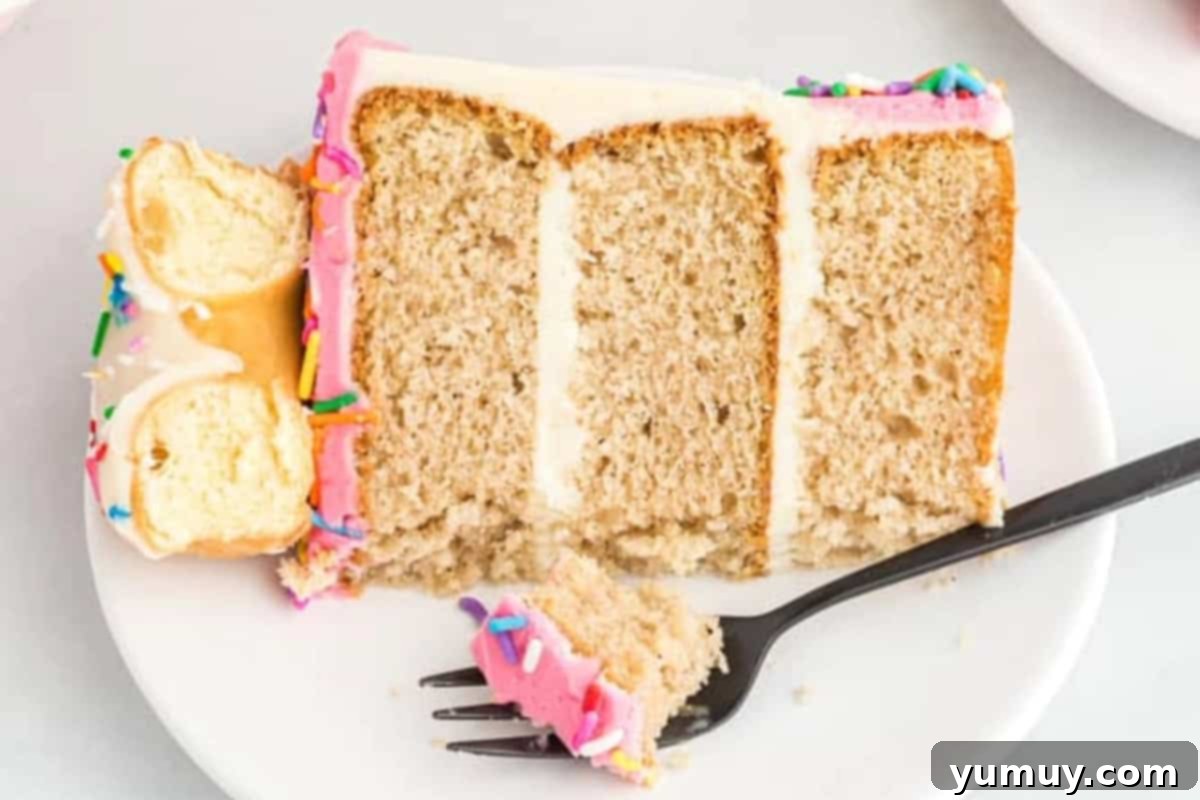
Imagine the irresistible taste of your favorite old-fashioned glazed donut, transformed into a moist, tender cake that’s perfect for any grand occasion. Our Donut Themed Cake beautifully marries the comforting familiarity of a classic glazed donut with the sheer simplicity of a boxed cake mix, creating a dessert that is truly the best of both worlds. Every bite delivers a symphony of warm spices, a light and fluffy texture, and a truly delightful sweetness that will transport you straight to your fondest donut shop memories.
What makes this frosted donut cake truly special is its incredible balance. The cake itself is incredibly tender, subtly spiced with cinnamon and nutmeg, giving it that authentic donut flavor. But the magic doesn’t stop there. It’s generously slathered with a rich, creamy vanilla buttercream, perfectly smooth and easy to apply even for novice bakers. The vibrant pink glaze, achieved with just a few drops of food coloring, along with a scattering of cheerful colorful sprinkles, makes it an absolute visual delight. And for the ultimate touch of whimsy, we crown it with real mini donuts, transforming it into a magnificent, edible centerpiece that will be the talk of any party. Whether it’s a birthday bash, a baby shower, or just an excuse to indulge in something spectacular, this donut cake is guaranteed to impress.
Why You’ll Love This Donut Themed Cake
- Incredibly Easy: Starting with a convenient cake mix drastically cuts down on prep time, making this an accessible recipe for bakers of all skill levels.
- Authentic Donut Flavor: The carefully selected spices of cinnamon and nutmeg infuse the cake with that distinct, beloved old-fashioned donut taste.
- Stunning Visual Appeal: With its bright pink frosting, cheerful sprinkles, and real donut toppers, this cake is a feast for the eyes and an instant party showstopper.
- Versatile for Any Occasion: Perfect as a unique birthday cake, a charming bridal shower dessert, or a delightful treat for family gatherings.
- Beginner-Friendly Frosting: Our buttercream recipe is forgiving and simple to work with, ensuring a smooth, professional-looking finish every time.
Mastering the Art of Donut Cake: Essential Tips for Success
Creating a bakery-worthy donut cake at home is entirely achievable with a few key techniques and a little attention to detail. From preparing your cake layers to perfecting the frosting, these tips will help you achieve a stunning and delicious result.
The Importance of Chilling Your Cake Layers
When developing this donut cake with cake mix, I discovered that chilling the cake layers before frosting is an absolute game-changer. This crucial step is often overlooked but makes all the difference in achieving a clean, professional finish. Warm cake layers are prone to crumbling and shifting during the decorating process, leading to frustration and a less-than-perfect appearance. Chilling the layers firms up the cake, making them much easier to handle, stack, and frost without tearing or creating excessive crumbs. This simple technique is your secret weapon for a birthday donut cake that not only tastes incredible but also looks like it came straight from a gourmet bakery display.
Choosing Your Cake Mix and Spices
While using a vanilla cake mix provides a fantastic base, the magic truly happens with the addition of spices. Freshly ground cinnamon and nutmeg are essential for replicating that authentic old-fashioned donut flavor. Don’t be shy with the spices; they are key to achieving the desired warmth and depth. For an even richer crumb, consider swapping half a cup of water for whole milk or buttermilk as suggested in our notes. This small adjustment can elevate the cake’s texture and moisture significantly.
Crafting the Perfect Vanilla Buttercream
Our vanilla buttercream is designed to be super forgiving, making it ideal for beginners. The secret to its light and fluffy texture lies in proper beating. Ensure your butter is slightly softened, but not fully melted, before creaming it with powdered sugar and pure vanilla extract. Beat it on high speed for at least 5 minutes to incorporate plenty of air, resulting in a smooth, spreadable consistency. If at any point the frosting feels too soft during decorating, a quick 5-minute chill in the fridge followed by another whip will restore its stability.
Decorating with Sprinkles and Real Donuts
The vibrant pink glaze and colorful sprinkles are what give this cake its iconic donut appearance. We recommend using Chefmaster Liqua-gel in Neon Pink for the most vivid color. Don’t worry if the pink icing drips slightly over the sides when applied to the top; this adds to the charm of a freshly glazed donut! When adding sprinkles, hold the cake over a baking sheet to catch any excess, which can then be reused. Topping the cake with real mini donuts, especially funfetti donuts, not only enhances the theme but also adds another layer of texture and flavor that guests will adore. Toothpicks can be used discreetly to secure them in place if needed.
Donut Cake Recipe
: 3 hours 45 minutes
Ingredients
For the Cake
- 26.5 ounces vanilla cake mix (2 (13.25-ounce) boxes)
- 2 cups water *(see notes for substitution)
- ⅔ cup unsalted butter melted (1⅓ sticks)
- 6 large eggs
- 1 teaspoon ground cinnamon
- ½ teaspoon ground nutmeg
For the Frosting
- 5 cups powdered sugar
- 1½ cups unsalted butter slightly melted (3 sticks)
- 1 tablespoon pure vanilla extract
- 1-2 drops pink gel food coloring **(see notes for brand recommendation)
- ¼ cup rainbow sprinkles
- Funfetti donuts for topping
Equipment
- Kitchen Scale (optional, for even layers)
- 3 8-inch Round Cake Pan(s)
- Stand Mixer
- Piping Tip Set (optional, for precise piping)
- Cake Scraper (for smooth frosting)
Instructions
For the Cake
- Prepare Pans: Preheat your oven to 350°F (175°C). Generously spray three 8-inch round cake pans with nonstick spray. For easy release and to prevent sticking, line the bottom of each pan with a parchment paper circle. This ensures your beautiful cake layers come out perfectly. Set the prepared pans aside.
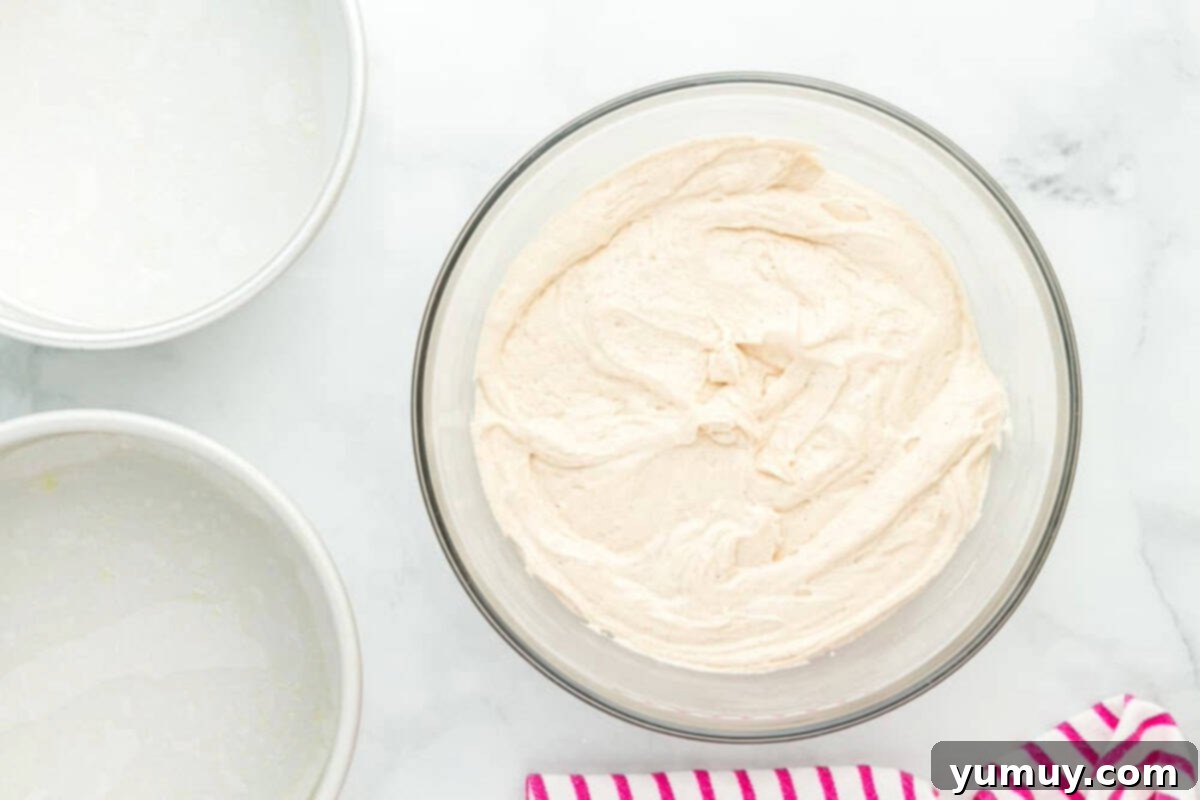
- Mix the Batter: In a large mixing bowl, combine the vanilla cake mix, water, melted unsalted butter, large eggs, ground cinnamon, and ground nutmeg. Mix thoroughly until all ingredients are just combined and no dry streaks remain. Be careful not to overmix, as this can lead to a dry cake. The batter should be smooth and lightly spiced.

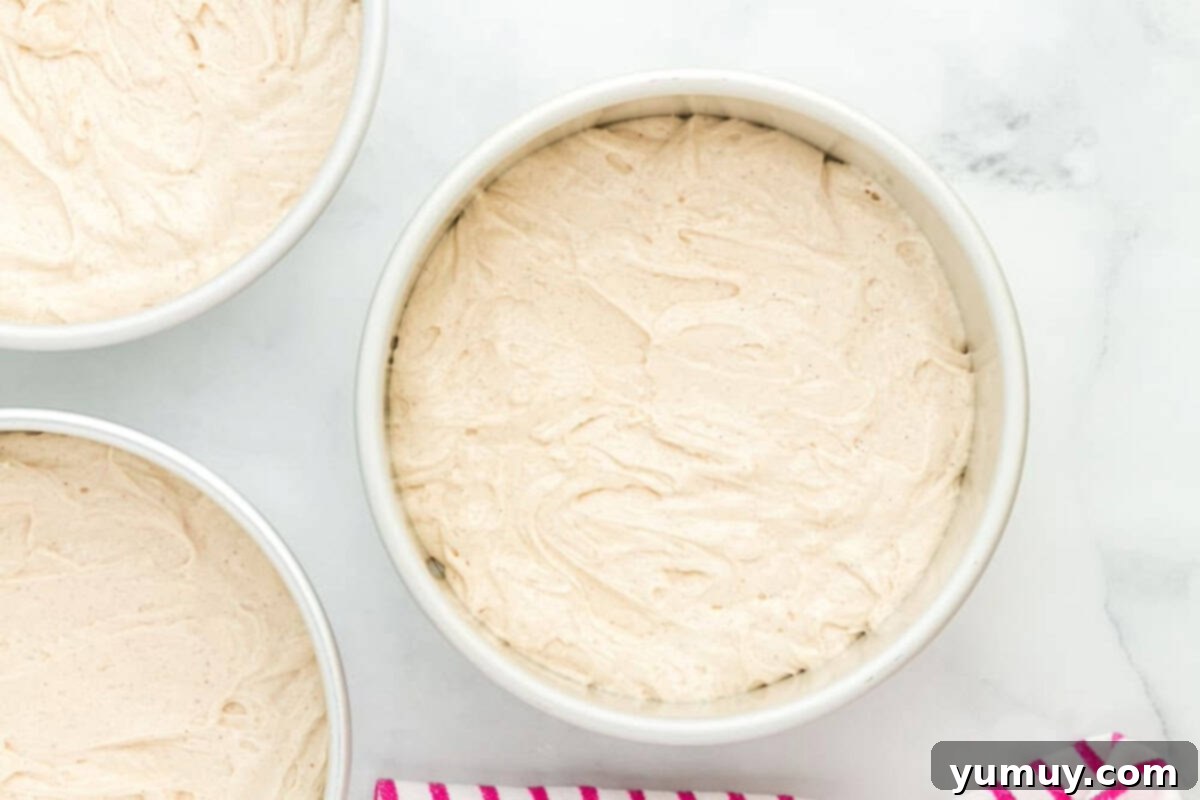
- Portion Evenly: Divide the prepared cake batter evenly among the three 8-inch cake pans. For precise and uniform layers, you can use a kitchen scale to measure about 552 grams of batter into each pan. Gently tap each pan on your counter a few times to release any large air bubbles and help settle the batter for even baking.

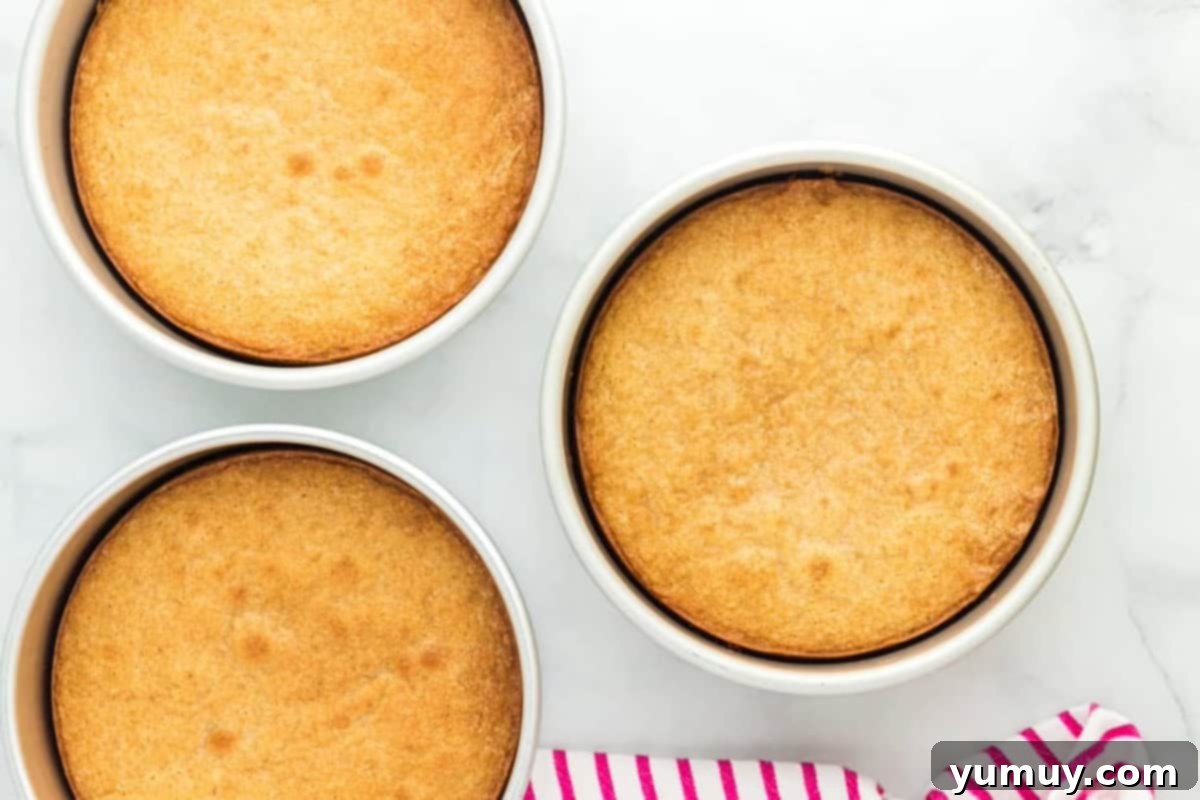
- Bake to Perfection: Bake the cake layers in your preheated oven for 28-30 minutes. Baking times can vary, so keep an eye on them. The cakes are done when a wooden toothpick inserted into the center of a cake comes out clean, with no wet batter clinging to it.
- Cooling Process: Once baked, remove the cakes from the oven and let them cool in their pans for about 15 minutes. This allows them to firm up slightly before you attempt to remove them. After 15 minutes, carefully invert the cakes onto a wire rack to cool completely. Ensure they are at room temperature before proceeding to the next step to prevent frosting from melting.

- Chill the Layers: Once the cakes have cooled completely to room temperature, wrap each cake layer individually and tightly in food-safe plastic wrap. This prevents them from drying out and sticking together. Refrigerate the wrapped cakes for at least 2 hours. This chilling step is crucial for firming up the cake layers, making them much easier to handle and frost for a neat, professional finish.
For the Frosting
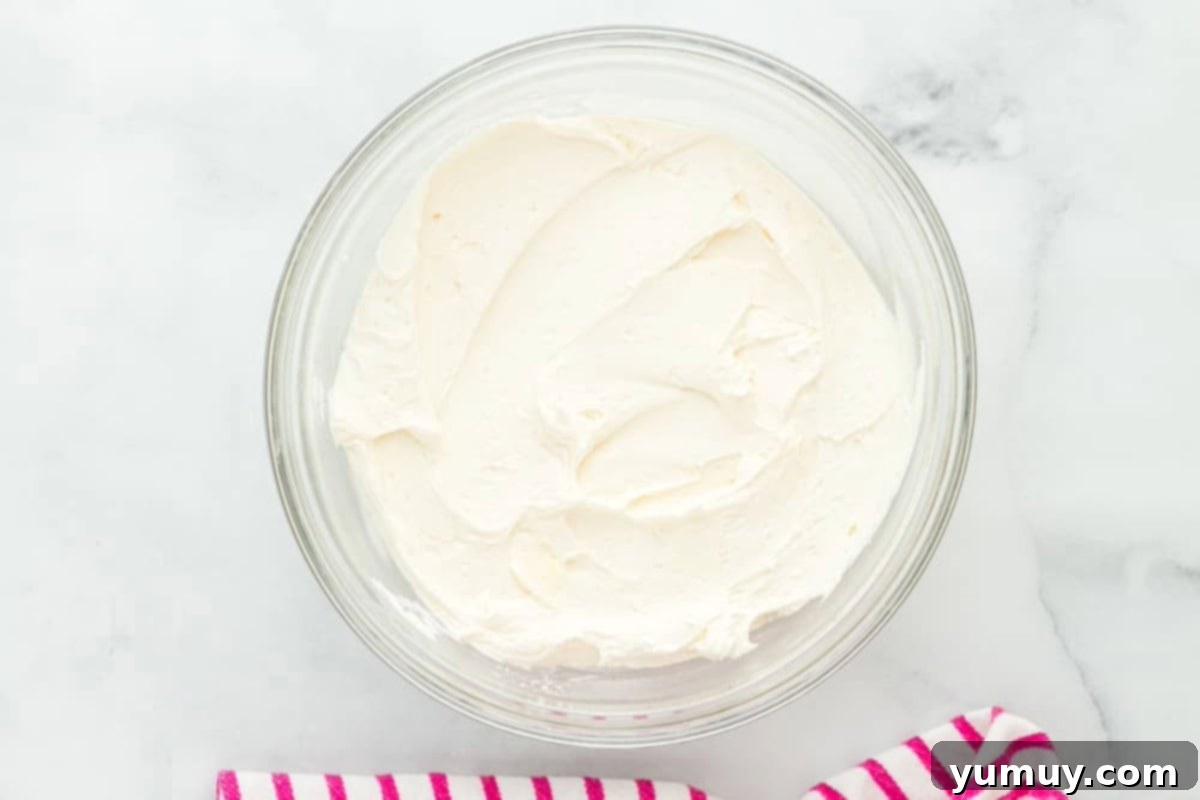
- Prepare the Buttercream: While your cakes are chilling, it’s time to prepare the luscious vanilla buttercream. In the bowl of a stand mixer fitted with the whisk attachment, combine the powdered sugar, slightly melted unsalted butter, and pure vanilla extract. Beat these ingredients together on high speed for approximately 5 minutes, or until the frosting is light, airy, and fluffy. The “slightly melted” butter helps create a smoother consistency.

For Assembly and Decoration
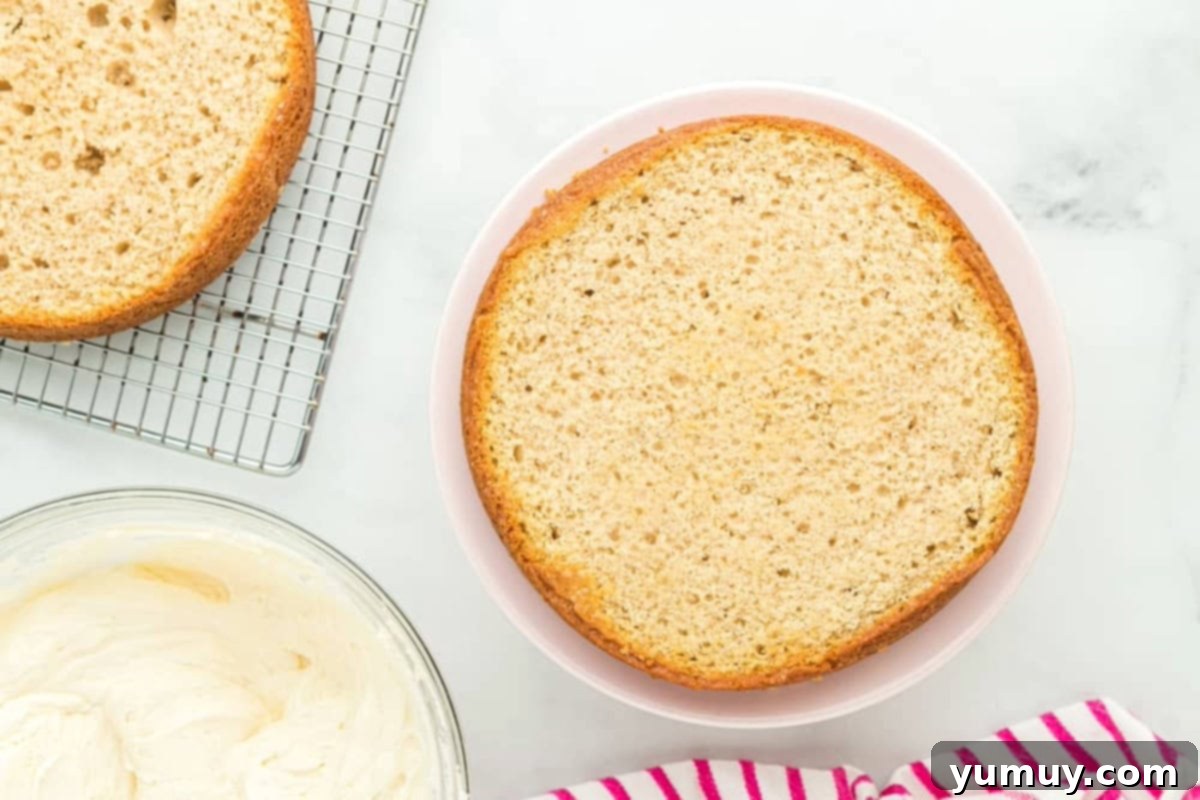
- Level the Cakes: Remove the chilled cake layers from the refrigerator and unwrap them. Using a large serrated knife, carefully level the dome tops off each cake layer to create flat, even surfaces. These cakes typically don’t rise significantly, so only a minimal amount of trimming should be needed. Flat layers are key for a stable and beautiful stacked cake.

- First Layer Placement: Place a small dollop (about 2 tablespoons) of frosting in the center of your cake board or serving plate. This acts as an anchor to prevent the cake from sliding. Carefully place one of your leveled cake layers on top of this frosting, with its cut side facing up.
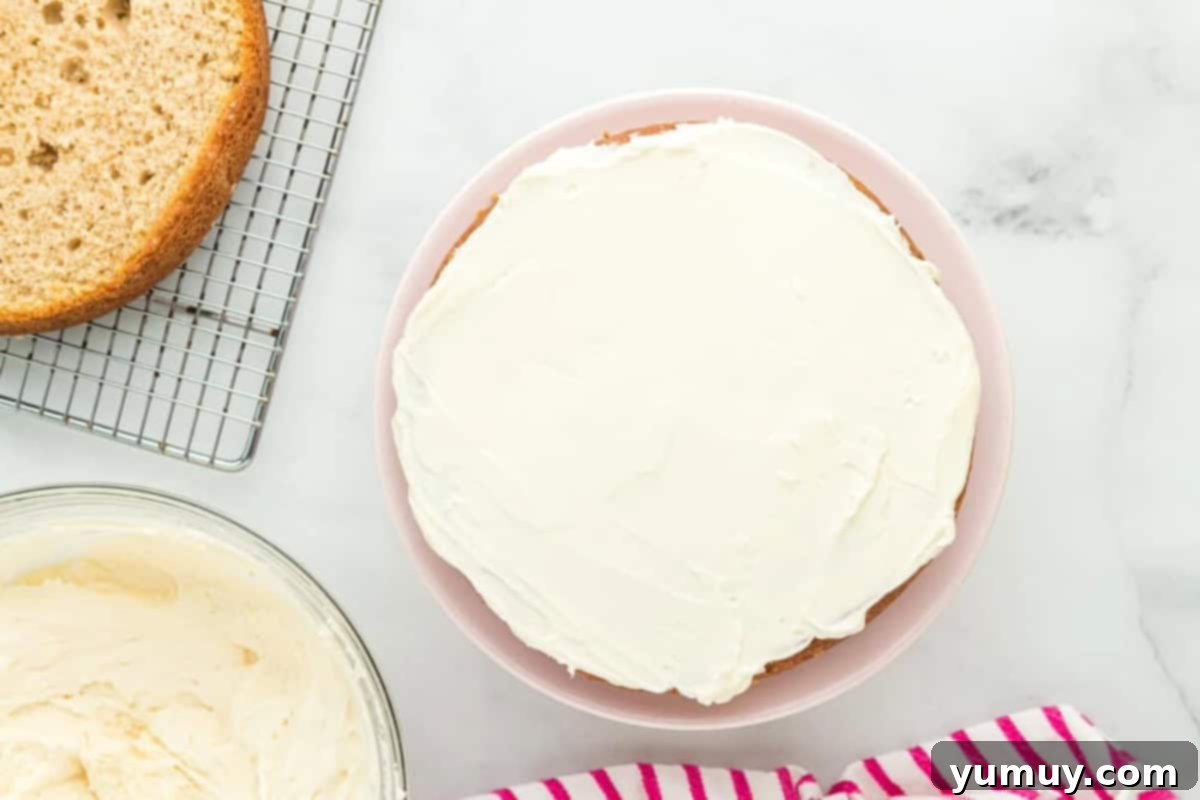
- Stacking Layers: Spread a generous layer of frosting evenly over the first cake layer. Aim for an even thickness across the entire surface. Then, carefully place the second cake layer on top, again with its cut side facing up. Repeat the process by adding another generous layer of frosting, ensuring it’s smooth and level.

- Final Layer: Place the third cake layer on top of the frosted second layer. For a neat top, place this layer with its original bottom side facing upwards. This provides the smoothest and most level surface for your final frosting layer.
- The Crumb Coat: Apply a very thin layer of frosting around the entire top and sides of the stacked cake. This is known as a “crumb coat,” and its purpose is to trap any loose cake crumbs, preventing them from mixing into your final, visible layer of frosting. Don’t worry about it being perfectly smooth at this stage.
- Chill the Crumb Coat: Place your crumb-coated cake into the freezer for about 10-15 minutes. This brief chill will firm up the crumb coat, making it easier to apply the final layer of frosting without disturbing the trapped crumbs.
- Color the Frosting: While the cake is chilling, take approximately 1½ cups of the remaining white frosting and transfer it to a separate bowl. Add 1-2 drops of pink gel food coloring (such as Chefmaster Neon Pink) and mix until you achieve a vibrant, uniform pink color. Transfer this pink frosting into a tipless icing bag and snip off about ½ an inch from the tip to create an opening.
- Decorate the Sides: Remove the cake from the freezer. Apply the remaining white frosting to the sides of the cake, leaving about a 1-inch border clear at the bottom. Then, use your pink icing bag to pipe a line of pink frosting along this bottom border. Use a cake scraper tool to smooth both the white and pink frosting on the sides of the cake as much as possible, blending them slightly for a seamless look. While the pink frosting is still soft, generously apply rainbow sprinkles to this pink border. Return the cake to the freezer for about 5 minutes to set the frosting and sprinkles.
- Finish the Top: Take the rest of your pink icing and place it in a microwave-safe bowl. Heat it on high for about 5 seconds, just enough to slightly soften it for an easy pour. Remove the cake from the freezer and carefully pour or spread the softened pink icing evenly over the top of the cake. It’s perfectly fine if some of it drips gracefully down the sides, mimicking a real frosted donut. Immediately add more rainbow sprinkles to the top of the cake while the pink icing is still wet and tacky, ensuring they adhere well.
- Add Donut Toppers: For the final, playful touch, arrange your Funfetti donuts (or any mini donuts of your choice) on top of the cake. You can strategically use toothpicks to help them stand upright or stay in place if necessary. Your stunning Frosted Donut Cake is now complete and ready to be admired and devoured!

Notes
**Vibrant Pink Frosting: To achieve the bright, eye-catching pink frosting color seen in our photos, we highly recommend using a high-quality gel food coloring. The brand Chefmaster Liqua-gel in the color Neon Pink delivers exceptional vibrancy with just 1-2 drops.
Additional Tips for Success:
- Perfect Pan Release: In addition to parchment circles, lightly flour the greased sides of your cake pans. This creates a non-stick barrier that ensures your cake layers release cleanly and easily every time.
- Avoid Overmixing: Overmixing cake batter develops too much gluten, which can result in a dense, dry, and chewy cake. Mix only until the ingredients are just combined and no streaks of dry mix remain.
- Even Cake Layers: If you don’t have a kitchen scale, you can still achieve even layers. After dividing the batter, gently tap the filled pans on the counter to help level the batter. You can also visually adjust the amounts if one pan looks significantly fuller than another. Remember, any slight unevenness can be corrected when leveling the baked cakes.
- Frosting Consistency: If your frosting becomes too soft while you’re piping or decorating, simply place the bowl of frosting in the refrigerator for about 5 minutes. After chilling, give it another quick whip with your stand mixer. This will help restabilize the butter and make the frosting firm enough for clean, precise decorating.
- Mess-Free Sprinkles: To keep your kitchen tidy and reuse excess sprinkles, always hold the cake over a baking sheet or a large piece of parchment paper when adding sprinkles to the sides or top. The sprinkles that fall can be easily collected and saved for another time.
- Donut Topper Suggestion: For a delightful hint at the cake’s flavor and a charming visual, consider topping your cake with our delicious funfetti donuts! They add an extra layer of festivity.
- Nutritional Note: Please be aware that the provided nutritional information for this recipe does not include the added donuts used for topping.
Storage: To maintain its freshness and deliciousness, store your Frosted Donut Cake in an airtight container. It can be kept at room temperature for up to 2 days, in the refrigerator for up to 4 days, or in the freezer for up to 1 month. If frozen, remember to let it thaw overnight in the refrigerator before serving to ensure optimal texture and flavor.
Calories from Fat 342
@easydessertrecipes
for a chance to be featured.
Step-by-Step Visual Guide to Your Donut Cake
Follow these simplified steps with accompanying visuals to guide you through the creation of your spectacular Frosted Donut Cake. Each image represents a key stage in the process, ensuring you can easily replicate this delicious dessert.
Mix the Batter
Begin by combining all your cake ingredients: vanilla cake mix, water, melted butter, eggs, cinnamon, and nutmeg. Mix until just combined, ensuring a smooth batter ready for baking. The spices are what give this cake its distinctive old-fashioned donut flavor.
Portion and Bake
Divide the batter evenly among your three prepared 8-inch cake pans. Using a kitchen scale helps ensure consistent layers. Once portioned, bake the cakes until a toothpick comes out clean. This indicates they are perfectly cooked and ready for the next stage.
Cool and Chill
After baking, allow the cakes to cool in their pans for about 15 minutes before transferring them to a wire rack to cool completely. The crucial step here is to wrap each cooled cake layer tightly in plastic wrap and refrigerate for at least 2 hours. This chilling process makes the cakes firm and much easier to handle when decorating, preventing crumbs and ensuring a smooth finish.
Prepare the Frosting
While the cakes are chilling, prepare your creamy vanilla buttercream. Beat powdered sugar, slightly melted unsalted butter, and pure vanilla extract in a stand mixer on high speed until it’s wonderfully light and fluffy. This frosting is easy to work with and provides the perfect base for your donut cake’s decoration.
Assemble the Layers
Once chilled, level your cake layers by trimming off any dome tops with a serrated knife. Anchor your first layer to the cake board with a dollop of frosting. Then, add generous layers of frosting between each cake layer, smoothing it out evenly as you stack. The chilled layers will hold their shape beautifully.
The Crumb Coat
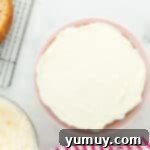
Apply a thin layer of frosting over the entire cake – top and sides. This “crumb coat” is essential for trapping any loose crumbs, ensuring your final layer of frosting remains perfectly smooth and pristine. Chill the cake in the freezer for about 10-15 minutes to set this crumb coat before proceeding. You can see one of the layers getting its frosting in the image.
Final Decorating Touches
Remove the cake from the freezer and apply the final white frosting layer to the sides, leaving a border for pink. Pipe pink frosting along the bottom, smooth with a scraper, and add sprinkles while soft. Chill again. Then, slightly soften the remaining pink frosting in the microwave and spread it over the top of the cake, letting it drip slightly. Add more sprinkles to the wet pink icing. Finally, arrange mini donuts on top, securing them with toothpicks if needed, to complete your spectacular Frosted Donut Cake.
Storage and Freezing: Keeping Your Donut Cake Fresh
To ensure your delicious Frosted Donut Cake remains as fresh and delightful as the day it was baked, proper storage is key. You can store leftover cake, whether whole or cut into individual slices, in an airtight container to protect it from drying out and absorbing other odors.
- Room Temperature: For immediate enjoyment, the cake can be stored at room temperature for up to 2 days. Ensure it’s in a cool, dry place away from direct sunlight.
- Refrigerator: To extend its freshness, place the airtight container in the refrigerator, where it will stay delicious for up to 4 days. Chilling the cake can also improve the stability of the frosting.
- Freezer: For longer-term storage, the donut cake freezes beautifully! Wrap the cake (whole or individual slices) tightly in several layers of plastic wrap, then an additional layer of aluminum foil, and place it in a freezer-safe container or bag. It can be stored in the freezer for up to 1 month without compromising flavor or texture.
Thawing Instructions: If you’ve frozen your cake, simply transfer it to the refrigerator overnight to thaw gradually. This slow thawing process helps maintain the cake’s moisture and prevents condensation from forming on the frosting. Once thawed, you can enjoy it chilled directly from the fridge or allow it to come to room temperature for a softer texture.
Explore More Delicious Cake Creations!
Simple White Wedding Cake
Cotton Candy Cake
Airplane Cake
Milk and Cookies Cake
Browse All Cakes
