There’s an undeniable joy that comes with baking, especially when the result is a batch of vibrant, delicious treats. For moments when you need a dessert that’s both visually appealing and incredibly satisfying, look no further than these delightful funfetti cookies. Bursting with cheerful rainbow sprinkles and creamy white chocolate chips, they are a celebration in every bite. Perfect for birthdays, holidays, or simply brightening an ordinary day, these cookies consistently bring smiles and are surprisingly simple to whip up, taking just about 20 minutes from start to finish.

- Pin this recipe for later!
Irresistible Funfetti Cookies: A Simple Recipe for Joy
Imagine soft, chewy cookies generously studded with cheerful rainbow sprinkles and rich white chocolate chips. That’s exactly what these homemade funfetti cookies deliver! This recipe has become a beloved tradition, especially for birthdays, and it’s no wonder – everyone adores their festive look and delightful taste. Using basic pantry staples like flour, butter, sugar, and eggs, these cookies come together effortlessly. The secret to their incredible melt-in-your-mouth tenderness and perfectly round shape lies in a touch of cornstarch in the dough. This simple addition elevates the texture, making each cookie incredibly soft and moist.
Why You’ll Love This Funfetti Cookie Recipe
- Effortlessly Easy: With straightforward instructions and common ingredients, this recipe is perfect for bakers of all skill levels, from beginners to seasoned pros.
- Quick to Prepare: From mixing bowl to oven, these cookies are ready in under 20 minutes, making them ideal for last-minute treats or busy schedules.
- Festive & Fun: The vibrant rainbow sprinkles and luscious white chocolate chips create a visually stunning cookie that’s sure to bring a smile to anyone’s face.
- Perfect for Celebrations: Whether it’s a birthday party, a school event, or a holiday gathering, funfetti cookies are always a crowd-pleaser and a symbol of joy.
- Melt-in-Your-Mouth Texture: Thanks to a special ingredient, these cookies boast an exceptionally soft and tender crumb that practically melts as you eat it.

Choosing the Right Sprinkles for Vibrant Funfetti Cookies
The key to truly stunning funfetti cookies lies not just in the quantity of sprinkles, but also in their quality and type. For this white chocolate chip funfetti cookie recipe, I highly recommend using long, skinny jimmies (also known as strand sprinkles) rather than the tiny, round nonpareils. Jimmies are superior for several reasons:
- Preventing Color Bleed: Jimmies are far less prone to bleeding their vibrant colors into the cookie dough during mixing and baking. This means your cookies will emerge from the oven with distinct, bright speckles of color, maintaining that classic funfetti look. Nonpareils, with their higher surface area and often softer coating, tend to dissolve and release their dyes, turning your beautiful dough into a muddy, dull hue.
- Texture: Jimmies also provide a slight textural contrast that is pleasant, without being too crunchy or hard.
However, if nonpareils are all you have on hand, don’t despair! You can still achieve a festive look by adjusting your method. Instead of mixing nonpareils directly into the dough, roll the scooped cookie dough balls in them just before baking. This minimizes the contact time with the dough’s moisture and fat, significantly reducing color bleeding. The sprinkles will adhere to the outside, creating a fun, colorful crust while keeping the interior dough pristine. For even better results, consider chilling your cookie dough for at least 30 minutes before rolling in nonpareils and baking.

Funfetti Cookies Recipe
: 20 minutes
Print
Rate
Save
Saved!
Ingredients
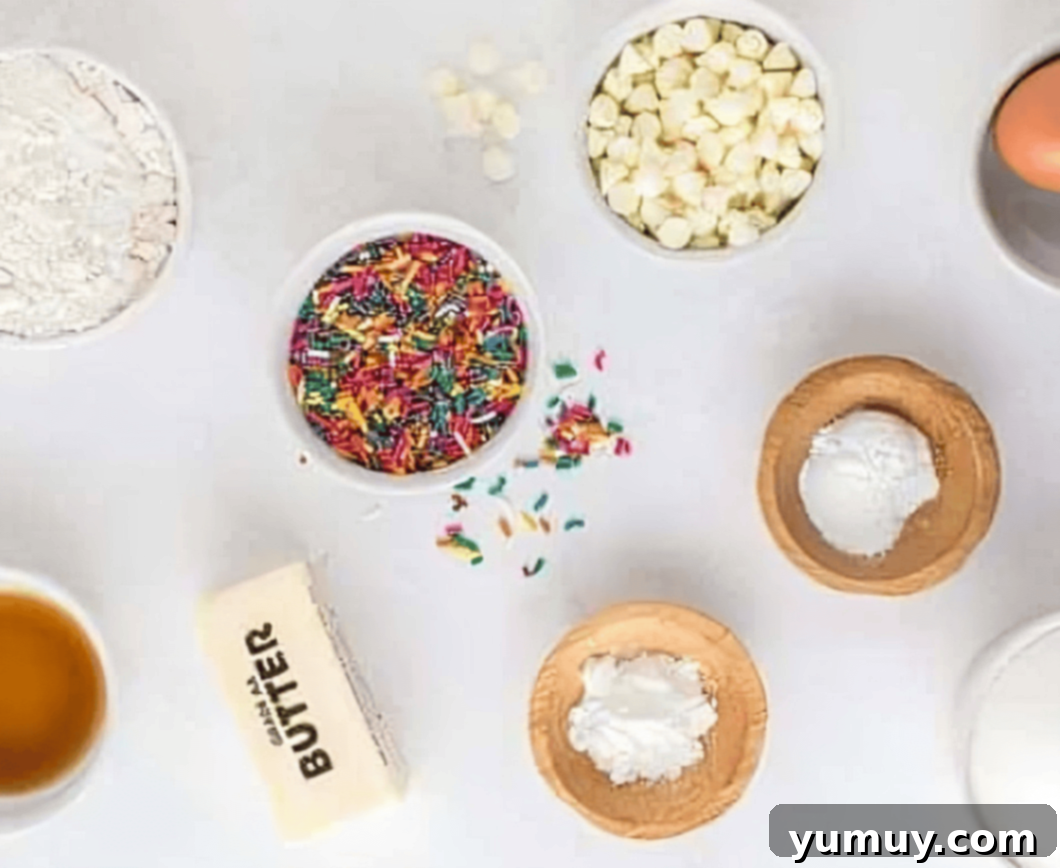
- 1½ cups all-purpose flour
- 2 teaspoons baking powder
- 2 teaspoons cornstarch
- ½ cup salted butter room temperature (1 stick)
- 1 cup granulated sugar
- 1 large egg room temperature
- 1 teaspoon pure vanilla extract
- ¾ cup white chocolate chips
- ¾ cup rainbow sprinkles divided
Equipment
- Kitchen Scale (optional, for precision)
- Baking Sheet
- Hand Mixer
- Parchment Paper
Instructions
- Preheat your oven to 350°F (175°C). Line a large baking sheet with parchment paper to prevent sticking and ensure easy cleanup. Set this aside.

- In a medium-sized bowl, whisk together the dry ingredients: all-purpose flour, baking powder, and cornstarch. Stir them well until they are thoroughly combined. This ensures even distribution in the dough. Set this bowl aside for later.1½ cups all-purpose flour, 2 teaspoons baking powder, 2 teaspoons cornstarch

- In a separate large mixing bowl, using a hand mixer (or stand mixer with paddle attachment), cream together the room-temperature salted butter and granulated sugar. Beat on medium-high speed until the mixture is visibly light, fluffy, and smooth, almost pale in color. This process incorporates air and creates a tender cookie.½ cup salted butter, 1 cup granulated sugar

- Once the butter and sugar mixture is light and fluffy, crack in the large room-temperature egg and add the pure vanilla extract. Continue mixing until these wet ingredients are fully combined into the creamed butter mixture, ensuring no streaks of egg remain.1 large egg, 1 teaspoon pure vanilla extract
- Reduce the mixer speed to low. Gradually add the reserved flour, baking powder, and cornstarch mixture to the wet ingredients. Mix until just combined, being careful not to overmix, as this can lead to tough cookies. Scrape down the sides of the mixing bowl with a spatula to ensure all ingredients are incorporated evenly.

- Gently fold in the ¾ cup of white chocolate chips and ½ cup of the rainbow sprinkles (reserving ¼ cup for later). Use a spatula to fold them in just until they are evenly distributed throughout the dough. Overmixing here can also cause sprinkles to bleed color.¾ cup white chocolate chips, ¾ cup rainbow sprinkles

- Scoop the cookie dough into 1-inch balls. A 2-tablespoon cookie scoop works perfectly for consistent sizing, ensuring even baking. Arrange them on the prepared baking sheet, leaving some space between each for spreading.
- Take the remaining ¼ cup of rainbow sprinkles and place them in a small bowl. Gently roll each scooped cookie dough ball in the sprinkles, lightly pressing them into the sides to ensure they adhere well. This step adds an extra pop of color and sweetness to the finished cookies.

- Bake the cookies for 8-10 minutes. It’s crucial not to let these cookies brown around the edges, as overbaking will result in a dry texture. They should still look slightly pale and set around the edges but soft in the center.
- Once baked, remove the baking sheet from the oven and let the cookies rest on the pan for 1-2 minutes. This allows them to set slightly before transferring. Then, carefully transfer the warm cookies to a wire rack to cool completely. Repeat the baking process with any remaining cookie dough.

Notes & Expert Tips
- To Roll or Not to Roll: Rolling the cookie dough in extra sprinkles before baking is entirely optional. It significantly enhances the visual appeal and adds a delightful textural crunch with an extra touch of sweetness. However, the cookies will still be wonderfully delicious if you skip this step.
- Holiday Fun: Get creative with your sprinkles! For Christmas, swap out the rainbow jimmies for festive red and green sprinkles. For Halloween, try orange, purple, and black. Valentine’s Day? Pink and red, of course! This simple change makes these cookies perfect for any seasonal celebration.
- Avoid Overbaking: This is crucial for achieving that signature soft, chewy funfetti texture. Unlike many cookies, you do NOT want these to brown around the edges. They should appear set but still look pale and soft in the center when removed from the oven. Slight browning indicates they are overcooked and will likely be dry.
- Cooling Process: Always allow the cookies to cool on the baking sheet for a couple of minutes before attempting to transfer them to a wire rack. This brief resting period allows them to firm up slightly, preventing them from crumbling or breaking apart as you move them.
- Chill for Stability: For thicker cookies that spread less, consider chilling the scooped cookie dough balls in the refrigerator for 15-30 minutes before baking. This helps solidify the butter, leading to less spread.
- Dough Ahead: You can prepare the cookie dough ahead of time! Roll the dough into balls and store them in an airtight container in the refrigerator for up to 2 days. When ready to bake, you might need to add an extra minute or two to the baking time if baking from chilled.
Storage: Store baked funfetti cookies in an airtight container at room temperature for up to 3 days. For extended freshness, keep them in the refrigerator for up to 5 days. For long-term storage, freeze them for up to 1 month.
Reheating Frozen Cookies: To thaw frozen cookies, simply place them in the refrigerator overnight or allow them to come to room temperature for a few hours.
Calories from Fat 54
@easydessertrecipes
for a chance to be featured.
Creative Variations to Elevate Your Funfetti Cookies
The very name “funfetti” implies endless possibilities for creativity and customization. While the classic white chocolate chip and rainbow sprinkle combination is undeniably fantastic, there are so many ways to adapt this recipe to suit your taste or occasion. Here are some fun ideas to try:
- Chocolate Chip Swaps: White chocolate chips offer a creamy, sweet contrast, but feel free to experiment! Think milk chocolate, dark chocolate, semi-sweet, or even flavored chips like butterscotch or peanut butter chips. Lately, stores have been stocking unique options like “unicorn” or “birthday cake” flavored chips which would be absolutely adorable in these cookies.
- Holiday & Seasonal Sprinkles: Tailor your cookies to any event!
- Christmas: Use classic red and green jimmies for a festive touch.
- Halloween: Orange, purple, and black sprinkles will transform these into spooky-fun treats.
- Valentine’s Day: Pink and red sprinkles (perhaps with some heart shapes!) are perfect for a romantic gesture.
- Patriotic Holidays: Red, white, and blue sprinkles are great for celebrations like the 4th of July or Memorial Day.
- Spring/Easter: Pastel-colored sprinkles can bring a soft, seasonal charm.
- Extract Adventures: A simple change of extract can dramatically alter the flavor profile. Beyond pure vanilla, consider almond extract for a marzipan-like nuance, lemon extract for a bright citrusy note, or even a touch of peppermint extract for a festive winter cookie (especially with red and green sprinkles!).
- Add a Glaze or Frosting: For an extra decadent treat, once the cookies are completely cooled, drizzle them with a simple vanilla glaze (powdered sugar, milk, vanilla) or spread a thin layer of cream cheese frosting. Top with extra sprinkles, of course!
- Nutty Additions: If you’re a fan of nuts, finely chopped pecans or walnuts can add a pleasant crunch and earthy flavor. Be sure to chop them small so they integrate well with the other mix-ins.
Don’t be afraid to experiment and make these funfetti cookies truly your own! The goal is to have fun with your baking and create something that everyone will enjoy.
How to Make Funfetti Cookies: A Detailed Step-by-Step Guide
Creating these vibrant funfetti cookies is a straightforward process, designed for delicious results every time. Follow these detailed steps to ensure your cookies are perfectly soft, chewy, and bursting with color and flavor.
Step 1: Prepare Your Workspace and Ingredients
Before you begin mixing, take a moment to set yourself up for success. Preheat your oven to a precise 350°F (175°C). Line a large baking sheet with parchment paper, which will prevent sticking and make cleanup a breeze. Having your butter and eggs at room temperature is crucial for a smooth, well-emulsified dough, so ensure they’ve been out of the fridge for at least 30 minutes to an hour. This preparation step ensures all ingredients blend seamlessly for the best texture.
Step 2: Combine Dry Ingredients
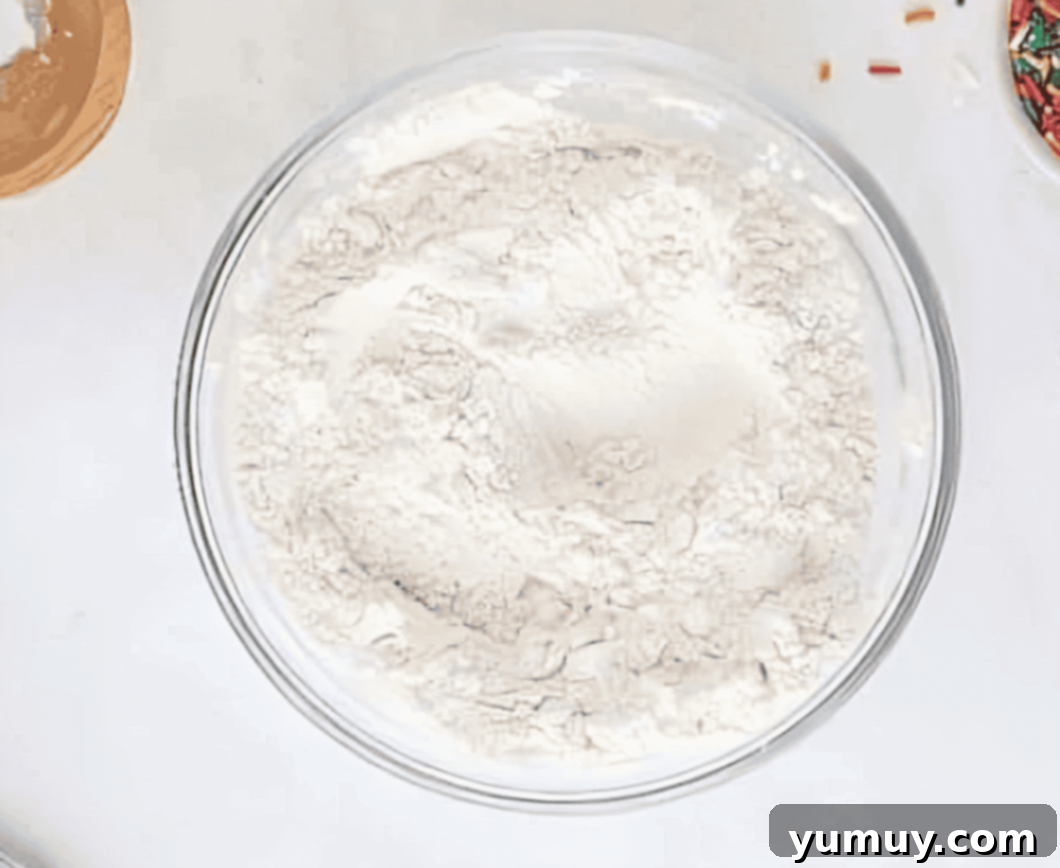
In a medium-sized bowl, measure out 1½ cups of all-purpose flour, 2 teaspoons of baking powder (which helps the cookies rise and become fluffy), and 2 teaspoons of cornstarch. The cornstarch is a secret ingredient here; it contributes significantly to the cookies’ soft, tender crumb and helps them maintain their shape without spreading too much. Use a whisk to stir these dry ingredients together thoroughly. This ensures the leavening agents and cornstarch are evenly distributed, leading to consistent results in every cookie. Set this bowl aside for now.
Step 3: Cream the Butter and Sugar
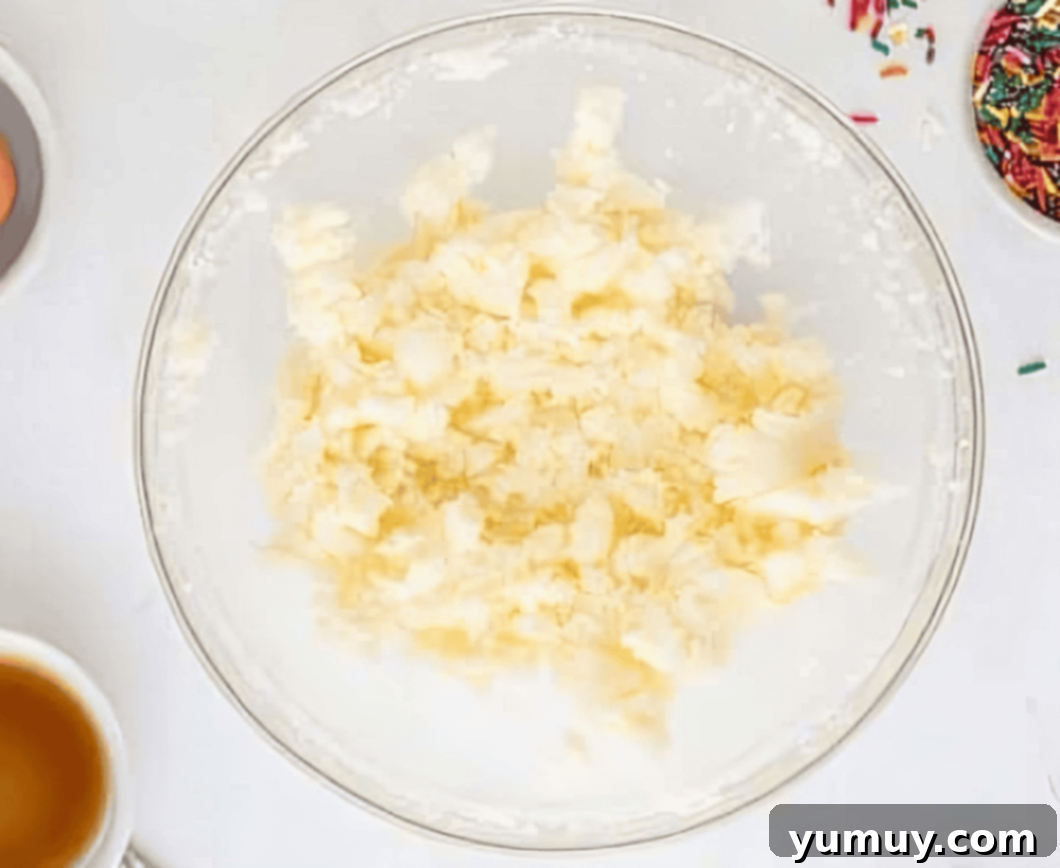
In a large mixing bowl, using a hand mixer (or a stand mixer fitted with the paddle attachment), combine ½ cup of room-temperature salted butter and 1 cup of granulated sugar. Beat these together on medium-high speed. Continue mixing for several minutes until the mixture transforms into a light, fluffy, and smooth creamed consistency. It should appear significantly lighter in color than when you started. This step, known as creaming, is vital as it incorporates air into the butter and sugar, contributing to the cookies’ tenderness and rise.
Step 4: Incorporate Wet and Dry Ingredients
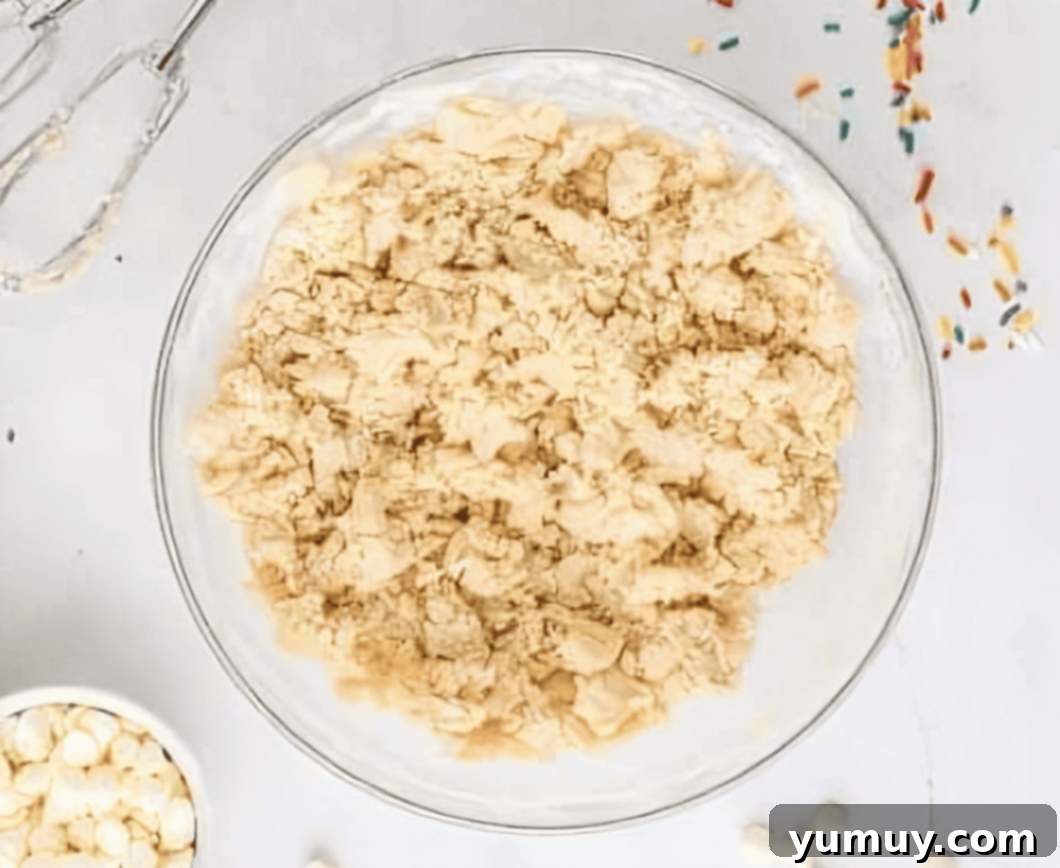
Once your butter and sugar are perfectly creamed and fluffy, crack in 1 large room-temperature egg and add 1 teaspoon of pure vanilla extract. Mix these ingredients thoroughly until they are completely combined and no yellow streaks of egg yolk are visible. Then, reduce your mixer speed to low. Gradually add the prepared flour, baking powder, and cornstarch mixture to the wet ingredients. Mix until just combined. Be careful not to overmix the dough at this stage, as it can develop gluten, leading to tougher cookies. Use a spatula to scrape down the sides of the mixer bowl to ensure all dry bits are fully incorporated into the dough.
Step 5: Fold in Sprinkles and Chips
Now for the fun part! Gently fold in ¾ cup of creamy white chocolate chips and ½ cup of your chosen rainbow sprinkles (remember to save ¼ cup of sprinkles for later). Use a sturdy spatula for this step to ensure you don’t overmix. Fold just until the chips and sprinkles are evenly distributed throughout the dough. Minimizing mixing at this stage helps prevent the sprinkles from bleeding their colors into the dough, keeping your cookies vibrant and appealing.
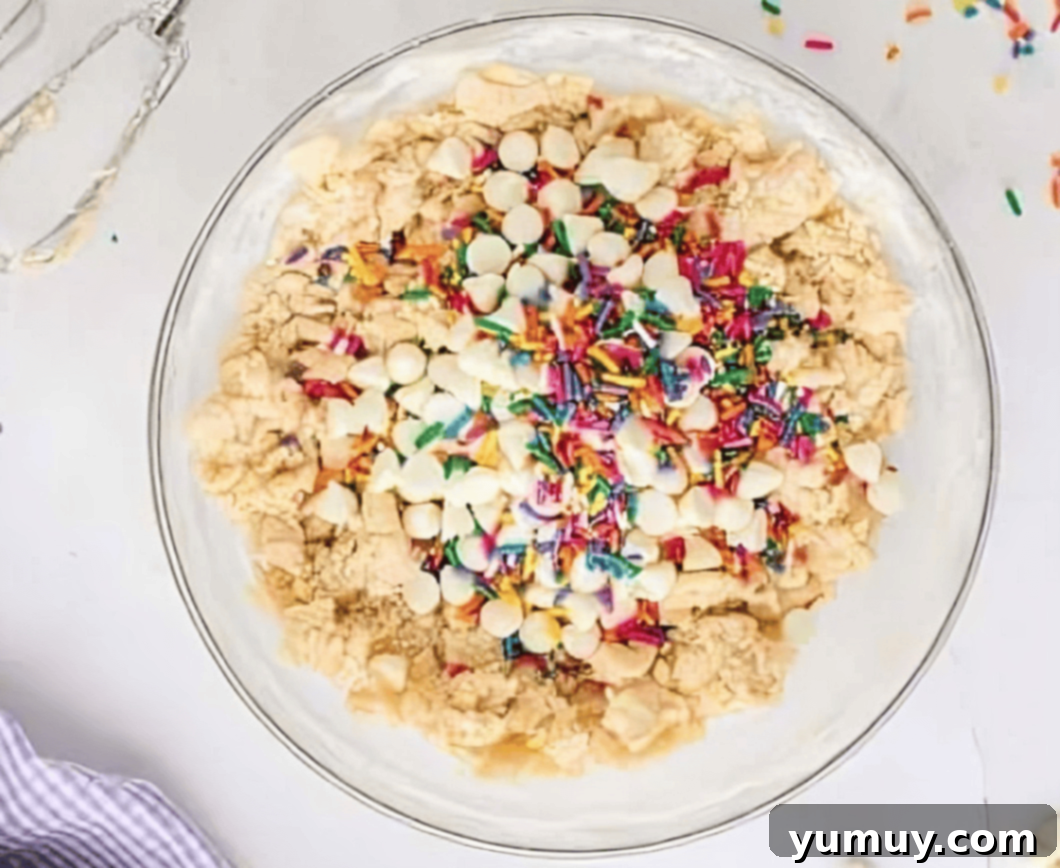
Step 6: Portion and Decorate Cookies
Using a 1-inch cookie scoop (a 2-tablespoon scoop works perfectly for uniform cookies), scoop balls of dough onto your prepared baking sheet. Leave approximately 2 inches between each dough ball to allow for proper spreading during baking. Next, take the remaining ¼ cup of rainbow sprinkles and place them in a small, shallow bowl. Gently roll each scooped cookie dough ball in the sprinkles, pressing lightly to ensure the sprinkles adhere well to the dough. This adds a beautiful, colorful exterior that’s truly irresistible.
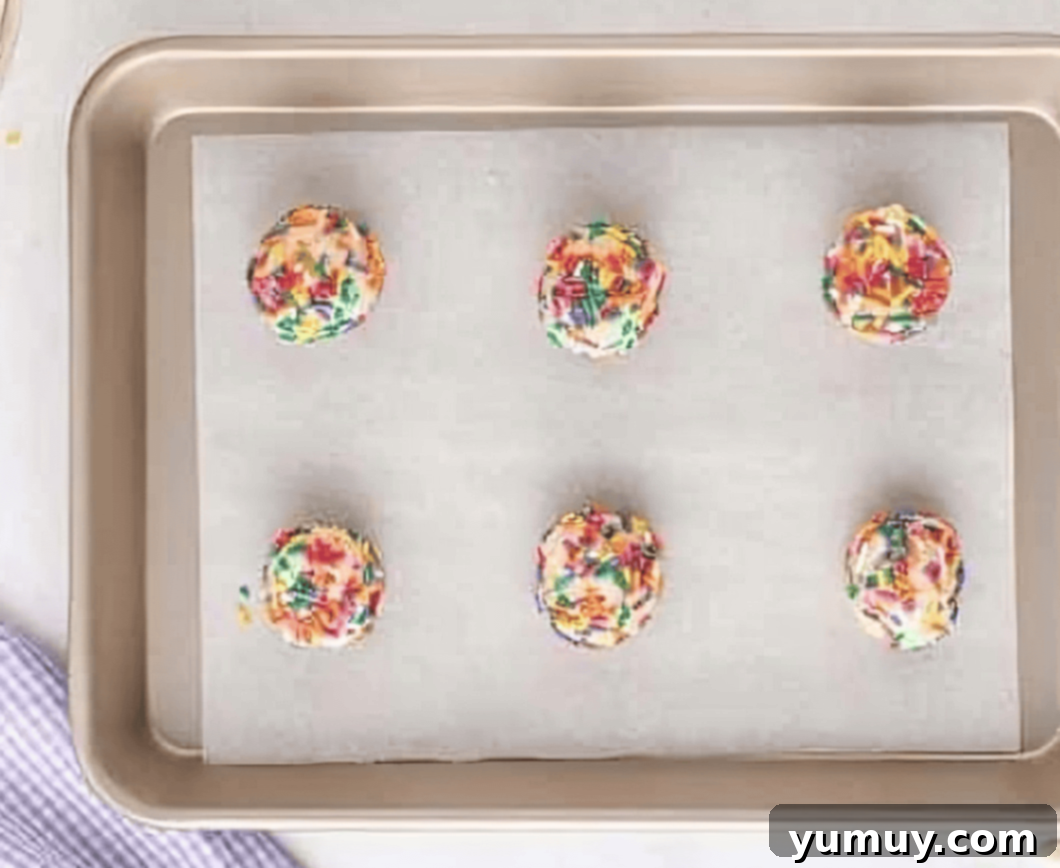
Step 7: Bake to Perfection
Place your white chocolate confetti cookies in the preheated oven and bake for 8-10 minutes. This is a critical step for funfetti cookies: do not let them brown! These cookies are meant to be soft and chewy, so overbaking will dry them out. They should look slightly pale, set around the edges, but still appear soft and lightly puffed in the center. Once baked, remove the baking sheet from the oven and let the cookies rest on the hot pan for 1-2 minutes. This brief resting period allows them to finish baking slightly and firm up, making them easier to handle. Then, carefully transfer the warm cookies to a wire rack to cool completely. Repeat this process with any remaining cookie dough until all your delightful funfetti cookies are baked and ready to enjoy.

Storage, Freezing, and Reheating Best Practices for Funfetti Cookies
To keep your delicious funfetti cookies fresh and enjoyable for as long as possible, proper storage is key. Here’s how to store, freeze, and even reheat them to maintain their soft, chewy texture:
- Room Temperature Storage: Once completely cooled, place leftover funfetti cookies in an airtight container. They will stay fresh and soft at room temperature for up to 3 days. To maintain their texture, you can even place a slice of bread in the container; the cookies will absorb moisture from the bread, keeping them soft.
- Refrigerator Storage: For slightly longer freshness, transfer your cooled cookies to an airtight container and store them in the refrigerator for up to 5 days. This is particularly useful if your kitchen tends to be warm or humid. Note that the texture might firm up a bit in the fridge, but they’ll still be delicious.
- Freezing Baked Cookies: Funfetti cookies freeze beautifully! Once fully cooled, arrange them in a single layer on a baking sheet and freeze for about an hour until solid. Then, transfer the frozen cookies to a freezer-safe airtight container or heavy-duty freezer bag. Layer them with parchment paper between layers to prevent sticking. They will keep well in the freezer for up to 1 month.
- Freezing Cookie Dough: You can also prepare the dough ahead of time and freeze it. Scoop the dough into balls, arrange them on a parchment-lined baking sheet, and freeze until solid. Transfer the frozen dough balls to a freezer-safe bag or container. They can be stored for up to 3 months. When ready to bake, you can bake them directly from frozen (adding a few extra minutes to the baking time) or let them thaw in the refrigerator for a few hours first.
- Thawing and Reheating: To thaw frozen baked cookies, simply remove them from the freezer and let them sit at room temperature for a few hours, or transfer them to the refrigerator overnight. If you’d like to enjoy them warm, you can briefly microwave them for 10-15 seconds or place them in a preheated oven (around 250°F / 120°C) for 5-7 minutes until just warmed through. Avoid overheating, as this can dry them out.
With these storage tips, you can always have a batch of festive funfetti cookies ready to enjoy whenever a craving strikes!
More Delicious Cookie Recipes to Try!
Classic Butter Cookies
Brownie Mix Crinkle Cookies
Sweet Churro Cookies
Decadent Chocolate Pudding Cookies
Browse All Cookie Recipes


