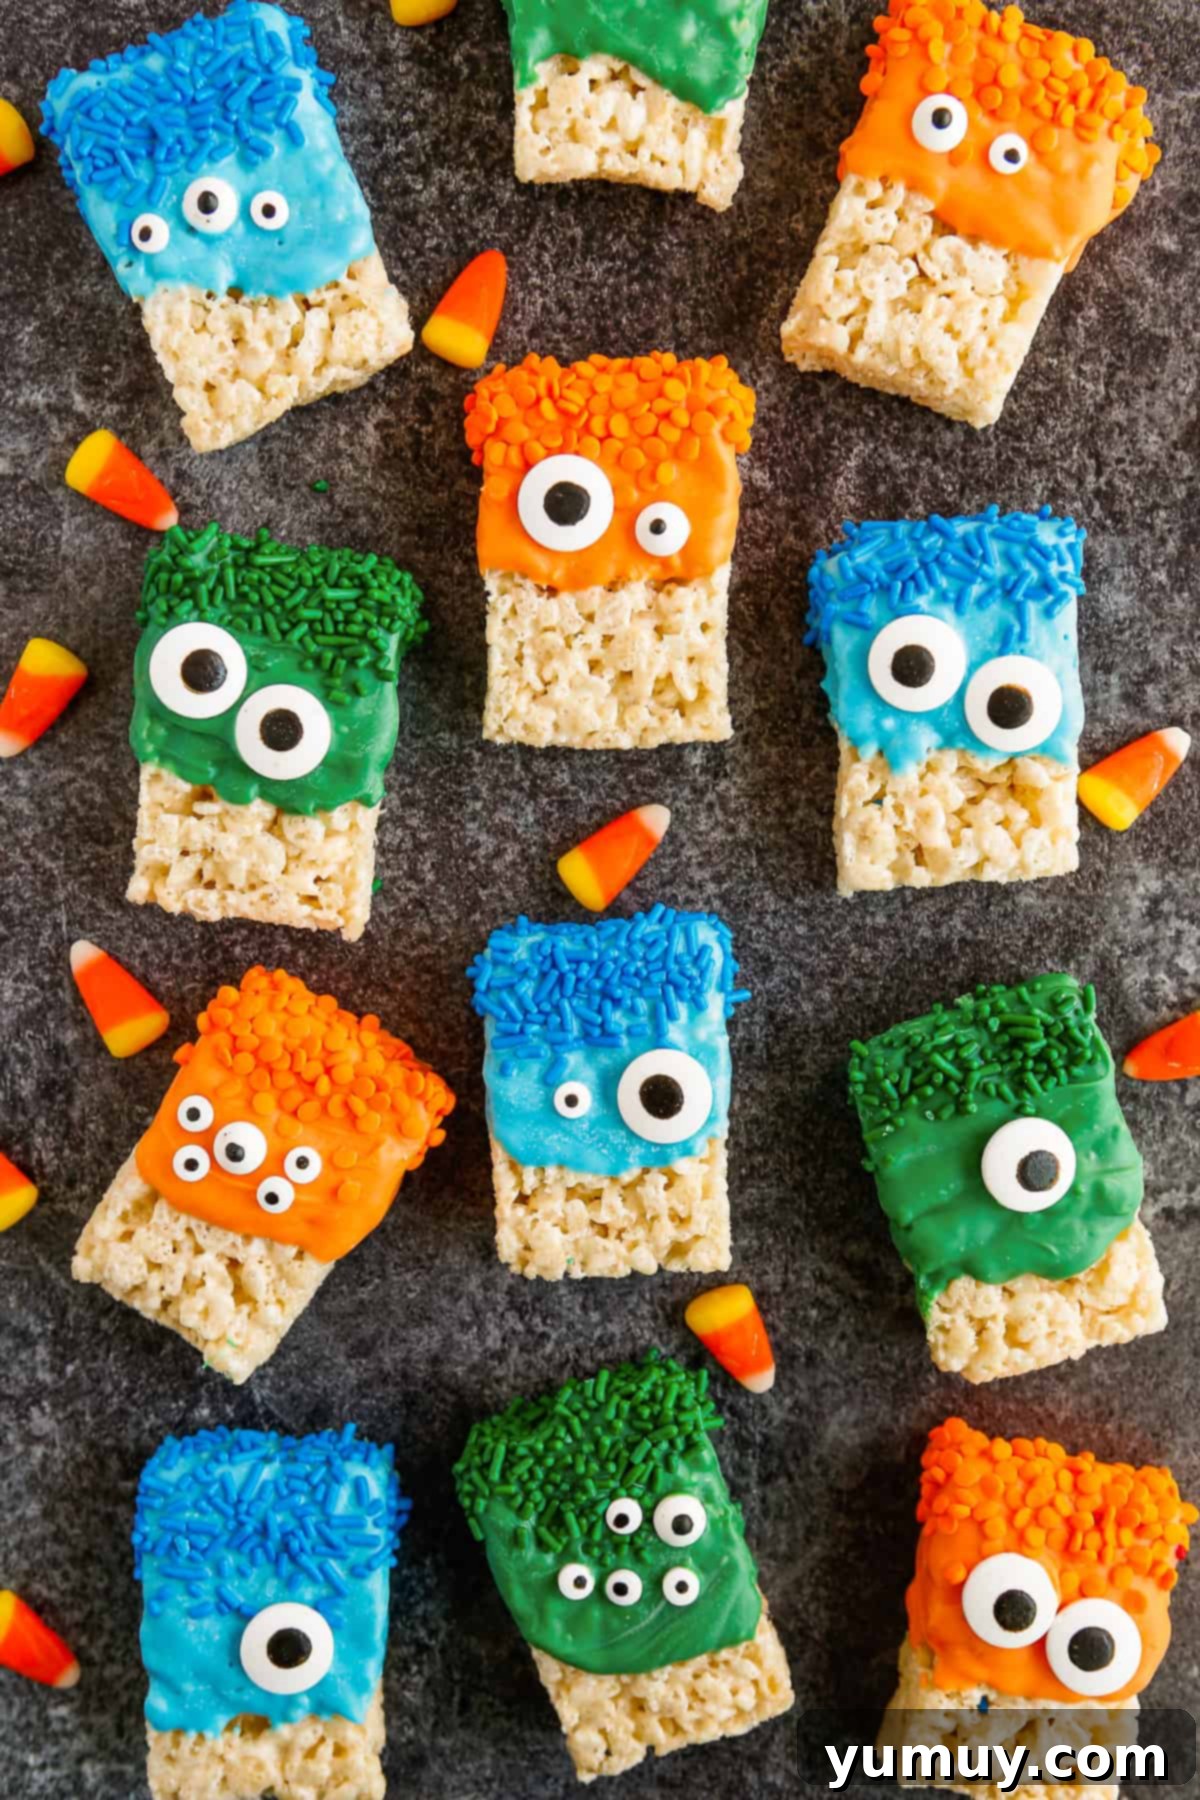
Are you searching for a delightfully simple yet incredibly festive treat to celebrate Halloween? Look no further! These adorable Rice Krispie Treat Monsters are the ultimate semi-homemade solution, combining the classic crispy goodness of Rice Krispie treats with vibrant candy melts and playful decorations. Designed for effortless creation, this recipe requires absolutely no baking and transforms into a fun, hands-on activity that children will adore. If you can unwrap, melt, and dip, you’re just moments away from crafting a batch of these spooky-cute Halloween treats!

Spooky & Sweet: The Ultimate Guide to Halloween Monster Rice Krispie Treats
Halloween is synonymous with creativity and deliciousness, and these Rice Krispie Treat Monsters embody both perfectly. They are not just treats; they are edible works of art that capture the whimsical spirit of the season. What makes them truly special is their incredible simplicity. With merely four core ingredients and a mere 20 minutes of active prep time, you can whip up a batch that looks impressively elaborate without any complicated techniques. Whether you’re aiming for a playful monster with many eyes, a vibrant creature coated in sprinkles, or a drizzled enigma, these treats offer endless possibilities for personalization. They’re an absolute crowd-pleaser for school events, Halloween parties, or simply a fun afternoon activity with the kids. Their quick assembly and customizable nature make them an unforgettable addition to any spooky celebration.
For those who love to bake from scratch, dive into our homemade Halloween Rice Krispie treats recipe for an equally festive experience!
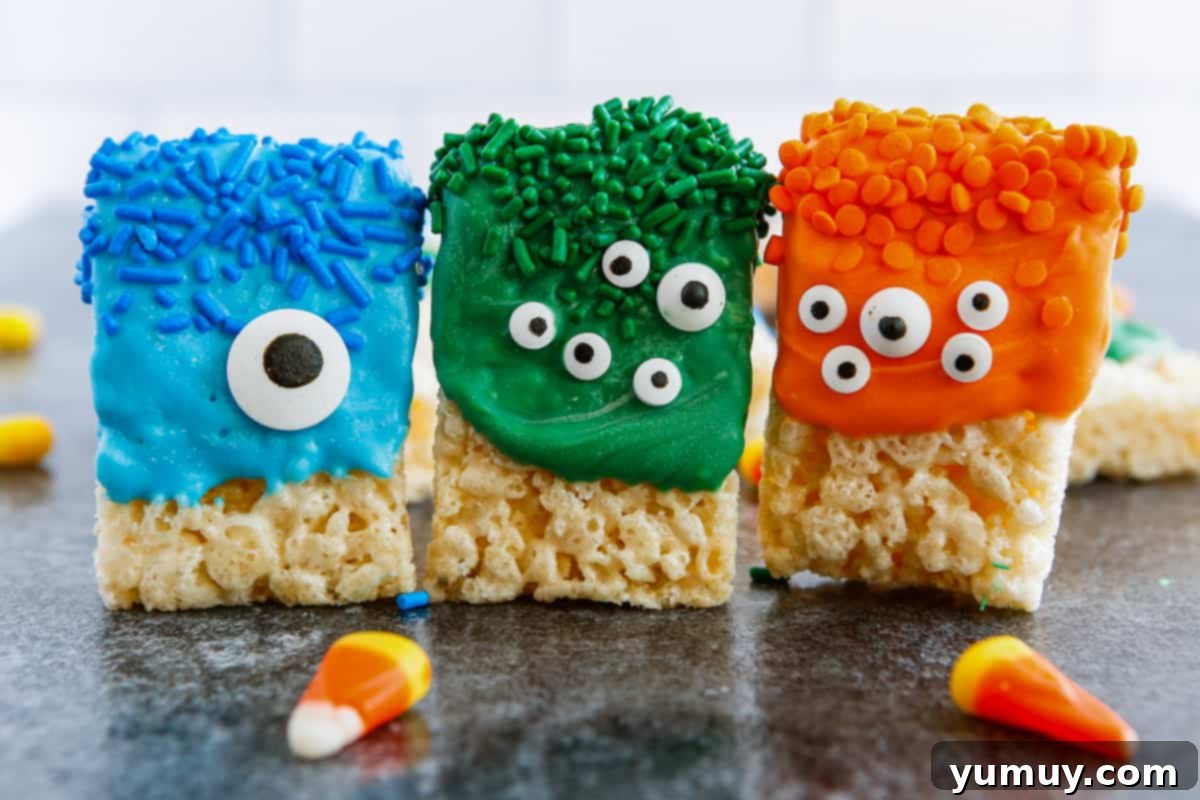
Why You’ll Love These Easy Halloween Monster Treats
- Effortlessly Simple: Forget complicated baking. These treats come together with minimal fuss, making them ideal for busy schedules.
- No-Bake Wonder: Perfect for all ages, especially little chefs who enjoy hands-on decorating without the need for an oven.
- Kid-Friendly Fun: A fantastic activity to involve children in the Halloween preparations. They’ll love choosing colors, sprinkles, and monster eyes.
- Customizable Creativity: From single-eyed cyclops to multi-colored beasts, the design possibilities are infinite.
- Party Perfect: A colorful and delightful addition to any Halloween party platter or classroom treat rotation.
- Quick Turnaround: Go from ingredients to impressive treats in under 30 minutes, including decorating!
- Delicious & Spooky: The classic taste of Rice Krispie treats paired with sweet candy melts creates an irresistible combination.
The Secret to Perfect Dipping: Chill Before Decorating
Whether you opt for convenient store-bought Rice Krispie treats or decide to whip up a batch of homemade Rice Krispie treats, a quick session in the freezer is a game-changer. This simple, often overlooked step helps firm up the treats, providing a stable foundation that won’t crumble or lose its shape when dipped into warm candy melts. It also ensures that your candy eyes and sprinkles adhere perfectly without sliding off or causing cracks in the coating. Taking just a few minutes for this chilling process guarantees that your monster Rice Krispie treats will boast a professional, polished look and remain perfectly intact, even after eager little hands help with the final embellishments. It’s the key to achieving those vibrant, picture-perfect monsters everyone will admire.
Rice Krispie Treat Monsters Recipe
These semi-homemade Rice Krispie Treat Monsters are a wonderfully fun and easy Halloween project for the entire family!
20 minutes
20 minutes
16 people
Ingredients
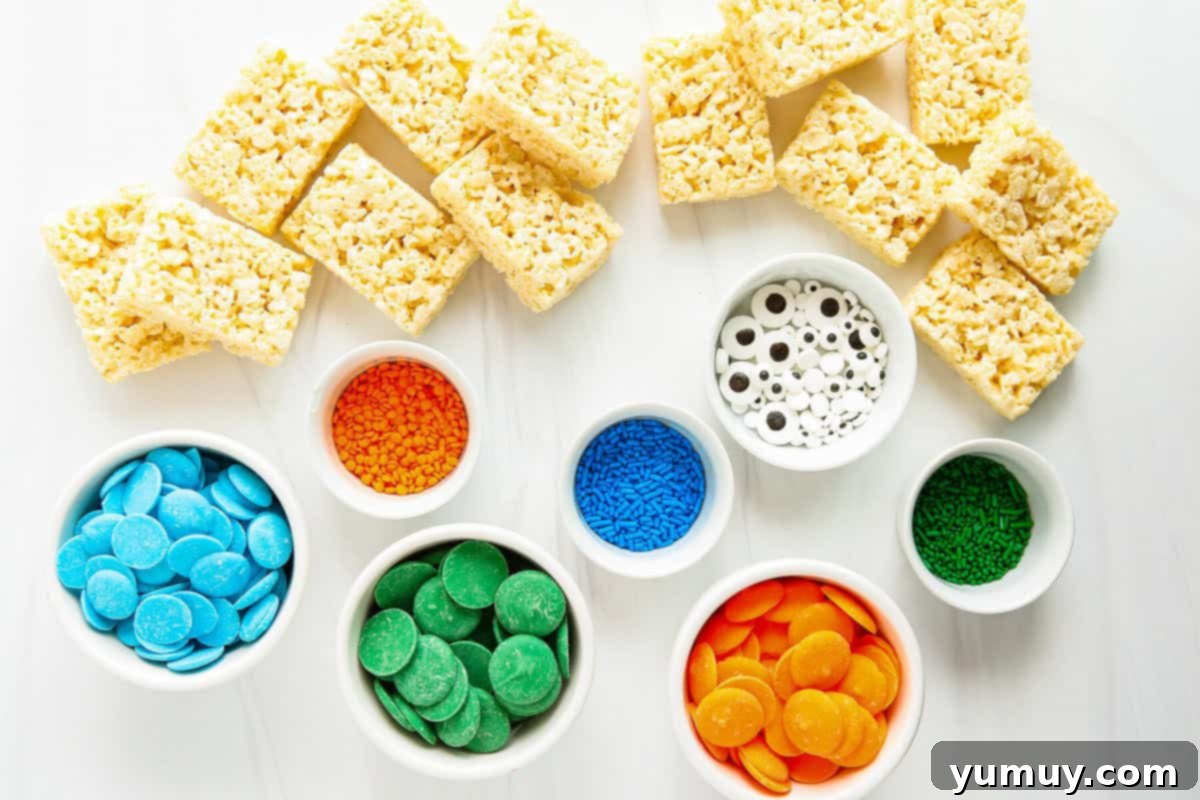
- 16 Rice Krispie treats (individually wrapped or homemade*)
- 12 ounces candy melts (assorted Halloween colors like green, orange, purple)
- Colored sprinkles (various shapes and colors)
- Candy eyes (small, medium, and large for variety)
Instructions
Prepare Your Treats: Unwrap each Rice Krispie treat and arrange them on a sheet of parchment paper or a clean plastic cutting board. For optimal results, place the unwrapped treats in the freezer for about 10-15 minutes to firm them up. This crucial step prevents them from falling apart during dipping and helps the candy coating set smoothly. While they are chilling, prepare your decorating station by pouring an assortment of colored sprinkles onto a wide, shallow plate or bowl. Keep your candy eyes readily accessible.

Melt the Candy Melts: Place your chosen candy melts (e.g., green, orange, blue) into separate medium microwave-safe bowls. Microwave each color in 15-second intervals, stirring thoroughly after each interval. Continue until the candy melts are completely smooth and free of lumps. Be careful not to overheat, as this can cause them to seize. If the melted candy seems too thick for dipping, stir in a teaspoon or two of vegetable shortening or coconut oil until it reaches a desired, thinner consistency.

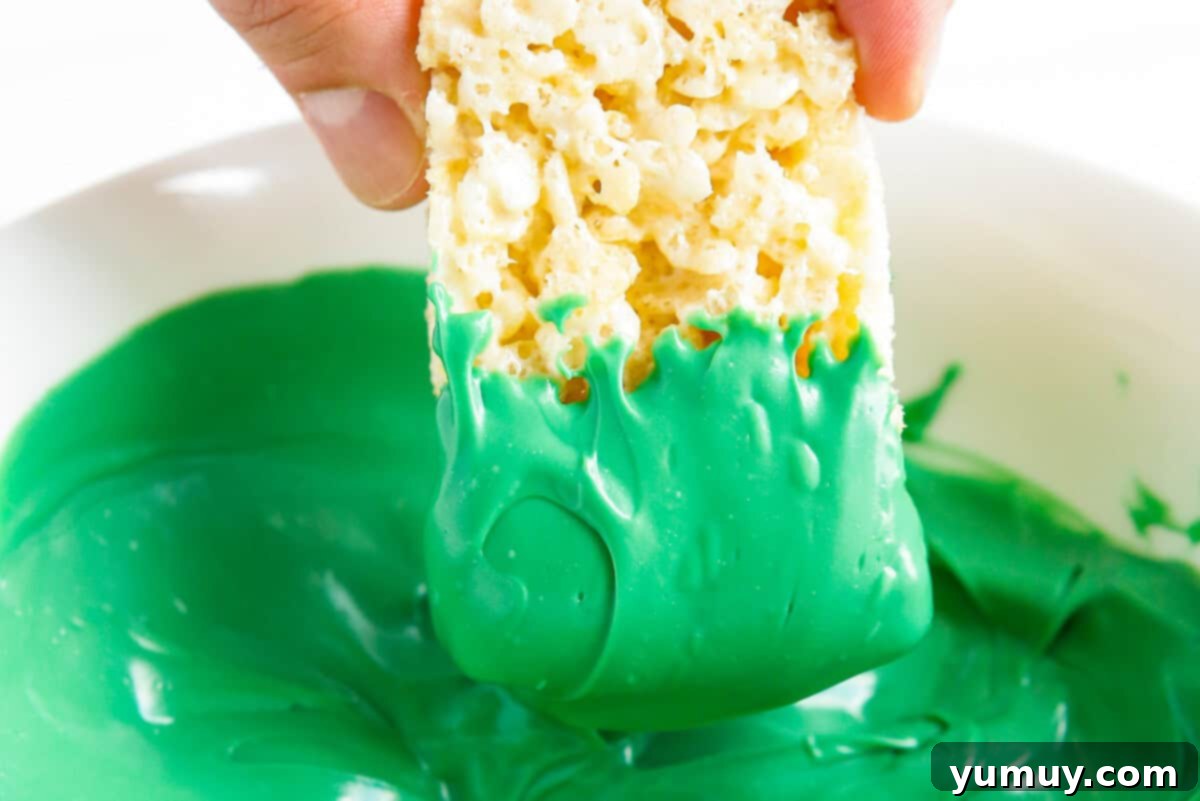
Dip and Coat: Carefully take one chilled Rice Krispie treat and dip half or all of it into your desired color of melted candy. Use the back of a spoon or a small spatula to gently smooth out the candy coating, ensuring even coverage. Allow any excess candy to drip off before proceeding to the next step.

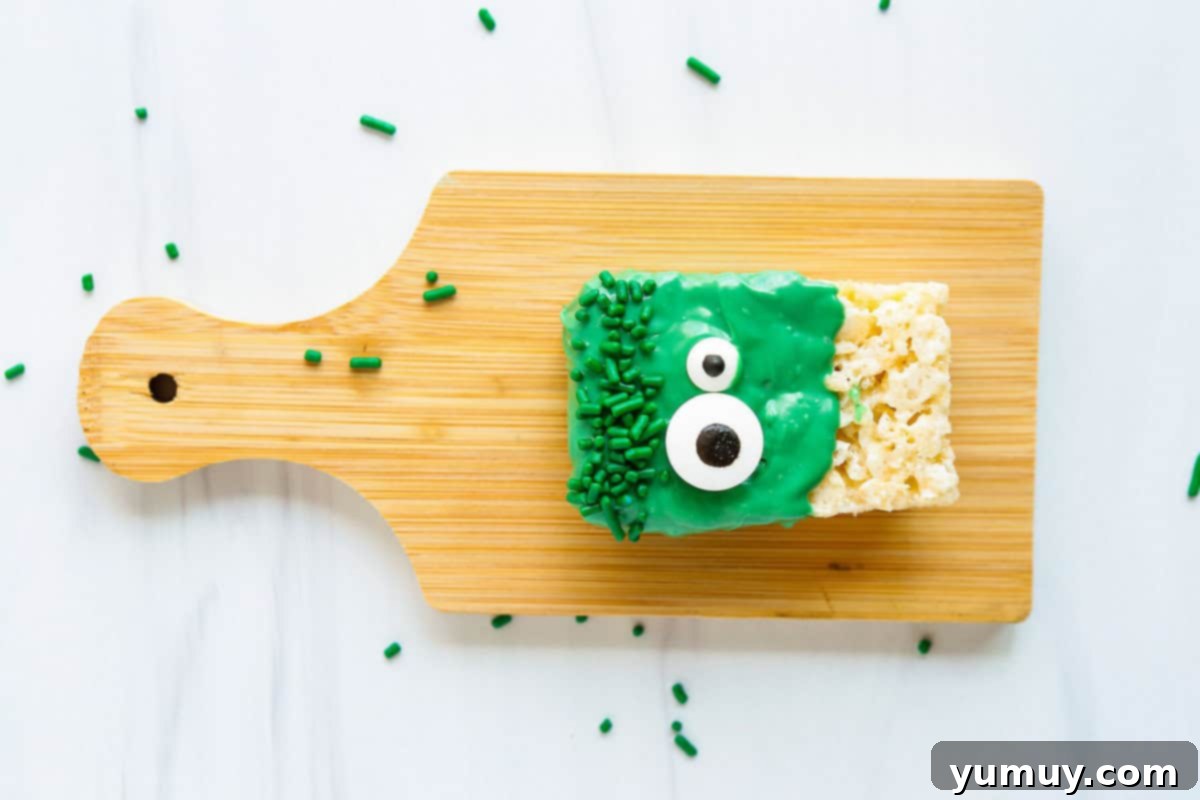
Decorate Instantly: While the candy coating is still wet and tacky, immediately proceed with decoration. Gently dip the coated portion of the treat into your chosen sprinkles, or use a small spoon to carefully sprinkle them over the surface. For eyes, firmly press several candy eyes onto the front of the treat. Work quickly, as candy melts set very fast. Once decorated, place the finished monster treat back onto the parchment paper to allow the candy to fully set.

Repeat and Enjoy: Continue this process with the remaining Rice Krispie treats, experimenting with different colors, sprinkles, and eye configurations to create a diverse and delightfully spooky collection of monsters. Once all treats are decorated, allow them to cool completely and for the candy melts to fully harden (this may take about 15-30 minutes at room temperature, or quicker if refrigerated for a few minutes). Serve and enjoy your ghoulishly good creations!
Notes & Pro Tips for Monster-Making Success
*If using homemade Rice Krispie treats, they can sometimes be more fragile than store-bought ones. We highly recommend briefly freezing them (10-15 minutes) before dipping to help them maintain their shape and prevent crumbling.
Expert Tips:
- Melting Precision: Always microwave candy melts in short bursts (15-20 seconds) and stir well in between. Candy melts can seize or burn if overheated, becoming unusable. A smooth, creamy consistency is key for easy dipping.
- Achieving Perfect Consistency: If your candy melts seem too thick or appear chunky, don’t despair! Add a teaspoon or two of vegetable shortening or coconut oil. Stir vigorously until the mixture becomes smooth and thin enough for a perfect, even coat.
- Drizzling for Extra Flair: Don’t let leftover melted candy go to waste! Use a fork or a piping bag with a tiny snipped corner to drizzle contrasting colors over your finished monsters. This adds an extra layer of visual interest and texture.
- Party Presentation: For a delightful “cake pop” aesthetic, gently insert a festive paper straw or lollipop stick into the bottom of each treat before the candy coating sets. This makes them easy to hold and display.
- Work in Batches: To ensure your candy melts stay warm and workable, consider melting smaller batches at a time, especially if you’re using multiple colors.
- Pre-Arrange Decorations: Have your sprinkles and candy eyes ready and open next to your dipping station. Once a treat is dipped, you need to add decorations immediately before the candy sets.
Storage:
Store your completed Rice Krispie treat monsters in an airtight container at room temperature for up to 5 days. While refrigeration is possible, the candy coating might lose some of its vibrant shine or develop condensation, so room temperature storage is generally preferred for best appearance and texture.
Nutrition Facts
Amount Per Serving (1 treat)
Calories from Fat 27
* Percent Daily Values are based on a 2000 calorie diet.
Author: Becky Hardin
Did You Make This? We love seeing what you’ve made! Tag us on social media at @easydessertrecipes for a chance to be featured.
Step-by-Step Guide: Crafting Your Rice Krispie Treat Monsters
Let’s walk through the simple process of creating these monstrously fun treats. Even the most novice decorator can achieve stunning results with these clear, easy-to-follow steps.
Step 1: Prepare Your Station and Chill the Treats
Begin by unwrapping all 16 of your chosen Rice Krispie treats. Whether you’re using store-bought ones for ultimate convenience or a freshly made batch, arrange them neatly on a sheet of parchment paper or a clean plastic cutting board. This prevents sticking and makes cleanup a breeze. To ensure optimal dipping, place these unwrapped treats into the freezer for approximately 10 to 15 minutes. This chilling period is essential; it helps the treats firm up, making them less prone to crumbling when dipped and allowing the candy coating to adhere more smoothly. While your treats are chilling, set up your decorating station. Pour your colorful sprinkles onto a wide, shallow plate or bowl. Having them spread out makes dipping much easier. Also, have your assortment of candy eyes ready and within reach.
Step 2: Mastering the Melt of Your Candy Coatings
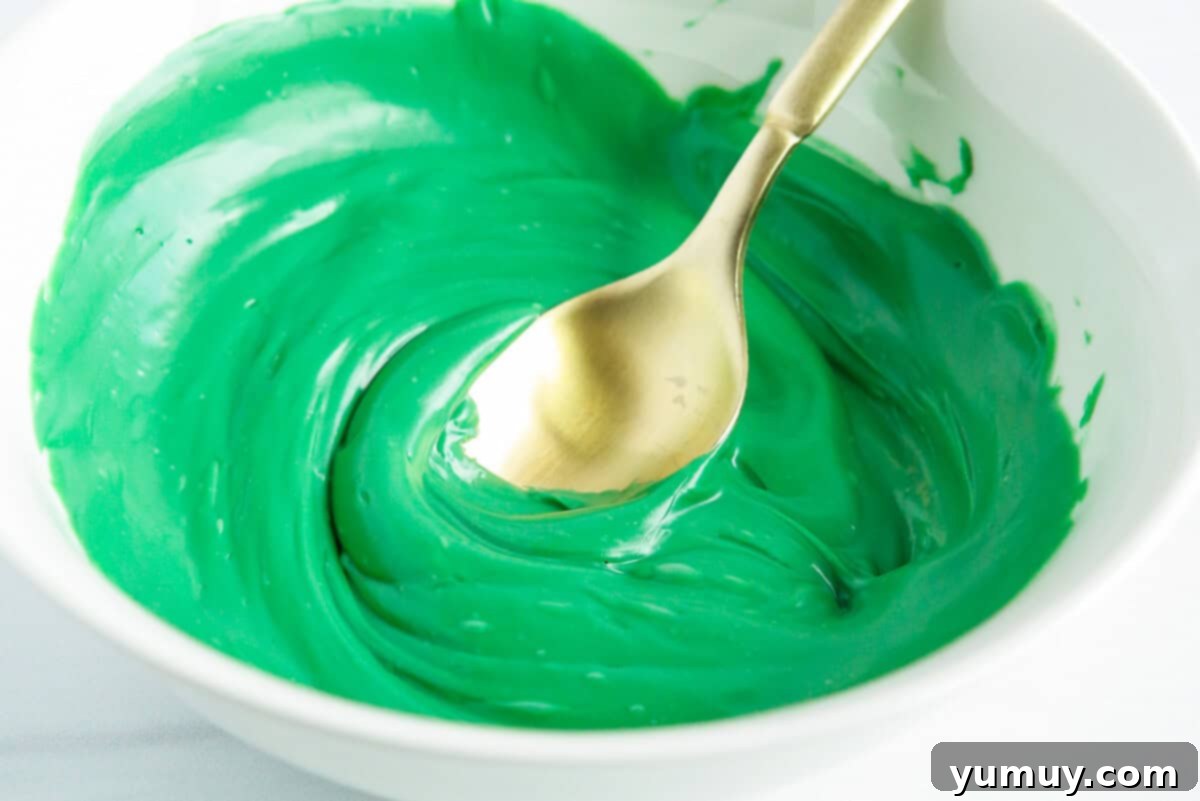
Next, prepare your candy melts. Choose an array of fun, Halloween-themed colors like vibrant green, fiery orange, or spooky purple. Place each color into separate medium microwave-safe bowls. Microwave them in short, controlled intervals—typically 15 to 20 seconds at a time. After each interval, remove the bowl and stir the candy melts thoroughly. This prevents scorching and ensures a smooth, even consistency. Continue this process until the candy melts are entirely smooth and free of any lumps. A common challenge is overly thick candy melts; if you find yours are too dense for a smooth dip, simply add a teaspoon or two of vegetable shortening or coconut oil. Stir this in until the mixture thins out to a perfect, dippable consistency.
Step 3: The Art of Dipping and Coating
Once your candy melts are perfectly smooth and your treats are chilled, it’s time for the fun part! Take one Rice Krispie treat from the freezer and carefully dip either half of it or its entirety into your chosen color of melted candy. Ensure a generous, even coat. After dipping, gently lift the treat and allow any excess candy to drip back into the bowl. You can use the back of a spoon or a small spatula to smooth out the coating and remove any drips, ensuring a neat finish. Precision here helps achieve that professional look. Remember to work swiftly, as the candy melts will begin to set quite quickly.
Step 4: Bring Your Monsters to Life with Instant Decoration
The moment a treat is dipped, act fast! While the candy coating is still wet and wonderfully tacky, it’s the perfect time to add your decorations. You can either gently dip the coated section directly into your plate of sprinkles, or for more controlled placement, use a small spoon to carefully add sprinkles to specific areas. Next, immediately press several candy eyes onto the front of your newly coated treat. Mix and match different sizes and numbers of eyes to give each monster a unique personality – one big eye for a cyclops, two for a classic look, or even three or four for a truly bizarre creature! Once decorated, carefully place your finished monster Rice Krispie treat onto the parchment paper to allow the candy coating to fully set and harden.
Step 5: Final Touches and Serving Your Spooky Creations
Repeat the dipping and decorating process for all remaining Rice Krispie treats. This is where your creativity can truly shine! Don’t be afraid to experiment with different color combinations for the candy melts, various sprinkle mixes, and even different expressions with the candy eyes. Once all your treats have been transformed into a charming collection of monsters, allow them ample time to cool completely and for the candy coating to harden. This might take approximately 15 to 30 minutes at room temperature, or you can speed up the process by placing them in the refrigerator for a few minutes. Once fully set, your ghoulishly delightful Rice Krispie Treat Monsters are ready to be served and enjoyed by all!
Creative Variations for Your Monster Treats
While the basic recipe is fantastic, here are some ideas to push your monster creativity even further:
- Multicolor Dips: Dip one end in green, let it set slightly, then dip the other end in purple or orange for a two-toned monster.
- Drizzled Designs: Use a piping bag (or a Ziploc bag with a tiny corner snipped) to drizzle contrasting candy melt colors over the set treats. Create zigzags, stripes, or spiderweb patterns.
- Monster Hair/Fur: Use shredded coconut dyed green or purple and press onto the wet candy for a furry texture. Edible glitter or sanding sugar can also create a shimmering monster look.
- Spooky Mouths: Use a black edible food marker to draw fangs or mouths on your monsters once the candy has completely set. Mini chocolate chips can also be used for tiny mouths or nostrils.
- Character Monsters: Think specific monster characters! Green for Frankenstein, white for mummies (with white chocolate drizzles), or classic orange for a pumpkin monster.
- Different Bases: While Rice Krispie treats are classic, you can also use pre-made brownies, cookies, or even pretzel rods for different monster shapes and textures.
How to Store Your Halloween Monster Rice Krispie Treats
Proper storage is key to keeping your delightful Rice Krispie Treat Monsters fresh and appealing. Once completely set, store them in an airtight container at room temperature. They will maintain their deliciousness and vibrant appearance for up to 5 days. It’s generally not recommended to freeze these treats after they’ve been decorated with candy melts, as the chocolate coating can lose its glossy shine and develop an undesirable texture once thawed. Additionally, freezing and thawing can sometimes make the Rice Krispie treats themselves a bit too soft or chewy. For the best quality and presentation, stick to room temperature storage and enjoy them within the recommended timeframe.
Frequently Asked Questions (FAQ)
- Can I make these ahead of time?
- Absolutely! These Rice Krispie Treat Monsters can be made up to 2-3 days in advance and stored in an airtight container at room temperature. This makes them a perfect stress-free Halloween party preparation!
- What if my candy melts are too thick or clumpy?
- This is a common issue! The best solution is to add a small amount (1-2 teaspoons) of vegetable shortening or coconut oil to the melted candy. Stir it in thoroughly until you achieve a smooth, pourable consistency. Avoid adding water or milk, as this will cause the candy melts to seize.
- Can I use regular chocolate chips instead of candy melts?
- While you can use regular chocolate chips, candy melts are formulated to set quickly and provide a smoother, more vibrant coating without needing tempering. If using chocolate chips, you might need to add a bit of shortening or oil for a smoother dip, and they may take longer to set.
- How do I prevent the treats from falling apart during dipping?
- The key is to chill them! Placing the unwrapped Rice Krispie treats in the freezer for 10-15 minutes before dipping firms them up significantly, making them much more robust and less likely to crumble when coated.
- What kind of sprinkles work best?
- Any kind of sprinkles will work! Nonpareils, jimmies, sanding sugar, or even edible glitter can all create unique monster looks. Matching sprinkle colors to your candy melts or using contrasting colors both yield fantastic results.
More Spooky & Sweet Halloween Dessert Recipes to Try!
Delightful Dirt Cake Cups
Festive Halloween Fudge
Irresistible Homemade Crunch Bars
Spooky Halloween White Chocolate Buckeyes
Discover All Halloween Desserts
