Have you ever dreamt of baking the perfect batch of scones at home? Those delightful treats that are wonderfully light and tender on the inside, with a beautiful golden crust that whispers of buttery perfection? You’re in exactly the right place! This comprehensive master scone recipe is my trusted guide for creating incredibly fluffy American-style scones, a versatile foundation that works flawlessly for both sweet and savory cravings. Whether you desire the comforting sweetness of blueberry scones, rich chocolate chip scones, or vibrant raspberry scones, or perhaps a hearty savory option like robust cheese scones, my detailed, step-by-step instructions will empower you to achieve consistent, bakery-quality results every single time. Get ready to elevate your baking skills and delight in homemade scones that are truly unparalleled.

Mastering Homemade American-Style Scones: Your Ultimate Guide
Crafting the perfect scone has been a culinary journey for me, involving countless trials and over a dozen different methods tested in my kitchen. Drawing inspiration from seasoned professional bakers and incorporating valuable lessons from my own experiments, I’ve refined this recipe to guarantee reliable, café-quality results in your home kitchen. Unlike their British counterparts, which often lean towards a more biscuit-like texture, American scones offer a distinct experience. They are typically sweeter, possess a slightly crumbly yet tender texture, and serve as an exquisite accompaniment to your morning coffee, afternoon tea, or as a delightful standalone treat.
This master recipe emphasizes critical techniques, starting with a well-chilled dough and the strategic use of cold butter, which are fundamental for achieving that signature flaky, airy interior. Furthermore, I’ll guide you through customizing your scones with various flavor mix-ins, allowing you to tailor each batch precisely to your palate. From timeless fruit combinations to inventive savory breakfast options, the adaptability of this scone recipe makes it an indispensable staple for any home baker.

The Secret to Achieving Perfectly Soft and Fluffy Scones
When aiming for classic American scones with an irresistibly light, tender crumb and a beautifully golden-brown top, my extensive testing has revealed three non-negotiable elements that are essential for success:
- The Magic of Cornstarch: A small but mighty addition of cornstarch to your dry ingredients plays a crucial role. It works by inhibiting gluten development in the flour, resulting in a softer, more delicate crumb that contributes significantly to the scones’ renowned fluffiness. This simple ingredient makes a noticeable difference in texture.
- Embrace Cold Butter: This is perhaps the most critical component. Always use unsalted butter that is straight from the refrigerator and cut into small cubes. The goal is to keep the butter as cold as possible throughout the mixing process. As the cold butter melts in the hot oven, it releases steam, creating tiny pockets of air within the dough. This process is what gives scones their characteristic flaky layers and contributes to their light, airy structure. Warm butter, on the other hand, will simply mix into the dough, leading to a denser, less desirable texture.
- The Indispensable Chill Time: After shaping your scones, a mandatory chilling period is vital. Placing the shaped scones in the freezer for at least 30 minutes before baking prevents the butter from melting prematurely in the oven. If the butter melts too quickly, it can leak out of the dough, leaving you with scones that are greasy, dense, and disappointingly flat. The chill time ensures the butter remains solid long enough to create those crucial steam pockets, promoting a high rise and perfect texture.
By meticulously following these fundamental steps, you’ll consistently produce scones that transcend dry, crumbly mediocrity, achieving instead the blissful perfection found in the finest bakeries.
Buttermilk vs. Heavy Cream: A Scone Showdown
Many scone recipes advocate for the use of buttermilk, and while it certainly has its merits, my testing consistently showed that heavy cream yields the most tender, rich, and luxurious texture for the majority of scone variations. Buttermilk imparts a distinctive tangy flavor, which, in my experience, can sometimes clash with sweeter mix-ins like delicate chocolate chips or fresh berries. The richness of heavy cream, however, creates a more neutral and cohesive flavor profile that allows the sweet additions to truly shine.
That being said, buttermilk is undeniably excellent for savory scones! Its inherent tang beautifully complements robust flavors such as sharp cheddar cheese, aromatic herbs, or smoky bacon. If your heart is set on a more pronounced tang, or if you’re specifically crafting savory cheese scones, feel free to substitute buttermilk for heavy cream at a 1:1 ratio. The choice ultimately depends on your desired flavor profile, but for ultimate tenderness in sweet scones, heavy cream remains my top recommendation.

Master Scone Recipe (Any Flavor)
Ingredients
Scone Base
- 1¾ cups all-purpose flour
- ¼ cup cornstarch
- ⅓ cup granulated sugar *
- 1 tablespoon baking powder
- ½ teaspoon kosher salt
- ½ cup unsalted butter cubed (1 stick)
- ¾ cup heavy cream
- 1 large egg
- 1 teaspoon pure vanilla extract *
Egg Wash
- 1 large egg lightly beaten
- 1 teaspoon water
Optional Mix-Ins
- 1 cup raspberries fresh or frozen
- 1 cup blueberries fresh or frozen
- 1 teaspoon fresh lemon zest
- 1 cup chocolate chips
- 1 cup shredded cheddar cheese
Equipment
- Kitchen Scale (optional)
- Food Processor
- Baking Sheet
Instructions
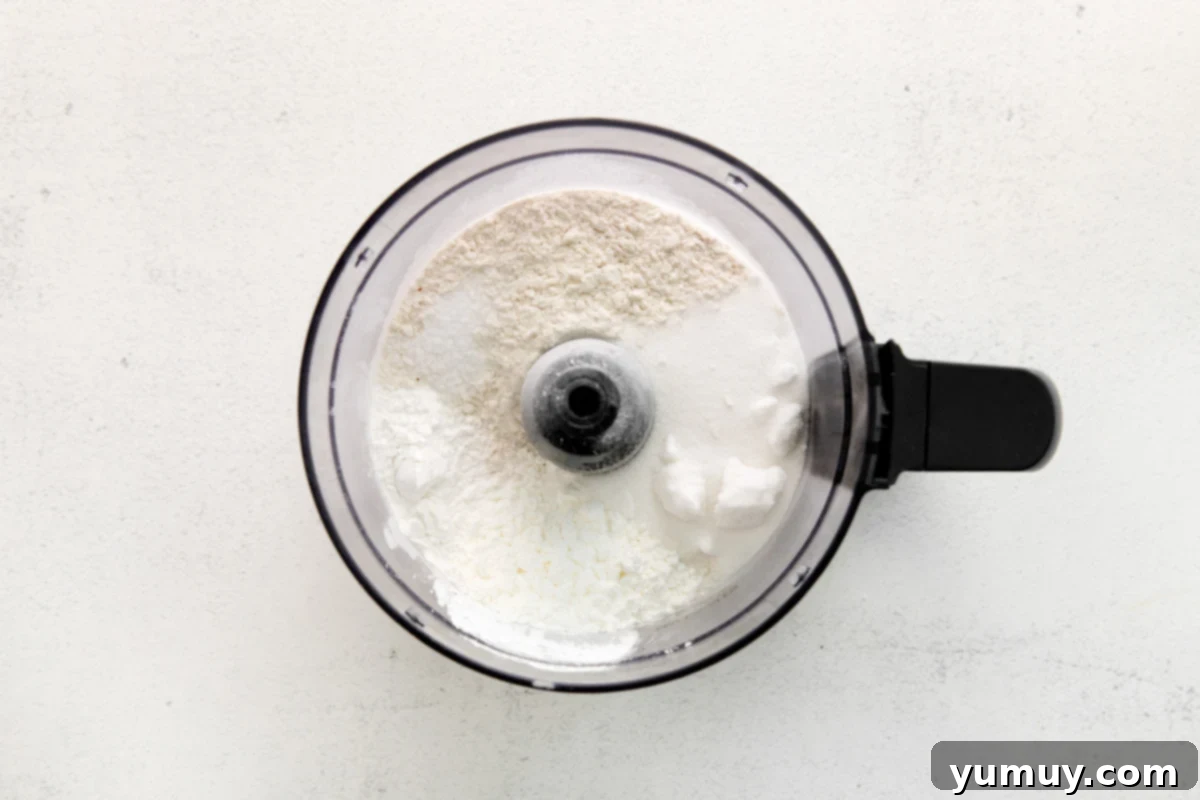
- Add the flour, cornstarch, sugar, baking powder, and salt to the bowl of a food processor. Pulse 5-10 times, or until well combined.1¾ cups all-purpose flour, ¼ cup cornstarch, ⅓ cup granulated sugar, 1 tablespoon baking powder, ½ teaspoon kosher salt

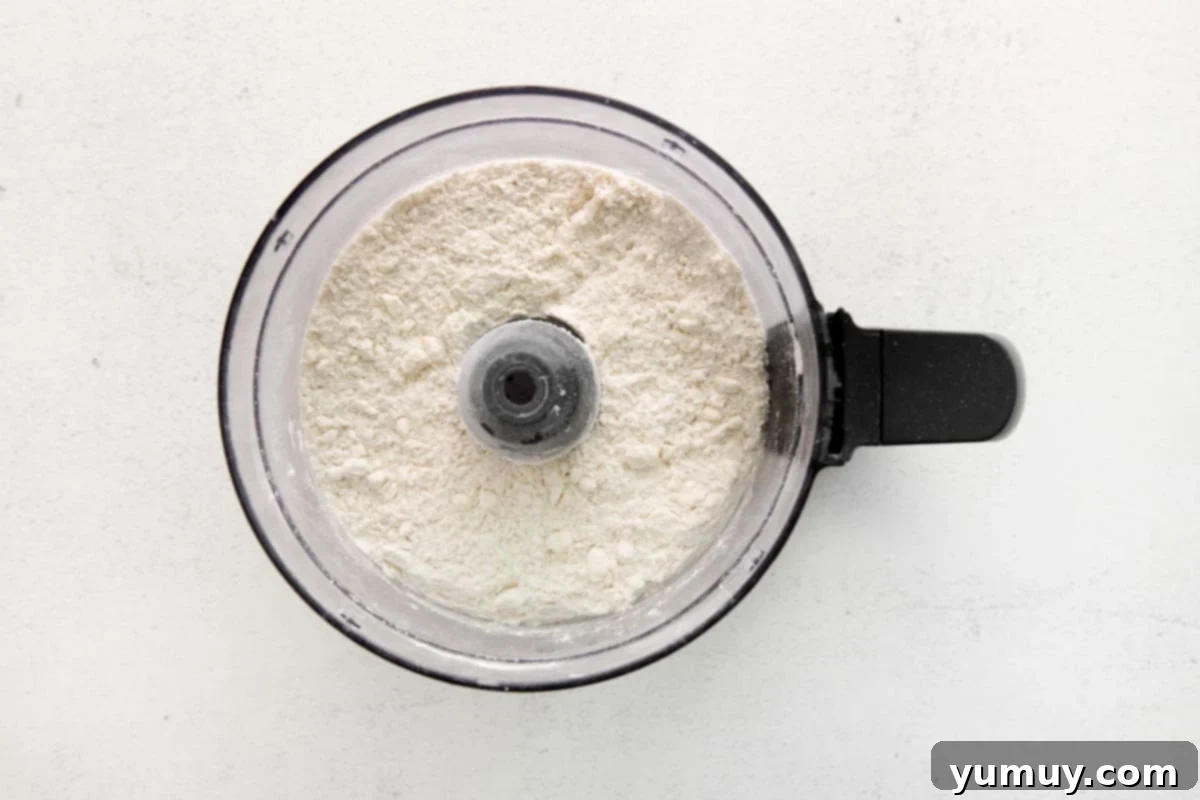
- Next add the cubed butter and pulse until the butter is the size of peas, about 10 pulses.½ cup unsalted butter

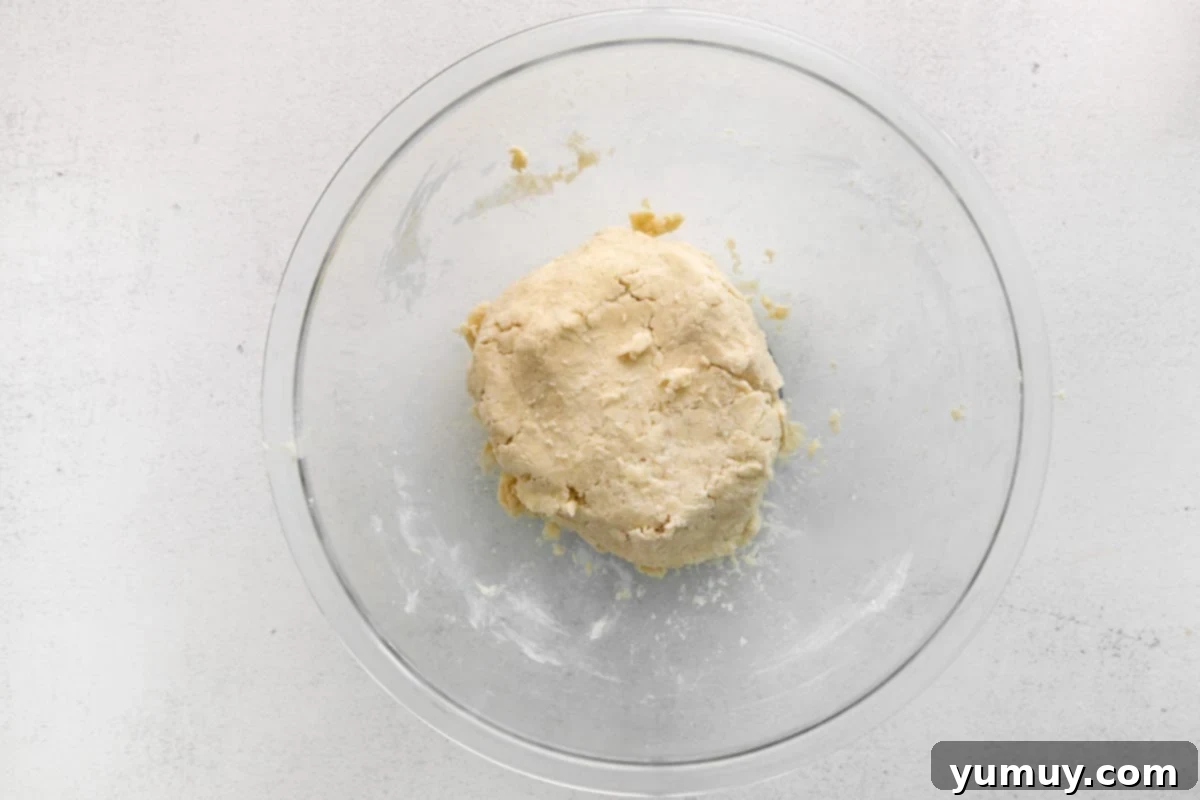
- In a large bowl, whisk together the heavy cream, egg, and vanilla. Add the butter-flour mixture to the wet ingredients and mix until the dough begins to come together into large clumps. If using any add-ins, add them to the dough now.¾ cup heavy cream, 1 large egg, 1 teaspoon pure vanilla extract, 1 cup raspberries, 1 cup blueberries, 1 cup chocolate chips, 1 cup shredded cheddar cheese

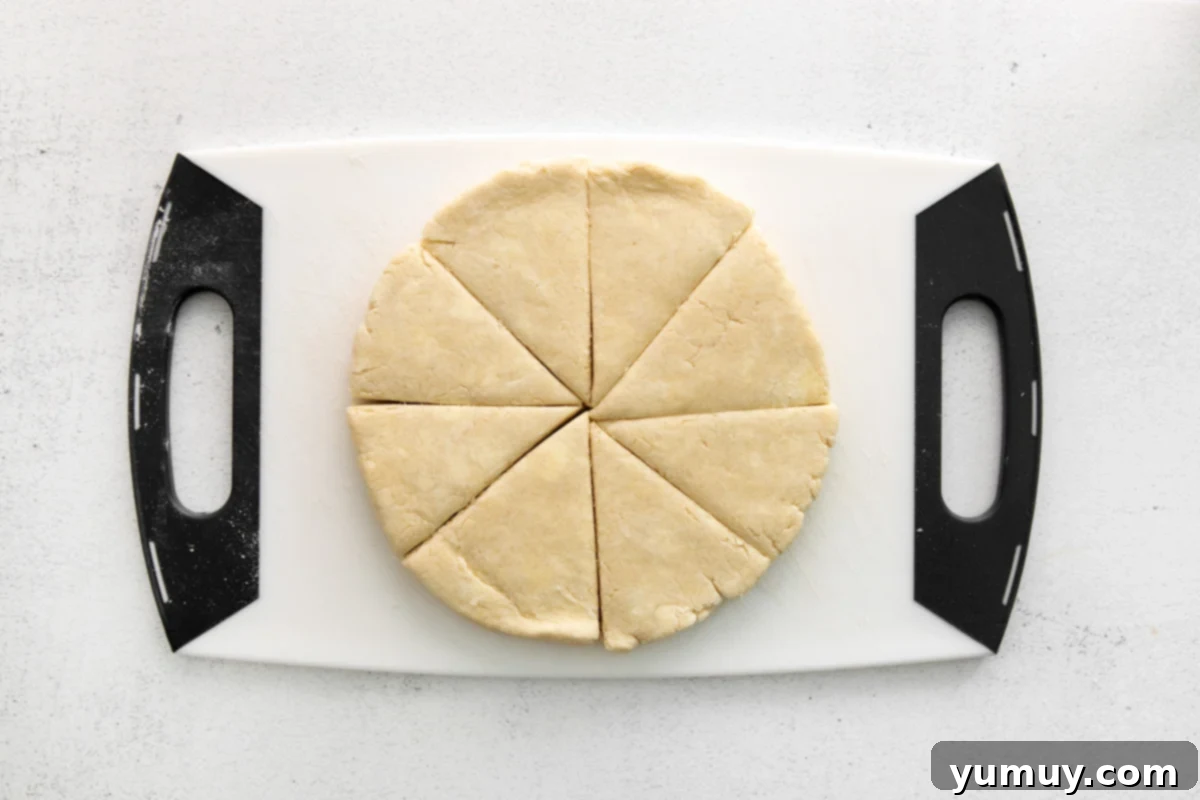
- Turn the dough out onto a lightly floured surface and shape it into an 8” round circle. It may look dry at first but keep working it with your hands and it will come together! Cut the dough into 8 triangles.

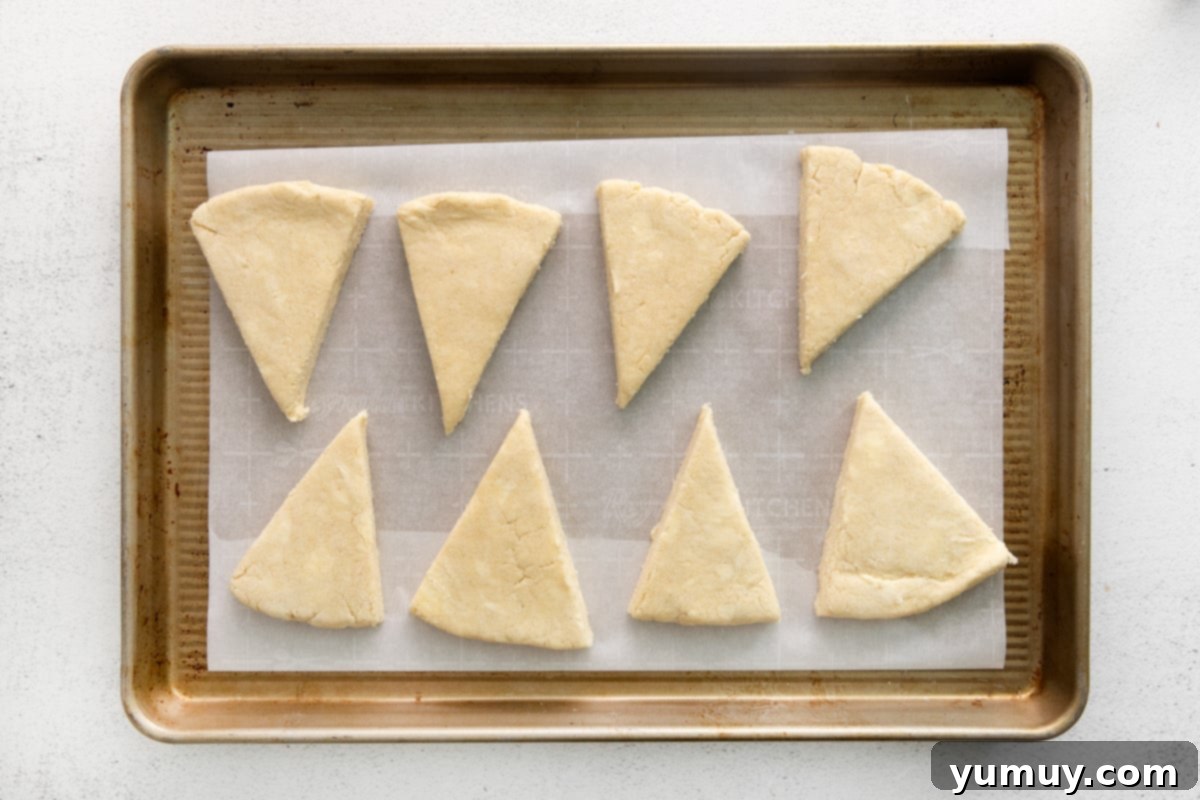
- Place the scones on a parchment lined baking sheet, making sure to place them at least 2 inches apart. They will spread a little while baking.

- Place the scones in the freezer to chill for 30 minutes. While the scones chill, preheat your oven to 350°F.
- When the oven is fully preheated, brush the scones with egg wash and sprinkle them with coarse sugar, if using. Bake for 22-25 minutes, or until the scones are puffed and golden brown around the edges.1 large egg, 1 teaspoon water

- Allow the scones to cool completely before enjoying.
Notes
- Temperature is Key (Cold Butter!): Seriously, don’t underestimate this! Keep your butter in the refrigerator until the very moment you’re ready to incorporate it into the dry ingredients. If your kitchen is warm, you can even chill your mixing bowl beforehand.
- The Power of the Freezer Chill: Chilling the shaped scone dough in the freezer for 30 minutes (while your oven preheats) is far more effective and faster than using the refrigerator. This rapid chill ensures the butter is rock-hard, preventing it from melting too early and contributing to a superior rise and flakiness.
- Freeze for Future Enjoyment: Scones are fantastic for make-ahead baking! You can freeze the unbaked, cut scone triangles for up to 3 months. Simply bake them straight from frozen, adding a few extra minutes to the baking time, for a taste as fresh as freshly made.
- Knowing When They’re Done: Perfectly baked scones will be noticeably puffed up and have beautifully golden-brown edges. The center should feel set and not appear doughy when gently pressed. Remember, they will firm up further as they cool.
- Cooling Period for Optimal Texture: While the aroma of warm scones is tempting, it’s best to allow them to cool completely. This crucial step lets the internal structure set, giving them their ideal texture. If you prefer them warm, a quick reheat in a preheated oven is better than the microwave.
- Delightful Blueberry Scones: Simply fold in 1 cup of fresh or frozen blueberries, and for an extra layer of brightness, add 1 teaspoon of fresh lemon zest to the dry ingredients.
- Irresistible Chocolate Chip Scones: Stir in 1 cup of your favorite chocolate chips (milk, dark, or white chocolate all work beautifully) for a rich, sweet treat.
- Classic Raspberry Scones: Incorporate 1 cup of fresh or frozen raspberries. If using frozen, there’s no need to thaw them first.
- Hearty Cheddar Scones: For a savory delight, add 1 cup of shredded sharp cheddar cheese to the dough. Remember to omit the granulated sugar and vanilla extract from the base recipe for this variation. Consider adding a pinch of black pepper or a teaspoon of dried chives for extra flavor!
- For an elegant finish, whisk together 1 cup of powdered sugar, 2 tablespoons of milk (or cream), and 1 teaspoon of pure vanilla extract until smooth. Drizzle this luscious glaze generously over your cooled baked scones and allow it to set completely before serving or storing.
- To complement savory scones, prepare a flavorful garlic-chive butter. Melt 3 tablespoons of unsalted butter and stir in ½ teaspoon of garlic powder along with 1 tablespoon of finely sliced fresh chives. Immediately after taking the savory scones out of the oven, brush them with this aromatic butter and sprinkle with a pinch of flaky sea salt for a perfect savory touch.
How to Make Scones: A Detailed Step-by-Step Guide
Baking perfect scones is a rewarding process that relies on careful execution of each step. Follow this detailed guide to ensure your scones turn out flaky, tender, and absolutely delicious:
Step 1: Prepare Your Dry Ingredients with Precision
Begin by combining 1¾ cups of all-purpose flour, ¼ cup of cornstarch, ⅓ cup of granulated sugar (remember to omit this if you’re making savory scones), 1 tablespoon of baking powder, and ½ teaspoon of kosher salt in the bowl of a food processor. Pulse the ingredients 5-10 times, or until they are thoroughly combined and evenly distributed. This ensures that your leavening agents and flavorings are spread throughout the dough, promoting a uniform rise and consistent taste. If you don’t have a food processor, you can easily whisk these dry ingredients together in a large metal bowl. For an extra edge in keeping your butter cold in the next step, I highly recommend chilling your mixing bowl in the refrigerator for about 15-20 minutes before you begin.
Step 2: Incorporate the Cold Butter for Flaky Layers
Next, add ½ cup of cold, unsalted butter, cut into small cubes, to your dry ingredient mixture. Pulse the food processor until the butter pieces are roughly the size of small peas. This usually takes about 10 quick pulses. The key here is to keep the butter as cold as possible; these small, distinct pieces of cold butter are essential for creating steam pockets in the oven, which results in the incredibly flaky and tender texture we desire in a scone. If you’re working by hand, use a pastry cutter, a fork, or even your fingertips to cut the butter into the flour. Be quick and efficient to prevent the butter from warming up too much. If you notice the butter starting to soften, don’t hesitate to place the bowl back into the refrigerator for a few minutes to rechill before continuing.
Step 3: Gently Combine Wet and Dry Ingredients, Add Mix-Ins
In a separate large bowl, whisk together ¾ cup of heavy cream, 1 large egg, and 1 teaspoon of pure vanilla extract (again, omit the vanilla if you’re preparing savory scones). Ensure these wet ingredients are also cold to maintain the chill of your butter. Pour the butter-flour mixture into the wet ingredients. Mix everything gently until the dough just begins to come together into large, shaggy clumps. It’s crucial not to overmix at this stage, as overworking the dough can lead to tough scones. If you plan to include any optional mix-ins – such as raspberries, blueberries, chocolate chips, or shredded cheese – now is the time to gently fold them into the dough until just incorporated. Distribute them evenly but avoid excessive handling.
Step 4: Shape and Precisely Cut Your Scones
Turn the shaggy scone dough out onto a lightly floured surface. Gather the dough and gently work it with your hands to bring it together. Don’t be alarmed if it appears dry or crumbly at first; with gentle pressure and continued shaping, it will coalesce into a cohesive mass. Once combined, gently pat and shape the dough into an 8-inch round circle, aiming for an even thickness. Next, using a sharp knife or a bench scraper (which is excellent for clean, even cuts), cut the dough into 8 equal-sized triangles, much like slicing a pizza. While triangular scones are classic, you can also use a round biscuit cutter for circular scones, just be sure to re-roll scraps gently and minimally.
Step 5: The Essential Chill for Scone Perfection
Arrange your neatly cut scone triangles on a parchment-lined baking sheet, ensuring they are spaced at least 2 inches apart to allow for proper air circulation and expansion during baking. This step is critical: immediately place the entire baking sheet with the scones into the freezer to chill for a full 30 minutes. Do NOT skip this crucial chilling period! If your scone dough is too warm when it enters the oven, the butter will melt out too quickly, resulting in flat, greasy, and dense scones instead of light and flaky ones. While your scones are chilling, take this time to preheat your oven to 350°F (175°C). A properly preheated oven is just as important as cold dough for a good rise.
Step 6: Bake to Golden Perfection
Once your oven has reached its full preheated temperature and the scones are thoroughly chilled, prepare an egg wash. In a small bowl, whisk together 1 large egg with 1 teaspoon of water until well combined. Gently brush the tops of each scone with this egg wash; this will give them a beautiful golden sheen and a slightly crisp crust. For sweet scones, you can sprinkle a little coarse sugar on top for added sparkle and texture. For savory scones, a pinch of flaky sea salt works wonders. Transfer the baking sheet to the preheated oven and bake for 22-25 minutes. Look for visual cues: the scones should be noticeably puffed up and have a rich golden-brown color around the edges. Their centers should feel set when lightly touched. Remove them from the oven and, though tempting, allow them to cool completely on the baking sheet or a wire rack before indulging. This final cooling period is vital for the scone’s internal structure to fully set, ensuring the best possible texture and flavor.

How to Store Your Delicious Homemade Scones
Proper storage is essential to keep your homemade scones tasting fresh and delightful. After baking, it’s crucial to allow them to cool completely on a wire rack before moving them to storage. This prevents condensation from making them soggy.
For short-term enjoyment, store the cooled scones in an airtight container at room temperature. They will remain wonderfully fresh and delicious for up to 3 days. If you need to extend their shelf life slightly, transfer them to the refrigerator, where they’ll stay good for up to 5 days. However, be aware that refrigeration can sometimes alter the texture of baked goods, making them a bit firmer.
For longer-term storage, scones freeze exceptionally well. Once completely cooled, place them in a single layer on a baking sheet and freeze until solid (this prevents them from sticking together). Then, transfer the frozen scones to a freezer-safe bag or airtight container. They can be stored in the freezer for up to 3 months, making them perfect for meal prep or impromptu treats.
To reheat your scones, whether from the refrigerator or freezer, the best method is to place them in a preheated 300°F (150°C) oven for 5-7 minutes. This gentle heat will refresh their texture, making them tender on the inside and slightly crisp on the outside, without drying them out. I strongly advise against using a microwave for reheating, as this can quickly make your beautiful scones rubbery, tough, or even soggy, diminishing their carefully crafted texture.
