For those who adore the classic German Black Forest cake but crave a more convenient, shareable delight, these Black Forest cupcakes are a dream come true. They capture all the iconic flavors of the beloved dessert – rich chocolate, luscious cherries, and airy whipped cream – in a perfectly portioned, handheld treat. Each cupcake promises a soft, moist, and tender crumb, generously filled with sweet cherry goodness. By starting with a simple chocolate cake mix and incorporating a few clever modifications, like adding pudding to the frosting for stability, we ensure a baking experience that’s as effortless as it is delicious. These chocolate cherry cupcakes are an absolute showstopper, ideal for parties, holiday gatherings, or any moment you desire a bite-sized piece of chocolate and cherry heaven.
- Pin this recipe for later!
Decadent Chocolate Cherry Cupcakes: The Ultimate Black Forest Treat
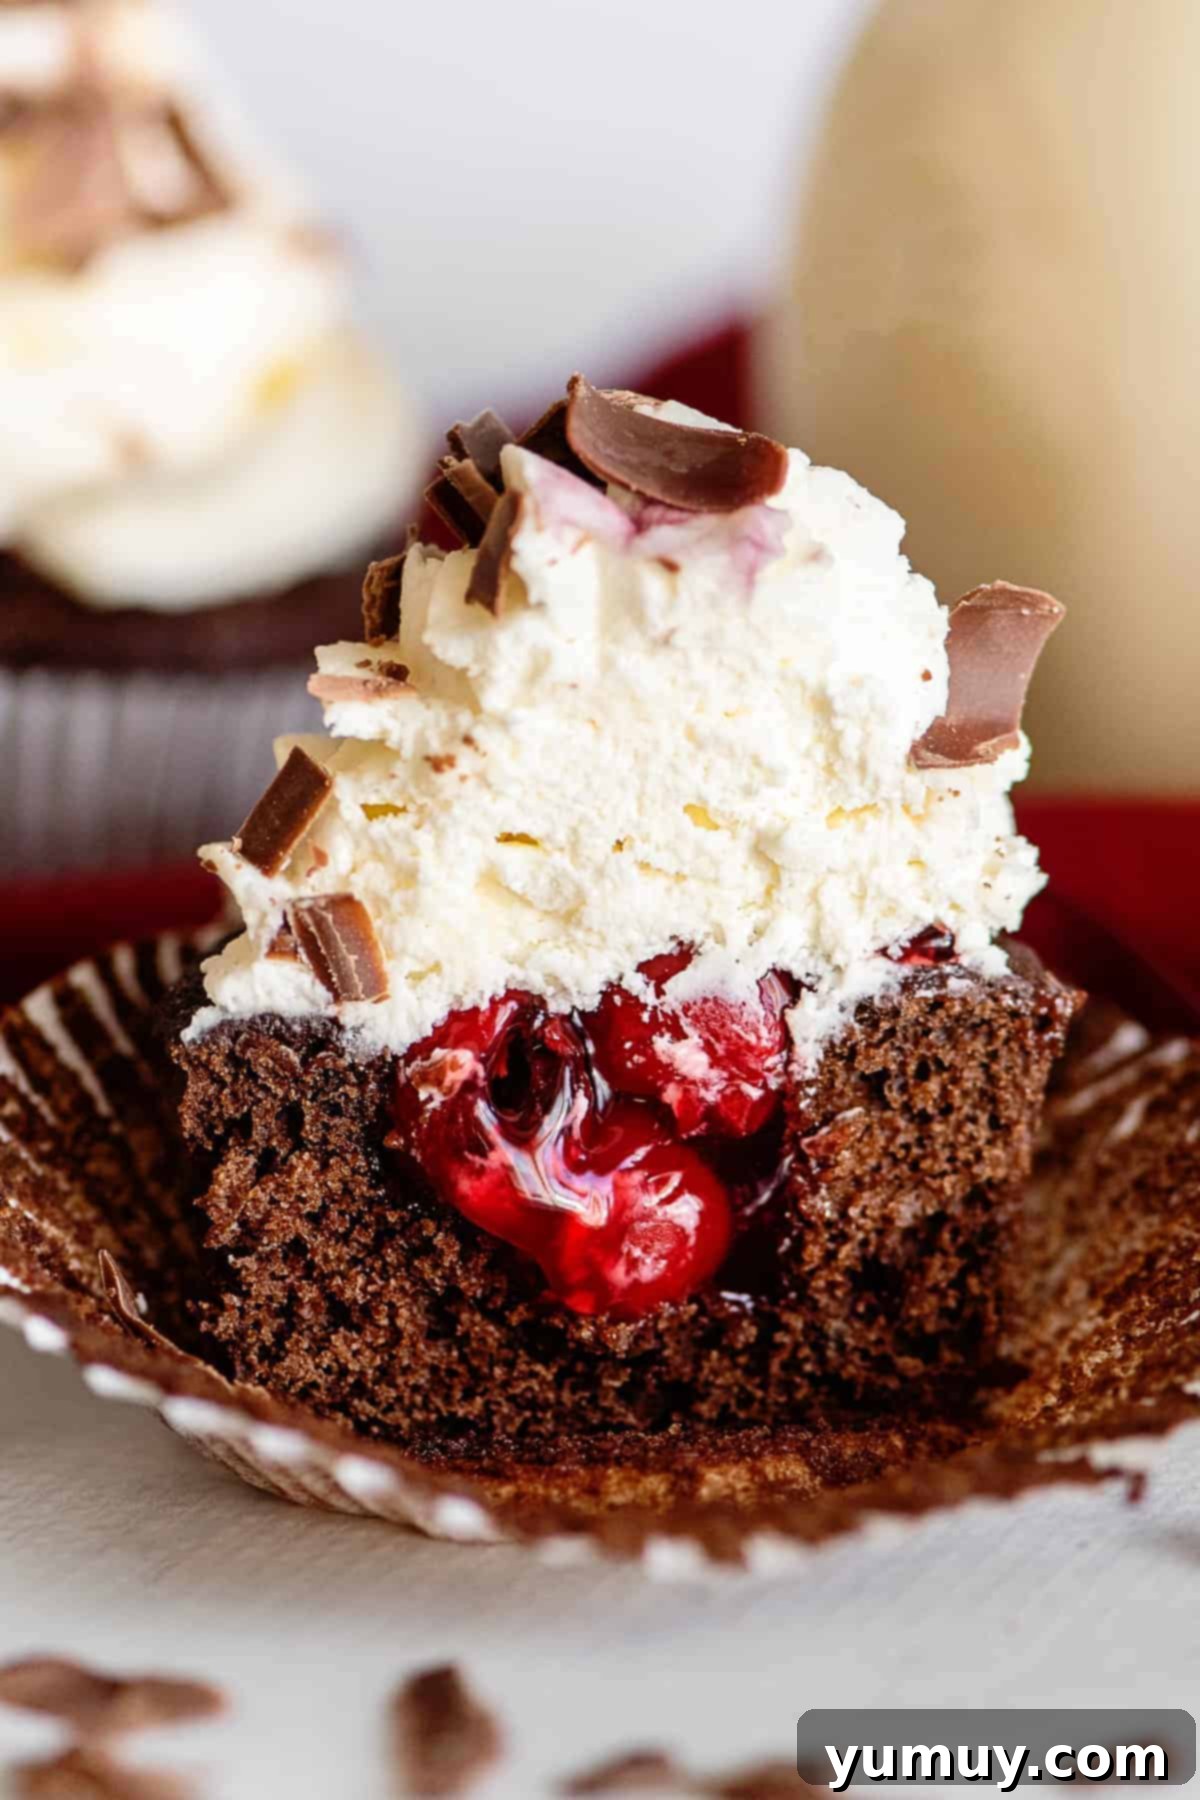
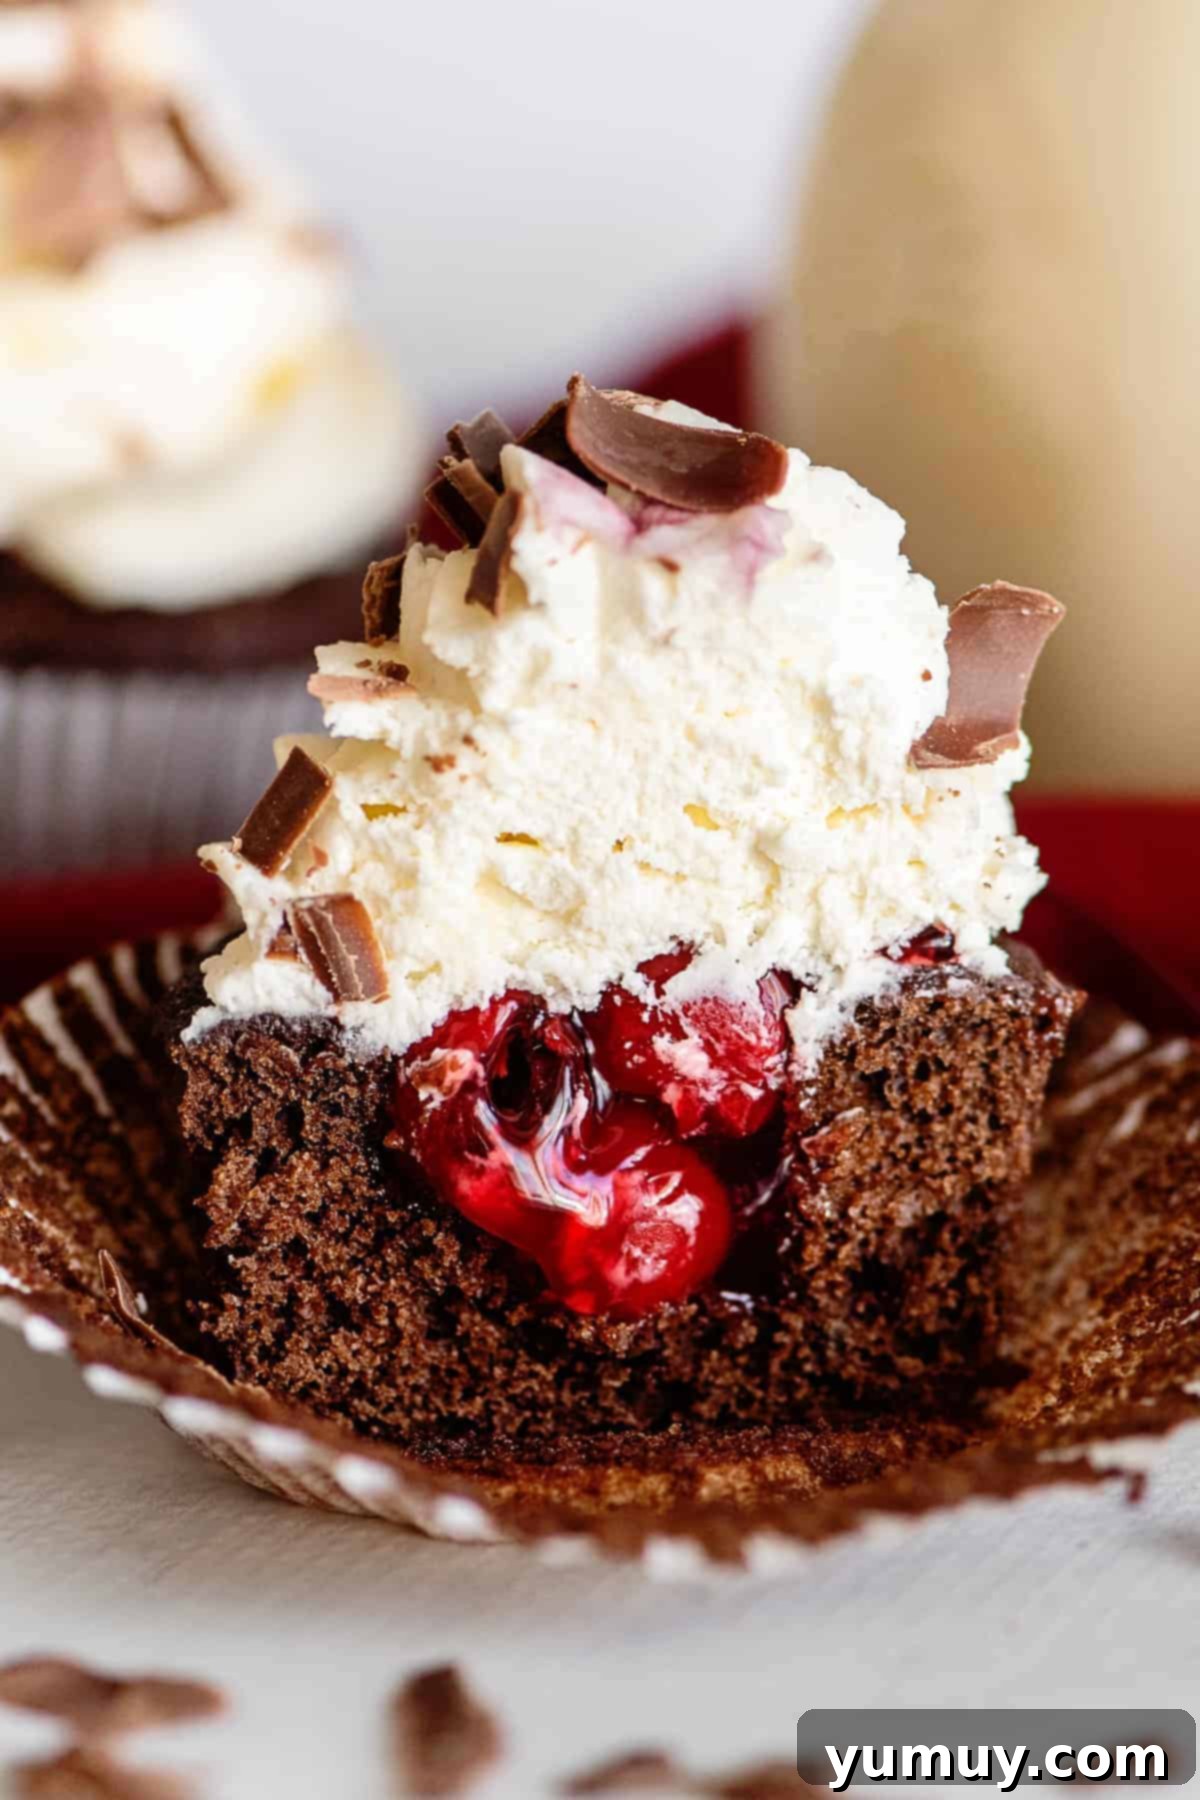
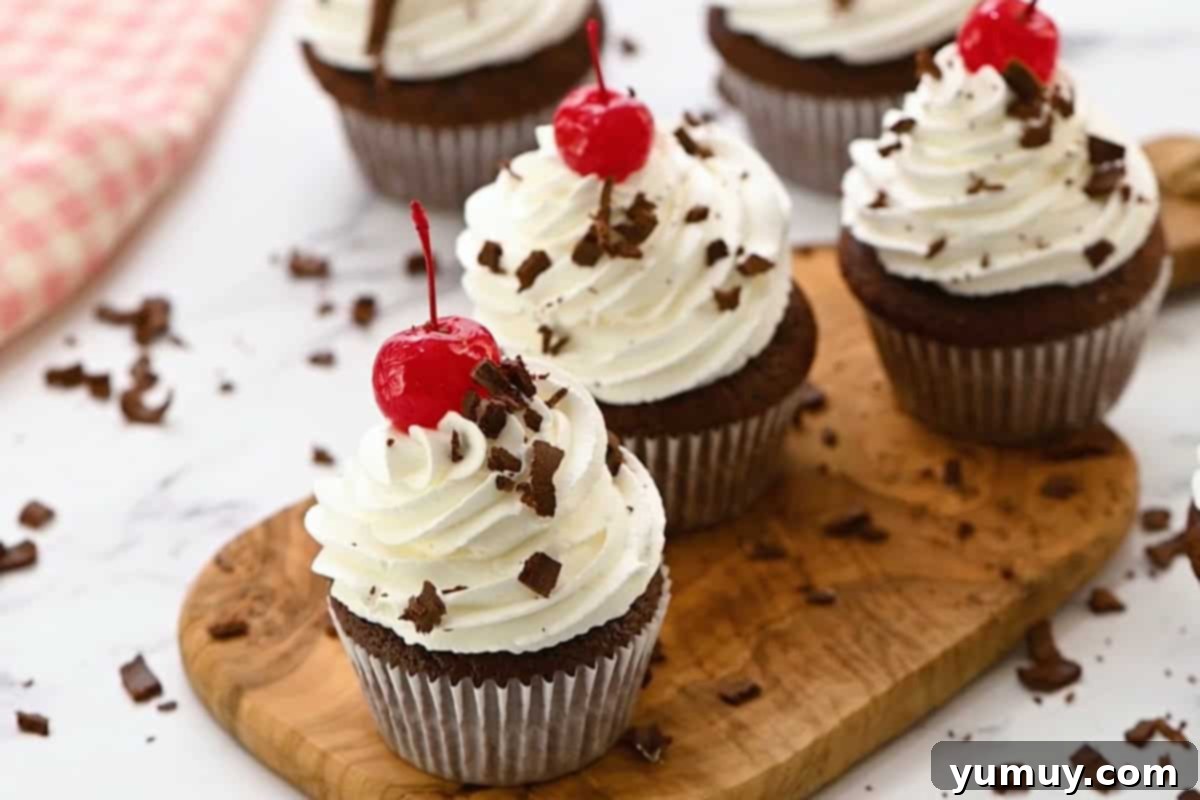
These Black Forest cupcakes with cake mix offer a truly irresistible handheld dessert experience. Each individual chocolate cupcake is carefully cored and filled with a generous scoop of luscious cherry pie filling, creating a delightful burst of fruit in every bite. They are then crowned with a graceful swirl of light and fluffy stabilized whipped cream frosting and finished with elegant chocolate shavings. For that quintessential Black Forest charm, don’t forget a vibrant cherry on top!
This recipe brilliantly marries simplicity with gourmet appeal. Starting with a basic box of chocolate cake mix streamlines the baking process, making it accessible even for novice bakers. Yet, the thoughtfully incorporated cherry filling and the expertly crafted frosting elevate these cupcakes, giving them a sophisticated, homemade taste that’s sure to impress your guests and satisfy any chocolate cherry craving. It’s the perfect balance of convenience and culinary delight.
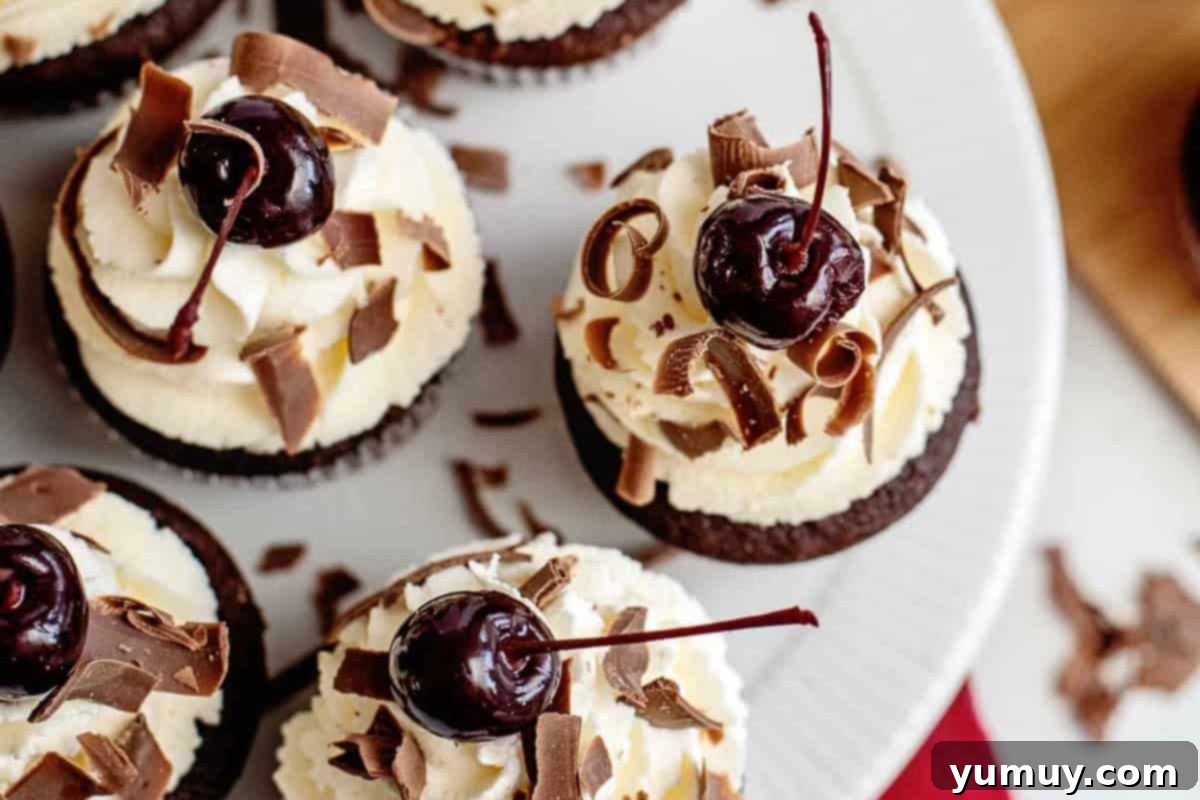
Choosing the Best Cherry Filling for Moist, Never Soggy Cupcakes
The secret to truly outstanding Black Forest cupcakes lies in selecting the perfect cherry filling. After extensive testing, we’ve discovered that commercially available canned or jarred cherry pie filling yields the most consistent and delicious results. Its ideal thickness ensures that it stays perfectly nestled within the cupcake without making the delicate cake soggy. It’s crucial to avoid overly wet cherry varieties, such as jarred Bing cherries or maraschino cherries packed in copious amounts of juice, as these can compromise the texture of your cupcakes.
If you’re opting for a homemade cherry filling, be sure to thicken it adequately to prevent any unwelcome seepage. For an added layer of authentic Black Forest flavor, consider stirring in a splash of Kirsch (cherry brandy) or a hint of almond extract into your cherry pie filling. These additions enhance the fruitiness and bring a deeper, more complex aroma that truly captures the spirit of this classic German dessert.
Black Forest Cupcakes Recipe
These Black Forest cupcakes are chocolate cherry delights made with chocolate cake mix and filled with sweet cherry pie filling. Topped with stabilized whipped cream frosting and chocolate shavings, these cherry-filled cupcakes are easy to make, shareable, and perfect for holidays, parties, or any chocolate cherry craving.
20 minutes
18 minutes
38 minutes
15 cupcakes
Share on Facebook
Save to Pinterest
Ingredients
For the Cupcakes
- 13.25 ounces chocolate cake mix (1 box)*
- 1 cup water
- ½ cup vegetable oil
- 3 large eggs
For the Filling
- 1 cup cherry pie filling
For the Frosting
- 2 cups heavy whipping cream
- ⅓ cup powdered sugar
- 3.3 ounces white chocolate instant pudding mix (1 box)
For the Toppings
- 1 chocolate bar, shaved
- 12 bing cherries, stemless and pitted (from 1 jar, or fresh)
Recipe Video
Watch how to make these decadent Black Forest Cupcakes!
Equipment
- Kitchen Scale (optional, for precision)
- 12-count Cupcake Tin
- Hand Mixer (or stand mixer)
- Piping Tip Set (e.g., Wilton 1M)
- Melon Baller or small knife (for coring cupcakes)
Instructions
For the Cupcakes
- Preheat your oven to 350°F (175°C). Line a 12-count cupcake tin with paper liners or generously spray the wells with a nonstick baking spray. Prepare your workspace and ensure all ingredients are at room temperature for best results.
- In a large mixing bowl, combine the chocolate cake mix, water, vegetable oil, and large eggs. Using a hand mixer or stand mixer on medium speed, mix until the batter is smooth and just combined. Be careful not to overmix, as this can lead to dry cupcakes.

- Evenly scoop the prepared batter into each of the cupcake liners, filling them approximately two-thirds of the way full. A cookie portion scoop or a ¼-cup measuring cup can help achieve consistent sizing.

- Bake in the preheated oven for 17-18 minutes, or until a toothpick inserted into the center of a cupcake comes out clean. Once baked, remove the cupcakes from the oven and allow them to cool completely in the tin on a wire rack before proceeding to the filling stage.

For the Filling
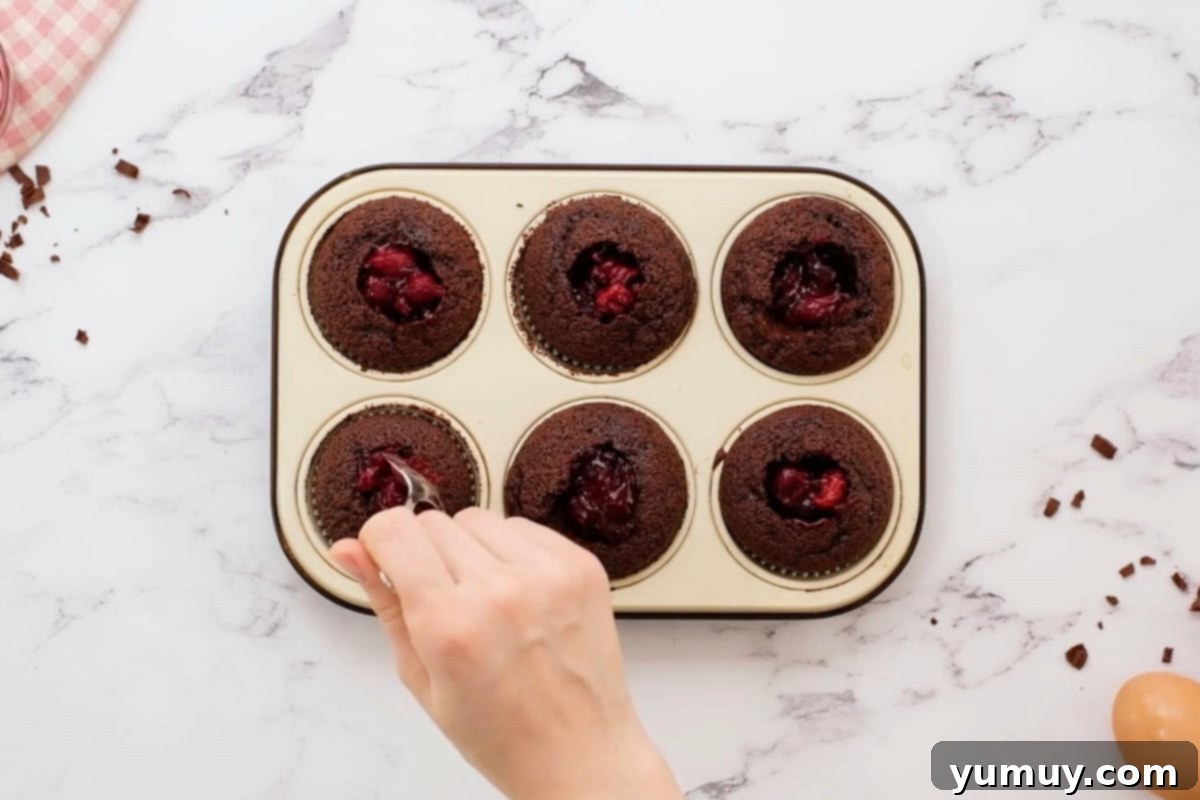
- To prepare the cupcakes for filling, use a small knife, a piping tip, or a melon baller to carefully carve out a shallow well from the center of each cooled cupcake. Be mindful not to go too deep, as the filling could potentially seep out the bottom.

- Gently fill each of the hollowed wells with the cherry pie filling. We found that each cupcake can accommodate approximately 3-4 cherries. Set the filled cupcakes aside while you prepare the frosting.

For the Frosting
- For the best results, place a stainless steel mixing bowl and your whisk attachments (for a hand mixer) into the freezer for 20-30 minutes before you begin preparing the frosting. This chilling step significantly helps the heavy cream whip faster and maintain its stability.
- Once your bowl and whisk are chilled, pour the 2 cups of heavy whipping cream into the bowl. Using a hand mixer on high speed, mix the cream just until soft peaks begin to form, typically around 2-3 minutes. It’s crucial not to overmix at this stage, as you risk turning your whipped cream into butter.

- Add the ⅓ cup of powdered sugar to the whipped cream. Continue mixing on medium-high speed until the sugar is fully incorporated and the mixture just starts to thicken, but still remains soft. This should take about 1 minute.
- Finally, add the 3.3 ounces (1 box) of white chocolate instant pudding mix to the bowl. Continue mixing on a low speed for an additional 30 seconds, just until the pudding mix is completely combined and the frosting achieves a stable, pipeable consistency. Again, be cautious not to overmix, as the frosting can curdle quickly once the pudding is added.

- Scoop the stabilized whipped cream frosting into a piping bag fitted with your favorite decorating tip (we recommend a Wilton 1M for a beautiful swirl). Frost the cupcakes as desired, creating elegant peaks or swirls. For the chocolate shavings, use a vegetable peeler to gently shave curls off the side of a standard chocolate bar. Garnish each cupcake with these shavings and a whole bing or maraschino cherry for a stunning presentation.

- Serve immediately and enjoy your homemade Black Forest cupcakes!

Notes & Expert Tips
*You have excellent flexibility when choosing your chocolate cake mix. Dark chocolate, German chocolate, or even devil’s food cake mixes work wonderfully to create different depths of chocolate flavor. Experiment to find your favorite!
Tips for Success:
- For perfectly uniform cupcakes, use a cookie portion scoop to evenly divide the batter into each liner. This ensures even baking and consistent size.
- When coring the cupcakes, a melon baller is a fantastic tool as it helps you control the depth, preventing the filling from oozing out the bottom. If you scoop too far, the cupcake structure can be compromised.
- To infuse an authentic Black Forest essence, consider stirring a small splash of Kirsch (cherry liqueur) or almond liqueur directly into your cherry pie filling before using it. This subtle addition elevates the flavor profile significantly.
- Ensure your cupcakes are at room temperature before filling them. If they are too cold, the cherry filling won’t subtly soak into the crumb; if they’re too warm, the filling can cause the cake to become too soft or even melt.
- Chilling your mixing bowl and whisk attachments in the freezer for 20-30 minutes before whipping the cream is a game-changer. It helps the heavy cream whip up faster and maintain its stiff, stable peaks for a longer duration, especially beneficial in warmer kitchens.
- Once you add the instant pudding mix to the frosting, mix on a low speed and be careful not to overmix. Whipped cream, especially stabilized versions, can quickly curdle if agitated excessively after the stabilizers are added. Stop as soon as it’s combined and firm.
- Use the frosting immediately after preparing it. Stabilized whipped cream tends to thicken as it sits, making it more challenging to pipe smoothly.
- If you don’t have a piping tip, a sturdy Ziplock bag with one corner snipped off makes for an excellent impromptu piping bag. The Wilton 1M tip is a classic choice for beautiful swirls.
Make-Ahead & Storage:
- Make-Ahead: The cupcake bases can be baked up to 3 days in advance and stored at room temperature in an airtight container. You can fill them up to 2 days ahead, storing them refrigerated. For best results, frost them no more than 1 day ahead, also refrigerated.
- Storage: Store fully assembled Black Forest cupcakes in an airtight container in the refrigerator for up to 2 days. Beyond this timeframe, the delicate whipped cream frosting may begin to deflate.
- Freezing: For longer storage, freeze the unfilled and unfrosted cupcakes for up to 3 months. Allow them to cool completely after baking, then transfer them to a freezer-safe container. Thaw them at room temperature before coring, filling, and frosting.
Calories from Fat 234
Becky Hardin
Did You Make This?
We love seeing what you’ve made! Tag us on social media at
@easydessertrecipes
for a chance to be featured.
How to Make Black Forest Cupcakes with Cake Mix: A Detailed Step-by-Step Guide
Creating these delightful Black Forest cupcakes is a straightforward process, even for beginners, thanks to the convenience of a cake mix. Follow these steps for perfect results every time:
Step 1: Prepare the Cupcake Batter
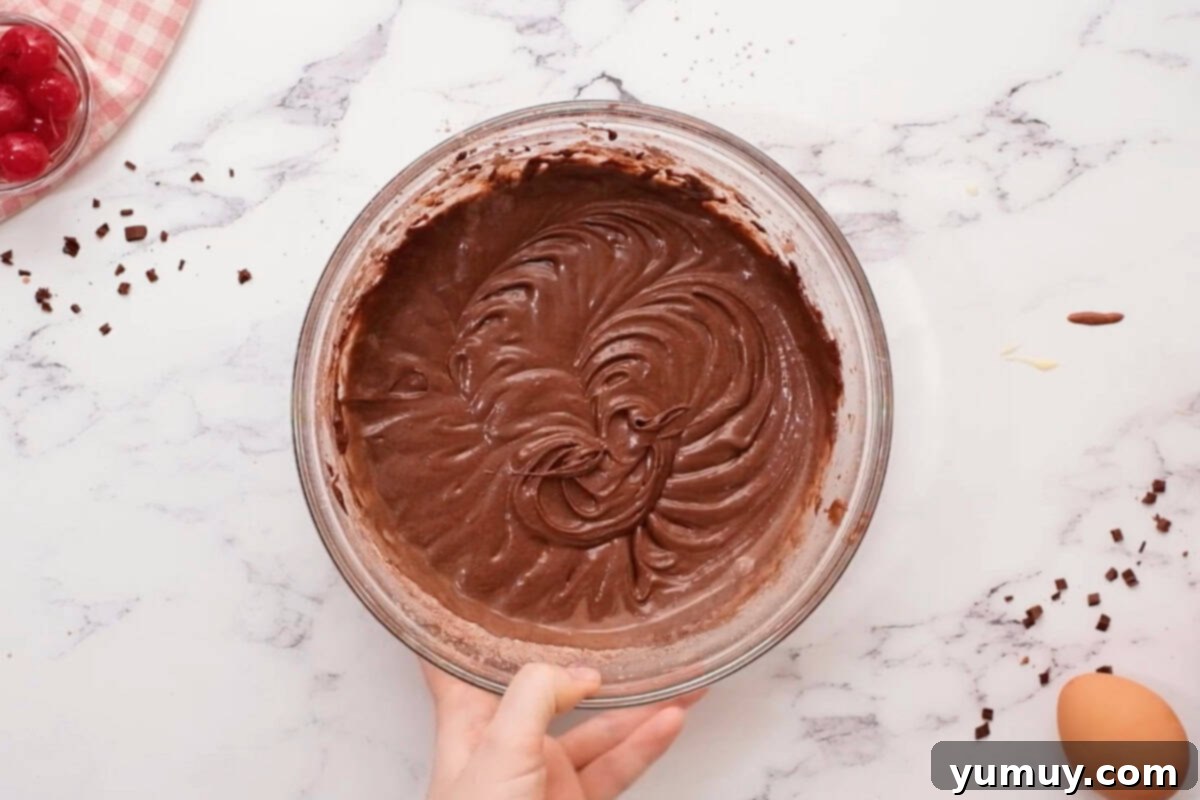
Begin by preheating your oven to 350°F (175°C). Line a standard 12-count cupcake tin with paper liners, or generously spray each well with a nonstick baking spray to ensure easy removal. In a large mixing bowl, combine the contents of a 13.25-ounce box of chocolate cake mix with 1 cup of water, ½ cup of vegetable oil, and 3 large eggs. Mix these ingredients together using a hand mixer or a stand mixer on medium speed until the batter is smooth and well combined. It’s crucial to mix just until smooth; overmixing can develop the gluten too much, resulting in a dry and tough cupcake texture. Set the perfectly mixed batter aside briefly.
Step 2: Bake the Cupcakes to Perfection
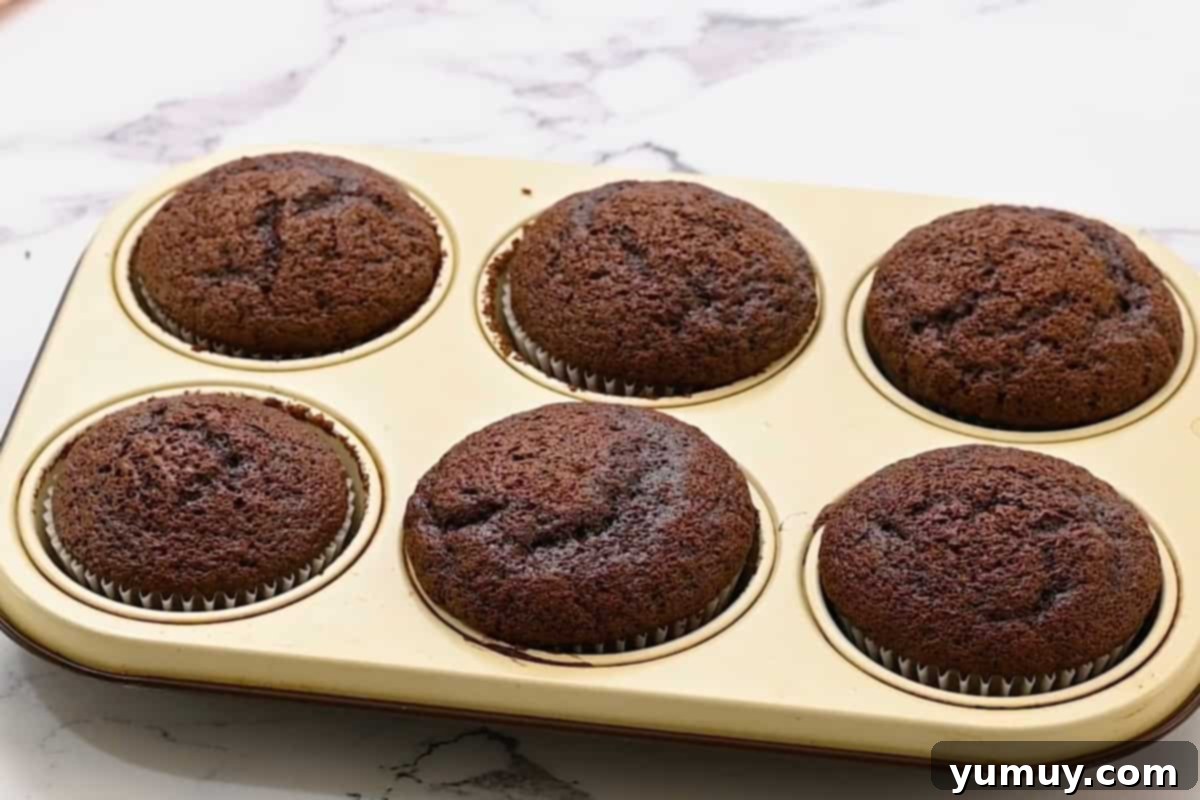
Once your batter is ready, carefully scoop it into each of the prepared cupcake liners, filling them approximately two-thirds of the way full. For uniform cupcakes that bake evenly, we recommend using a cookie portion scoop or a ¼-cup measuring cup. Place the filled cupcake tin into your preheated oven and bake for 17-18 minutes. To check for doneness, insert a toothpick into the center of a cupcake; it should come out clean. As soon as they are baked, remove the cupcakes from the oven and allow them to cool completely in the tin on a wire rack. Cooling completely is vital before moving on, as warm cupcakes can absorb too much filling or cause frosting to melt.
Step 3: Fill Your Cupcakes with Cherry Delight
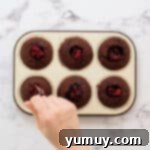
Now for the iconic cherry filling! To create the perfect reservoir, use a small, sharp knife, a wide piping tip, or a melon baller to carefully carve out a shallow well from the center of each cooled cupcake. The goal is to remove a small core of cake, leaving enough cake at the bottom to hold the filling securely. Be careful not to go too deep, or your delicious cherry filling might make a mess by seeping through the bottom. Once cored, generously fill each well with a small amount of the 1 cup of cherry pie filling. You’ll find that each cupcake can comfortably accommodate about 3-4 cherries within its core. Set these delightful, filled cupcakes aside while you prepare the luscious frosting.
Step 4: Achieve Perfectly Whipped Cream
To ensure your whipped cream frosting is light, airy, and stable, start by placing a stainless steel mixing bowl and your whisk attachments into the freezer for 20-30 minutes. This chilling process is key to achieving optimal volume and stability. Once your equipment is thoroughly chilled, pour 2 cups of cold heavy whipping cream into the bowl. Using a hand mixer (or stand mixer with a whisk attachment) on high speed, whip the cream just until soft peaks begin to form. This usually takes about 2-3 minutes. It’s crucial to watch it closely and avoid overmixing at this stage, as continued whipping will turn your cream into butter. The goal is a light, billowy consistency.
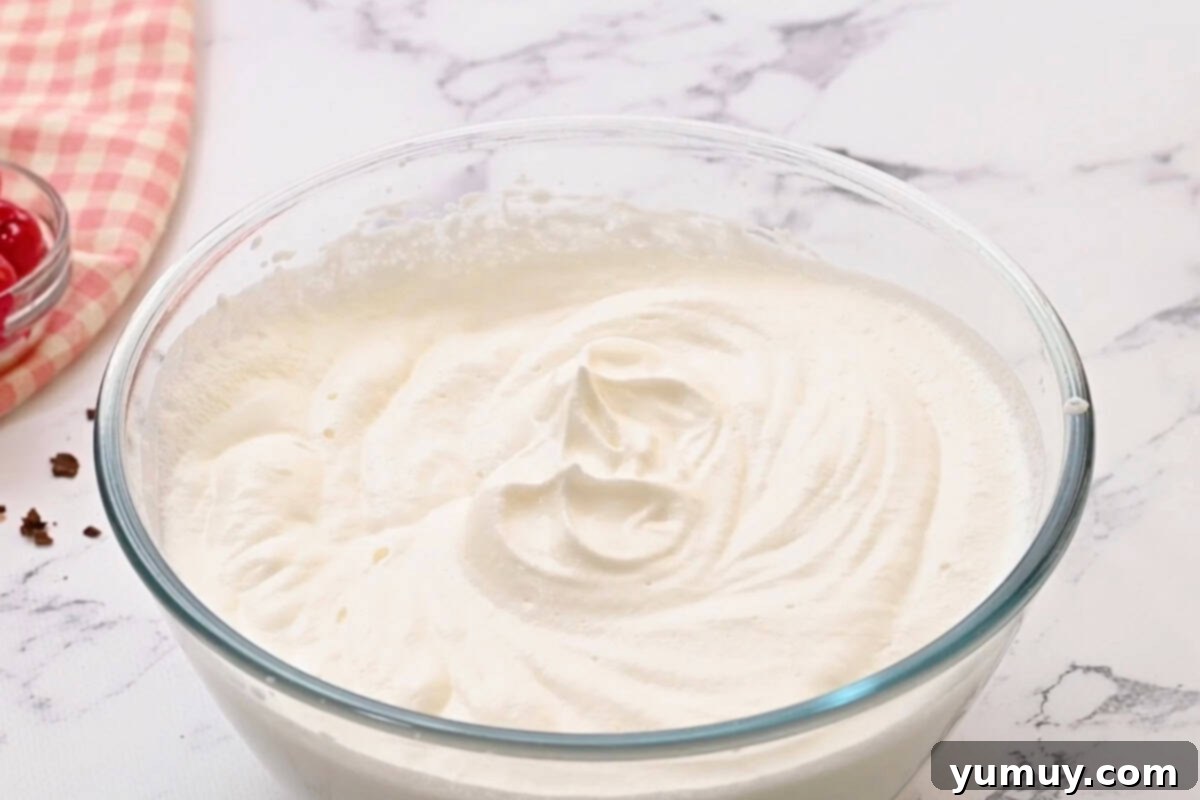
Step 5: Stabilize Your Whipped Cream for Lasting Beauty
Once you have soft peaks, gently add ⅓ cup of powdered sugar to the whipped cream. Continue mixing on medium-high speed until the sugar is fully incorporated and the cream starts to thicken slightly, reaching a point just before stiff peaks form (approximately 1 minute). Next, add a 3.3-ounce box of white chocolate instant pudding mix. Reduce the mixer speed to low and continue mixing for just another 30 seconds, or until the pudding mix is completely combined and the frosting appears uniform and stable. Exercise caution here and do not overmix, as adding the pudding can cause the frosting to curdle very quickly if over-agitated. This quick, gentle mixing ensures a perfectly stabilized, pipeable frosting that will hold its shape beautifully.
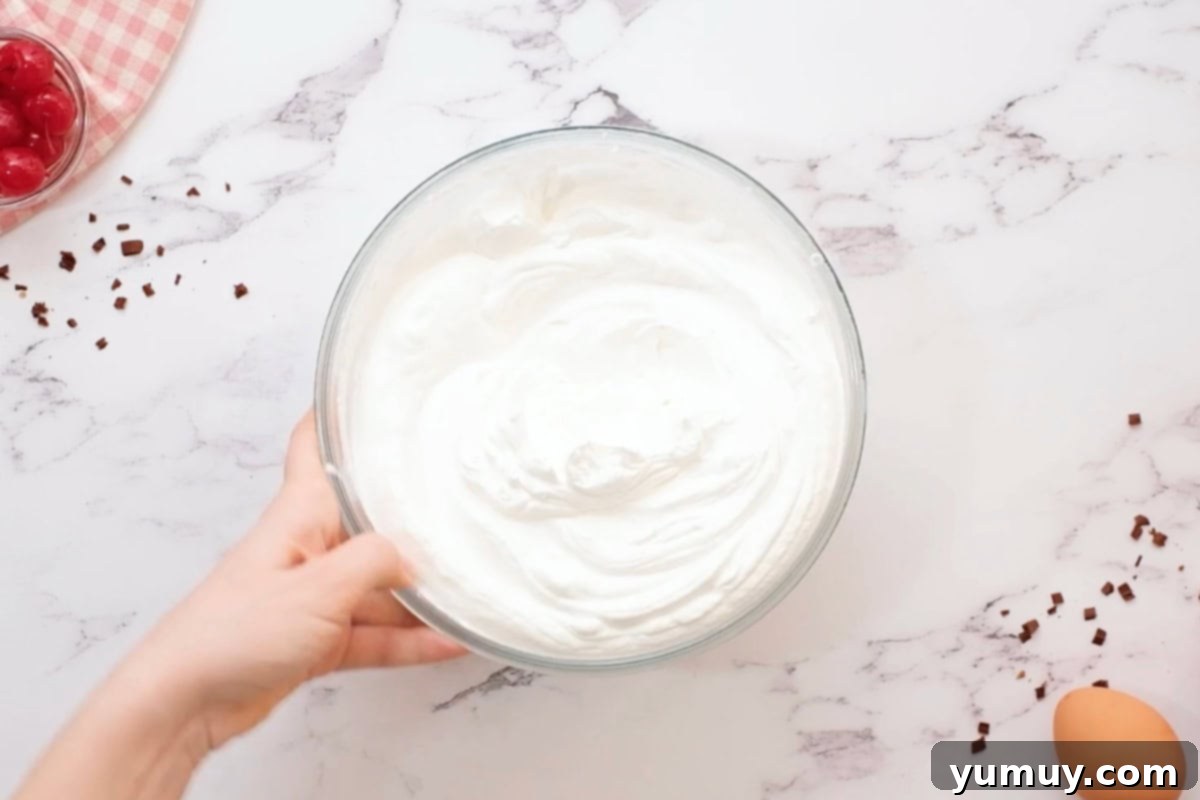
Step 6: Frost and Garnish Your Black Forest Masterpieces
With your stabilized whipped cream frosting ready, scoop it into a piping bag fitted with your favorite decorating tip. A Wilton 1M tip is highly recommended for creating those classic, elegant swirls, but if you’re in a pinch, a sturdy Ziplock bag with one corner snipped off works remarkably well. Frost the cooled and filled cupcakes as desired, letting your creativity shine. For the traditional chocolate shavings, take a vegetable peeler and gently run it along the side of a chocolate bar to create delicate curls. Finally, crown each cupcake with these beautiful chocolate shavings and a vibrant bing or maraschino cherry. Your stunning Black Forest cupcakes are now ready to be admired and devoured!
Make Ahead & Storage Tips for Black Forest Cupcakes
Planning ahead for your next event or simply want to enjoy these delightful treats over several days? Here’s how to store and freeze your Black Forest cupcakes to maintain their freshness and flavor:
- Make Ahead: The plain, unfrosted, and unfilled chocolate cupcakes can be baked up to 3 days in advance. Store them in an airtight container at room temperature. The cupcakes can be cored and filled with cherry pie filling up to 2 days ahead, but once filled, they should be refrigerated. For the freshest taste and appearance, it’s best to frost the cupcakes no more than 1 day before serving, also storing them in the refrigerator.
- Storage: Fully assembled Black Forest cupcakes, with their cherry filling and whipped cream frosting, should be stored in an airtight container in the refrigerator. They will remain wonderfully fresh for up to 2 days. Beyond this period, the delicate stabilized whipped cream frosting may begin to lose its volume and integrity.
- Freezing: If you’re looking to extend their shelf life significantly, you can freeze the unfrosted and unfilled cupcake bases for up to 3 months. Ensure they are completely cooled after baking before transferring them to a freezer-safe container or bag. When you’re ready to enjoy them, simply thaw the cupcakes at room temperature, then proceed with coring, filling, and frosting as per the recipe instructions. This method allows for a quick assembly of fresh-tasting cupcakes whenever a craving strikes!
Frequently Asked Questions (FAQs)
- Can I use a different type of cherry for the filling?
- While cherry pie filling is recommended for its thickness and flavor, if using fresh or frozen cherries, ensure they are pitted and cooked down with a thickener (like cornstarch) to prevent excess moisture from making the cupcakes soggy. Avoid overly wet canned or jarred cherries packed in juice.
- My whipped cream isn’t stiffening. What went wrong?
- Ensure your heavy cream, mixing bowl, and whisk attachments are very cold. Also, make sure you’re using “heavy whipping cream” (which has at least 36% milk fat) and not just “whipping cream” (which has less fat). Overmixing before adding the pudding can also lead to issues, or insufficient mixing if not chilled properly.
- Can I make these cupcakes gluten-free?
- Yes, you can often find gluten-free chocolate cake mixes. Just follow the package instructions for the cake mix and proceed with the filling and frosting steps as usual. Always double-check ingredient labels for hidden gluten.
- What’s the purpose of the instant pudding mix in the frosting?
- The instant pudding mix acts as a stabilizer for the whipped cream. It helps the frosting hold its shape for longer periods, preventing it from deflating quickly, especially in warmer environments. It also adds a subtle flavor dimension.
- How can I make my chocolate shavings look professional?
- For beautiful chocolate curls, use a good quality chocolate bar (not chocolate chips, which are formulated to hold shape). Let the chocolate come to room temperature briefly, then hold it firmly and scrape the flat side with a vegetable peeler at a slight angle. The warmth of your hand can help create softer curls.
Explore More Delightful Cupcake Recipes!
Chocolate Chip Cupcakes
Orange Creamsicle Cupcakes
Lemon Cupcakes with Lemon Whipped Cream Frosting
Berry Cupcakes
View All Cupcake Recipes
