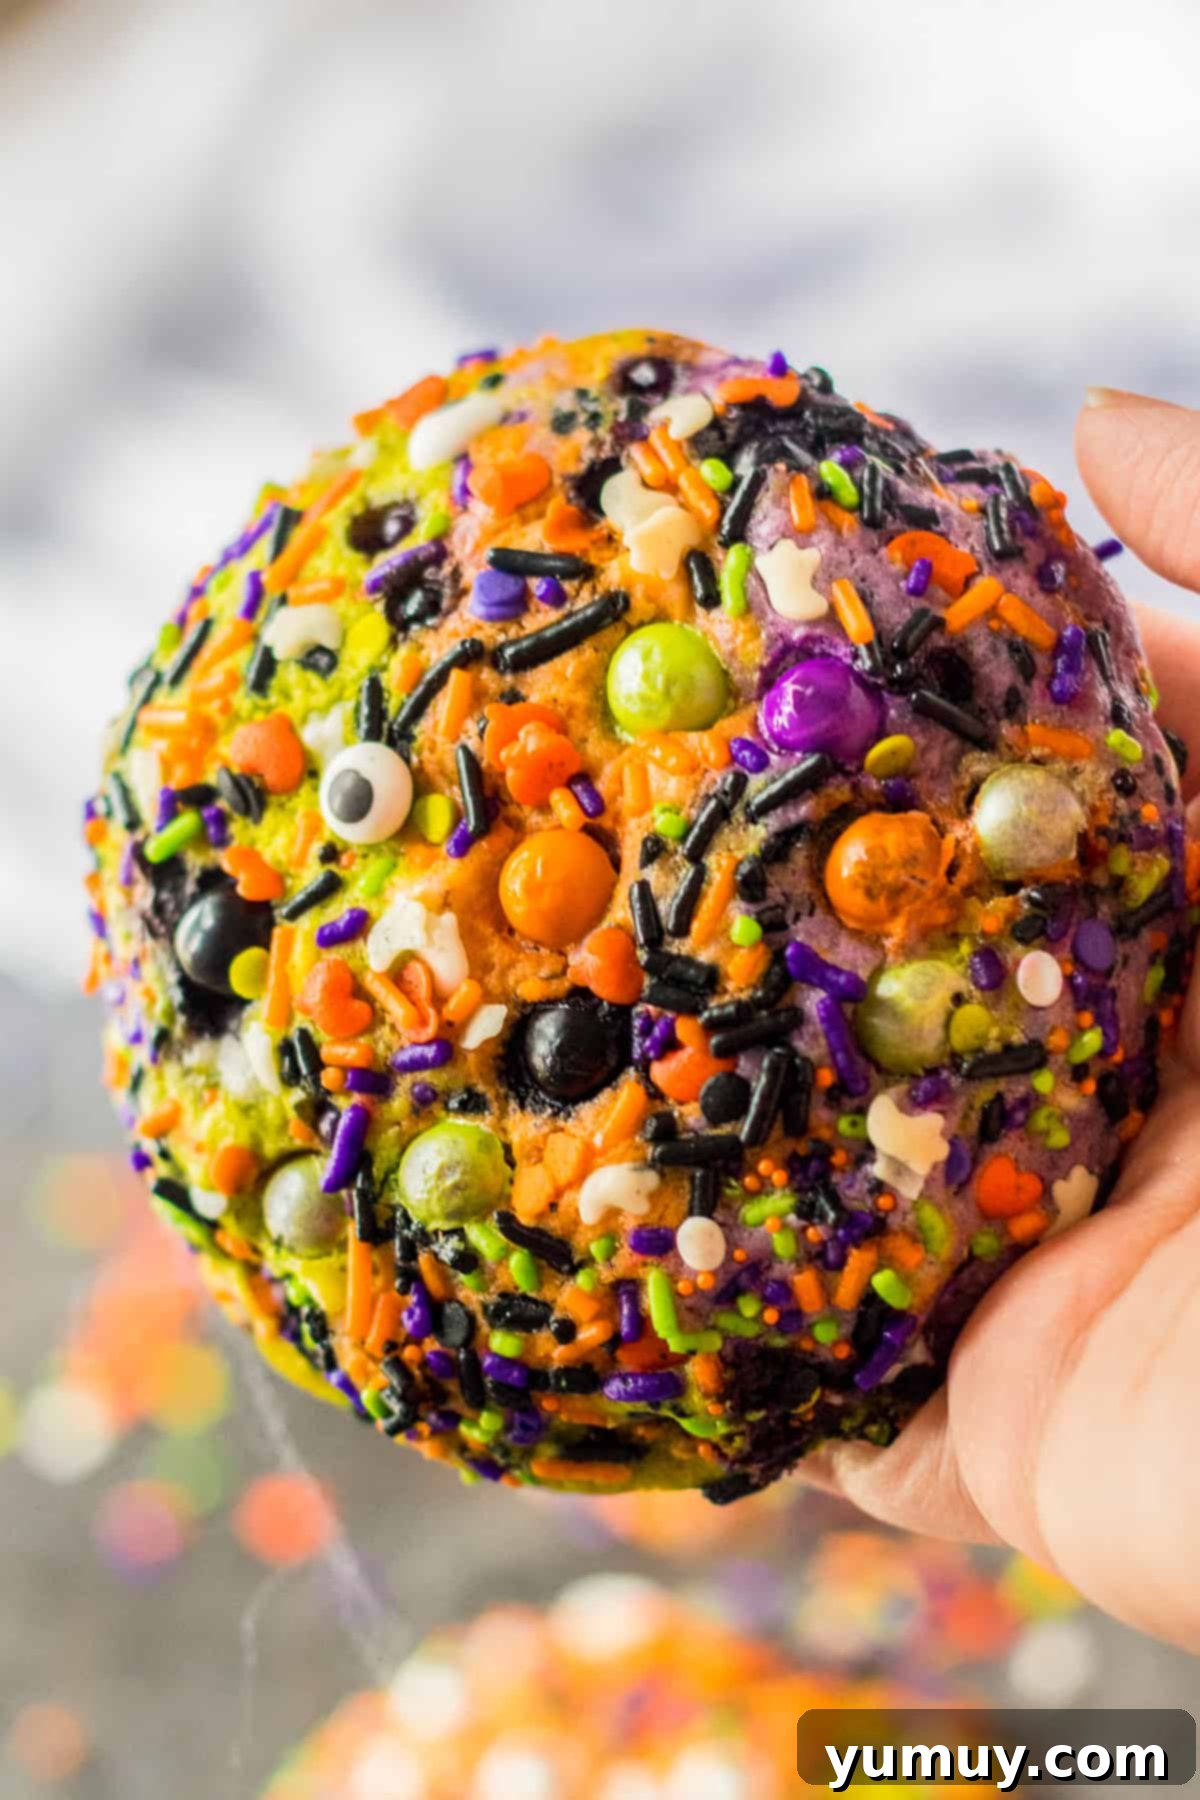
Get ready for the most enchanting time of year with a batch of these extraordinary Halloween sprinkle cookies! These delightful treats are an absolute showstopper, boasting vibrant marbled colors and a satisfying crunch from festive sprinkles. Forget complicated decorating techniques; this recipe makes it incredibly simple to achieve a visually stunning dessert that tastes as amazing as it looks. Whether you’re a seasoned baker or just starting out, these easy Halloween cookies are designed for fun in the kitchen, making them perfect for family activities and creating unforgettable spooky season memories.
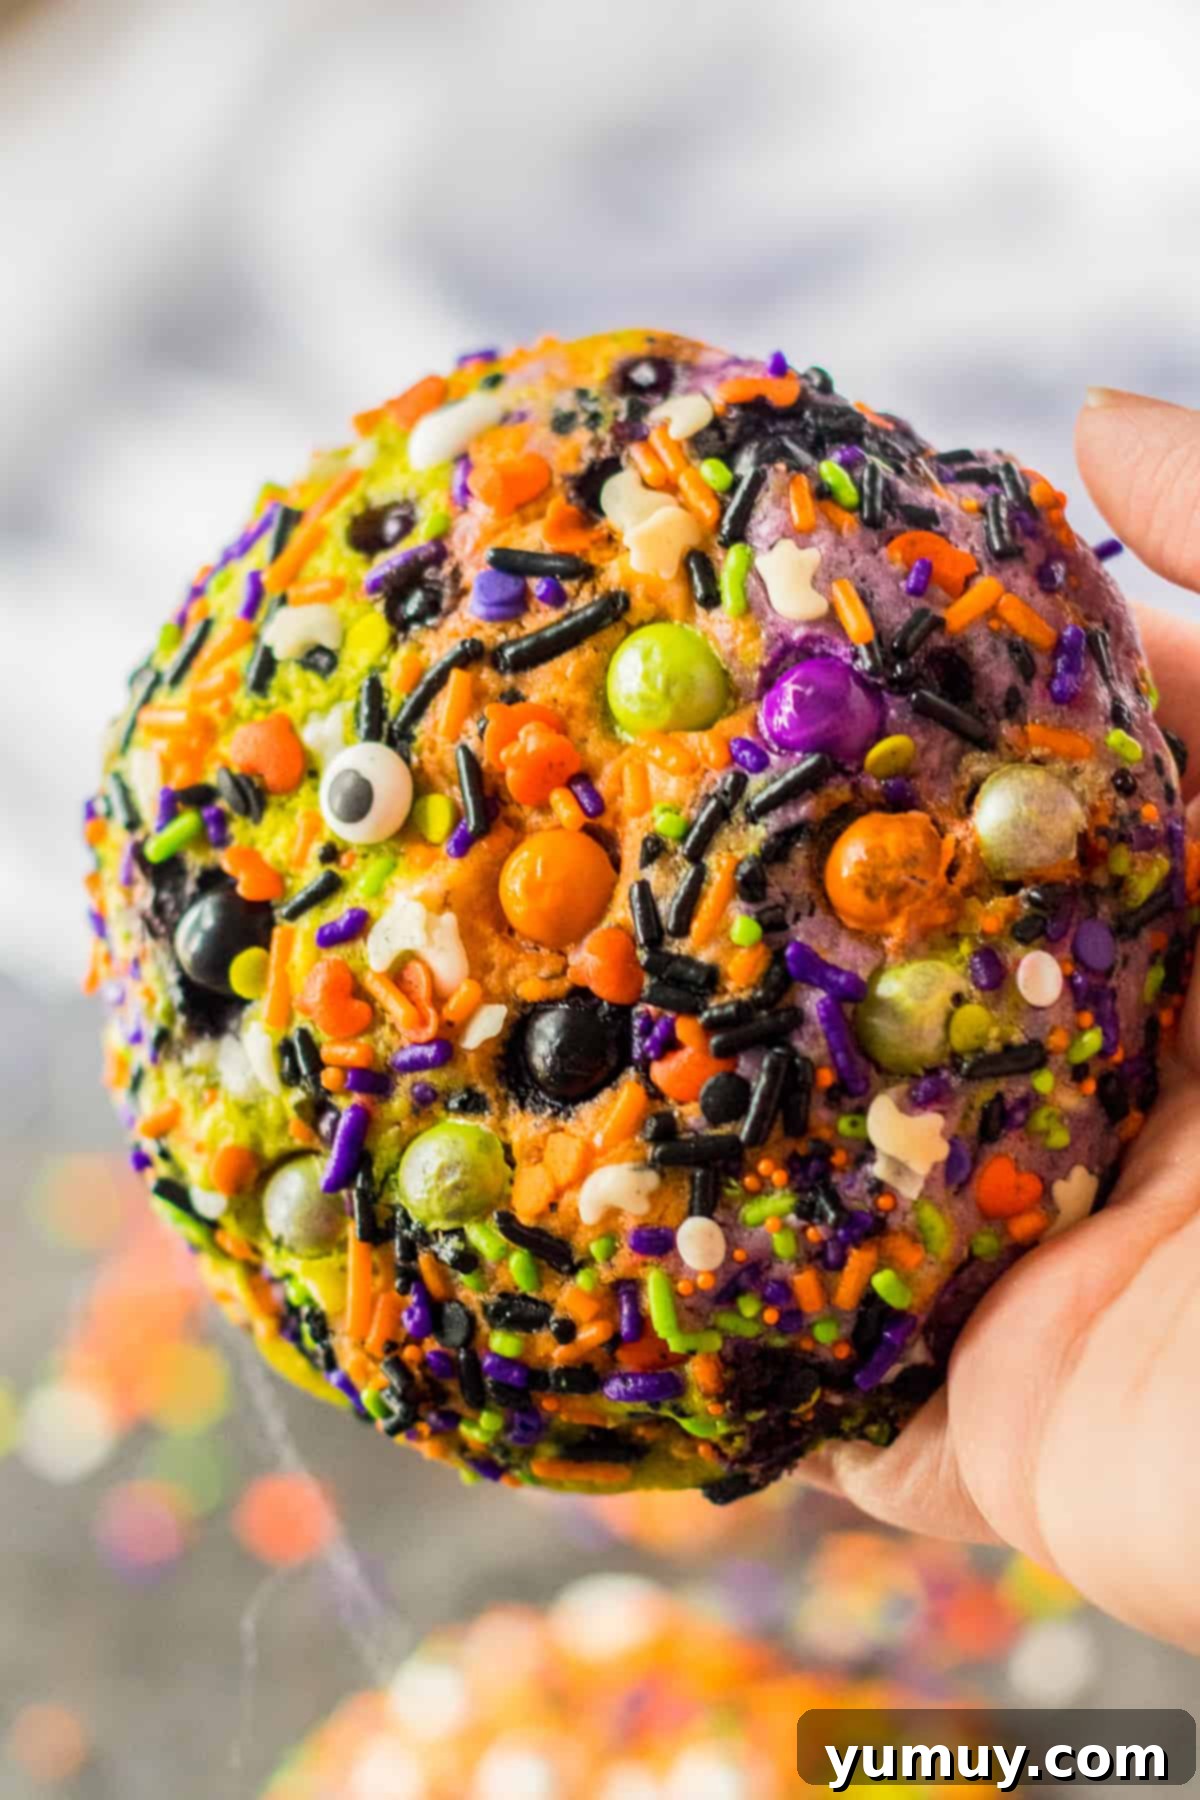
Unleash the Spooky Fun with Marbled Halloween Sugar Cookies and Sprinkles
Imagine cookies so captivating, they practically decorate themselves! Our Halloween sugar cookies with sprinkles are truly magical, turning simple ingredients into a dazzling display of spooky charm. The secret lies in our custom marbled sugar cookie dough, which, when combined with a generous roll in a mix of crunchy Halloween sprinkles, eliminates the need for any fussy icing or piping bags. Each bite offers a beautiful swirl of color, a comforting sweetness, and a delightful texture. These giant, festive cookies are not just visually appealing; they also feature delightful pockets of sweet white chocolate chips, adding another layer of flavor and indulgence. They bake up perfectly, delivering a satisfying crunch from the sprinkles and a tender, chewy center.
Beyond being incredibly delicious, making these cookies is an experience in itself. Kids absolutely adore helping with the kneading, rolling, and swirling, transforming the kitchen into a hub of creative activity. This recipe isn’t just about baking; it’s about making memories, making it a perfect addition to your list of kid-friendly Halloween baking traditions. Get ready to impress everyone with these deceptively easy-to-make and even more fun-to-eat spooky treats!
The Secret to Success: Chilling for Vibrant Colors and Perfect Crunch
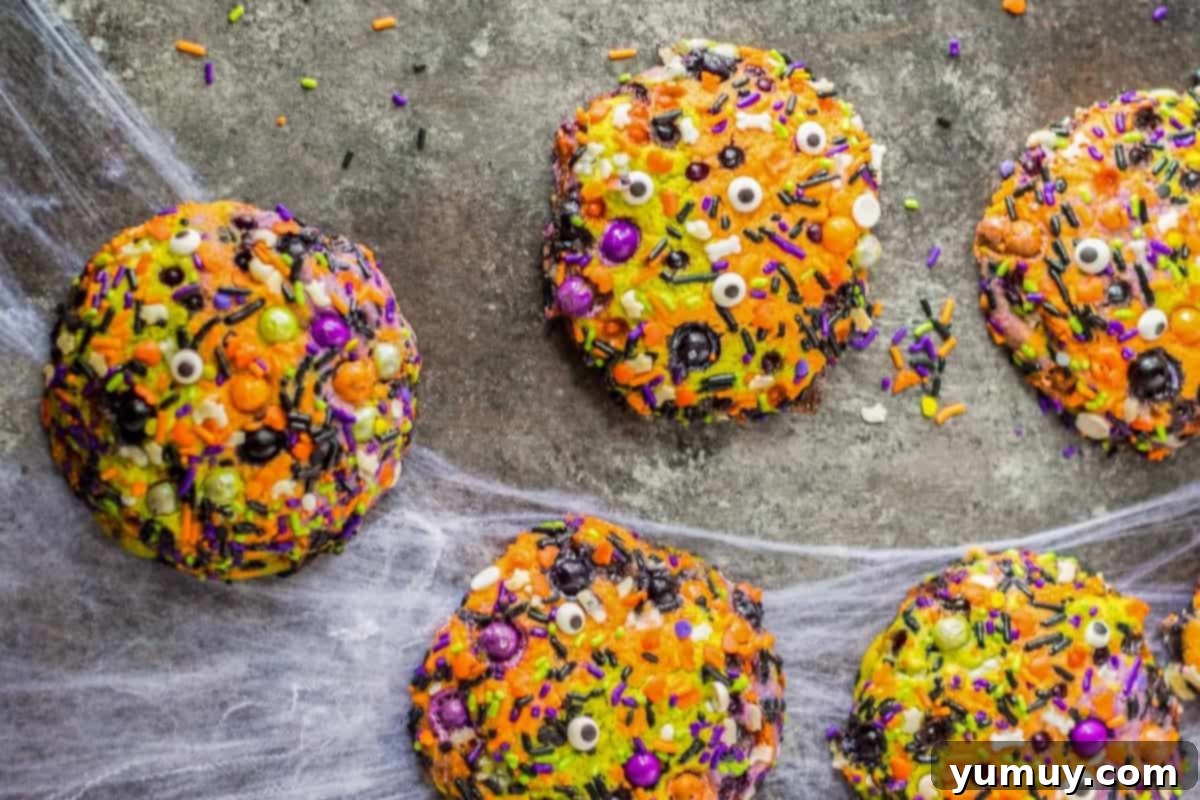
One of the most crucial steps to achieving flawless Halloween sprinkle cookies is a quick chill before baking. After you’ve rolled your beautifully marbled cookie dough in the festive Halloween sprinkles, resist the urge to pop them straight into the oven. Instead, place the dough balls into the freezer for a brief 10-15 minutes, or in the refrigerator for at least 30 minutes, as stated in the full recipe. This seemingly small step plays a huge role in the final outcome. The cold temperature helps to firm up the butter in the dough, which in turn prevents the cookies from spreading too rapidly in the oven. More importantly, it safeguards your vibrant sprinkles from melting or bleeding into the dough, ensuring that your marbled colors remain bold, distinct, and eye-catching through the entire baking process. The chill also contributes to a wonderfully chewy texture and keeps the sprinkles crisp, adding that satisfying crunch to every bite of your spooky Halloween cookies. This simple technique elevates your homemade Halloween cookies from good to absolutely glorious!
Irresistible Halloween Sprinkle Cookies Recipe
20
18
1
8
30
6 large cookies
Ingredients
- ½ cup salted butter room temperature (1 stick)
- ¾ cup brown sugar
- ¼ cup granulated sugar
- 1 large egg room temperature
- 1 teaspoon pure vanilla extract
- 2 cups all-purpose flour
- ½ teaspoon baking powder
- ½ cup white chocolate chips
- Food coloring neon green, orange, and purple (gel recommended for best results)
- Halloween sprinkles (or a mix of black, orange, and purple)
Equipment
- Kitchen Scale (optional, for precision)
- Hand Mixer (or stand mixer with paddle attachment)
- Large Mixing Bowls
- Baking Sheet
- Parchment Paper or Silicone Baking Mat
Instructions
- Cream Wet Ingredients: In a large mixing bowl, use a hand mixer to cream together the room-temperature salted butter, brown sugar, and granulated sugar until the mixture is light and fluffy. This usually takes about 2-3 minutes of beating. Ensure the butter is truly softened for the best creamy consistency.½ cup salted butter,
¾ cup brown sugar,
¼ cup granulated sugar - Add Egg and Vanilla: Beat in the large room-temperature egg and the pure vanilla extract until fully incorporated. Take a moment to scrape down the sides of the bowl with a spatula to ensure all ingredients are well mixed and there are no hidden pockets of uncombined batter.1 large egg,
1 teaspoon pure vanilla extract - Combine Dry Ingredients: Gradually add the all-purpose flour and baking powder to the wet mixture. Mix on the lowest speed setting of your mixer until the ingredients are just combined. It’s important not to overmix at this stage; the dough will appear quite crumbly, almost like wet sand. This texture is absolutely normal and expected for these cookies.2 cups all-purpose flour,
½ teaspoon baking powder - Fold in Chocolate Chips: Gently stir in the white chocolate chips using a spatula. Mix just enough to ensure they are evenly distributed throughout the crumbly dough. These little pockets of white chocolate will add a delicious melty surprise to your baked cookies.½ cup white chocolate chips

- Color the Dough: Divide the cookie dough into 3 equal portions. For precision, use a kitchen scale to aim for approximately 234 grams of dough in each bowl. To each separate portion, add a different color of food coloring. Neon green, bright orange, and deep purple gel food coloring are highly recommended for vivid results. Mix each portion individually until the color is completely uniform. As you work the coloring in, you’ll find the crumbly dough magically transforms into a softer, more pliable consistency.Food coloring

- Marble and Form Cookies: Now for the creative part! Take a small, roughly equal piece from each of the three different colored doughs (approximately 39 grams of each color if using a scale for consistent cookie sizes). Gently bring these three pieces together and lightly roll them in your palms to form a single, cohesive ball. The goal is to create a beautiful, natural swirl, so avoid overworking the dough to keep the distinct color streaks visible. Repeat this process until you have 6 generously sized cookie dough balls.

- Roll in Sprinkles & Chill: Pour your chosen Halloween sprinkles onto a shallow plate or into a wide bowl. Roll the top and sides of each cookie dough ball generously in the sprinkles, ensuring they are well coated for maximum visual impact and crunch. Once coated, place the cookies onto a greased baking sheet (or one lined with parchment paper or a silicone baking mat). Now, for the crucial chilling step: refrigerate the cookie dough balls for a minimum of 30 minutes. This period is essential; it helps prevent the cookies from spreading excessively in the oven and, most importantly, keeps those colorful sprinkles from melting or bleeding into your vibrant dough during baking.Halloween sprinkles

- Preheat Oven: While your perfectly prepared cookies are chilling, preheat your oven to 375°F (190°C). This ensures the oven is at the correct temperature when the cookies go in, promoting even baking.
- Bake: Transfer your chilled, sprinkle-coated dough balls to the preheated oven and bake for approximately 18 minutes. Keep a close watch: the cookies are typically done when their edges are lightly golden and the centers still appear slightly soft. Baking times can vary by oven, so trust your judgment.
- Add More Sprinkles (Optional): Immediately after removing the cookies from the oven, if you notice any spots that appear sparse on sprinkles, this is your golden opportunity! Gently press a few more sprinkles onto the hot cookie surface; the residual heat will help them adhere perfectly, enhancing the festive look.
- Cool: Allow the baked cookies to cool on the baking sheet for a solid 5 minutes before carefully transferring them to a wire rack to cool completely. This crucial cooling period on the tray allows the cookies to set properly and prevents them from breaking apart when moved.
Notes & Expert Tips for Perfect Halloween Sprinkle Cookies
Essential Tips for Best Results:
- Dough Consistency Matters: Don’t be alarmed if the dough appears quite crumbly after you’ve mixed in the dry ingredients. This is a normal stage in the process. It will come together and become much smoother and more pliable once you incorporate the food coloring and knead it fully into each portion.
- Opt for Gel Food Coloring: For the most vibrant and intense colors without compromising the dough’s consistency, always opt for high-quality gel food coloring. Start with a small amount (a toothpick’s worth) and gradually add more until you reach your desired shade. Knead it fully into each dough portion to ensure uniform color. Gel colors prevent overhydrating the dough, which is a common issue with liquid food colorings and can lead to excessive spreading and colors bleeding into each other during baking.
- Consider Cookie Size: This particular recipe is meticulously designed to yield 6 generously oversized cookies, perfect for making a big statement at any Halloween gathering. If you prefer smaller, more conventional cookie sizes, you’ll need to adjust the baking time accordingly. Smaller cookies will naturally bake faster, so start checking for doneness a few minutes earlier to prevent over-baking.
- The “Test” Cookie Method: Every oven is unique, and surprisingly, the type of sprinkles used can subtly affect how much a cookie spreads. To ensure a perfect batch every time, consider baking just one “test” cookie first. This allows you to observe its behavior – how much it spreads, how quickly it browns, and how well the sprinkles hold up. You can then make any necessary minor adjustments to your chilling time or baking time for the rest of the batch, guaranteeing consistent, beautiful results.
- Cooling Patience is Key: It’s tempting to move freshly baked cookies immediately, but for these large, soft-centered delights, patience is a virtue. Let your cookies sit undisturbed on the baking sheet for at least 5 minutes after removing them from the oven. This crucial resting period allows them to firm up slightly, preventing them from falling apart when you transfer them to a cooling rack.
- Sprinkle Touch-Ups: For that extra professional and visually appealing touch, keep a small bowl of extra Halloween sprinkles handy. If you notice any areas on your cookies that look a bit bare or dull after baking, gently press a few more sprinkles onto the hot surface. The residual heat will help them adhere perfectly, instantly enhancing the cookie’s festive appearance.
Storage: To maintain optimal freshness and flavor, store your delicious Halloween sprinkle cookies in an airtight container at room temperature for up to 3 days. For longer enjoyment, they can be kept in the refrigerator for up to 5 days, or securely wrapped and frozen for up to 1 month. If frozen, let them thaw overnight in the refrigerator before bringing them to room temperature and enjoying. They can also be gently reheated in a microwave for a few seconds if you prefer them warm.
Calories from Fat 189
Becky Hardin
A Detailed Guide: Crafting Your Spooktacular Halloween Sprinkle Cookies
Follow these enhanced step-by-step instructions to ensure your homemade Halloween cookies turn out perfectly marbled, beautifully sprinkled, and utterly delicious. Precision and patience are your best friends in creating these festive treats! Each step is detailed to guide you through making these visually impressive yet easy Halloween sprinkle cookies.
Step 1: Preparing the Rich Cookie Dough Foundation
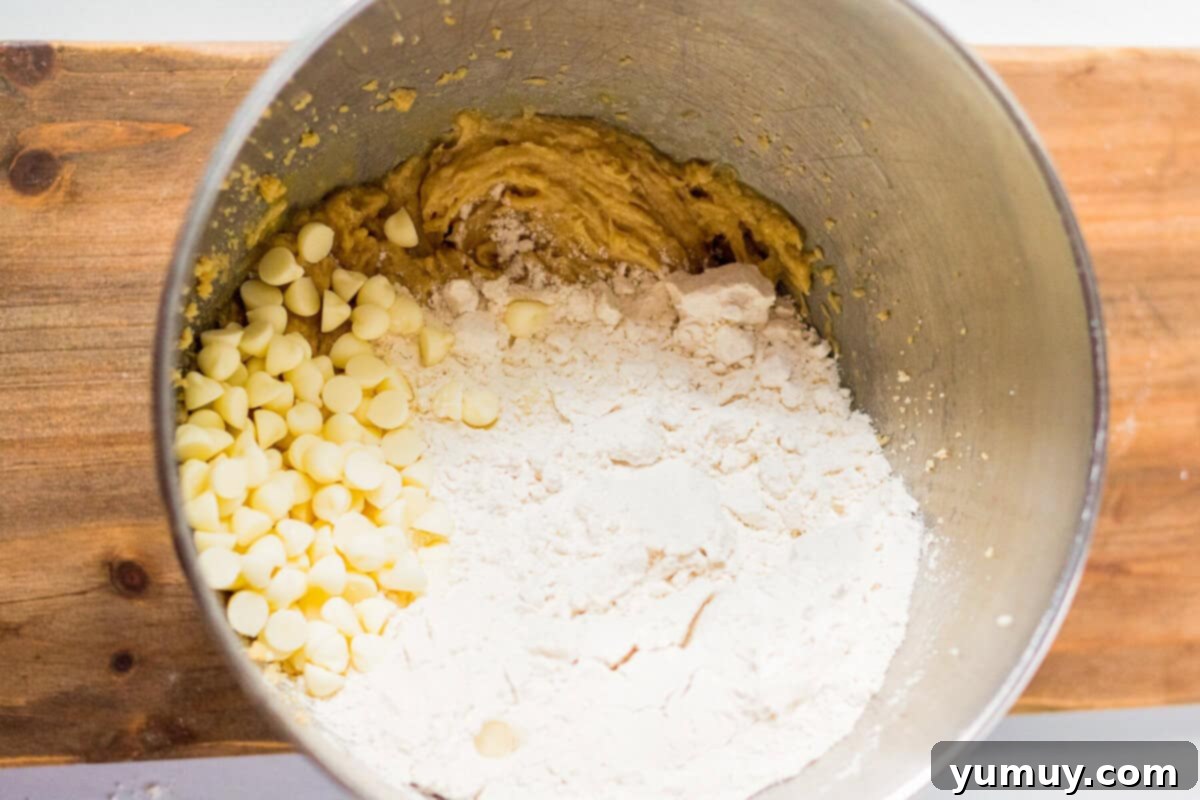
Begin by setting the stage for your delightful cookies. In a spacious mixing bowl, introduce ½ cup of room-temperature salted butter. The “room temperature” part is vital here, as it allows the butter to cream smoothly with the sugars, creating an airy and consistent base. Add ¾ cup of brown sugar (for chewiness and moisture) and ¼ cup of granulated sugar (for crispness and sweetness). Using a hand mixer (or a stand mixer fitted with the paddle attachment), beat these ingredients together until the mixture is light, fluffy, and noticeably paler in color. This process typically takes about 2-3 minutes. Next, incorporate 1 large room-temperature egg and 1 teaspoon of pure vanilla extract. Beat until the egg is fully integrated, and scrape down the sides of the bowl to ensure no pockets of unmixed ingredients remain. Finally, gently mix in 2 cups of all-purpose flour and ½ teaspoon of baking powder. Mix until just combined; the dough will appear quite crumbly and dry at this stage, but don’t fret – this is exactly how it should look! Avoid overmixing, as this can develop the gluten in the flour, leading to tough cookies. Stir in ½ cup of white chocolate chips, distributing them evenly throughout the crumbly dough. These chips will melt into delicious pockets of sweetness during baking.
Step 2: Infusing the Dough with Spooky Hues
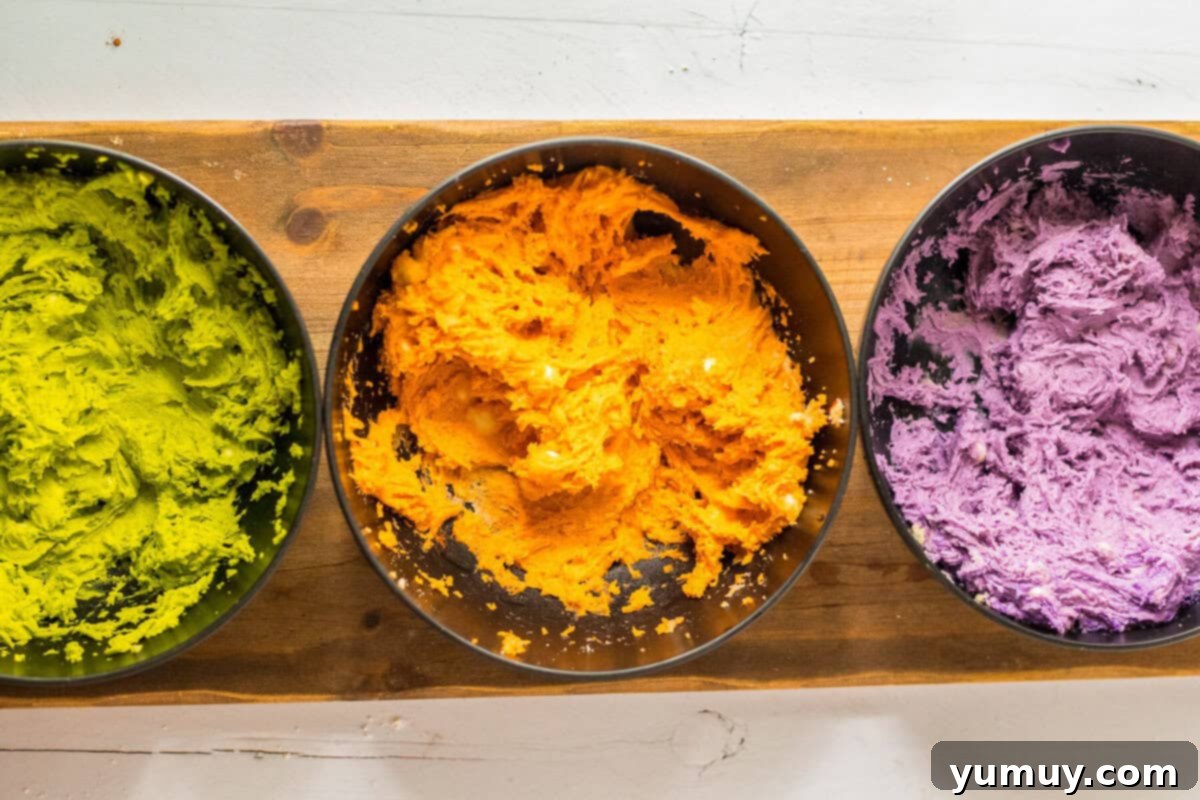
Now for the fun, artistic part! Divide your prepared cookie dough into 3 equal portions. For best results and consistent sizing, you can use a kitchen scale – aim for approximately 234 grams of dough in each bowl. To each separate portion, add your chosen food coloring. I highly recommend using high-quality gel food coloring for its concentrated pigments; this allows you to achieve vivid, intense colors like neon green, bright orange, and deep purple without adding excess liquid that could alter the dough’s texture. Mix each portion individually until the color is completely uniform. As you knead and mix the coloring into the dough, you’ll notice it magically transforms from crumbly to a much softer, more pliable consistency. This step is a fantastic opportunity for children to get involved, as they love watching the dough change color and seeing their marbled cookie dough come to life!
Step 3: Mastering the Marbled Effect and Forming the Cookies
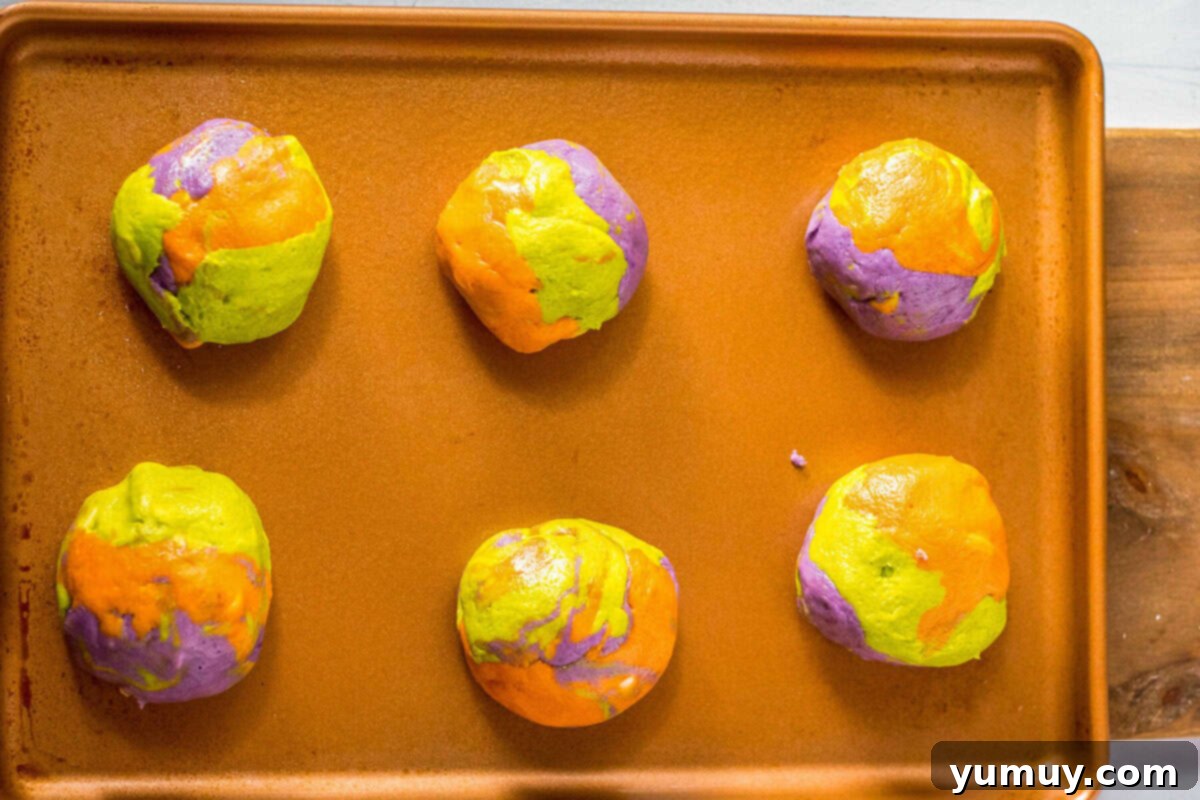
This is where the unique beauty of your marbled cookie dough comes to life! To create the stunning swirled effect, take a small, roughly equal piece from each of your three different colored doughs. The exact amount isn’t critical, but aiming for about 39 grams of each color (if using a scale) will help ensure uniform cookie sizes. Gently bring these three pieces together and lightly roll them in your palms to form a single, cohesive ball. The goal is a gentle swirl, not a fully blended color, so don’t overwork the dough. You want those distinct color streaks to remain visible, giving each cookie its unique, artistic look. Repeat this process for the remaining dough until you have 6 generously sized cookie dough balls. These are designed to be large, impactful spooky Halloween cookies. If you prefer smaller cookies, simply make more dough balls, but remember that smaller cookies will require a reduced baking time (typically 2-4 minutes less, depending on their size).
Step 4: The Final Flourish: Rolling, Chilling, and Baking to Perfection
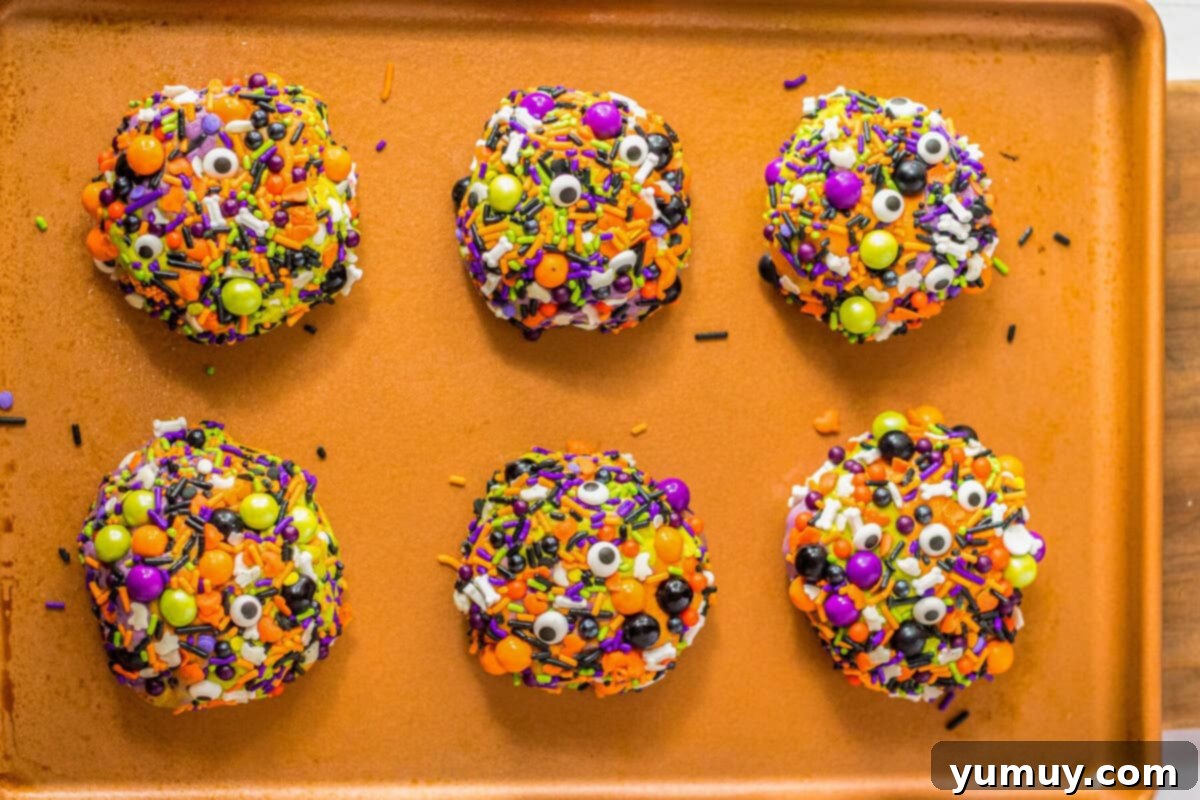
With your marbled dough balls ready, it’s time for the festive finish! Pour your favorite Halloween sprinkles onto a shallow plate or into a bowl. Roll the top and sides of each cookie dough ball generously in the sprinkles, ensuring they are well coated. The more sprinkles, the more festive and crunchy your Halloween sugar cookies will be! Once coated, place the cookies onto a greased baking sheet, or one lined with parchment paper or a silicone baking mat for easy release. Now, for the crucial chilling step: refrigerate the cookie dough balls for a minimum of 30 minutes (or 10-15 minutes in the freezer). This period is essential; it helps prevent the cookies from spreading too much in the oven, maintaining their shape, and, most importantly, keeps those colorful sprinkles from melting or bleeding into your vibrant dough during baking. While your cookies are chilling, preheat your oven to 375°F (190°C).
Once chilled, transfer your sprinkle-coated dough to the preheated oven and bake for approximately 18 minutes. Keep an eye on them; cookies are done when the edges are lightly golden and the centers still look slightly soft and puffed. Baking time may vary depending on your oven and the exact size of your cookies. Upon removing the cookies from the oven, if you notice any spots that appear sparse on sprinkles, this is your golden opportunity! Gently press a few more sprinkles onto the hot cookie surface; the residual heat will help them adhere perfectly, adding an extra pop of color and texture. Allow the baked cookies to cool on the baking sheet for a solid 5 minutes before carefully transferring them to a wire rack to cool completely. This cooling period on the tray helps them set and prevents breakage, ensuring your beautiful Halloween sprinkle cookies hold their shape.
Ensuring Lasting Freshness: Storage and Reheating Tips for Your Halloween Sprinkle Cookies
To keep your delectable Halloween sprinkle cookies fresh and delicious for as long as possible, proper storage is key. Once completely cooled to room temperature, place any leftover cookies in an airtight container. They will maintain their delightful flavor and soft texture at room temperature for up to 3 days. If you need to extend their shelf life further, store them in the refrigerator for up to 5 days. For even longer enjoyment, these cookies freeze beautifully! Simply place them in a freezer-safe, airtight container or a heavy-duty freezer bag, separated by parchment paper to prevent sticking, and freeze for up to 1 month. When you’re ready to enjoy them again, transfer the frozen cookies to the refrigerator overnight to thaw. For an extra touch of warmth and a freshly baked feel, you can gently reheat them in the microwave for a few seconds or in a low oven (around 275°F or 135°C) for 5-7 minutes until just warmed through.
More Spooktacular Halloween Dessert Recipes to Try!
If you’re loving the festive spirit of these easy Halloween treats and craving more spooky baking adventures, you’re in luck! We’ve got a cauldron full of other fantastic Halloween dessert recipes that are just as fun and delicious. From monstrously good cookies to ghoulishly delightful fudges, these recipes are perfect for parties, family gatherings, or simply getting into the Halloween spirit. Explore our collection and find your next favorite:
Discover More Delicious Halloween Treats
Halloween Monster Cookies
Easy Halloween Fudge
Festive Halloween M&M Cookies
Spooky Halloween White Chocolate Buckeyes
View All Halloween Recipes
Frequently Asked Questions About Halloween Sprinkle Cookies
- Can I use liquid food coloring instead of gel for these Halloween sprinkle cookies?
- While you technically *can* use liquid food coloring, it’s not recommended for this recipe. Liquid coloring adds extra moisture to the dough, which can make it sticky and difficult to handle, and might cause the cookies to spread too much during baking. Gel food coloring provides more vibrant color with less liquid, maintaining the dough’s ideal consistency for beautifully marbled effects and preventing the sprinkles from bleeding.
- What if I can’t find specific Halloween sprinkles?
- No problem at all! Get creative. You can easily buy individual bags of black, orange, and purple sprinkles and mix them together to create your own custom Halloween blend. Any combination of festive colors will work beautifully to make your cookies spooky and fun.
- Can I make the cookie dough ahead of time?
- Absolutely! This recipe is excellent for meal prepping. You can prepare the marbled cookie dough balls, roll them in sprinkles, and then arrange them on a baking sheet. Freeze them until firm, then transfer them to a freezer-safe airtight container or bag for up to 1 month. When ready to bake, simply place the frozen dough balls on a baking sheet (no need to thaw) and add a few extra minutes (usually 2-4) to the baking time.
- How do I prevent the sprinkles from burning or melting off the spooky Halloween cookies?
- The chilling step is absolutely essential for this! Refrigerating the cookie dough for at least 30 minutes (or freezing for 10-15 minutes) before baking helps to firm up the butter in the dough. This prevents the cookies from spreading too rapidly and, crucially, stops the sprinkles from melting and bleeding into the dough. Additionally, bake at the recommended temperature of 375°F (190°C) for the specified time; over-baking can lead to burnt sprinkles.
- Can I use other types of chocolate chips in this Halloween sugar cookie recipe?
- Yes, feel free to customize your Halloween sprinkle cookies! While white chocolate chips complement the vibrant colors and overall sweetness beautifully, you could certainly experiment with milk chocolate chips, dark chocolate chips, or even a delightful mix. Just be aware that using different chocolate types might subtly change the overall flavor profile of your cookies.
Ready to Bake Your Own Spooky Masterpiece?
We hope this comprehensive guide has inspired you to create your very own batch of these incredible Halloween sprinkle cookies. With their stunning marbled appearance, delightful crunch, and irresistible flavor, they are guaranteed to be a hit at any Halloween celebration. They embody the spirit of the season in every colorful bite and offer a wonderfully engaging baking project for the whole family. So gather your ingredients, unleash your creativity, and get ready to bake some magic this spooky season. These easy Halloween cookies are more than just a dessert; they’re an experience waiting to happen. Happy baking, and happy Halloween!
