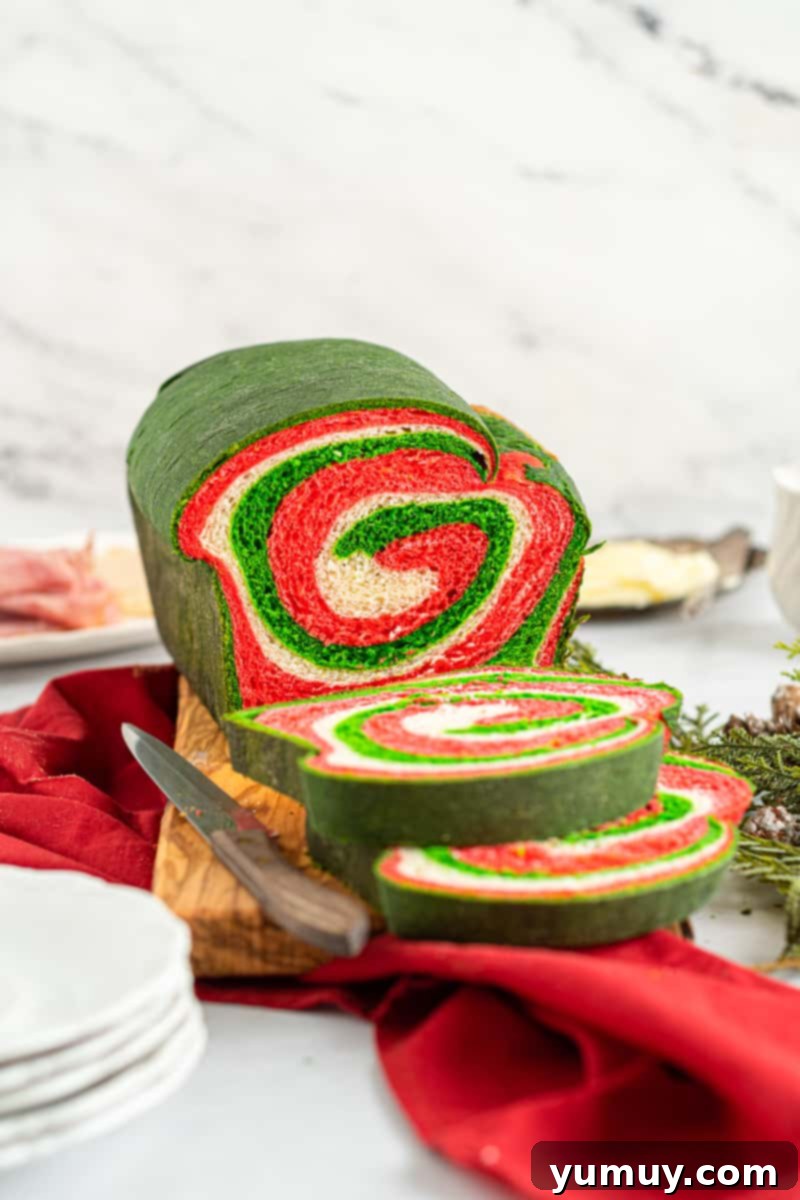
Festive Swirled Christmas Sandwich Bread: A Delightful Holiday Baking Tradition
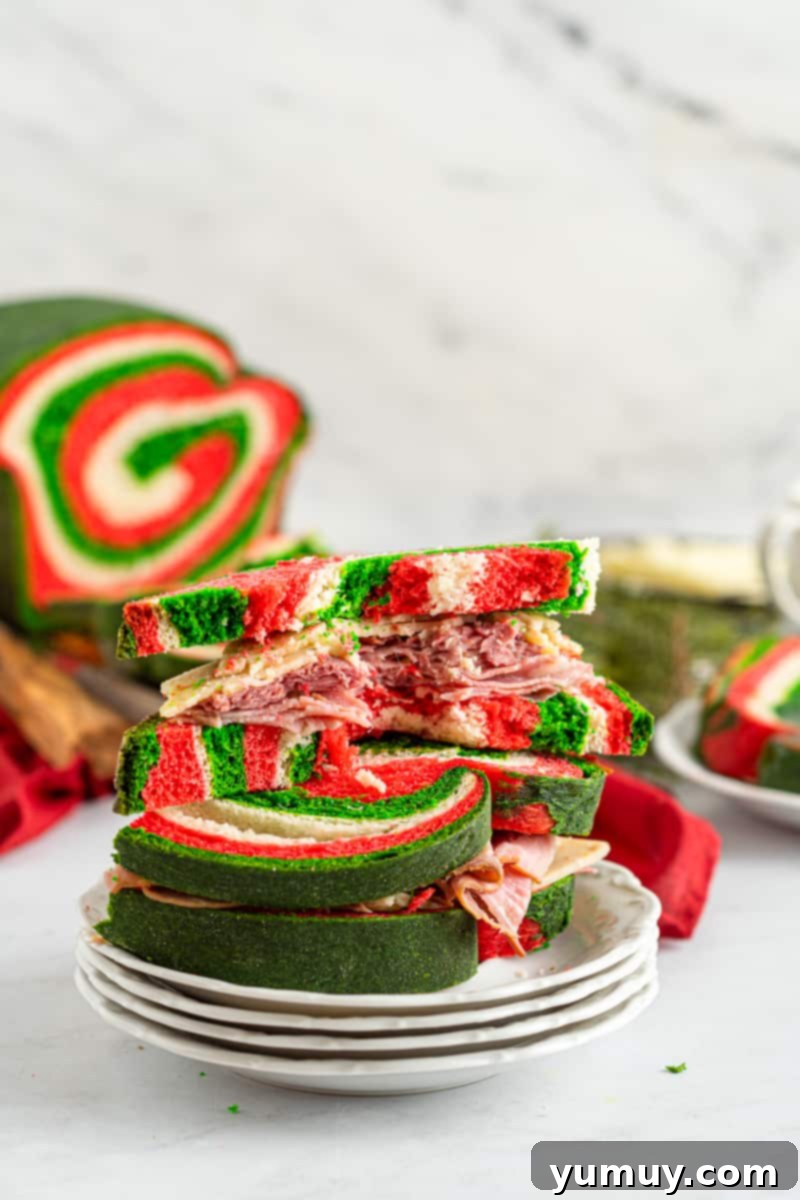
Welcome the holiday season with open arms and the irresistible aroma of freshly baked bread! This captivating Christmas Swirl Bread is my absolute favorite way to infuse festive cheer into our home. It’s a surprisingly straightforward bread recipe, made extraordinary with a vibrant swirl of red and green food coloring. Don’t let its impressive appearance fool you; crafted with just eight simple ingredients, this is an ideal recipe for beginner bakers, promising a show-stopping result every time you slice into it. Whether you’re preparing a special holiday breakfast, crafting memorable afternoon sandwiches, or simply enjoying a slice with your morning coffee, this versatile loaf is guaranteed to bring smiles and a touch of magic to your table.
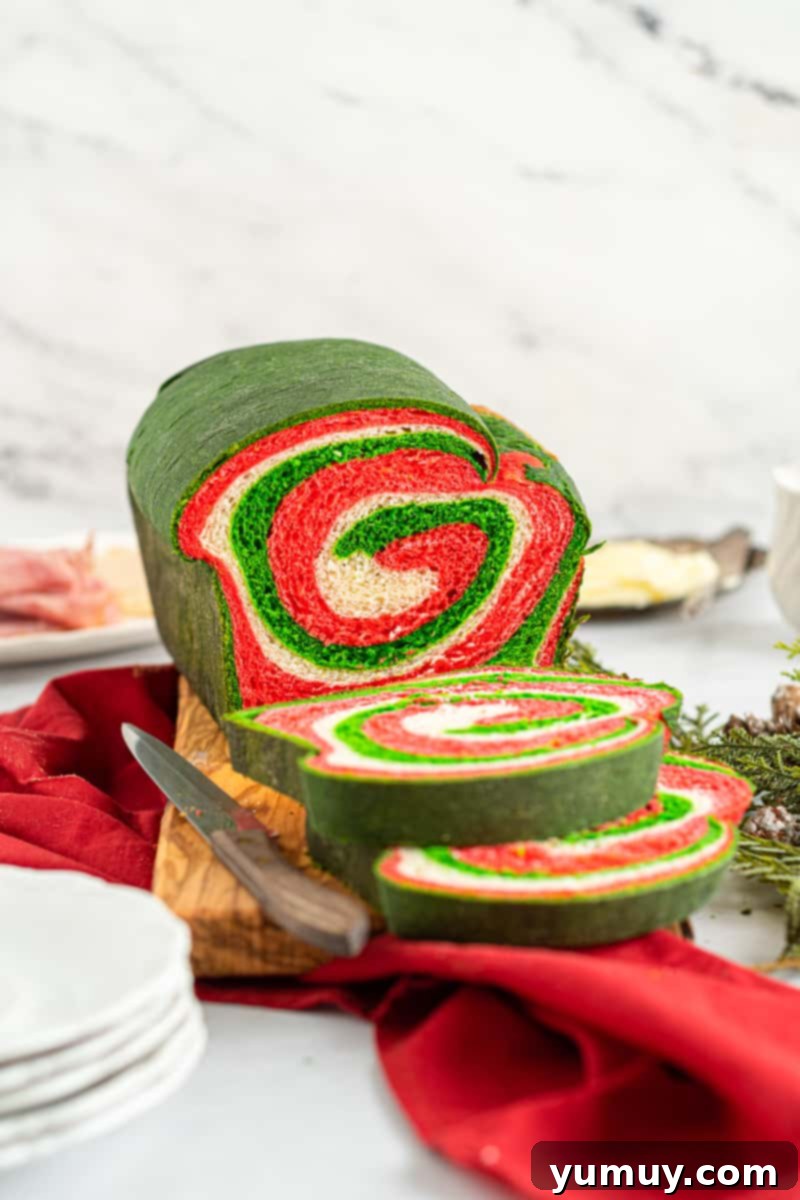
Embrace the Holiday Spirit with Homemade Christmas Bread
There’s nothing quite like the warmth and comfort of homemade bread, especially during the holidays. I adore baking multiple loaves of this enchanting Christmas bread to share with my wonderful neighbors and friends. Amidst a sea of holiday cookies and sweet treats, a versatile, freshly baked loaf of bread is always a welcome and cherished gift. Its appealing colors make it a joy to share, and the simple yet effective method ensures delightful results. This recipe isn’t just about baking; it’s about creating memories and spreading joy one delicious slice at a time. The festive swirls elevate it beyond a simple loaf, making it a true centerpiece that tastes as good as it looks.
Why This Swirled Christmas Bread Will Become Your New Holiday Tradition
- Visually Stunning: The striking red and green swirls make this bread an instant showstopper, perfect for holiday brunches, potlucks, or gifting.
- Incredibly Versatile: Enjoy it toasted with butter, as a festive sandwich base, alongside holiday soups, or transform it into magical French toast!
- Beginner-Friendly: Despite its elaborate appearance, the recipe uses basic bread-making techniques and minimal ingredients, making it accessible for new bakers.
- Pure Comfort: The aroma of fresh bread baking is undeniably comforting, filling your home with a cozy, inviting atmosphere that embodies the holiday spirit.
- Perfect for Sharing: A loaf of homemade Christmas Swirl Bread makes a thoughtful and unique gift that will be genuinely appreciated by anyone who receives it.
- Customizable: Easily change the food coloring to suit other holidays or themes throughout the year, making this a truly adaptable recipe.
Pro Tips for Crafting Your Perfect Christmas Swirl Bread
Achieving bakery-quality bread at home is incredibly rewarding. Here are some expanded tips to ensure your Christmas Swirl Bread turns out perfectly every time:
- Proof Your Yeast Reliably: This is the most crucial step! Always ensure your yeast is active. If, after 5 minutes in warm milk and sugar, your mixture doesn’t become frothy and bubbly, your yeast is likely dormant or expired. It’s essential to discard it and start over with fresh yeast to guarantee your bread will rise properly. The ideal temperature for milk is between 100-110°F (38-43°C); too hot will kill the yeast, too cold will not activate it.
- The Art of Kneading: Don’t rush the kneading process. Whether by hand or with a stand mixer, proper kneading develops the gluten, which is essential for the bread’s structure and chewiness. Knead until the dough is smooth, elastic, and pulls away cleanly from the sides of the bowl. It should feel slightly sticky but not wet.
- Patient Rising is Key: Bread requires patience. Allowing the dough to rise twice in a cool, draft-free place, covered with a clean kitchen towel, is vital for achieving a light and airy texture. The first rise develops flavor, and the second rise, known as proofing, ensures a good final texture and volume. Don’t try to speed this up with excessive heat, as it can result in an inferior crumb.
- Flour Your Surface Lightly: When rolling out your dough, use just enough flour to prevent sticking, but avoid over-flouring. Too much additional flour can make the dough tough and dry. A light dusting is all you need to keep things manageable.
- Achieving Even Color: When adding food coloring, incorporate it thoroughly by kneading the dough for a few minutes. Gel food colorings tend to produce more vibrant hues without altering the dough’s consistency as much as liquid ones.
- Evenly Layering for the Swirl: For the most beautiful and consistent swirl, aim for rectangular dough sheets that are as close in size as possible before layering. This ensures the colors are distributed uniformly throughout the loaf when rolled.
- Testing for Doneness: The best way to know if your bread is fully baked is by checking its internal temperature with a thermometer. It should reach around 190-200°F (88-93°C). If you don’t have a thermometer, tap the bottom of the loaf; it should sound hollow.
- Cool Completely Before Slicing: While tempting, slicing into warm bread can compress its delicate structure. Allow your baked bread to cool completely on a wire rack before cutting. This helps the crumb set and makes for cleaner slices.
- Creative Holiday Variations: Beyond Christmas, consider using orange and black for Halloween, pastels for Easter, or red and blue for patriotic holidays. This technique is incredibly adaptable!
Storage and Reheating Tips
To keep your Christmas Swirl Bread fresh and delicious:
- Room Temperature: Store any leftover Christmas sandwich bread in an airtight container or a sealed bread bag at room temperature for up to 3 days. This helps maintain its softness and prevents it from drying out.
- Freezing for Longer: For longer storage, slice the cooled bread and freeze the slices in a single layer on a baking sheet before transferring them to a freezer-safe bag or container. This prevents sticking. Frozen bread can last for up to 2-3 months. Thaw slices at room temperature or toast directly from frozen.
- Reheating: Enjoy the bread at room temperature or gently toasted. To revive a whole loaf, you can wrap it in foil and warm it in a preheated oven at 300°F (150°C) for 10-15 minutes, or until warm throughout.
Swirled Christmas Sandwich Bread Recipe
20 minutes
1 hour
2 hours 50 minutes
1 hour 30 minutes
16 slices
Ingredients
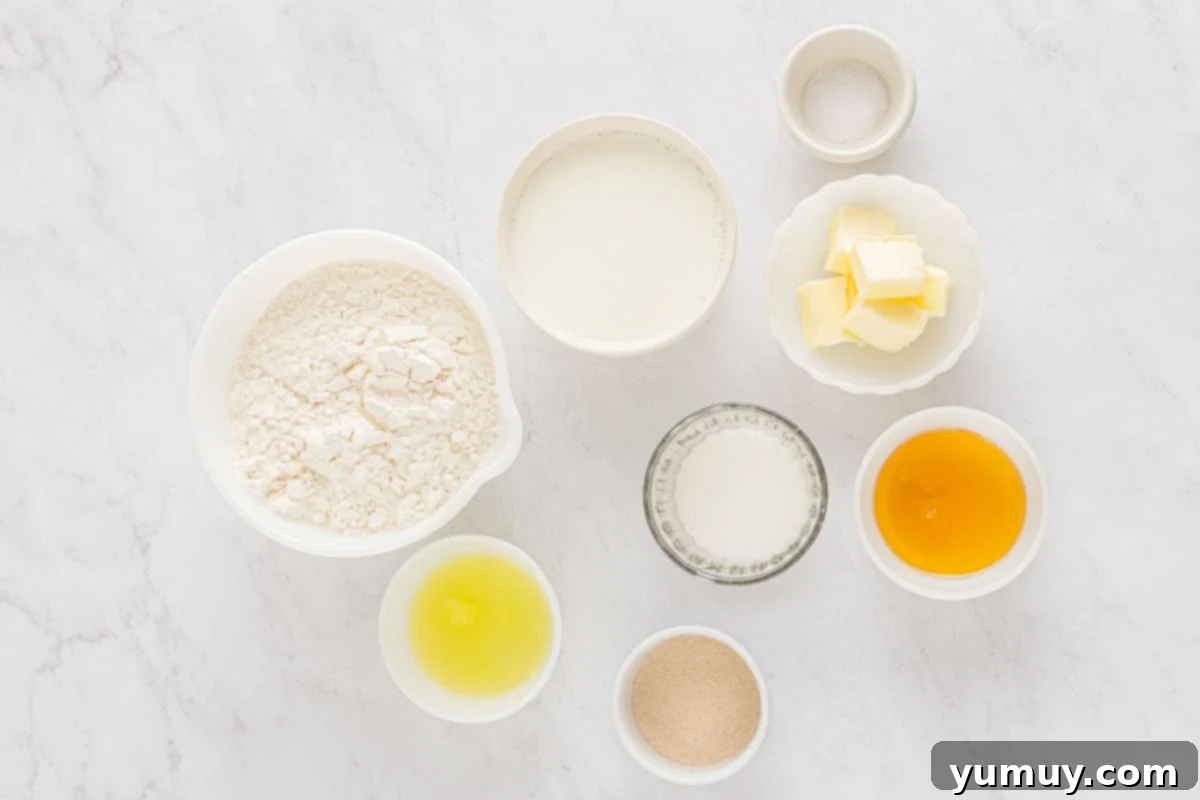
- 1½ cups milk, warm (100-110°F)
- 3 tablespoons granulated sugar
- 2½ teaspoons active dry yeast (1 envelope)
- ¼ cup honey
- 2 egg whites
- 4½ cups all-purpose flour
- 1 teaspoon kosher salt
- 6 tablespoons unsalted butter, room temperature (¾ stick)
- Red food coloring
- Green food coloring
Equipment
- Kitchen Scale (optional, for precise dough division)
- Stand Mixer (with dough hook attachment)
- Rolling Pin
- 9×5-inch Loaf Pan
- Large Bowls (for rising dough)
- Clean Kitchen Towels
Instructions
1. Prepare the Dough Base: In the bowl of a stand mixer, combine the warm milk, granulated sugar, and active dry yeast. Gently whisk them together and let the mixture sit for about 5 minutes, or until a visible frothy layer forms on top. This indicates your yeast is active. Once frothy, stir in the honey until well combined. Next, add the egg whites, mixing them in thoroughly, followed by the all-purpose flour and kosher salt. Attach the dough hook to your stand mixer and knead the mixture until the flour is fully incorporated and a shaggy dough forms. Now, gradually add the softened unsalted butter, continuing to knead for approximately 4 minutes until the dough becomes smooth, elastic, and slightly sticky. It should pull away cleanly from the sides of the bowl.

2. Color and First Rise: Turn the freshly kneaded dough out onto a lightly floured surface. Divide the dough into three equal sections; each should weigh approximately 391 grams for uniform loaves. Take one section, roll it into a tight ball, and place it into a lightly greased bowl. Cover this bowl with a clean kitchen towel. To the first remaining section of dough, add a generous amount of red food coloring, and to the last section, add green food coloring. Knead each colored dough ball for a few minutes until the color is vibrant and evenly distributed throughout. Roll each colored section into a tight ball and place them into two separate, lightly greased bowls. Cover all three bowls with towels and let the dough rise in a warm, draft-free place for about 1 hour, or until each ball has visibly doubled in size.

3. Layer the Festive Swirls: Once the dough has completed its first rise, gently turn the uncolored (white) ball of dough out onto a lightly floured surface. Using a rolling pin, roll it into a rough rectangle, aiming for dimensions of about 7 inches wide by 10 inches long. Carefully transfer this white sheet of dough onto a clean baking sheet or parchment paper. Next, repeat the process with the red dough, rolling it into a similar-sized rectangle. Gently lay the red sheet directly on top of the white dough sheet. Finally, roll out the green dough into a rectangle of the same size. Carefully flip the layered red and white dough onto the green sheet. The arrangement should be green on the bottom, red in the middle, and white on top, creating a vibrant three-layer stack.

4. Form the Loaf and Second Rise (Proofing): With your layered dough stack, use your rolling pin to gently roll the sheets together into a slightly larger rectangle, approximately 8 inches wide and 12 inches long. This helps meld the layers. Starting from one of the 8-inch ends, carefully and tightly roll the dough into a log. Once rolled, pinch the seam along the edge of the dough firmly to seal it, ensuring the log holds its shape during baking. Lightly grease a 9×5-inch loaf pan with butter or baking spray. Carefully transfer the dough log into the prepared loaf pan, seam-side down. Lightly spray the top of the dough with baking spray to prevent it from drying out during the second rise. Cover the loaf pan with a clean towel and let it rise again in a warm, draft-free spot for another 30 minutes to 1 hour, or until the dough has doubled in size and appears puffy. During the last 30 minutes of this rise, preheat your oven to 350°F (175°C).

5. Bake and Serve: Place the fully risen loaf into your preheated 350°F (175°C) oven. Bake for approximately 1 hour, or until the bread is golden brown on top and thoroughly baked through. You can confirm doneness by inserting a toothpick into the center (it should come out clean) or by checking its internal temperature with a digital thermometer, which should read around 190-200°F (88-93°C). Once baked, carefully remove the loaf pan from the oven and immediately transfer the bread onto a wire cooling rack. Allow the bread to cool completely before slicing and serving. Cooling is crucial for the internal structure to set, ensuring perfect slices and a delightful texture.

Notes
Storage: Store cooled Christmas sandwich bread in an airtight container or bread bag at room temperature for up to 3 days. For longer freshness, slice and freeze for up to 2-3 months.
Calories from Fat 45
Becky Hardin
How to Make Christmas Bread Step-by-Step with Visuals
Follow these detailed steps to create your festive Swirled Christmas Sandwich Bread, complete with helpful images to guide you through each stage:
1. Mix the Dough
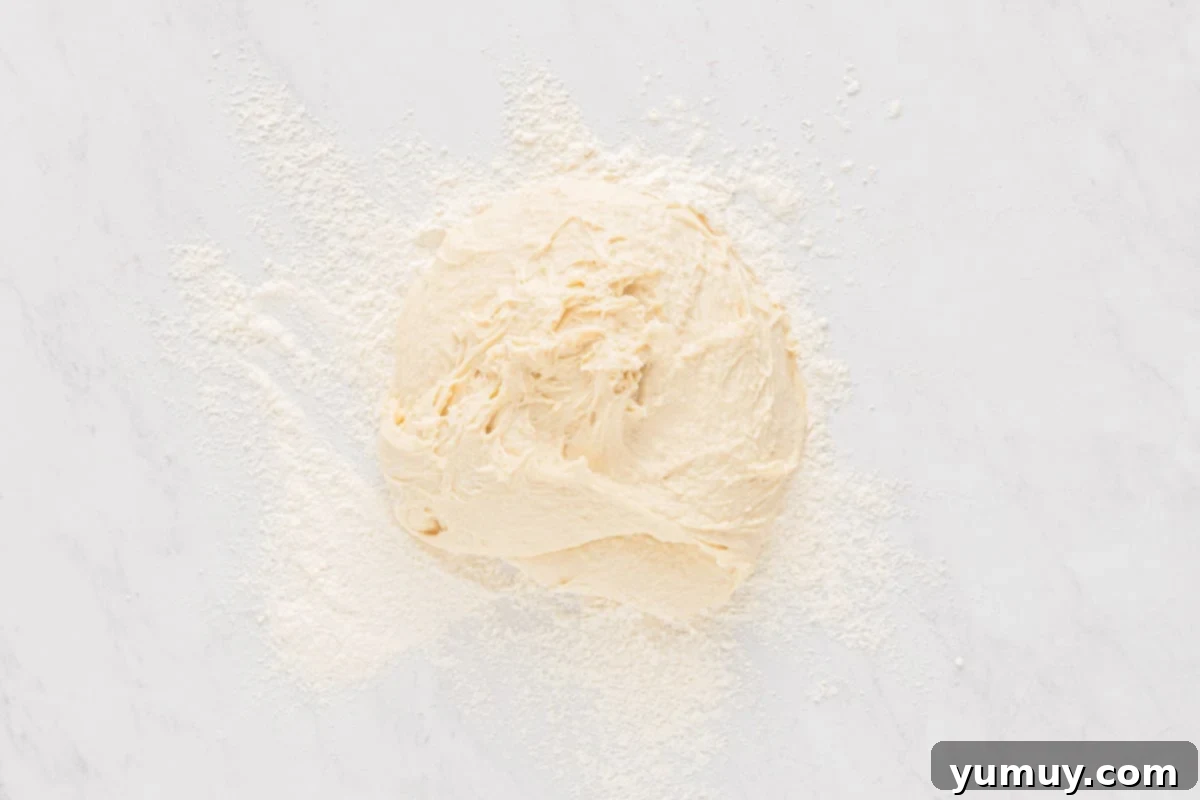
Begin by combining the warm milk, granulated sugar, and active dry yeast in the bowl of your stand mixer. Whisk them gently and allow the mixture to sit for 5 minutes, giving the yeast time to activate and become frothy. This frothy layer is your assurance that the yeast is alive and ready to work its magic. Once activated, stir in the honey until it’s fully incorporated, adding a subtle sweetness and helping the bread stay moist. Next, whisk in the egg whites, followed by the all-purpose flour and kosher salt. Attach the dough hook to your mixer and knead until the flour is thoroughly combined and the dough starts to come together. Finally, add the room-temperature unsalted butter and continue kneading for about 4 minutes. The dough should transform into a smooth, elastic, and slightly sticky consistency, pulling away cleanly from the sides of the bowl. Proper kneading is crucial for developing the gluten that gives bread its characteristic chewiness.
2. Color the Dough and First Rise
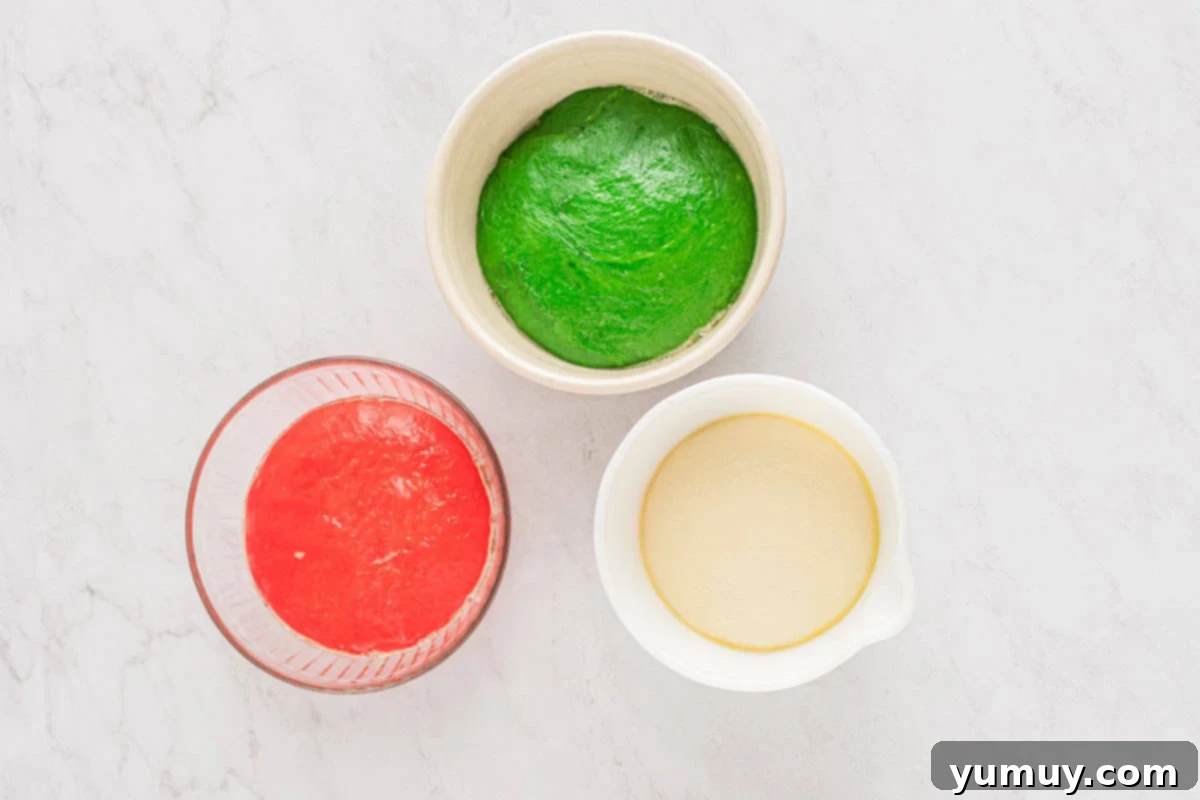
Turn the prepared dough out onto a lightly floured surface. Divide it into three equal-sized sections; a kitchen scale is helpful here to ensure each section weighs approximately 391 grams for uniform results. Take one section, roll it into a tight ball, and place it into a lightly greased bowl. Cover this bowl with a clean kitchen towel to begin its rise. Now, the fun part! Add vibrant red food coloring to one of the remaining dough sections and bright green food coloring to the other. Knead each colored section separately for a few minutes until the color is completely and evenly incorporated throughout the dough. The more you knead, the more intense and uniform the color will be. Roll each colored dough section into a tight ball and place them into two separate, lightly greased bowls. Cover all three bowls with towels and let the dough rise in a warm, draft-free place for approximately 1 hour, or until each dough ball has significantly doubled in size. This first rise allows the yeast to work and develop flavor.
3. Layer the Dough for the Swirl
Once your dough has proudly completed its first rise, gently turn the uncolored (white) ball of dough out onto a lightly floured surface. Using a rolling pin, carefully roll it out into a rough rectangle, aiming for dimensions of about 7 inches wide and 10 inches long. Precision isn’t paramount, but consistency helps with the final swirl. Carefully transfer this white sheet of dough onto a separate baking sheet lined with parchment paper. Next, take the red ball of dough and roll it out in the exact same manner, matching the dimensions of the white sheet as closely as possible. Gently transfer the red sheet of dough and lay it directly on top of the white sheet. Finally, roll out the green ball of dough, again aiming for similar dimensions. Now, with a little finesse, carefully flip the combined red and white sheets of dough onto the top of the green sheet. The final stack should have the green layer on the bottom, the red layer sandwiched in the middle, and the white layer on top. This careful layering sets the stage for your beautiful Christmas swirl.
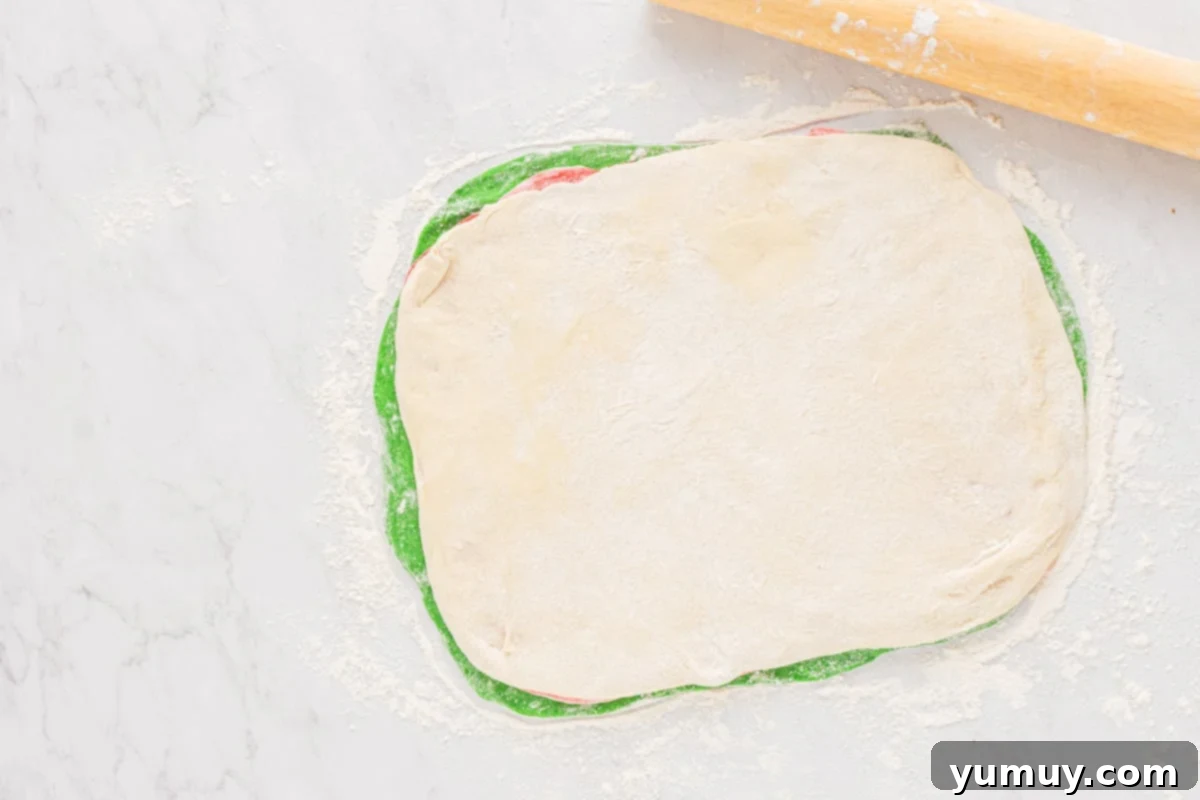
4. Proof the Bread for Baking
With your festive layers in place, gently roll the stacked sheets of dough together into a slightly larger rectangle, aiming for approximately 8 inches wide and 12 inches long. This step helps to slightly compress and adhere the layers. Starting from one of the 8-inch ends, carefully and snugly roll the dough into a tight log. As you reach the end, firmly pinch the edge of the dough together with the log to create a secure seam. This prevents the loaf from unrolling during baking. Prepare a 9×5-inch loaf pan by greasing it well with butter or baking spray. Carefully transfer the dough log into the prepared pan, ensuring the pinched seam is facing downwards. To prevent the top of the dough from drying out, lightly spray it with baking spray. Cover the loaf pan with a clean kitchen towel and set it aside to rise for its second proof, which will take approximately 30 minutes to 1 hour, or until the dough has doubled in size and looks puffy. During the final 30 minutes of this proofing stage, preheat your oven to 350°F (175°C).
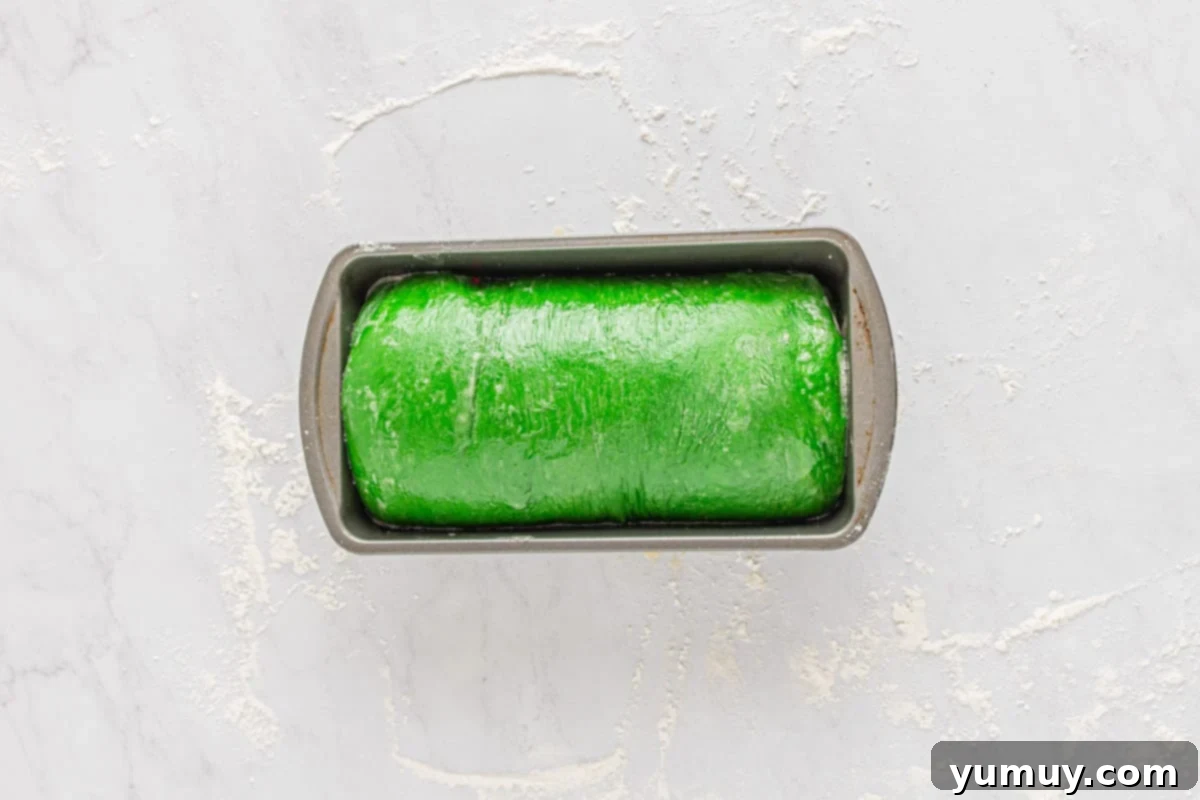
5. Bake and Cool to Perfection
Once your beautifully proofed bread has doubled in size and the oven is preheated, carefully place the loaf pan into the oven. Bake for approximately 1 hour. Baking times can vary slightly depending on your oven, so keep an eye on it. The bread should develop a lovely golden-brown crust and be baked through. To confirm doneness, you can insert a wooden skewer or toothpick into the center; it should come out clean. For a more precise measure, a digital thermometer inserted into the center of the loaf should read between 190-200°F (88-93°C). Once baked to perfection, carefully remove the loaf pan from the oven. Immediately transfer the hot bread from the pan onto a wire cooling rack. It’s crucial to allow the bread to cool completely on the rack before attempting to slice it. This cooling period allows the internal structure of the bread to set and prevents a gummy texture, ensuring you get neat, perfect slices that reveal the stunning red and green swirl. Resist the temptation to cut into it too early!
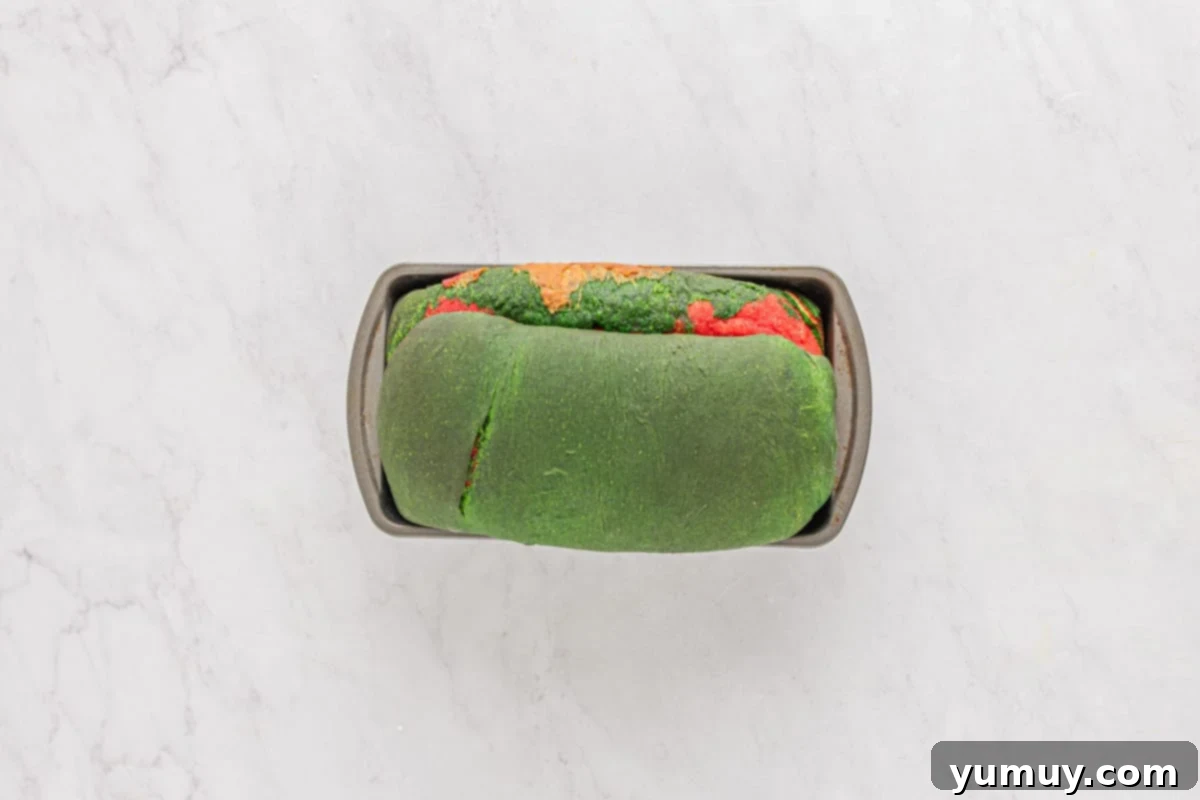
Serving Suggestions for Your Festive Swirl Bread
This Christmas Swirl Bread is incredibly versatile and can be enjoyed in countless ways throughout the holiday season:
- Classic Toast: Simply toast a slice and spread with butter, jam, or your favorite hazelnut spread for a delightful holiday breakfast.
- Festive Sandwiches: Elevate your lunch sandwiches! Fill with turkey and cranberry, ham and cheese, or even a simple cream cheese spread for a pop of color.
- Holiday French Toast: Cut thicker slices and dip them in an egg and milk mixture, then griddle until golden. The colorful swirls will make your French toast extra special.
- Alongside Soups and Stews: Serve warm slices with hearty winter soups or stews for a comforting and visually appealing meal.
- With Cheese and Charcuterie: The subtle sweetness of the bread pairs wonderfully with mild cheeses, creating a beautiful platter for holiday gatherings.
- Gift Giving: Wrap a fresh loaf in festive cellophane and tie it with a bow for a homemade gift that everyone will adore.
Frequently Asked Questions About Christmas Swirl Bread
Here are some common questions to help you master this delightful holiday bread:
- Can I use instant yeast instead of active dry yeast? Yes, you can. If using instant yeast, you don’t necessarily need to proof it first. You can add it directly to the dry ingredients, but ensure your liquids (milk and honey) are still warm enough to activate it (100-110°F). For best results and peace of mind, it’s always good practice to proof it regardless.
- What kind of food coloring works best? Gel food coloring is highly recommended. It provides vibrant, concentrated colors without adding excess liquid to your dough, which could affect its texture. Liquid food coloring can be used but you might need more of it, and it could slightly alter the dough consistency.
- Can I prepare the dough ahead of time? You can prepare the dough up to the end of the first rise. After the dough has doubled in size in the colored bowls, punch it down gently, cover the bowls tightly with plastic wrap, and refrigerate overnight (up to 24 hours). The next day, let the dough come to room temperature for about 30-60 minutes before proceeding with layering, rolling, and the second rise.
- My dough isn’t rising, what went wrong? The most common reasons for dough not rising are inactive yeast (check proofing temperature and yeast expiry), too cold or too hot liquids, or a drafty environment during rising. Ensure your milk is the correct temperature and your rising spot is warm and still.
- Can I make this bread in a bread machine? While the initial dough mixing can be done in a bread machine on the dough cycle, you would need to remove it after the first rise to divide, color, layer, and roll by hand to achieve the swirl effect.
- What if I don’t have a stand mixer? You can definitely make this bread by hand! The kneading process will take longer, likely 10-15 minutes, but the result will be just as delicious. Be prepared for a good arm workout!
More Bread Recipes to Try for the Holidays and Beyond!
Christmas Wreath Bread
Halloween Bread
Monkey Bread with Biscuits
Pecan Kringle
All Bread Recipes
Did You Make This?
We love seeing what you’ve made! Tag us on social media at
@easydessertrecipes
for a chance to be featured.
