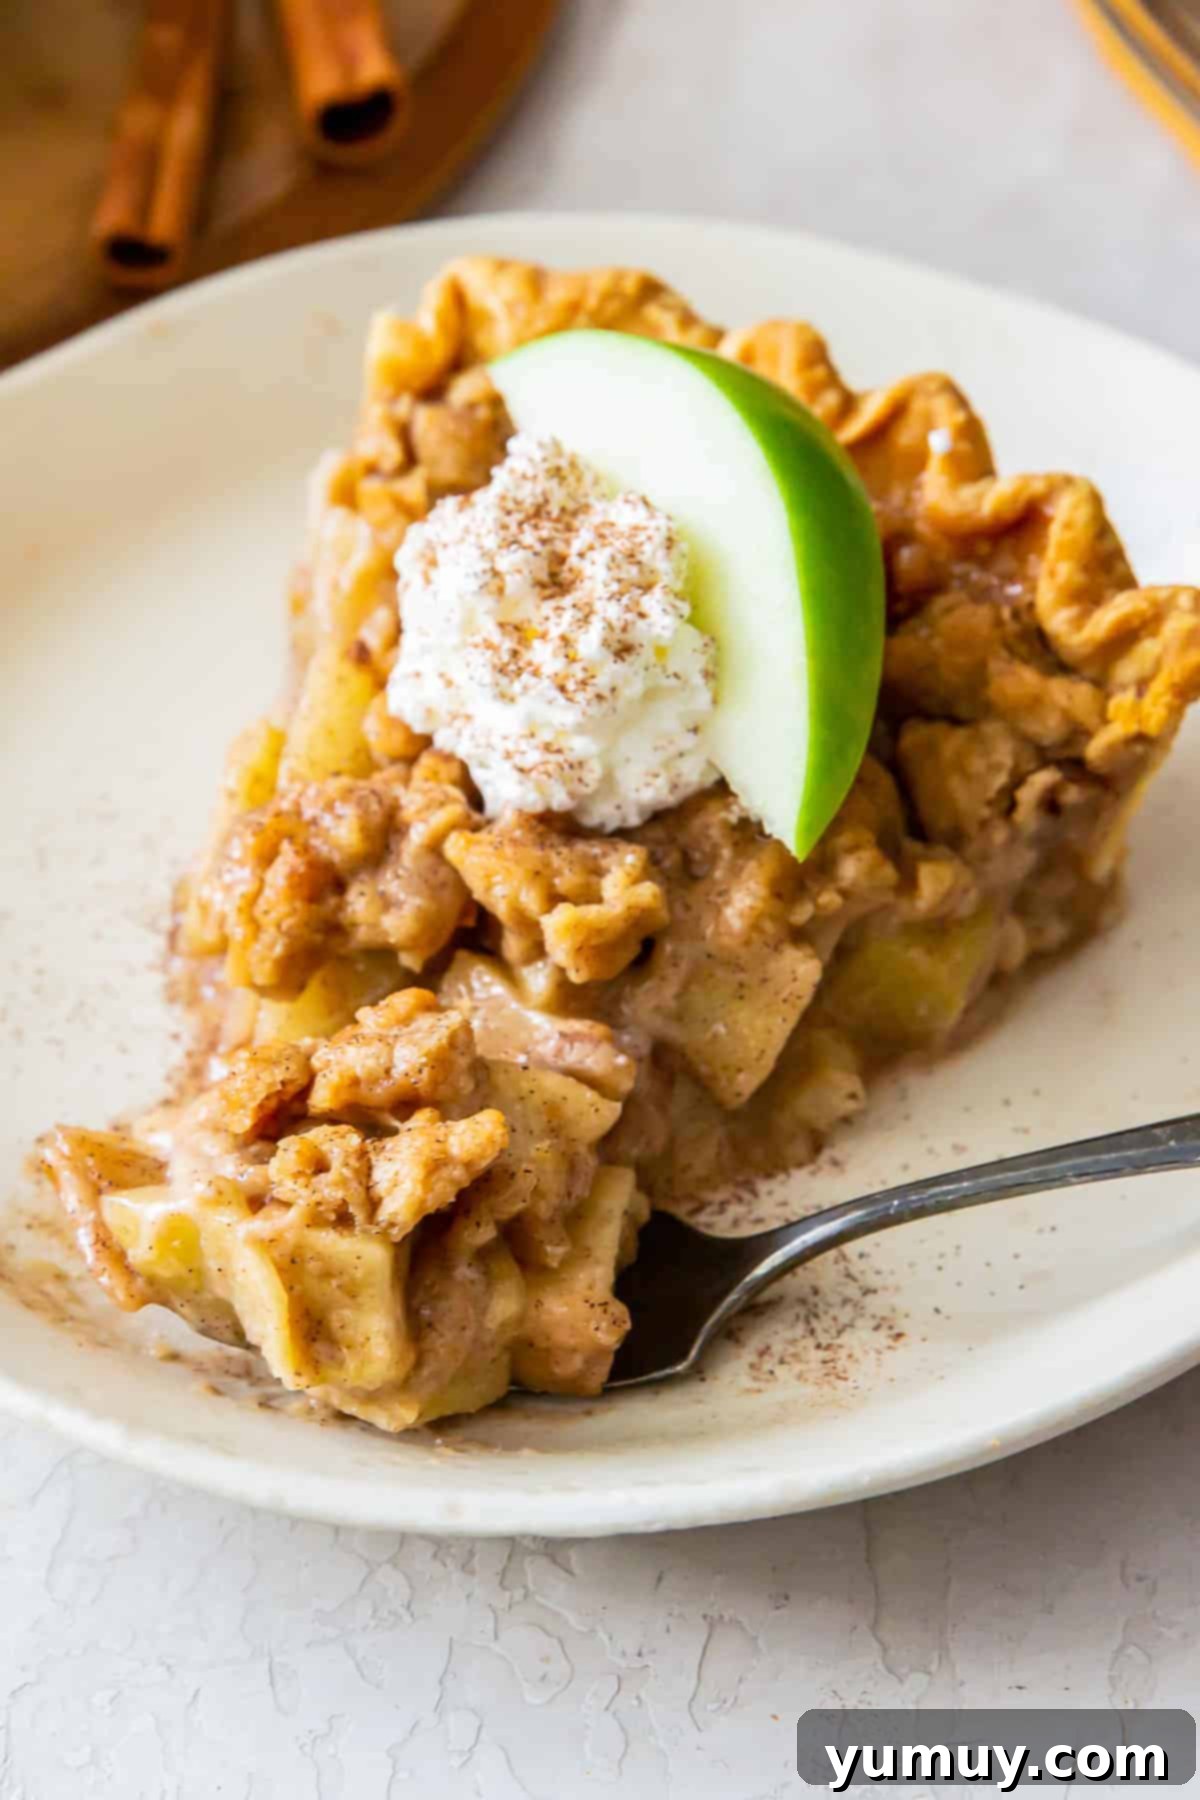
Irresistible Dutch Apple Pie with Crumb Topping: Your Ultimate Fall Dessert
There’s nothing quite like the comforting aroma of a freshly baked apple pie filling your home, especially during the crisp days of fall. This homemade Dutch apple pie captures all the magic of the season, blending the rich flavors of gooey cinnamon-spiced apples with a gloriously crisp and buttery streusel topping. What sets this recipe apart is its delightful simplicity; you get all the homemade goodness without the fuss of rolling out and crimping a tricky top crust. While we embrace the ease of a refrigerated pie crust for the base, the star-studded apple filling and irresistible crumb topping are crafted from scratch, ensuring a dessert that feels truly artisanal and deeply satisfying. If you’re yearning for a cozy, nostalgic treat that tastes like a hug, this easy Dutch apple crumb pie is an absolutely perfect choice.
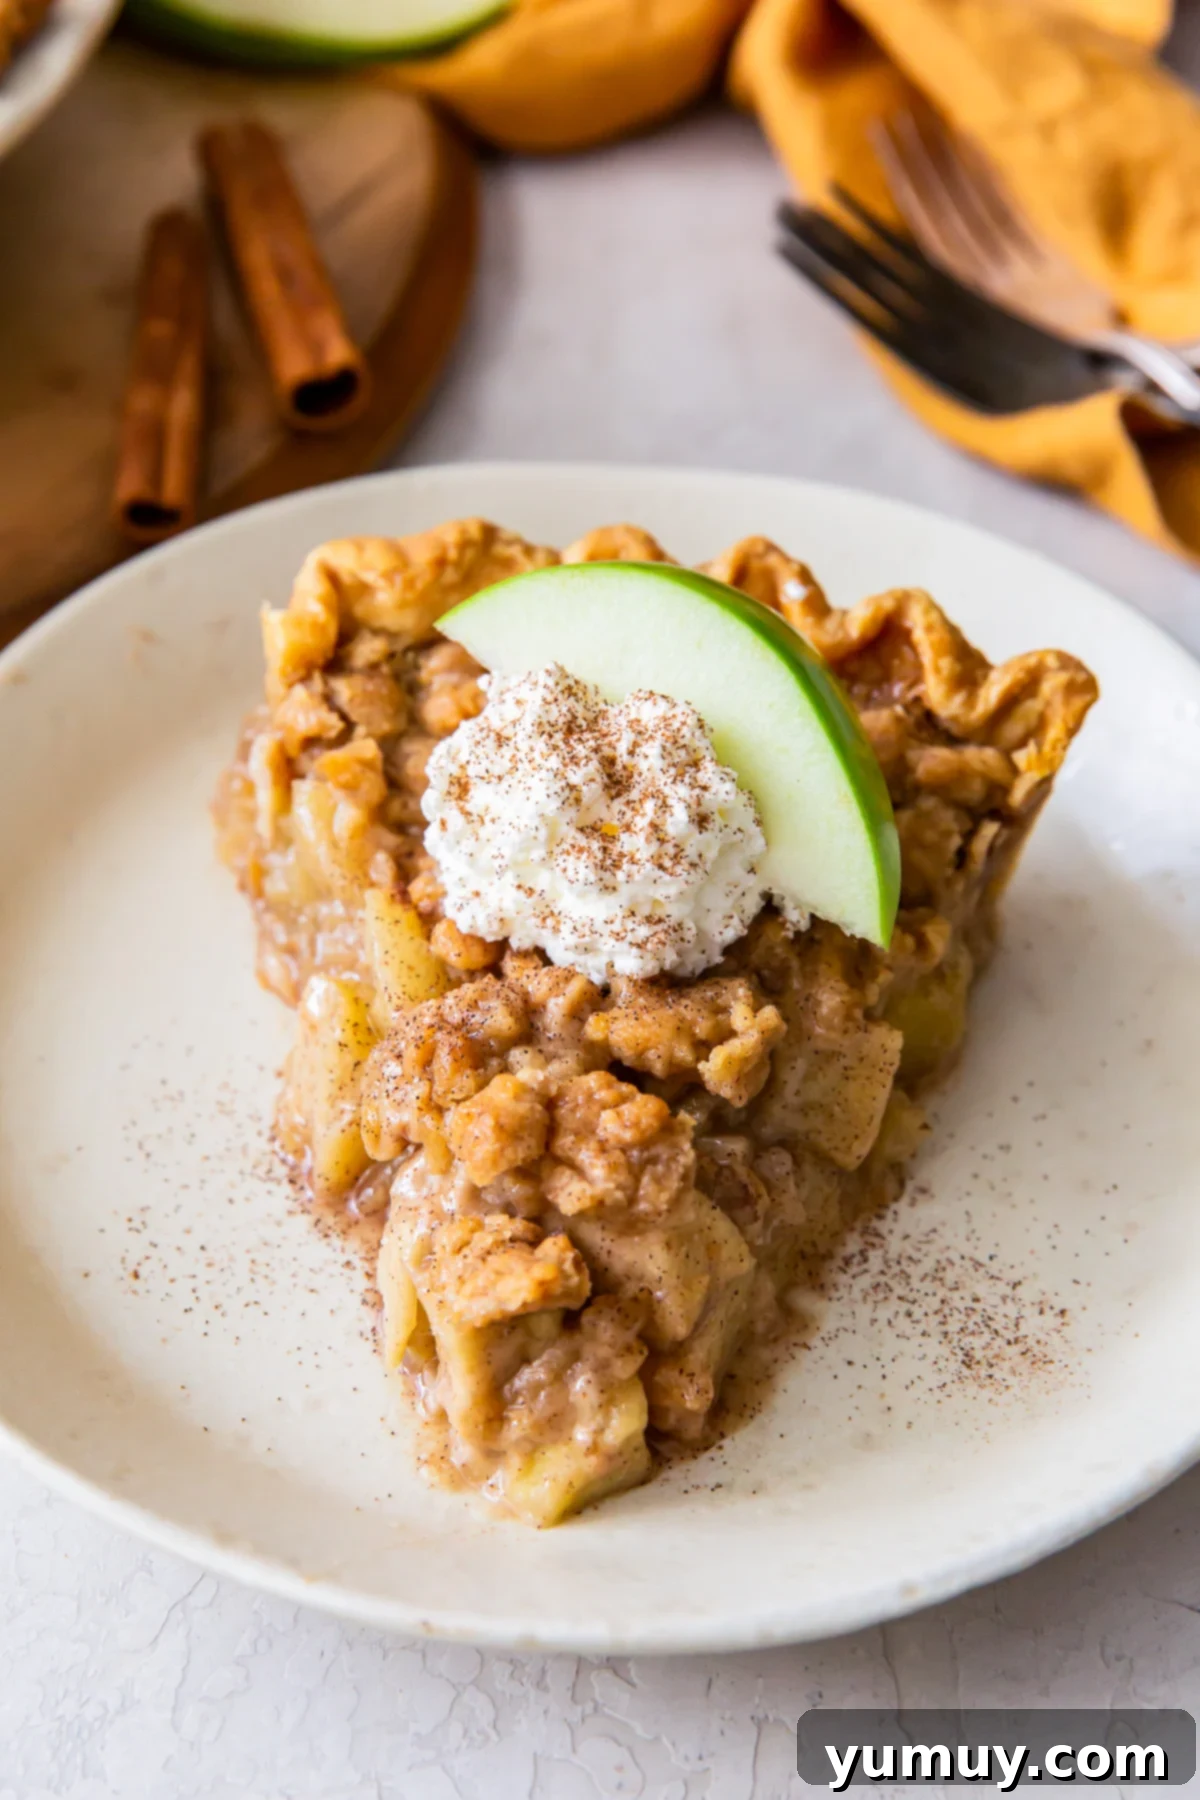
Top Reader Review
“This turned out amazing! My family raved. It disappeared really fast so will have to make again… I would note that the butter for the streusel should be “melted and cooled”…yum yum yum” -Stefanie
What Makes a Dutch Apple Pie Unique?
The distinctive charm of a Dutch apple pie lies in its iconic crumbly streusel topping, a delightful departure from the double-crusted traditional apple pie. Instead of a second pastry layer, this pie boasts a luscious brown sugar crumble that bakes to a beautiful golden crisp, creating a textural symphony that’s almost a mash-up between a classic apple pie and a rustic apple crisp. This particular recipe focuses on a bold, yet simple, apple filling featuring tart Granny Smith apples, bright fresh lemon juice, and a carefully balanced blend of cinnamon and sugar. A crucial step for ensuring success and avoiding a dreaded soggy bottom is to drain the apples before they hit the crust – a small effort that yields big rewards. The end result is a truly indulgent Dutch apple pie: rich, buttery, and unforgettable with every forkful.
The Heart of the Pie: Perfectly Spiced Apple Filling
The secret to an exceptional apple pie lies in the quality and preparation of its filling. For this Dutch apple pie, we highly recommend using firm, tart apples such as Granny Smith. Their inherent tartness beautifully cuts through the richness of the streusel and the sweetness of the sugars, creating a balanced flavor profile. Furthermore, Granny Smiths maintain their shape wonderfully during baking, ensuring a filling that’s tender but not mushy. If you’re looking for variations, a mix of apples can add complexity: consider Honeycrisp for sweetness and crunch, Braeburn for its spicy notes, or Golden Delicious for a softer texture and sweet flavor. Whichever apples you choose, peeling, coring, and chopping them into uniform pieces is essential for even cooking.
Our filling is further elevated by a harmonious blend of brown sugar and granulated sugar, providing depth and a molasses-like sweetness that complements the apples. All-purpose flour acts as a thickener, ensuring the juices become a luscious, gooey sauce rather than a watery mess. The warming embrace of ground cinnamon is indispensable for any apple pie, while a touch of kosher salt sharpens all the flavors. Finally, a hint of fresh lemon juice brightens the overall taste, prevents the apples from browning too quickly, and adds a subtle tang that truly makes the filling sing. After combining these ingredients, letting the mixture sit for a few minutes allows the apples to release some of their natural liquids. This step is crucial; discarding any excess liquid before adding the apples to the crust is key to preventing a soggy pie bottom and ensuring a perfectly set filling.
Achieving the Signature Buttery Streusel Topping
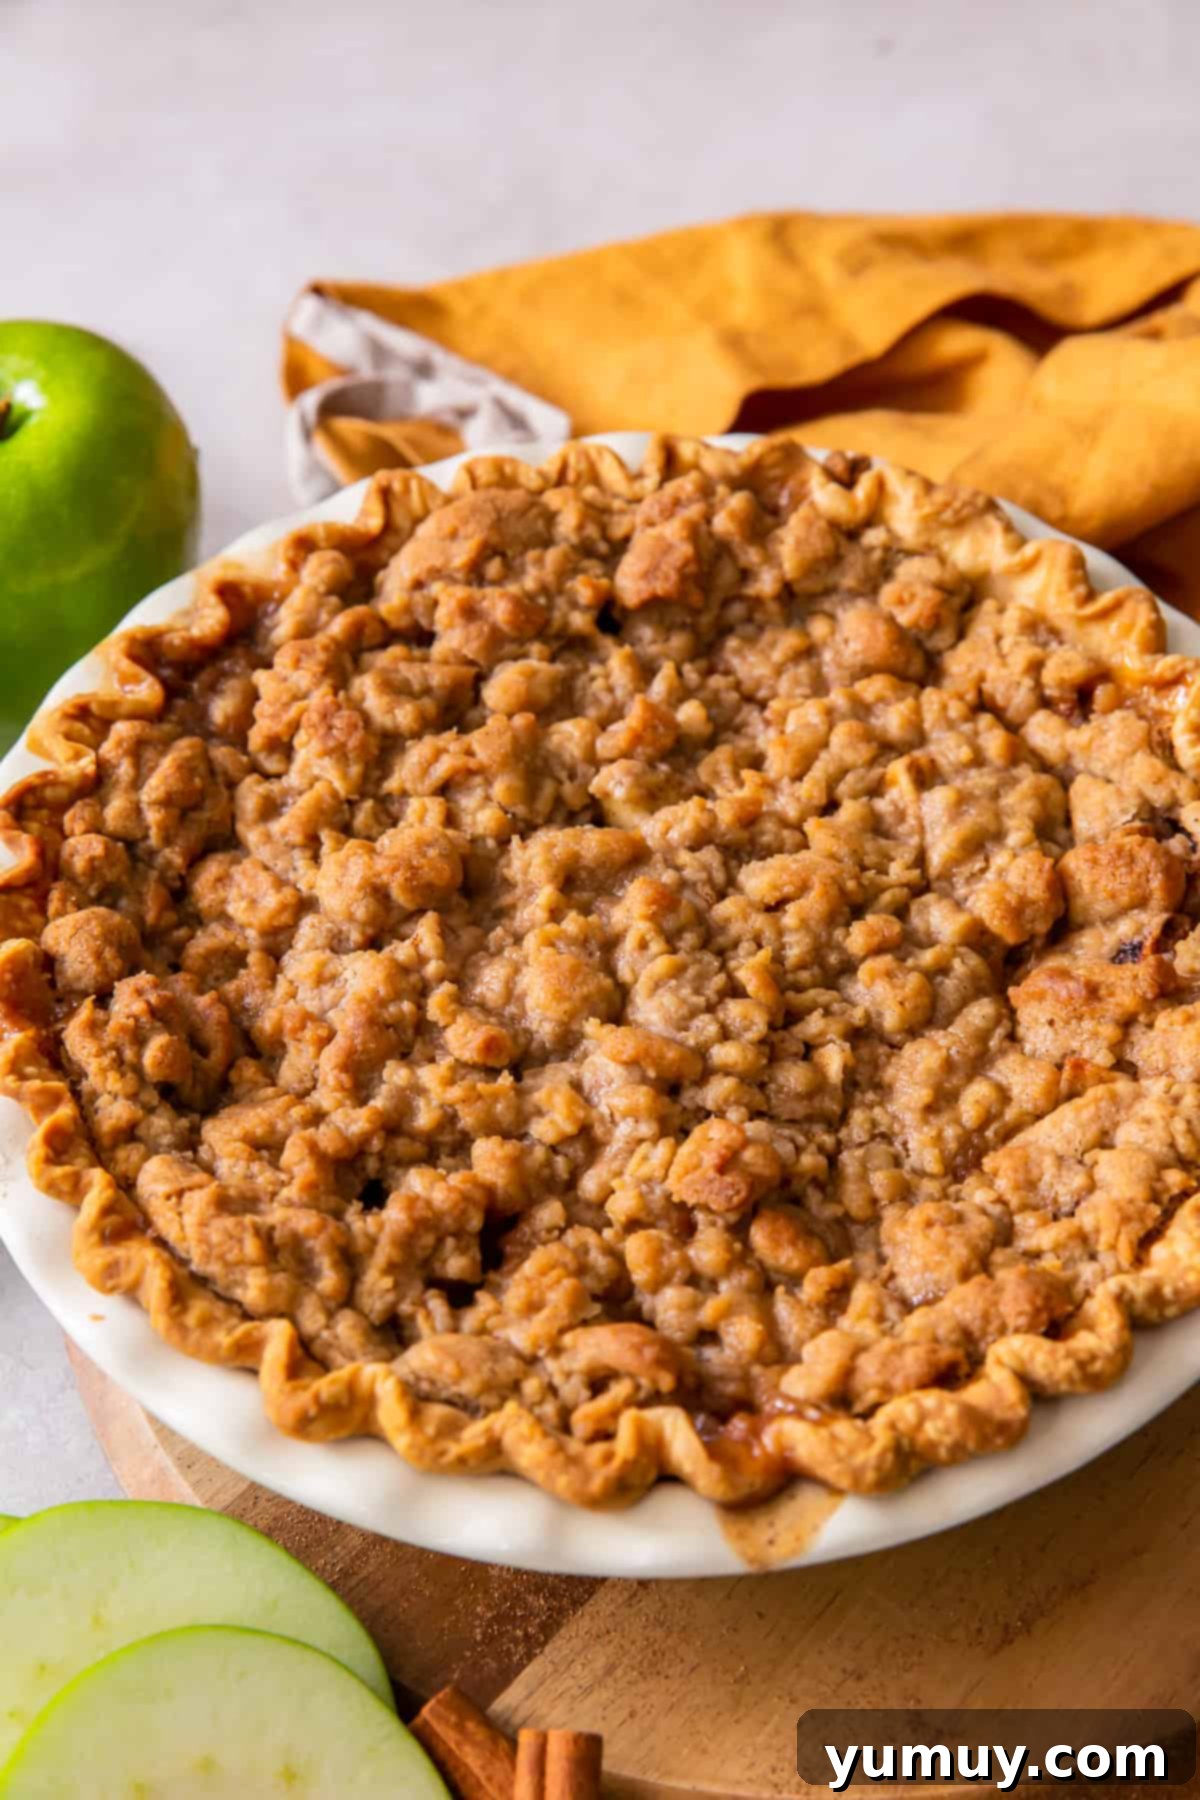
The streusel topping is not just an adornment; it’s a fundamental component of Dutch apple pie, offering a textural contrast and rich flavor that defines the dessert. The ideal streusel is golden brown, delightfully crumbly, and imbued with a rich, buttery taste. Crafting it is surprisingly simple. You’ll combine all-purpose flour, both brown and granulated sugars for a layered sweetness, and a touch more ground cinnamon to echo the spices in the filling. The star ingredient, however, is unsalted butter. It’s best to use cold, cubed butter and work it into the dry ingredients until coarse crumbs form. This can be achieved efficiently using two forks, a pastry blender, or even your fingertips. The goal is to incorporate the butter just enough to create varying sizes of crumbs – from pea-sized to smaller, sandy bits – without overmixing. Overmixing can lead to a dense, cookie-like topping rather than the light, airy crumble we’re aiming for. This buttery, sweet, and spiced topping bakes into a crisp layer that perfectly complements the tender apples below, making every bite an unforgettable experience.
Effortless Elegance: Crafting the Pie Crust
While the filling and streusel are undeniably the stars, a good pie needs a sturdy and flavorful foundation. Our recipe calls for a 9-inch refrigerated pie crust, offering a fantastic shortcut without compromising on the homemade feel. These pre-made crusts are incredibly convenient for busy bakers and provide a consistent, flaky base. To ensure it’s pliable and easy to work with, allow the crust to sit at room temperature for 15-30 minutes before unrolling. You’ll want to gently roll it out into a 12-inch round to fit a standard 9-inch pie plate. Once placed in the plate, tuck in the edges and, with a simple technique, create a beautiful crimped design. This classic scalloped edge is easy to achieve: simply place your index finger on the inside edge of the dough, then use the index finger and thumb of your other hand to pinch the dough from the outside, pushing inward with the first finger. A little practice will make this motion quick and natural, adding a lovely rustic elegance to your pie. Chilling the crimped crust in the refrigerator while you prepare the filling helps prevent shrinkage and ensures a crisp crust. Of course, for those who relish the art of pastry-making, a homemade pie crust can always be substituted for an even more personalized touch.

Dutch Apple Pie Recipe
Ingredients
- 1 9-inch refrigerated pie crust *
- 3 pounds Granny Smith apples peeled, cored, and chopped**
- ¼ cup brown sugar
- ¼ cup granulated sugar
- 1 tablespoon all-purpose flour
- 1 teaspoon ground cinnamon
- ¼ teaspoon kosher salt
- 1 teaspoon lemon juice
For the Streusel Topping
- ⅔ cup brown sugar
- ½ tablespoon granulated sugar
- 1 cup all-purpose flour
- ½ teaspoon ground cinnamon
- ½ cup unsalted butter cubed (1 stick)
Equipment
- Kitchen Scale (optional)
- Pie Pan
Instructions
- Preheat oven to 375°F. Position the oven rack to the lowest position.
- Roll out the pie crust into a 12-inch round and place it in the bottom of a 9-inch pie plate, tucking it in and crimping the edges. Place in the refrigerator to chill while preparing apples.1 9-inch refrigerated pie crust

- In a large bowl, combine the apples with the sugars, flour, cinnamon, salt, and lemon juice. Stir to coat and set aside.3 pounds Granny Smith apples, ¼ cup brown sugar, ¼ cup granulated sugar, 1 tablespoon all-purpose flour, 1 teaspoon ground cinnamon, ¼ teaspoon kosher salt, 1 teaspoon lemon juice

- Prepare the streusel by combining the sugars, flour, cinnamon, and butter in a medium mixing bowl. Use two forks or your fingers to mix everything together until coarse crumbs are formed.1 cup all-purpose flour, ⅔ cup brown sugar, ½ tablespoon granulated sugar, ½ teaspoon ground cinnamon, ½ cup unsalted butter

- Remove the crust from the refrigerator and spread the apples in an even layer, discarding any liquid that has been released. Sprinkle the streusel evenly over the apples. Cover the pie loosely with aluminum foil.

- Bake for 50-60 minutes, removing the foil after 30 minutes, until the apple mixture is bubbly and the streusel and crust are golden.

- Remove the pie from the oven when done and allow it to cool on a cooling rack.
Notes
**I like Granny Smith for their tart flavor and firm texture, but feel free to use your favorite apples.
Tips:
- Make sure you’re spreading the apple filling evenly over the pie crust before adding your streusel on top.
- You can add as much or as little streusel as you’d like. If you want to cover more of the pie, feel free to prepare extra streusel to add on top.
- Pie crust usually becomes soggy due to too much liquid in the filling. Be sure to drain off any excess runny liquid.
- If your pie crust is still soggy, try blind baking, brushing with egg before filling, or baking on a hot baking sheet.
- Baking on a hot baking sheet allows the crust to set faster than the filling, creating a barrier against moisture.
Storage: Store Dutch apple pie in an airtight container in the refrigerator for up to 4 days.
Calories from Fat 126
Step-by-Step Guide to Baking Your Delicious Dutch Apple Pie
Baking this Dutch apple pie is a straightforward and rewarding process. Follow these detailed steps to ensure a perfect pie every time, from a flaky crust to a luscious filling and golden streusel topping.

1. Prepare Your Oven and Crust
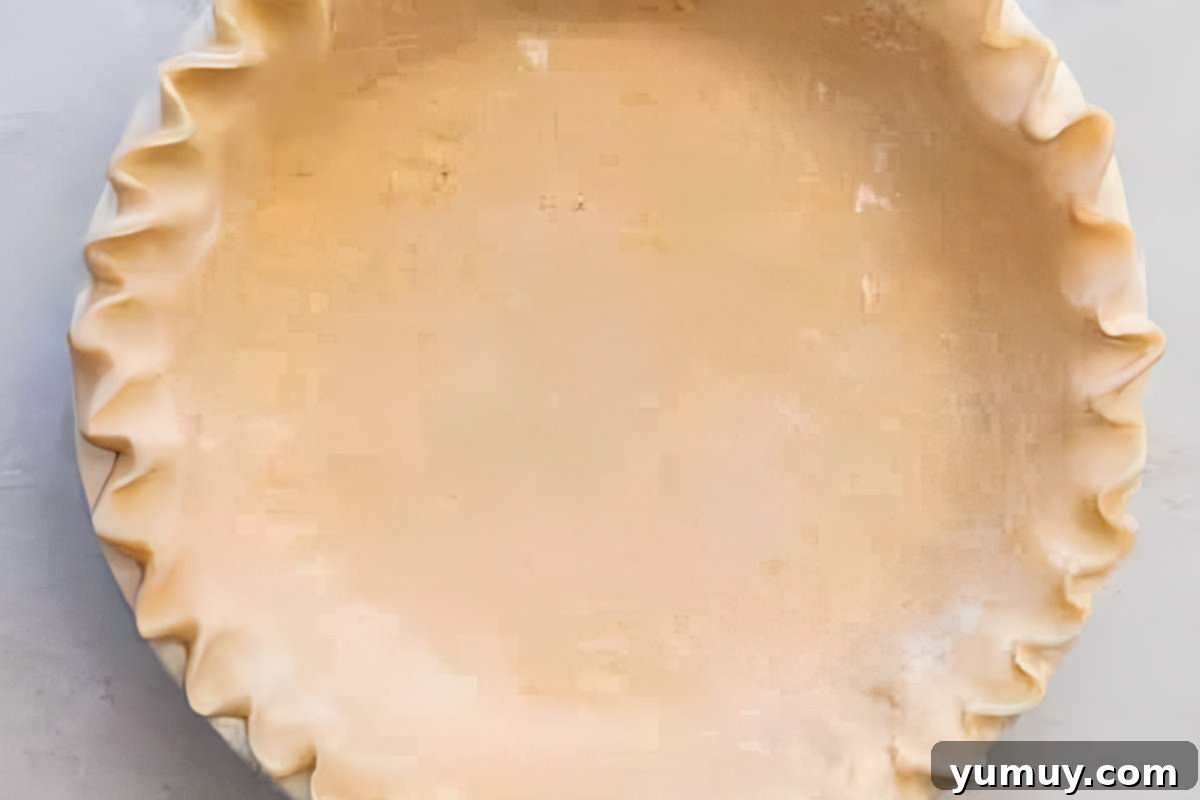
Begin by preheating your oven to 375°F (190°C) and positioning an oven rack to the lowest setting. This ensures the bottom crust bakes thoroughly. Take your 9-inch refrigerated pie crust out of the fridge and let it sit at room temperature for 15-30 minutes; this will make it more pliable. Gently unroll it onto a lightly floured surface and, if necessary, roll it out slightly to achieve a 12-inch round. Carefully transfer the crust into a 9-inch pie plate, pressing it firmly into the bottom and sides. Create a decorative crimped edge by pinching the dough between your thumb and index finger. Place the prepared pie crust back into the refrigerator to chill while you work on the filling. This prevents the crust from shrinking during baking.
2. Mix the Apple Filling
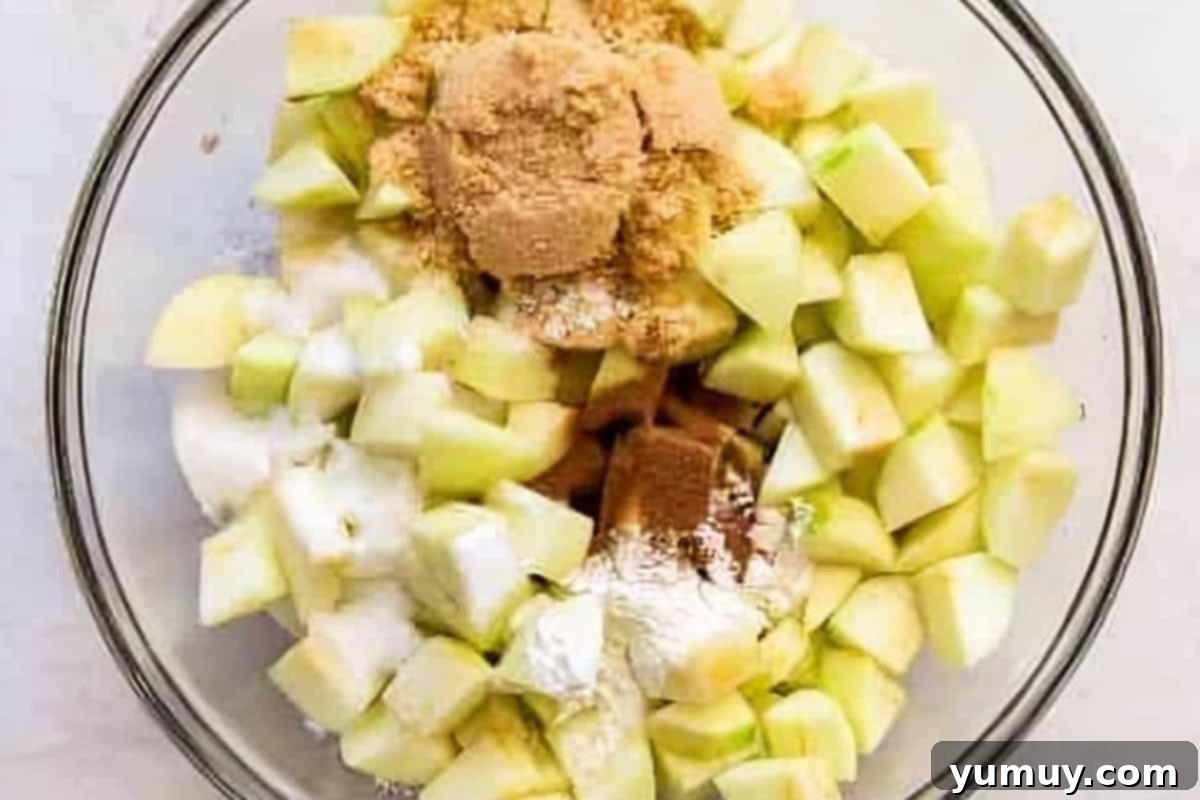
In a large mixing bowl, combine 3 pounds of peeled, cored, and chopped Granny Smith apples. Add ¼ cup of packed brown sugar, ¼ cup of granulated sugar, 1 tablespoon of all-purpose flour, 1 teaspoon of ground cinnamon, ¼ teaspoon of kosher salt, and 1 teaspoon of fresh lemon juice. Toss all the ingredients together thoroughly until the apples are evenly coated with the sugar and spice mixture. Set this bowl aside for a few minutes while you prepare the streusel. During this time, the apples will start to release their delicious juices.
3. Prepare the Streusel Topping
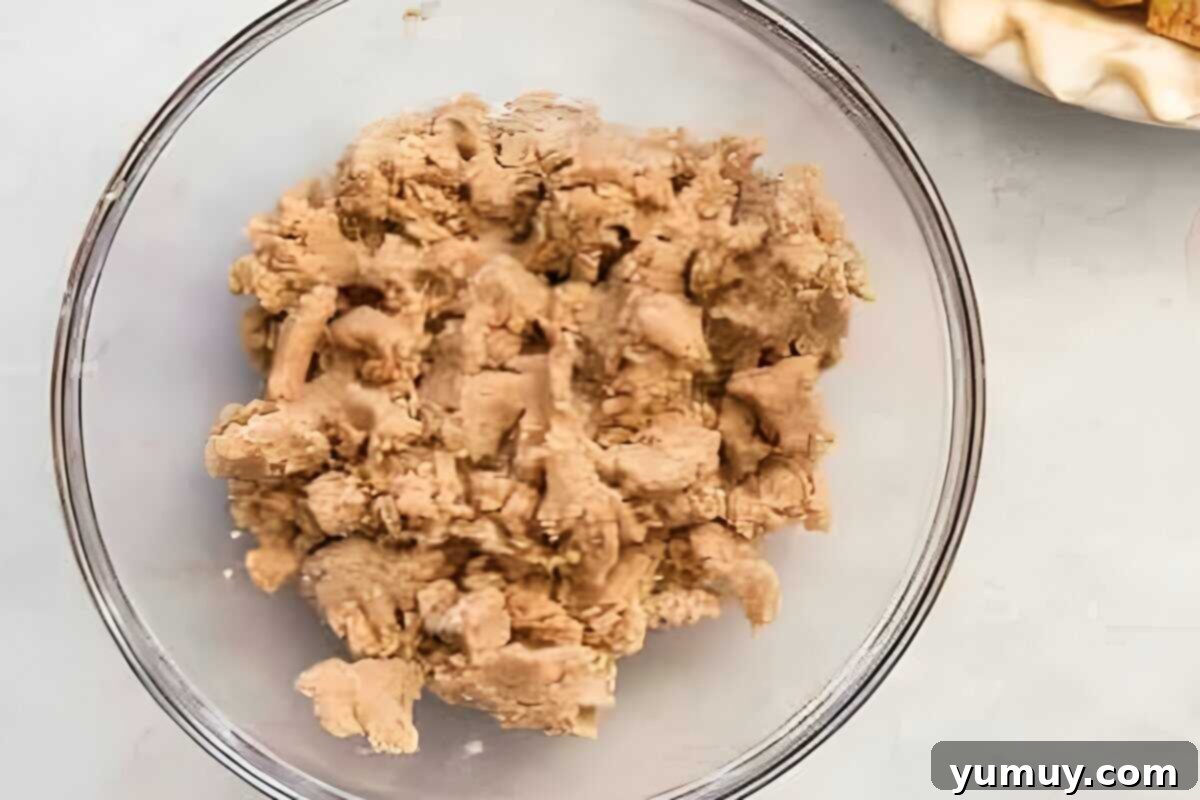
In a separate medium-sized mixing bowl, prepare your irresistible streusel. Combine 1 cup of all-purpose flour, ⅔ cup of packed brown sugar, ½ tablespoon of granulated sugar, and ½ teaspoon of ground cinnamon. Add ½ cup of cold, cubed unsalted butter to the dry ingredients. Using two forks, a pastry blender, or your fingertips, work the butter into the flour mixture until coarse, crumbly pieces form. Some pieces should be pea-sized, while others can be smaller and resemble coarse sand. Be careful not to overmix; you want distinct crumbs, not a smooth dough.
4. Assemble the Pie
Retrieve the chilled pie crust from the refrigerator. Before adding the apple filling, carefully drain any excess liquid that has accumulated in the bottom of the apple bowl; this is a critical step to prevent a soggy crust. Spread the spiced apple mixture evenly into the chilled pie crust, mounding it slightly in the center. Then, evenly sprinkle the prepared streusel topping over the apples, covering them generously. To prevent the crust edges and streusel from browning too quickly during the initial bake, loosely cover the entire pie with aluminum foil.

5. Bake the Pie to Perfection
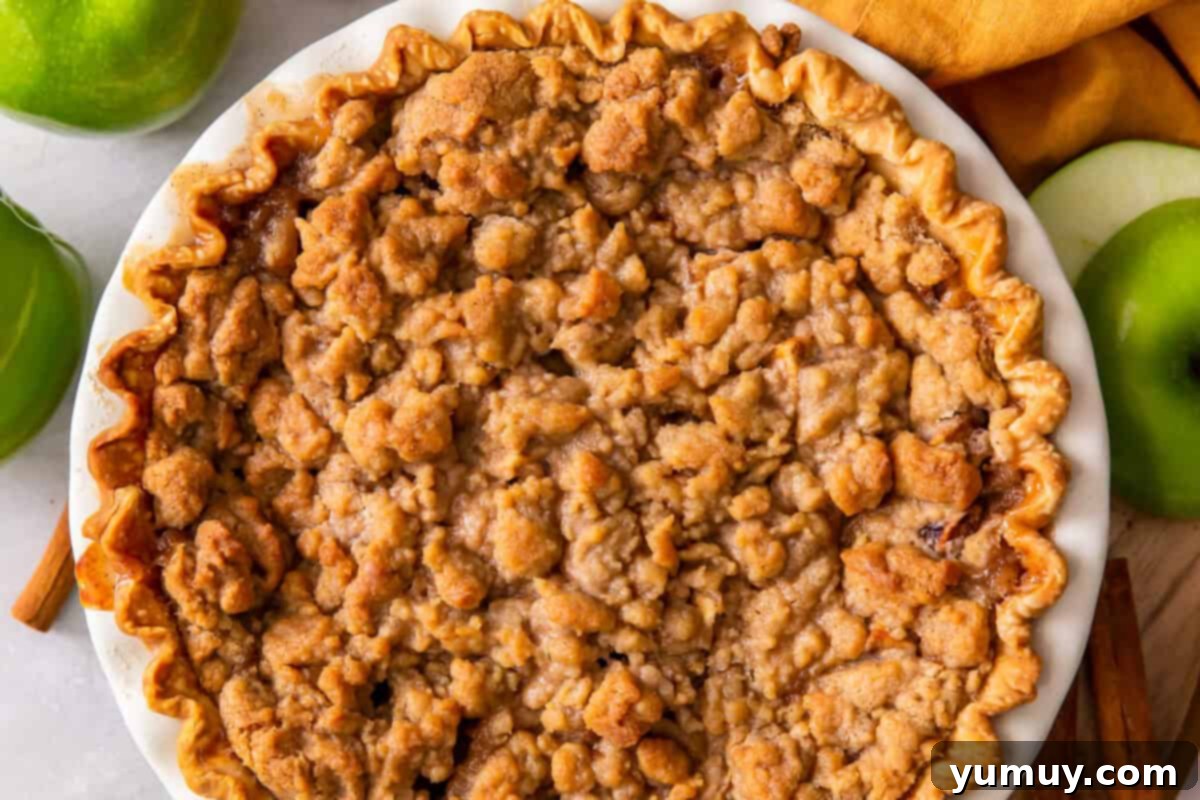
Carefully place the foil-covered pie on the lowest rack in your preheated 375°F (190°C) oven. Bake for an initial 30 minutes. After 30 minutes, remove the aluminum foil. This allows the streusel to brown and crisp up beautifully. Continue baking the pie for another 20-30 minutes, or until the apple mixture is visibly bubbly around the edges, the streusel topping is golden brown and fragrant, and the crust is also golden. You can test the apples for tenderness by gently inserting a thin knife into the filling; it should go in with minimal resistance.

6. Cool Before Serving
Once baked, carefully remove the pie from the oven. It’s crucial to let the Dutch apple pie cool completely on a wire rack before slicing and serving. This cooling period allows the filling to set properly, ensuring clean slices and a perfectly gooey, rather than runny, interior. While it might be tempting to dig in immediately, patience is a virtue here, leading to a much more satisfying dessert experience. The pie will gradually firm up as it cools, developing its full flavor and ideal texture.
Insider Tips for the Perfect Pie
- Apple Selection: While Granny Smith apples are ideal for their tartness and firm texture, feel free to experiment with other varieties. Mixing different apples can add layers of flavor and texture. Good alternatives or additions include Honeycrisp, Braeburn, Golden Delicious, or Fuji.
- Preventing a Soggy Bottom: The number one enemy of pie is a soggy crust. Ensure you thoroughly drain any excess liquid from the apple mixture after it sits; this liquid is a common culprit. For extra insurance, you can blind bake your pie crust for 10-15 minutes before adding the filling, or brush the bottom of the raw crust with a beaten egg white to create a moisture barrier. Baking the pie on a preheated hot baking sheet also helps the bottom crust set faster, creating a protective barrier against the apple juices.
- Customizing the Streusel: Don’t hesitate to adjust the streusel to your liking. If you prefer a thicker, more abundant crumb topping, simply increase the ingredient amounts by half. For added texture and nutty flavor, consider incorporating a handful of rolled oats or chopped pecans into your streusel mixture.
- Spice Variations: While cinnamon is classic, you can enhance the spice profile of your apple pie by adding a pinch of nutmeg, a dash of allspice, or even a touch of cardamom to the apple filling or streusel for a more complex and aromatic flavor.
- Checking for Doneness: Beyond the visual cues of bubbly filling and golden crust, you can also check for doneness by gently inserting a thin, sharp knife into the center of the pie. If the apples are tender and the knife slides in easily, your pie is ready.
Serving Suggestions for Your Delicious Pie
This Dutch apple pie is utterly delicious on its own, but its comforting flavors truly shine when paired with complementary toppings. We highly recommend serving it warm, allowing the gooey apple filling to tantalize your taste buds. A scoop of rich vanilla bean ice cream melting over a warm slice is a classic pairing that adds a creamy contrast. Alternatively, a dollop of freshly whipped cream provides a lighter, airy touch. For an extra decadent treat, drizzle a generous amount of warm caramel sauce over each slice before serving. Whether enjoyed simply or elaborately garnished, this pie promises a delightful dessert experience.
Storage and Reheating Tips
To keep your Dutch apple pie fresh, store any leftovers in an airtight container in the refrigerator for up to 4 days. You can enjoy the pie cold directly from the fridge, at room temperature, or gently warmed. If reheating, a quick blast in the microwave will warm individual slices, or you can place larger portions in a preheated oven (around 300°F/150°C) for about 10-15 minutes until heated through. While it’s tempting to freeze leftovers, we generally don’t recommend freezing this particular pie, as the delicious streusel topping tends to lose its crisp texture and can become soggy once thawed.
More Delectable Pie Recipes to Explore
Coconut Cream Pie
Caramel Apple Pie
Sour Cream Raisin Pie
Buttermilk Pie
Browse All Pies
