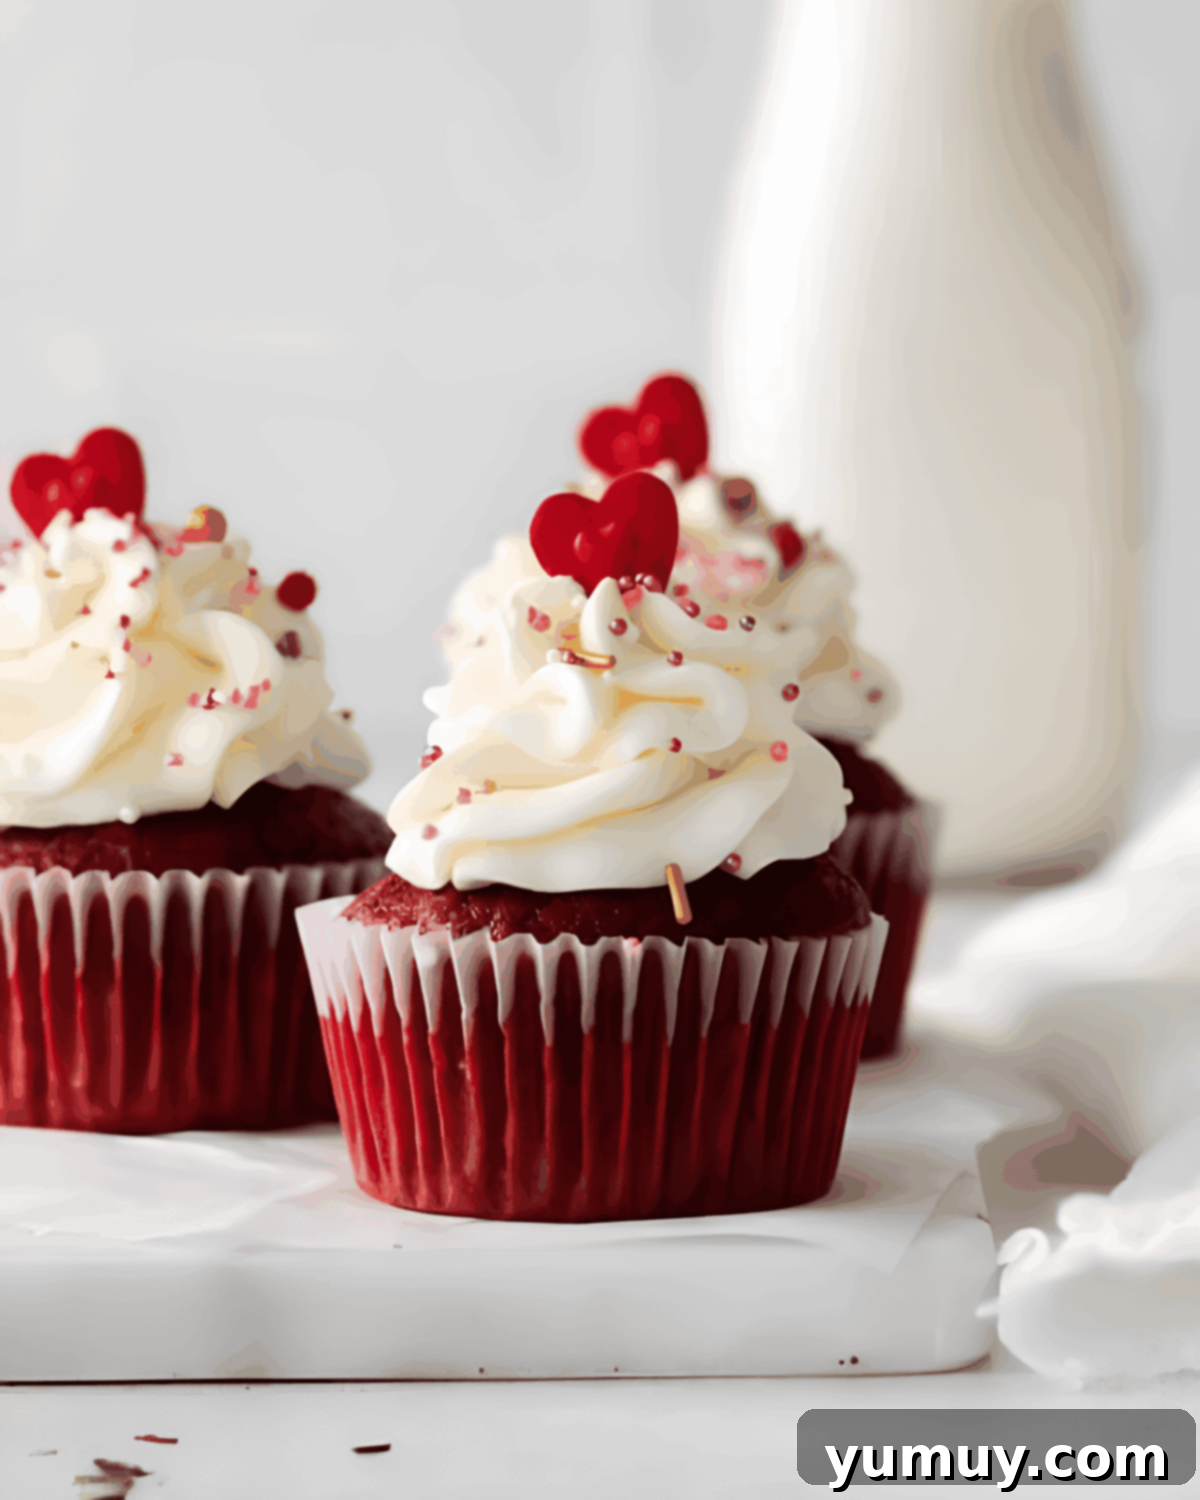
Indulge in the ultimate homemade treat with these exquisite Red Velvet Cupcakes. Each bite promises a harmonious blend of light, airy texture and a delicate hint of cocoa, perfectly complemented by a rich, tangy cream cheese frosting. Whether you’re celebrating holidays, marking a special Valentine’s Day, or simply desiring a show-stopping dessert, these cupcakes are designed to impress with their vibrant color and irresistible flavor. Best of all, this recipe simplifies the classic, ensuring moist and tender results every single time without the need for buttermilk, making it accessible and enjoyable for every home baker.
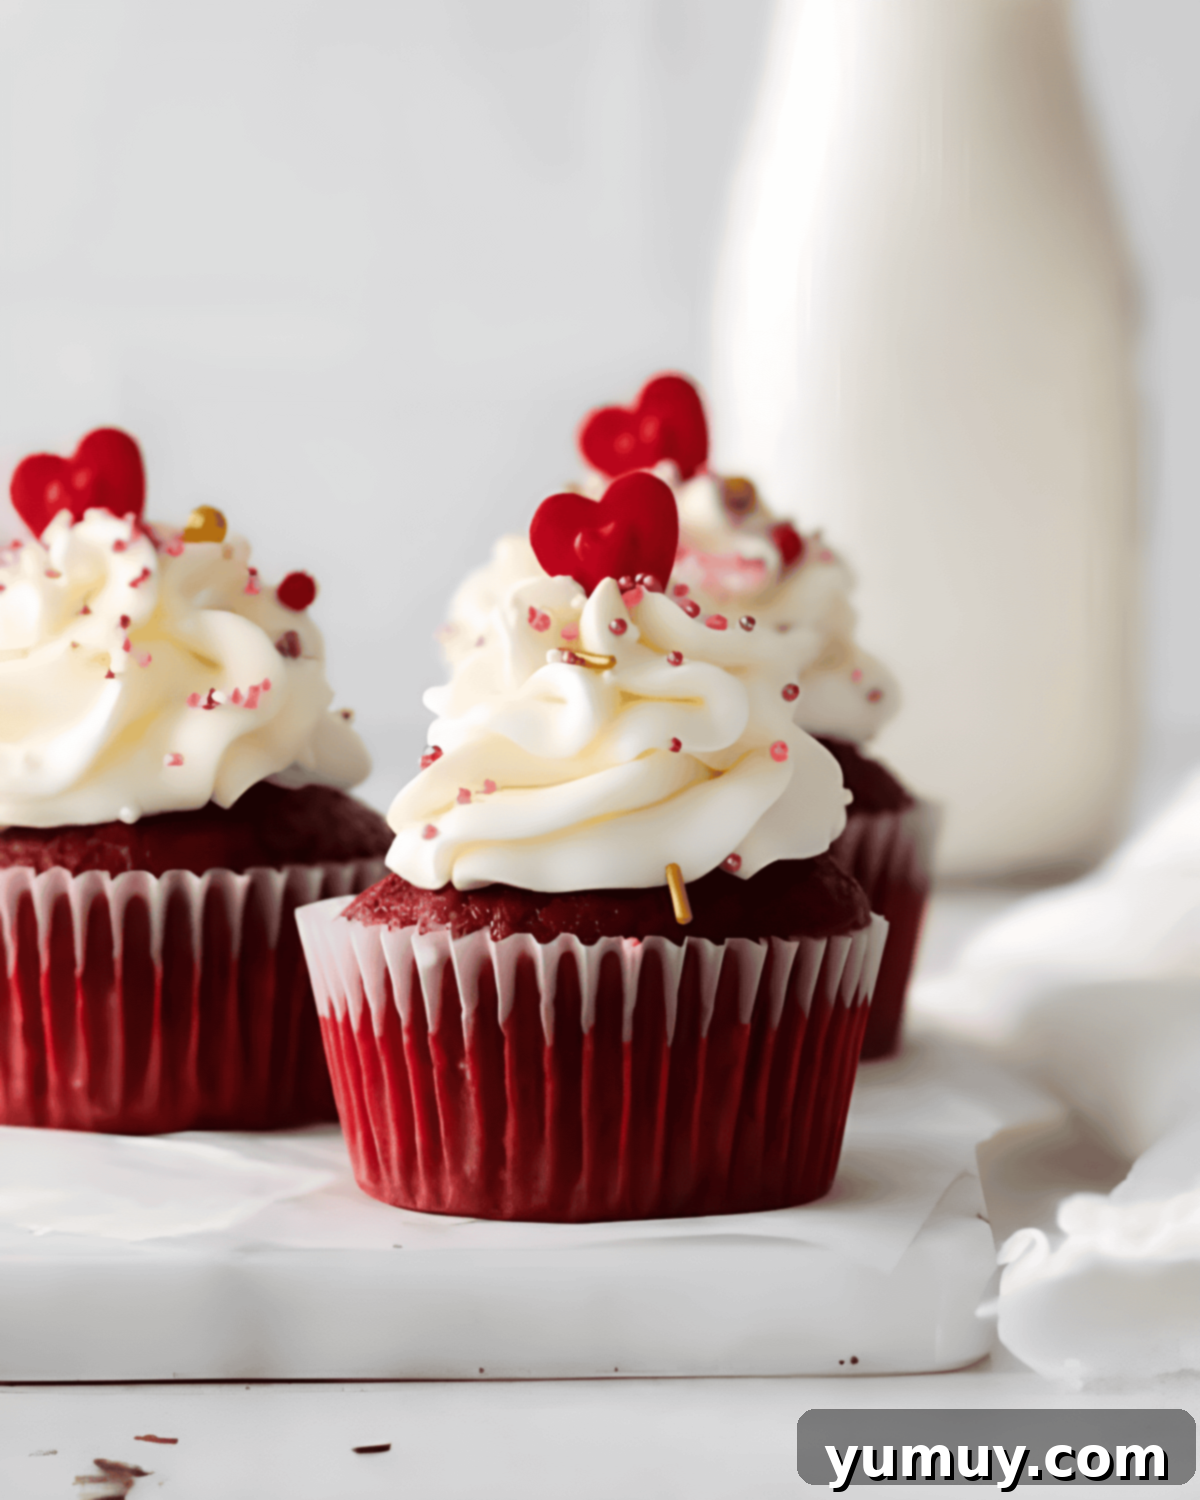
Classic Red Velvet Cupcakes with Tangy Cream Cheese Frosting
Red velvet cupcakes are a true culinary icon, cherished for their distinctive subtle cocoa flavor and an incredibly soft, plush texture that sets them apart from ordinary chocolate cupcakes. This recipe reimagines the traditional red velvet, eliminating the need for buttermilk, which often requires extra planning or specific ingredients. The result is a quicker, simpler baking process that delivers equally delicious, if not superior, results.
Crafted with everyday pantry staples and a straightforward mixing method, these red velvet cupcakes crowned with their signature cream cheese frosting are perfect for bakers of all experience levels. You’ll find yourself creating moist, tender cupcakes that not only hold their beautiful structure but also provide the ideal canvas for a generous swirl of rich, decadent frosting. The elegant contrast of the deep red cake and the pristine white frosting makes them a visually stunning centerpiece for any dessert table, inviting everyone to savor their unique charm.
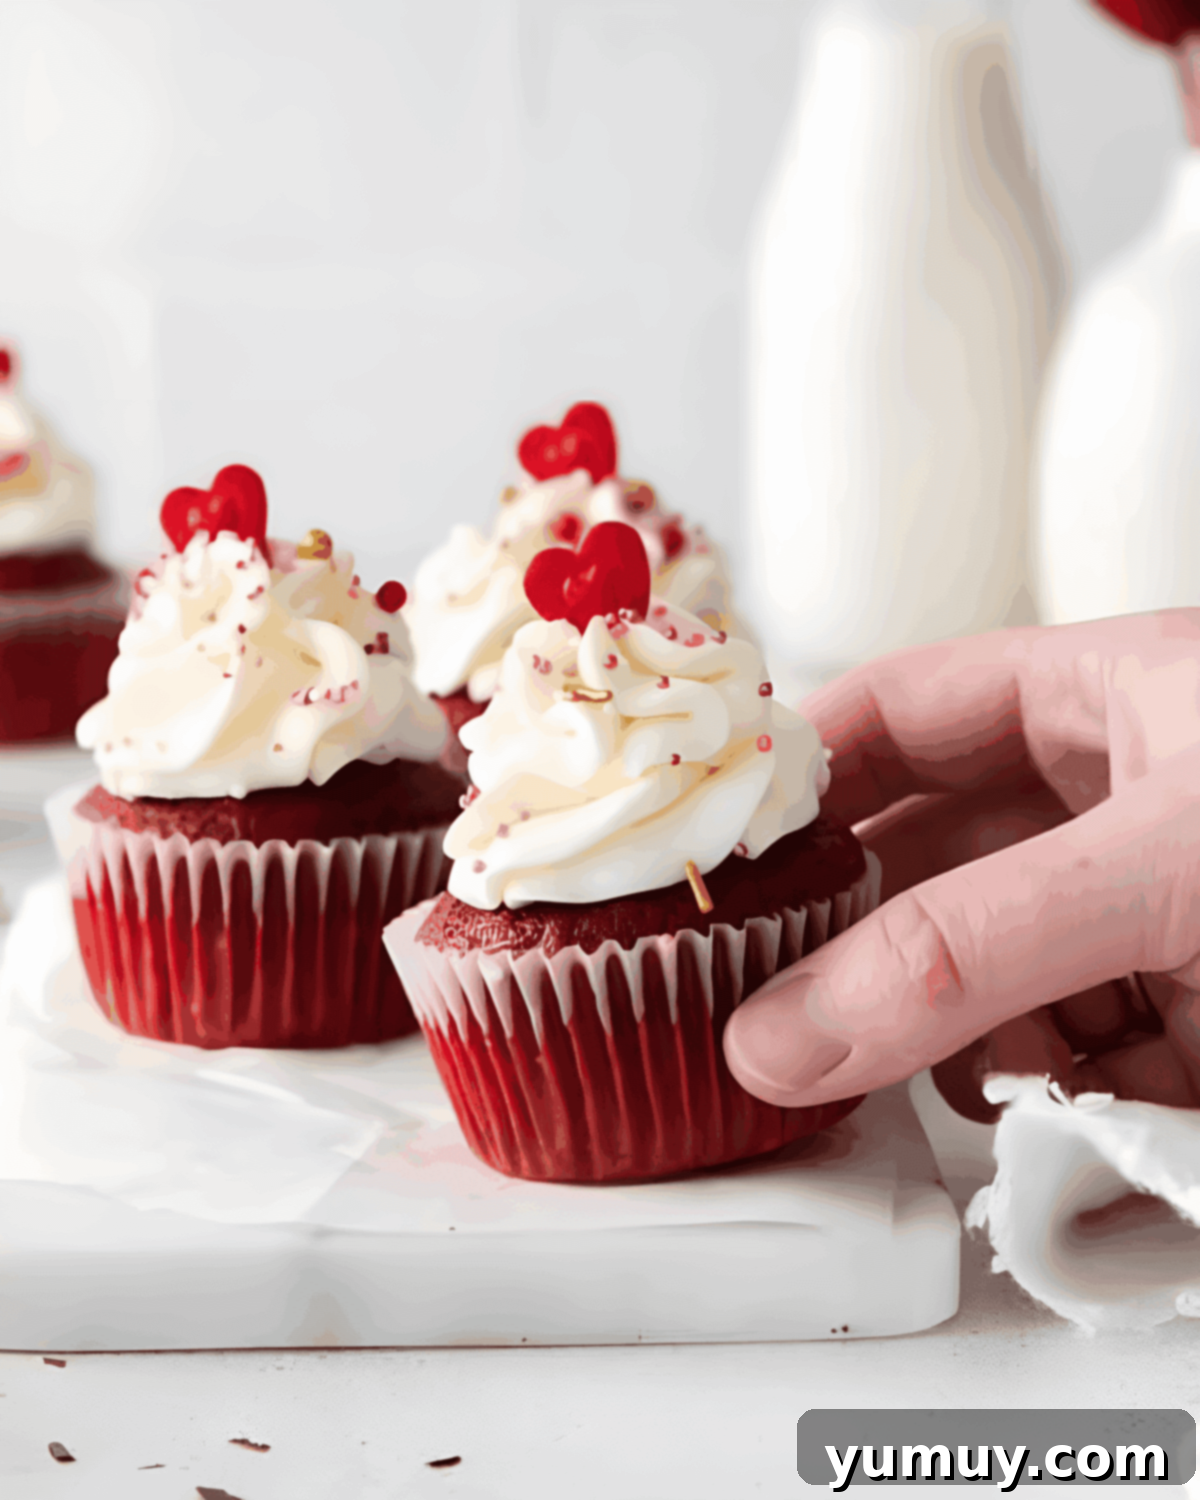
The Secret to Perfectly Moist and Vibrant Red Velvet Cupcakes
Achieving moist red velvet cupcakes with a captivating, even color and an incredibly soft crumb often hinges on a few key techniques. To ensure that bright red hue truly pops (even without excessive food coloring) and to fully develop that signature subtle cocoa flavor, I highly recommend a simple trick: whisk the cocoa powder into your room-temperature milk *before* incorporating it into the main batter. This step allows the cocoa solids to “bloom,” intensifying their flavor and ensuring they disperse evenly throughout the liquid. This not only prevents streaks but also contributes significantly to a tender, uniform texture that melts in your mouth.
Using room-temperature ingredients for both the cupcakes and the frosting is another crucial element. When ingredients like milk, butter, and eggs are at room temperature, they emulsify more easily with each other, creating a smooth, homogenous batter and frosting. This leads to a finer crumb in your cupcakes and a velvety, lump-free texture in your cream cheese frosting. The careful balance of these elements ensures your red velvet cupcakes are not just delicious but also aesthetically perfect, ready to be adorned with their signature topping.
Easy Homemade Red Velvet Cupcakes Recipe
These homemade red velvet cupcakes are celebrated for their light, fluffy texture and are magnificently crowned with the most decadent, perfectly balanced cream cheese frosting you’ll ever taste! A simple recipe for an unforgettable dessert.
Ingredients
For the Cupcakes
- ½ cup whole milk, room temperature*
- ½ cup unsalted butter, melted (1 stick)
- 2 large eggs, room temperature
- 1 teaspoon pure vanilla extract
- Red food coloring (optional)
- 1 cup granulated sugar
- 1¼ cups all-purpose flour
- 2 tablespoons unsweetened cocoa powder**
- 1 teaspoon baking powder
For the Cream Cheese Frosting
- 6 tablespoons unsalted butter, room temperature (¾ stick)
- 4 ounces cream cheese, room temperature (½ brick)
- 2½ cups powdered sugar
- 1 teaspoon pure vanilla extract
Equipment
- Kitchen Scale (optional, for precise measurements)
- 12-Cup Cupcake Tin
- Stand Mixer (or hand mixer)
- Piping Tip Set (optional, for decorative frosting)
Instructions
For the Cupcakes
Prepare Your Baking Station: Preheat your oven to 350°F (175°C). Line a standard 12-cup cupcake tin with paper liners. This prepares your tin for baking and ensures easy removal of your cupcakes.

Combine Wet Ingredients: In a large mixing bowl, thoroughly whisk together the room-temperature whole milk, melted unsalted butter, room-temperature large eggs, and pure vanilla extract. If you are using red food coloring, add it now and whisk until the mixture achieves a vibrant, uniform red hue.

Incorporate Sugar: Add the granulated sugar to the wet mixture. Continue whisking until the sugar is fully dissolved and well combined, ensuring the mixture is smooth.
Add Dry Ingredients: Gently fold in the all-purpose flour, unsweetened cocoa powder, and baking powder. Whisk just until the dry ingredients are fully incorporated and no large lumps remain. Be careful not to overmix the batter, as this can lead to tough cupcakes.

Fill Cupcake Liners: Evenly divide the prepared batter among the 12 cupcake liners, filling each approximately two-thirds full (about ¼ cup per well). This ensures the cupcakes bake evenly and rise without overflowing.

Bake to Perfection: Bake for 16-18 minutes, or until a wooden toothpick inserted into the center of a cupcake comes out clean, indicating they are fully cooked. Avoid overbaking to maintain moisture.

Cool Completely: Remove the baked cupcakes from the tin and transfer them to a wire rack. Allow them to cool completely to room temperature before applying the frosting. This step is critical to prevent the frosting from melting.
For the Cream Cheese Frosting
Cream Butter and Cream Cheese: In the bowl of a stand mixer fitted with the paddle attachment (or using a hand mixer), combine the room-temperature unsalted butter and cream cheese. Beat on medium speed for 1-2 minutes until the mixture is exceptionally smooth, creamy, and thoroughly combined, with no visible lumps.

Incorporate Powdered Sugar and Vanilla: With the mixer on low speed, gradually add the powdered sugar, one cup at a time, allowing it to fully incorporate after each addition. Once all the sugar is added, mix in the pure vanilla extract until just combined.
Whip to Fluffy Perfection: Stop the mixer and scrape down the sides and bottom of the bowl to ensure all ingredients are well blended. Increase the mixer speed to medium-high and beat for an additional minute, or until the frosting becomes noticeably light, airy, and fluffy.

Prepare for Piping: Transfer the finished cream cheese frosting to a piping bag fitted with your favorite piping tip. A Wilton 1M tip is excellent for classic swirls.
Frost and Garnish: Pipe the creamy frosting generously onto each completely cooled red velvet cupcake. If desired, garnish immediately with festive sprinkles or other decorations while the frosting is still moist and pliable to ensure they adhere well.

Notes & Expert Tips
*For the richest flavor and most tender crumb, full-fat whole milk is highly recommended, but any milk you have on hand will work. If you prefer a more traditional red velvet tang, feel free to use buttermilk in place of regular milk.
**Dutch-process cocoa powder is ideal for red velvet cupcakes as it provides a darker color and a smoother, less acidic chocolate flavor, which perfectly complements the subtle tang of red velvet. However, natural unsweetened cocoa powder can also be used if Dutch-process is unavailable.
Baking Success Tips:
- Accurate Measuring: Always spoon and level your dry ingredients (especially flour) if you’re not using a kitchen scale. This prevents adding too much flour, which can result in dense, dry cupcakes.
- Room Temperature Ingredients: Ensure all cold ingredients (milk, butter, eggs, cream cheese) are at room temperature. This allows them to emulsify properly, creating a smooth, lump-free batter and frosting.
- Do Not Overmix: Overmixing the batter develops the gluten in the flour, leading to tough, chewy cupcakes. Mix only until the ingredients are just combined.
- Cool Completely: It’s absolutely crucial that your cupcakes are completely cool before frosting. Even slightly warm cupcakes will cause the cream cheese frosting to melt and slide off, ruining your presentation.
- Food Coloring: The amount and type of red food coloring can significantly impact the final shade. Gel food coloring provides a more vibrant color with less liquid, making it ideal. Adjust to your desired shade of red.
- Piping Perfection: If you don’t have a dedicated piping tip set, you can easily use a strong Ziplock bag. Fill it with frosting, snip a small corner off the bag, and pipe away! This creates a simple yet effective way to decorate.
Storage Guidelines:
Store your delectable red velvet cupcakes in an airtight container in the refrigerator for up to 3 days. For longer storage, they can be frozen for up to 1 month. When freezing, ensure the cupcakes are fully cooled and individually wrapped before placing them in an airtight container or freezer bag. Thaw frozen cupcakes overnight in the refrigerator before serving. They are delightful served cold or allowed to come to room temperature for about 30 minutes before enjoying.
Variations to Try:
- Espresso Boost: For a deeper, more pronounced chocolate flavor, consider adding ½ teaspoon of instant espresso powder to the dry ingredients. This enhances the cocoa without making the cupcakes taste like coffee.
- Mini Cupcakes: For delightful bite-sized treats, use a mini cupcake tin and reduce the baking time to approximately 10-12 minutes. Adjust as needed for your oven.
- Chocolate Drizzle: Elevate the elegance by drizzling melted white or dark chocolate over the frosted cupcakes. This adds an extra layer of flavor and a sophisticated visual appeal.
Calories from Fat 171
Step-by-Step Guide to Baking Irresistible Red Velvet Cupcakes
Creating these delightful red velvet cupcakes is a rewarding experience, and following these detailed steps will ensure your success. Remember, attention to detail at each stage contributes to the perfect end result: tender, flavorful cupcakes with luscious frosting.
1. Gather and Prepare Your Ingredients
Before you begin mixing, ensure all your ingredients are measured and ready. Bring the milk, butter, eggs, and cream cheese to room temperature approximately 30-60 minutes before you start. This is a critical step because room-temperature ingredients combine more smoothly and create a more uniform, tender crumb in your cupcakes, as well as a silky-smooth frosting. Melt the unsalted butter for the cupcakes gently in the microwave (about 30 seconds should suffice, but watch it carefully to avoid overheating). While your ingredients are reaching optimal temperature, preheat your oven to 350°F (175°C) and line a 12-count cupcake tin with paper liners. Having everything prepped makes the baking process seamless and enjoyable.
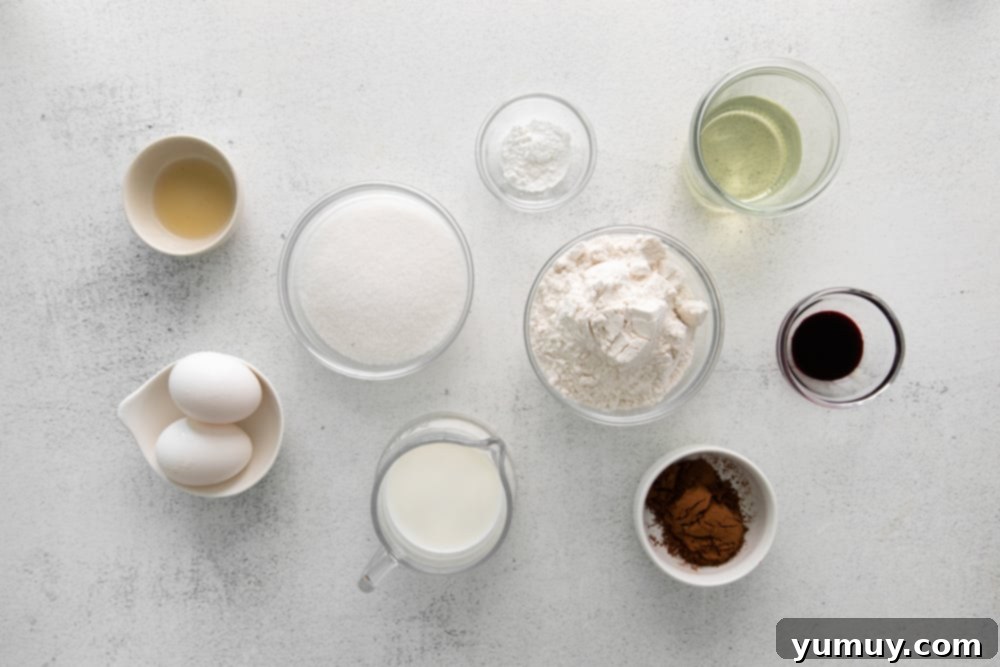
2. Whisk the Wet Ingredients to Perfection
In a generously sized mixing bowl, combine the liquid components that form the heart of your cupcakes. Whisk together ½ cup of room-temperature whole milk, ½ cup of melted unsalted butter, 2 large room-temperature eggs, and 1 teaspoon of pure vanilla extract. If you choose to use red food coloring for that iconic vibrant hue, add it at this stage. Whisk thoroughly until the mixture is completely smooth and evenly colored. Next, add 1 cup of granulated sugar and continue whisking until the sugar has fully dissolved and the mixture is well combined. This ensures a consistent sweetness throughout your cupcakes.

3. Gently Fold in the Dry Ingredients
Now, it’s time to introduce the dry components that give your cupcakes structure. Add 1¼ cups of all-purpose flour, 2 tablespoons of unsweetened cocoa powder, and 1 teaspoon of baking powder to your wet mixture. With a whisk or a rubber spatula, gently fold these dry ingredients into the wet mixture. The key here is to mix just until no large lumps of flour remain. Be exceptionally careful not to overmix the batter. Overmixing can overdevelop the gluten in the flour, resulting in tough, dry, and crumbly cupcakes—a common pitfall that can easily be avoided with a light hand.
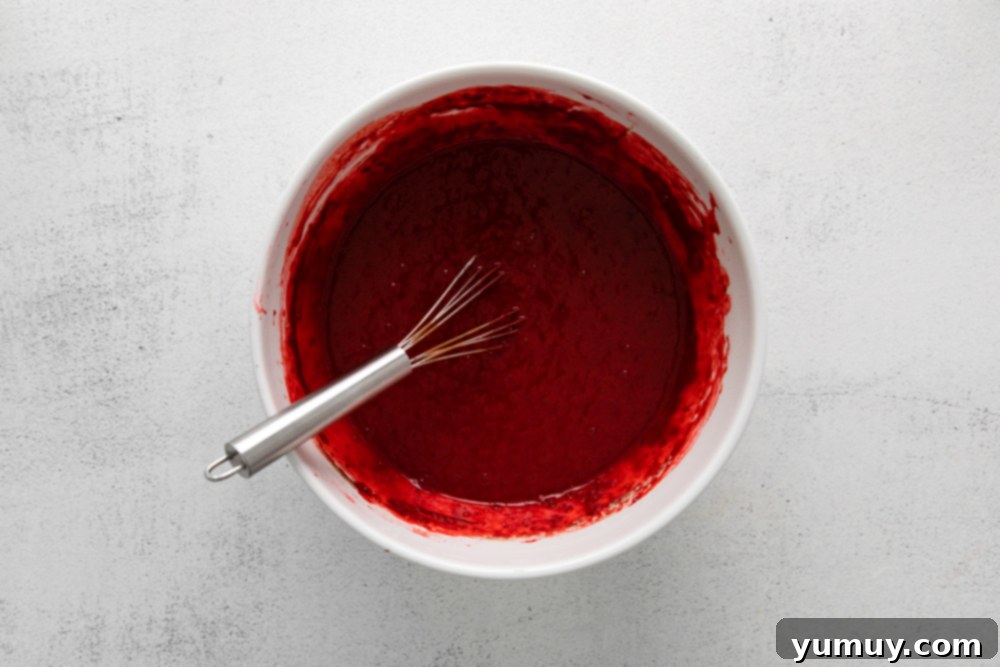
4. Portion the Cupcakes for Even Baking
Once your batter is ready, it’s time to fill the cupcake liners. Carefully divide the red velvet batter evenly among the 12 wells of your prepared cupcake tin. Aim to fill each liner with about ¼-cup of batter, or roughly two-thirds full. It’s important not to overfill the liners, as this can cause the batter to overflow during baking, leading to unevenly shaped cupcakes and a messy oven. Consistent filling ensures each cupcake bakes uniformly and achieves a beautiful dome.
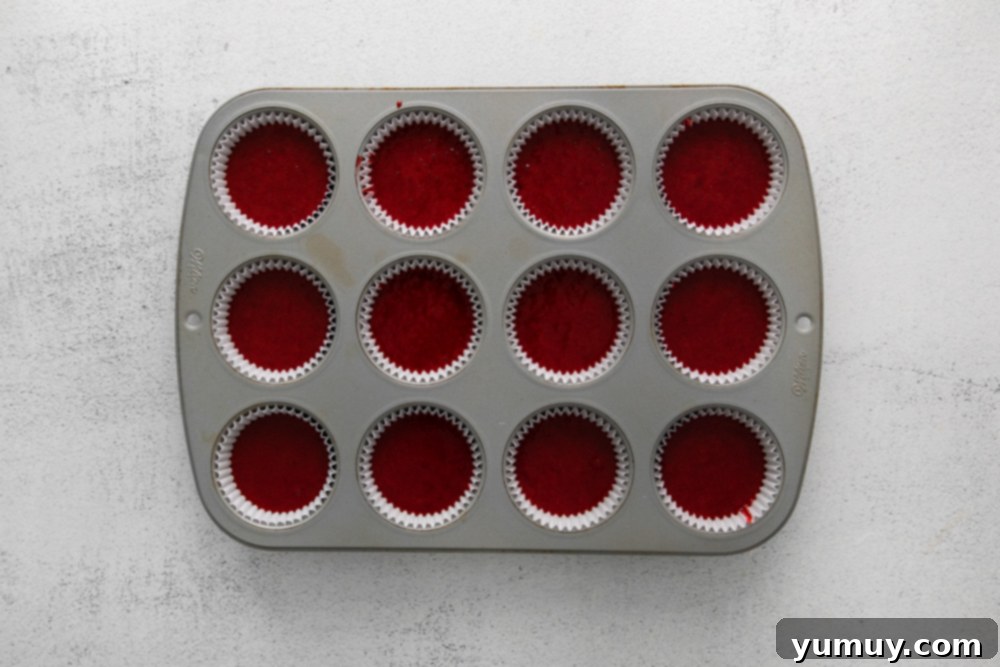
5. Bake and Cool Your Red Velvet Cupcakes
Place your filled cupcake tin into the preheated 350°F (175°C) oven. Bake for approximately 16-18 minutes. The best way to check for doneness is to insert a wooden toothpick into the center of one of the cupcakes; it should come out clean or with only moist crumbs attached. Avoid leaving them in the oven for too long, as overbaking is the quickest way to dry out your delicious treats. Once baked, remove the cupcakes from the oven and transfer them immediately to a wire rack. Allow them to cool completely before you even think about frosting them. Warm cupcakes will cause your beautiful cream cheese frosting to melt and slide right off, creating a sticky mess.
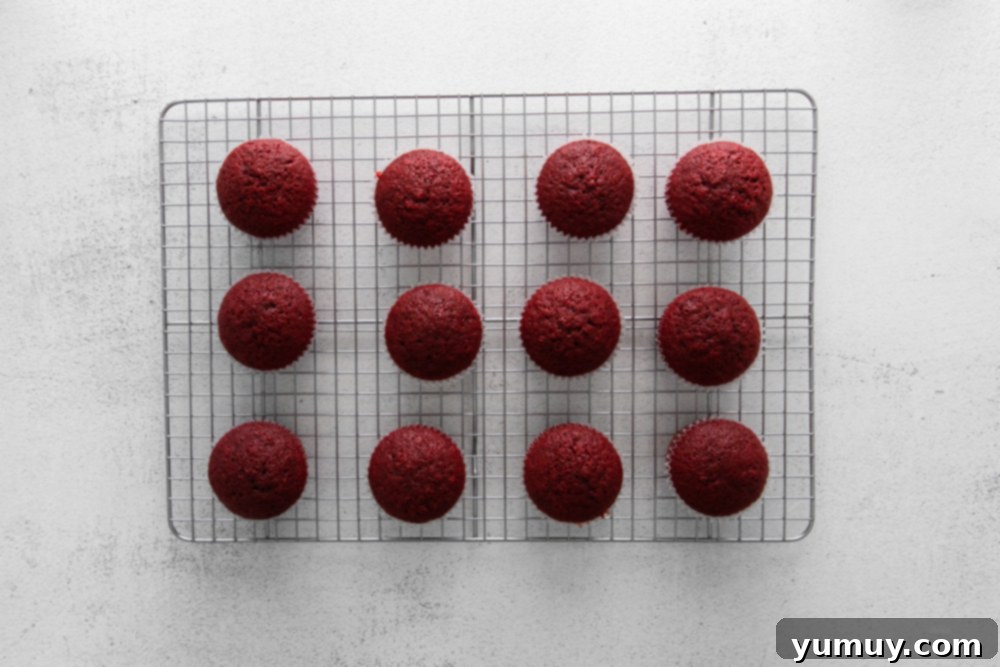
6. Prepare the Decadent Cream Cheese Frosting
While your cupcakes are cooling, prepare the luxurious cream cheese frosting. In the bowl of a stand mixer fitted with the paddle attachment (or using a hand mixer), combine 6 tablespoons of room-temperature unsalted butter and 4 ounces (½ brick) of room-temperature cream cheese. Beat these together on medium speed for 1-2 minutes until the mixture is incredibly smooth, creamy, and free of any lumps. Reduce the mixer speed to low and slowly add 2½ cups of powdered sugar and 1 teaspoon of pure vanilla extract. Mix until these ingredients are just incorporated. Then, scrape down the sides and bottom of the bowl to ensure everything is thoroughly combined. Increase the mixer speed to medium-high and beat for an additional minute, or until the frosting transforms into a light, airy, and fluffy consistency.
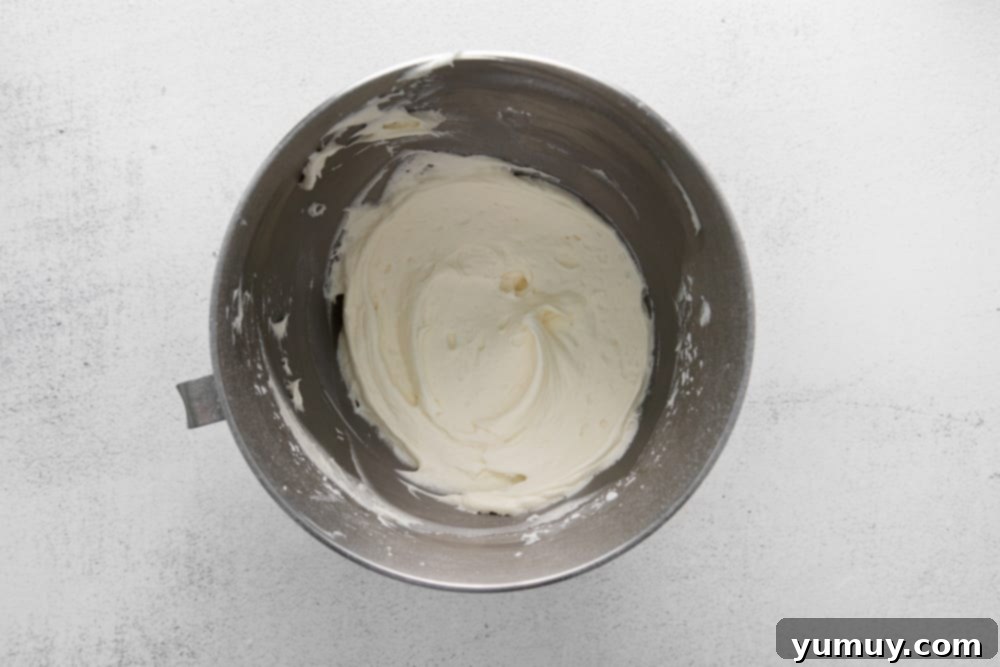
7. Frost and Garnish for a Perfect Finish
Once your cupcakes are completely cool and your frosting is whipped to perfection, it’s time for the grand finale. Transfer the cream cheese frosting to a piping bag fitted with your choice of tip (a Wilton 1M is excellent for beautiful swirls, but any decorative tip will work, or even a ziplock bag with a corner snipped off). Pipe the frosting generously onto each cooled cupcake. For an extra touch of festivity and charm, garnish with sprinkles or other decorations immediately after piping, while the frosting is still soft and pliable. This ensures your embellishments adhere beautifully, creating a stunning and delicious dessert ready to be enjoyed!
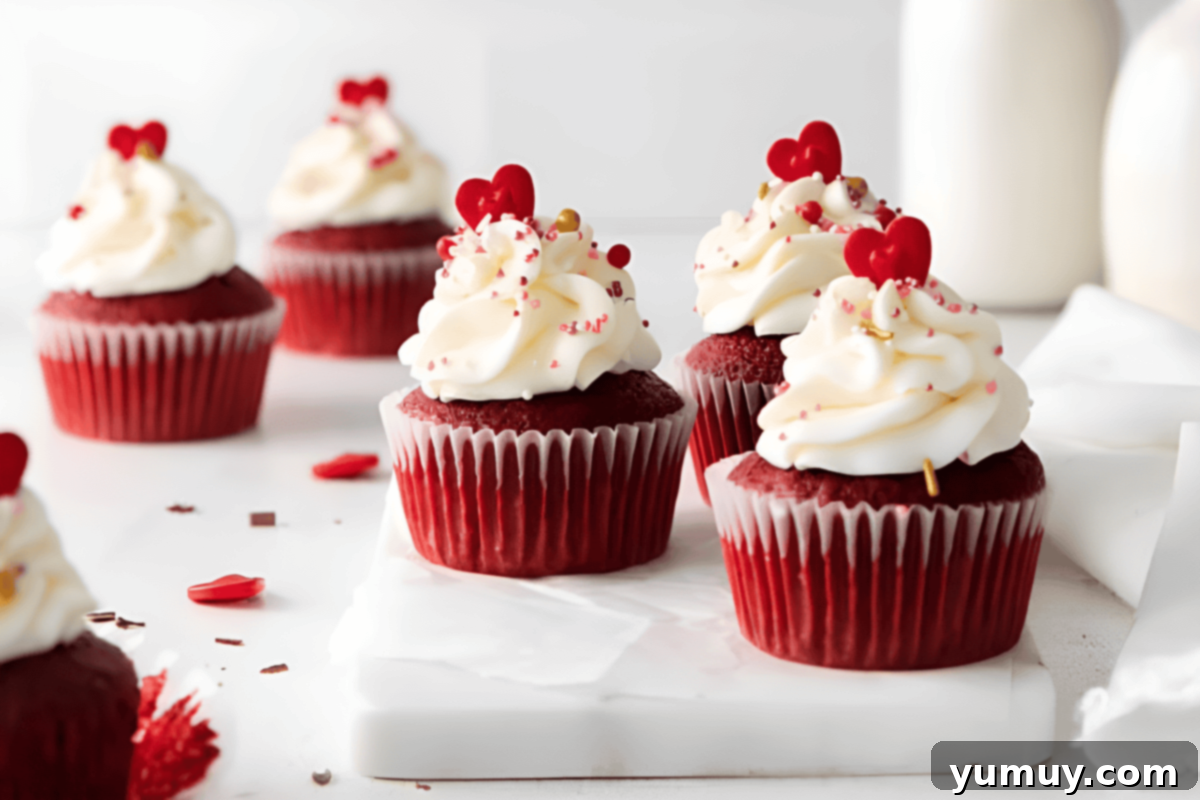
Storage and Make-Ahead Tips for Red Velvet Cupcakes
To keep your red velvet cupcakes fresh and delicious, proper storage is key. Store any leftover cupcakes, complete with their luscious cream cheese frosting, in an airtight container in the refrigerator. They will remain wonderfully fresh and moist for up to 3 days. If you’re planning further ahead or have a larger batch, these cupcakes freeze exceptionally well. You can freeze them for up to 1 month. For best results when freezing, ensure the cupcakes are completely cool. If they are frosted, it’s best to flash-freeze them on a tray until the frosting is firm, then wrap each cupcake individually in plastic wrap and place them in an airtight freezer-safe container or bag. When you’re ready to enjoy them, simply let them thaw overnight in the refrigerator. They are delightful served cold directly from the fridge or allowed to come to room temperature for about 30 minutes before serving, allowing the frosting to soften slightly.
Frequently Asked Questions About Red Velvet Cupcakes
- What gives red velvet its unique flavor?
- Red velvet’s distinctive flavor comes from a combination of cocoa powder, a touch of vinegar (or in this recipe, the subtle tang from cream cheese in the frosting, or optional buttermilk), and sometimes a tiny bit of red food coloring. The cocoa powder is usually less than that in a typical chocolate cake, giving it a milder, almost malty chocolate note rather than an intense cocoa punch. The acidic elements interact with the cocoa and baking soda, creating a tender crumb and a slight tanginess that balances the sweetness.
- Is red velvet just chocolate cake with red food coloring?
- While red velvet cake does contain cocoa powder, it is distinctly different from a standard chocolate cake. Traditional chocolate cakes often feature a much higher cocoa content, resulting in a deeper, more robust chocolate flavor. Red velvet cake has a subtle cocoa flavor, a tanginess from its acidic ingredients, and a unique tender texture that sets it apart. The red color is traditionally achieved through a chemical reaction between natural cocoa and acidic ingredients, though modern recipes often rely on food coloring to enhance or guarantee the vibrant hue.
- Can I make these red velvet cupcakes without food coloring?
- Absolutely! You can certainly make red velvet cupcakes without adding any red food coloring. The natural chemical reaction between the cocoa powder and acidic ingredients (even in small amounts) will still produce a reddish-brown tint, especially if you use natural cocoa powder. However, without additional food coloring, the color will be a much deeper, more subtle red or brown, rather than the bright, vivid red typically associated with red velvet. The flavor and texture will remain just as delicious.
- Why are my red velvet cupcakes dry or tough?
- Several factors can lead to dry or tough red velvet cupcakes. The most common culprits include overmixing the batter, which develops too much gluten and makes the texture dense; using too much flour, often due to improper measurement (always spoon and level your flour, or use a kitchen scale); or overbaking, which dries out the moisture from the cake. Ensuring your ingredients are at room temperature and accurately measuring them, combined with careful mixing and baking just until a toothpick comes out clean, will help you achieve perfectly moist and tender cupcakes every time.
More Indulgent Red Velvet Recipes to Explore!
Rich & Creamy Red Velvet Fudge
Decadent Red Velvet Cake with Raspberry Cream Cheese Frosting
Irresistible Red Velvet Cake Truffles
Quick & Easy Red Velvet Mug Cake
