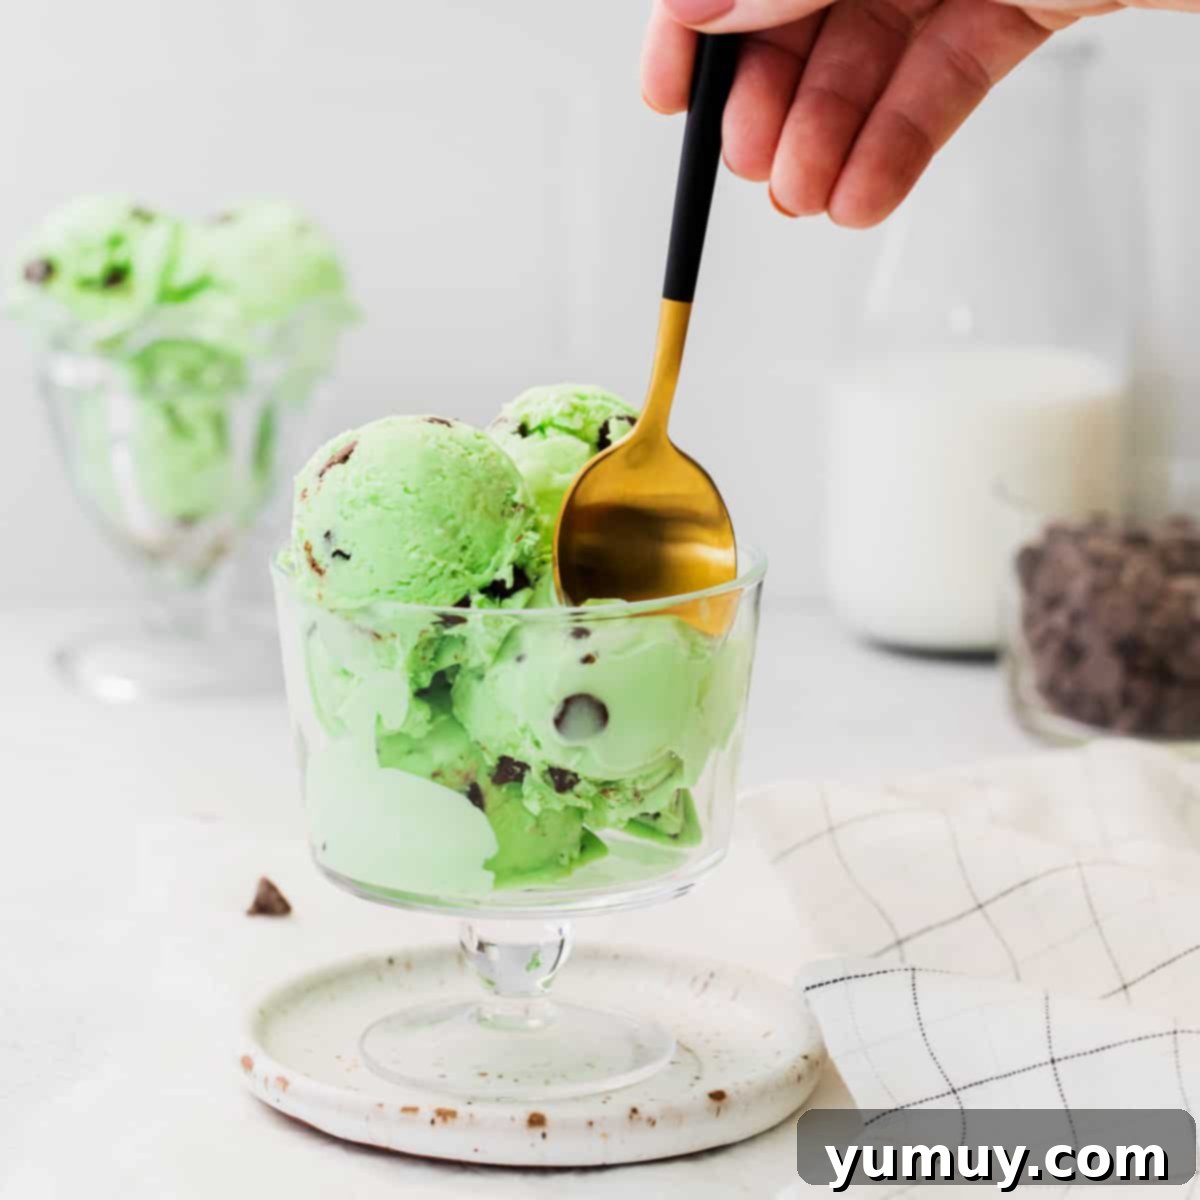
Welcome to the ultimate guide for creating luscious, creamy, and irresistibly minty no-churn mint chocolate chip ice cream! If you’re anything like me, a scoop (or two, or three!) of this refreshing treat is a non-negotiable freezer staple. The good news? You don’t need a fancy ice cream maker to achieve bakery-quality results right in your own kitchen. This simple, 5-ingredient recipe promises a rich, smooth texture and that perfect balance of cool mint and delicious chocolatey chunks that will have you coming back for more.

The Easiest No-Churn Mint Chocolate Chip Ice Cream Recipe
No-churn ice cream is a game-changer for anyone who loves homemade desserts but lacks specialized equipment. This mint chocolate chip variant is no exception, delivering exceptional flavor and texture with minimal effort. The secret lies in just a few key ingredients: heavy whipping cream, which forms the airy base, and sweetened condensed milk, which provides the necessary richness and sweetness without the need for churning. A touch of mint extract and plenty of chocolate chips complete this classic dessert.
Unlike traditional ice cream recipes that require constant stirring or an ice cream machine to prevent ice crystals from forming, no-churn methods rely on the fat and sugar content to keep things smooth and creamy. The whipped cream traps air, giving the ice cream its light and scoopable consistency, while the condensed milk ensures it stays wonderfully decadent. I often add a tiny drop of green food coloring for that signature vibrant hue, but feel free to omit it if you prefer a more natural look. Whichever way you prepare it, this simple recipe is guaranteed to be a sensational success, perfect for hot summer days or a sweet craving anytime!

The Secret to Perfect No-Churn Texture: Whip it Good!
For a truly exceptional no-churn ice cream, the most critical step is mastering the whipped cream. Ensure your heavy whipping cream is very cold before you begin. Beat it on medium-high speed until it forms stiff peaks. This means that when you lift the whisk, the cream will stand up firmly without collapsing. This aeration is the backbone of your ice cream, providing the light, fluffy texture that prevents it from turning into a solid block of ice. Without properly whipped cream, your ice cream will be dense and less enjoyable. This foundational step is what sets homemade no-churn ice cream apart, so don’t rush it!

No-Churn Mint Chocolate Chip Ice Cream Recipe
Ingredients
- 2 cups heavy whipping cream
- 1 drop green gel food coloring
- 14 ounces sweetened condensed milk (1 can)
- ½ teaspoon mint extract
- 1½ cups chocolate chips
Equipment
- Kitchen Scale (optional)
- Stand Mixer
- 9×5-inch Loaf Pan
Instructions
- Add the heavy whipping cream to the bowl of a stand mixer fitted with the whisk attachment. Beat on medium-high speed for 2-3 minutes, or until the cream forms stiff peaks. Add the green food coloring and mix just until combined.2 cups heavy whipping cream, 1 drop green gel food coloring

- Add the sweetened condensed milk and mint extract and fold them together gently using a rubber spatula to preserve the airiness of the whipped cream.14 ounces sweetened condensed milk, ½ teaspoon mint extract

- Once all of the sweetened condensed milk has been incorporated, add the chocolate chips and fold them in until evenly distributed throughout the mixture.1½ cups chocolate chips

- Transfer the mixture to a 9×5-inch loaf pan or a dedicated silicone ice cream tub. Cover it tightly with plastic wrap or transfer it to an airtight freezer bag. Place the ice cream in the freezer overnight (or for at least 12 hours) to allow it to firm up and develop its full texture.
Notes for Perfection
- Chocolate Chip Choice: You can use any type of chocolate chips you prefer – dark, semi-sweet, or milk chocolate. Keep in mind that chocolate chips tend to freeze relatively hard, so if you’re serving this to young children or prefer a softer bite, consider using mini chocolate chips or finely chopping a chocolate bar into smaller shards.
- Adjusting Mint Intensity: If you’re concerned about the ice cream being too minty, you can start with ¼ teaspoon of mint extract and add more to taste. Alternatively, adding ½ teaspoon of vanilla extract alongside the mint can mellow the flavor and add a layer of complexity.
- Freezing Time is Key: No-churn ice creams require about 12 hours to properly set and “cure.” This extended freezing time ensures the ice cream is firm enough to scoop without melting too quickly and allows the flavors to meld beautifully. Patience is a virtue when waiting for this delicious dessert!
Storage: Store your homemade mint chocolate chip ice cream in an airtight container in the freezer for up to 1 week. While it might last longer, the texture is best enjoyed within this timeframe compared to commercially churned varieties.
Calories from Fat 234
@easydessertrecipes
for a chance to be featured.
A Detailed Step-by-Step Guide to Crafting Your Mint Chocolate Chip Ice Cream
Making this delightful no-churn ice cream is straightforward and incredibly rewarding. Follow these steps for a perfect batch every time.
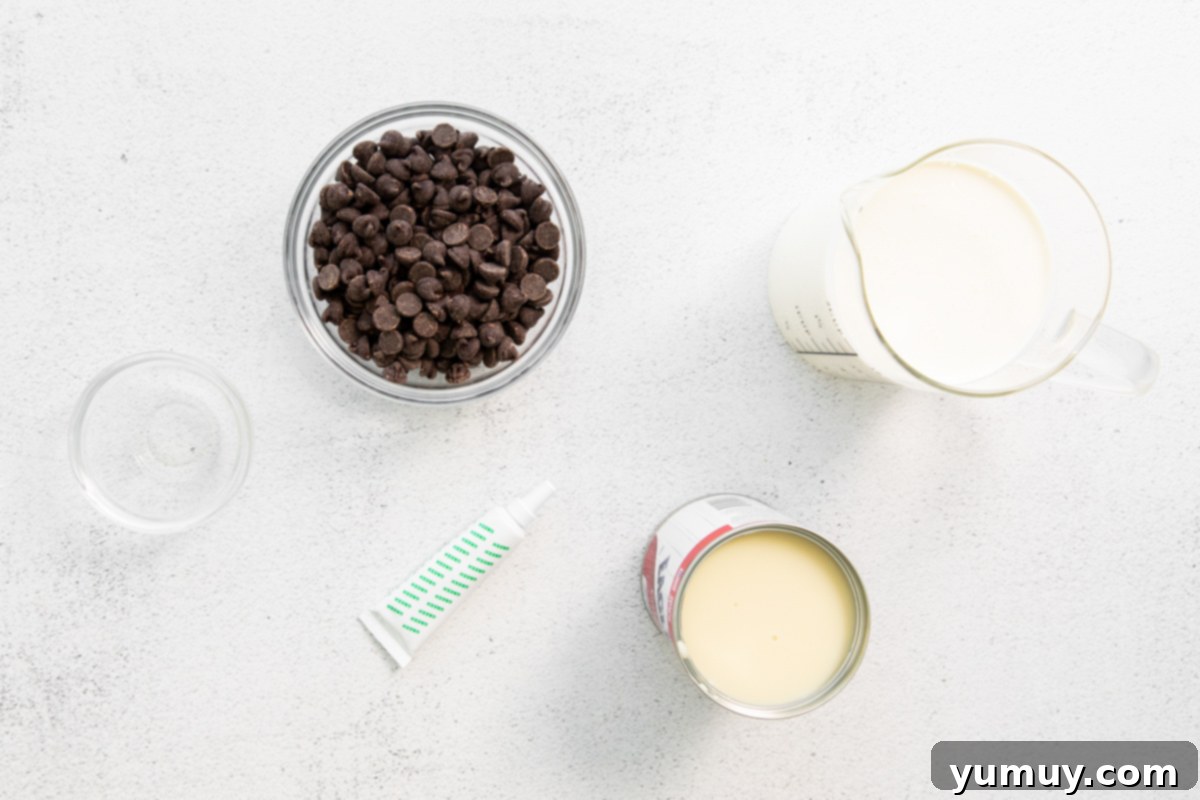
1. Gather Your Ingredients and Tools: Before you begin, lay out all your ingredients and necessary equipment. This ensures a smooth and efficient cooking process, making your ice cream-making experience even more enjoyable. Having everything at hand will prevent last-minute rushes and ensure you don’t miss any steps.
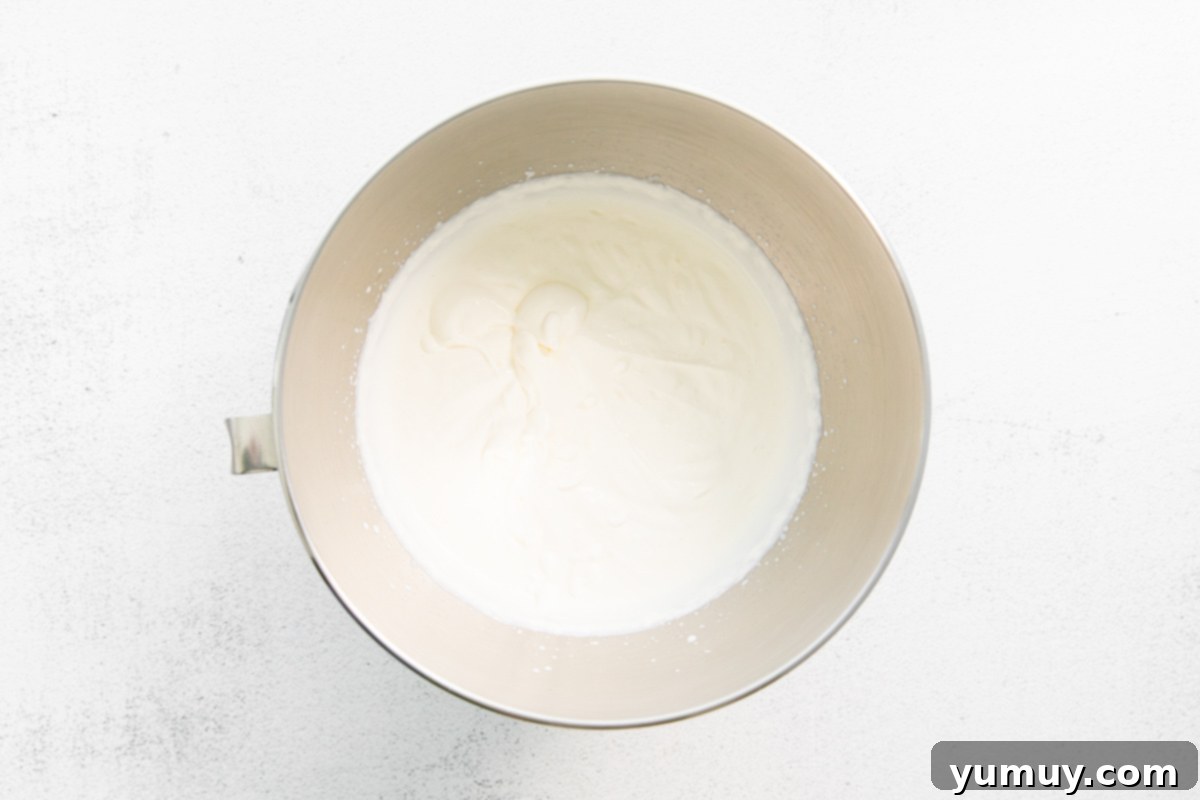
2. Whip the Heavy Cream to Stiff Peaks: Pour 2 cups of very cold heavy whipping cream into the clean bowl of your stand mixer. Attach the whisk attachment and begin beating the cream on medium-high speed. Continue beating for approximately 2-3 minutes, or until the cream achieves stiff peaks. This means that when you lift the whisk, the peaks of cream will hold their shape firmly without drooping. Once stiff peaks are formed, add just 1 drop of green gel food coloring. Mix briefly on low speed until the color is evenly incorporated. Be careful not to overmix, as this can turn the cream grainy.
3. Gently Fold in Sweetened Condensed Milk and Mint Extract: Next, carefully add 14 ounces (which is typically one standard can) of sweetened condensed milk along with ½ teaspoon of mint extract to the whipped cream. Using a rubber spatula, gently fold these ingredients together. The key here is to use a light hand to avoid deflating the airy whipped cream. Folding rather than stirring vigorously will maintain the volume and lightness crucial for the ice cream’s creamy texture. Continue folding just until the mixture is uniform in color and consistency.

4. Incorporate Chocolate Chips and Freeze: Once the sweetened condensed milk and mint extract are fully incorporated into the base, it’s time for the star addition: the chocolate chips! Add 1½ cups of your chosen chocolate chips to the mixture. Again, use your rubber spatula to gently fold them in until they are evenly distributed throughout the minty base. This ensures every spoonful of ice cream will have that perfect balance of mint and chocolate. Finally, transfer the entire mixture into a 9×5-inch loaf pan or a durable silicone ice cream tub. Cover the container tightly with plastic wrap, pressing it directly onto the surface of the ice cream to prevent ice crystals from forming. Alternatively, you can transfer the mixture into an airtight freezer bag for easy storage. Place your prepared ice cream in the freezer and allow it to freeze overnight, or for a minimum of 12 hours. This crucial freezing period allows the ice cream to firm up completely, ensuring a delightful, scoopable texture.

How to Store and Enjoy Your Homemade Treat
Proper storage is essential to maintain the quality and texture of your homemade no-churn mint chocolate chip ice cream. Store any leftovers in an airtight container in the freezer. This minimizes exposure to air, which can lead to freezer burn and a degradation in texture. While commercial ice cream is formulated for long-term freezer stability, homemade no-churn varieties typically contain fewer preservatives and stabilizers, meaning they’re best enjoyed sooner rather than later.
I recommend savoring your delicious homemade creation within about 1 week for the optimal taste and creaminess. Beyond this period, you might notice a slight change in texture as ice crystals can begin to form, making the ice cream less smooth. If your ice cream becomes too hard, let it sit on the counter for a few minutes before scooping. Serve it in cones, bowls, or as an accompaniment to brownies, cookies, or even in a refreshing milkshake!
Frequently Asked Questions (FAQs)
Can I use other types of milk instead of heavy whipping cream?
Unfortunately, no. Heavy whipping cream is crucial for this recipe as it’s the ingredient that gets whipped to create the light, airy base. Lower-fat milks, half-and-half, or even light cream will not whip to the same stiff peaks, and your ice cream will likely turn out icy and hard rather than creamy.
Why is my no-churn ice cream not freezing properly or too hard?
If your ice cream is too soft, it might not have been frozen for long enough, or your heavy cream might not have been whipped to stiff enough peaks. Make sure your cream is very cold when you start whipping. If it’s too hard, it could be due to incorrect ingredient ratios (too little sugar/condensed milk, which helps prevent over-freezing) or simply needing a few minutes at room temperature before scooping. Always ensure at least 12 hours of freezing time.
How long does homemade no-churn ice cream last in the freezer?
For the best quality, consume your homemade no-churn ice cream within 1 week. While it might be safe to eat for longer, its creamy texture can start to degrade after this period due to ice crystal formation.
Can I make this ice cream without the green food coloring?
Absolutely! The green food coloring is purely for aesthetic appeal and doesn’t affect the flavor. If you prefer a more natural appearance, simply omit it from the recipe. Your ice cream will still be wonderfully minty and delicious.
What kind of container is best for freezing no-churn ice cream?
A 9×5-inch loaf pan is excellent because its shape allows for easy scooping once frozen. Alternatively, a dedicated silicone ice cream tub or any shallow, freezer-safe container with an airtight lid works well. The goal is to minimize the surface area exposed to air to prevent freezer burn and ice crystal formation.
Variations to Customize Your Mint Chip Delight
While the classic mint chocolate chip is a timeless favorite, don’t hesitate to experiment with variations to suit your taste buds:
- Double Chocolate Mint: Use a combination of dark and semi-sweet chocolate chips, or swirl in a ribbon of melted chocolate fudge after adding the chips.
- Andes Mint Crunch: Crush some Andes mints and fold them in along with or instead of chocolate chips for an extra layer of minty chocolate flavor.
- Peppermint vs. Spearmint: Most mint extracts are peppermint. If you prefer a milder, sweeter mint flavor, try to find spearmint extract, though it’s less common.
- Nutty Mint Chip: Add a handful of finely chopped pecans or walnuts for an interesting textural contrast.
- Cookie Crunch: Crumble chocolate sandwich cookies or thin mint cookies into the mix for a delicious cookie dough effect.
With this easy no-churn recipe, you’re not just making ice cream; you’re crafting a cool, creamy experience that’s perfect for satisfying any sweet craving. Enjoy the process, and most importantly, enjoy every delightful scoop!
More Ice Cream Recipes to Try!
No Churn Birthday Cake Ice Cream
No Churn Vanilla Bean Ice Cream
No Churn Pumpkin Ice Cream
Dole Whip
All Ice Cream
