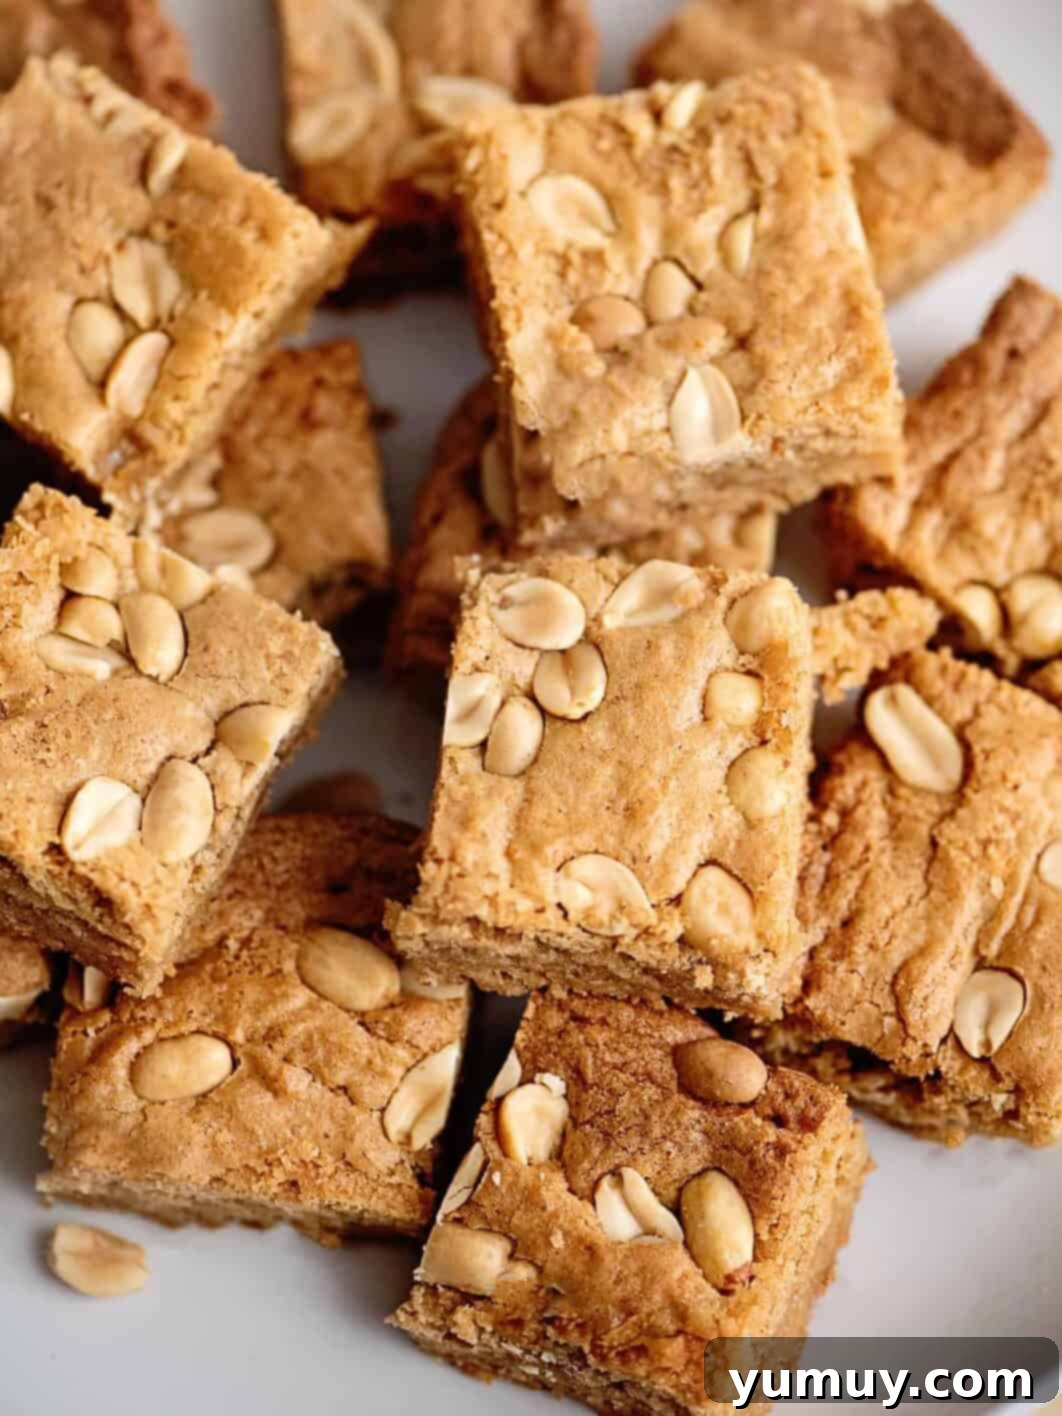
Prepare to fall in love with these irresistible **Peanut Butter Blondies**. They are the epitome of indulgence: remarkably chewy, incredibly rich, and bursting with an authentic, deep peanut butter flavor. When a craving for something sweet hits, but you’re not in the mood for elaborate baking involving melted chocolate or tedious dough scooping, these blondies are your perfect solution. This simple recipe comes together effortlessly in just one bowl and bakes to golden perfection in about 30 minutes. The result? A dessert that’s not only incredibly easy to make but also profoundly satisfying – a true testament to the magic of peanut butter in a bar form!
Indulge in the Ultimate Peanut Butter Blondies Experience
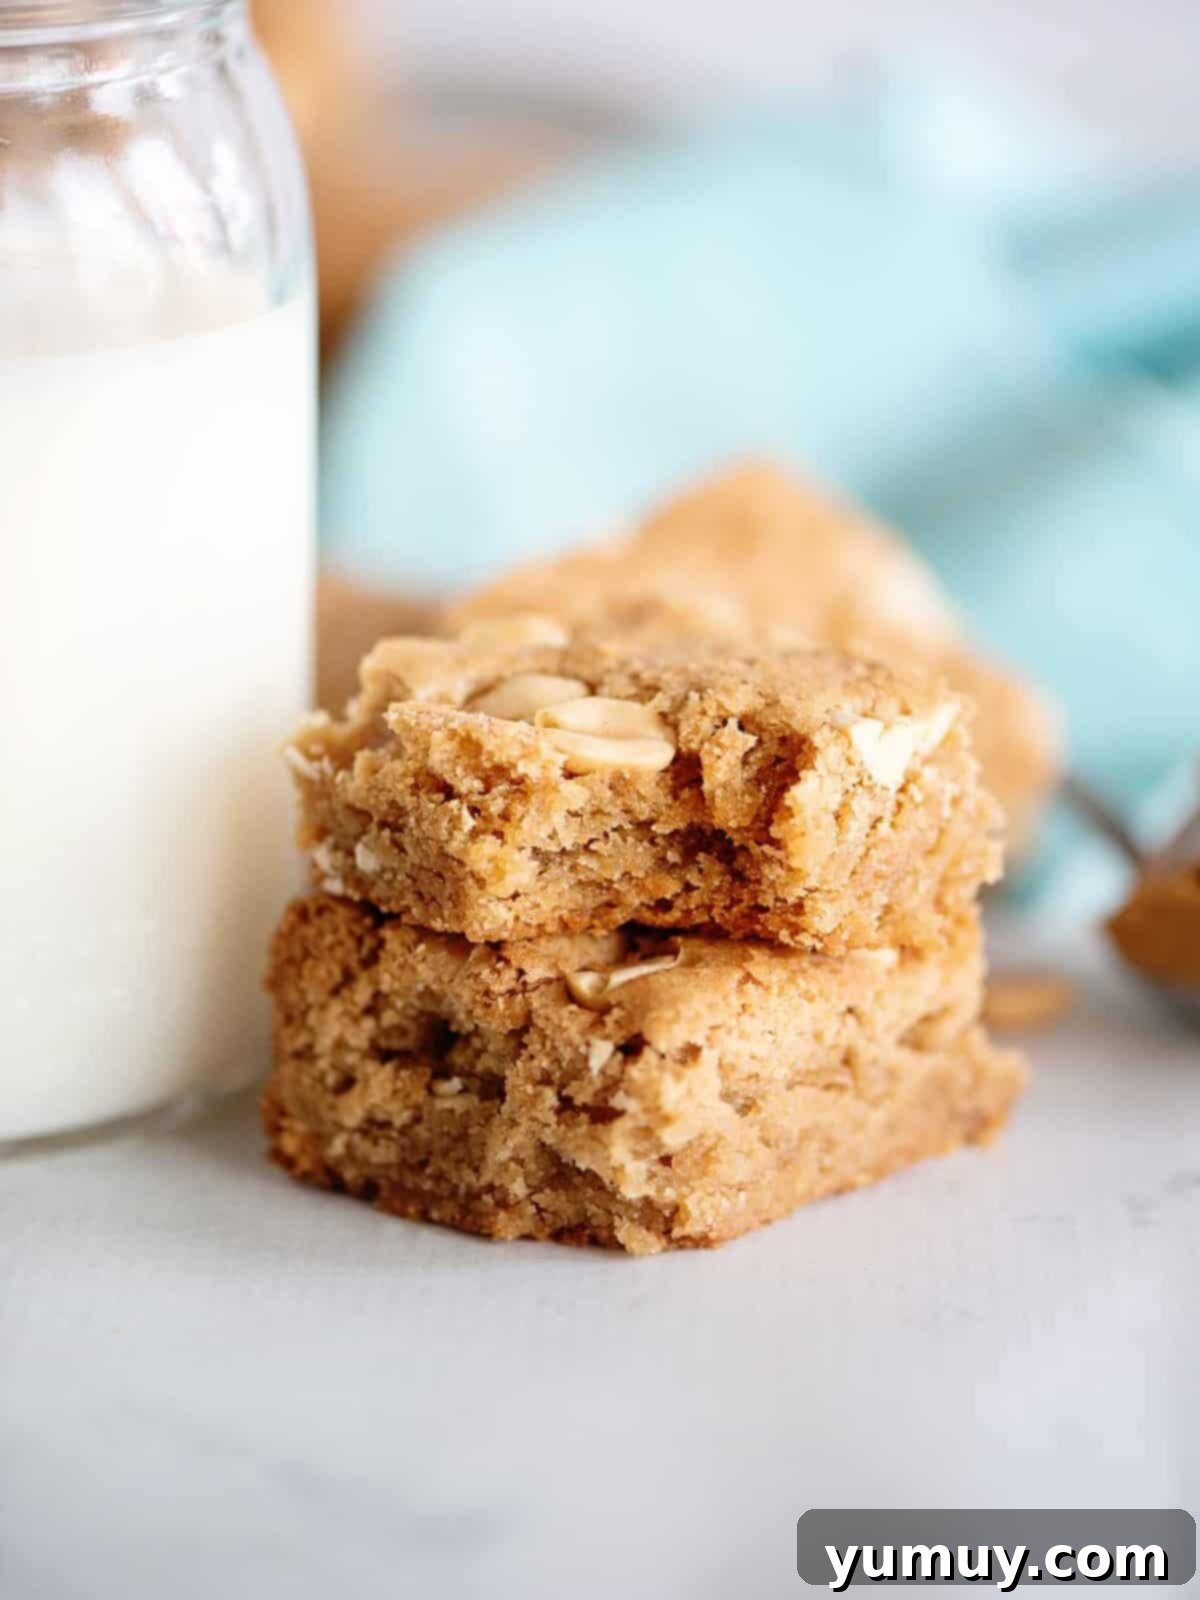
My obsession with these peanut butter blondie bars is no exaggeration; it’s a culinary love affair. Imagine the beloved soft, dense, and fudgy texture of the best brownies, but instead of the deep notes of cocoa, your palate is treated to the heavenly sweet and salty embrace of peanut butter. This distinctive flavor profile is achieved through a meticulous combination of creamy, rich peanut butter and velvety butter, ensuring each bite delivers a perfectly balanced and profoundly satisfying taste. The addition of brown sugar is crucial, contributing not only to that desired chewy consistency but also infusing the bars with a delightful caramel-y depth that sets them apart from ordinary blondie bars.
Whether you choose to enhance them with a sprinkle of salted peanuts for extra crunch, a handful of sweet peanut butter chips, or decadent milk chocolate chips, these bars are guaranteed to vanish in record time. There’s something truly magical about serving them slightly warm from the oven, allowing the flavors to meld and the texture to remain incredibly tender. If you’re a devoted fan of classic peanut butter cookies, then preparing these blondies is not just a suggestion—it’s an absolute must-try! They offer all the beloved peanut butter goodness in a new, exciting, and utterly delightful format.
The Secret to Achieve Perfect Chewy Blondie Texture
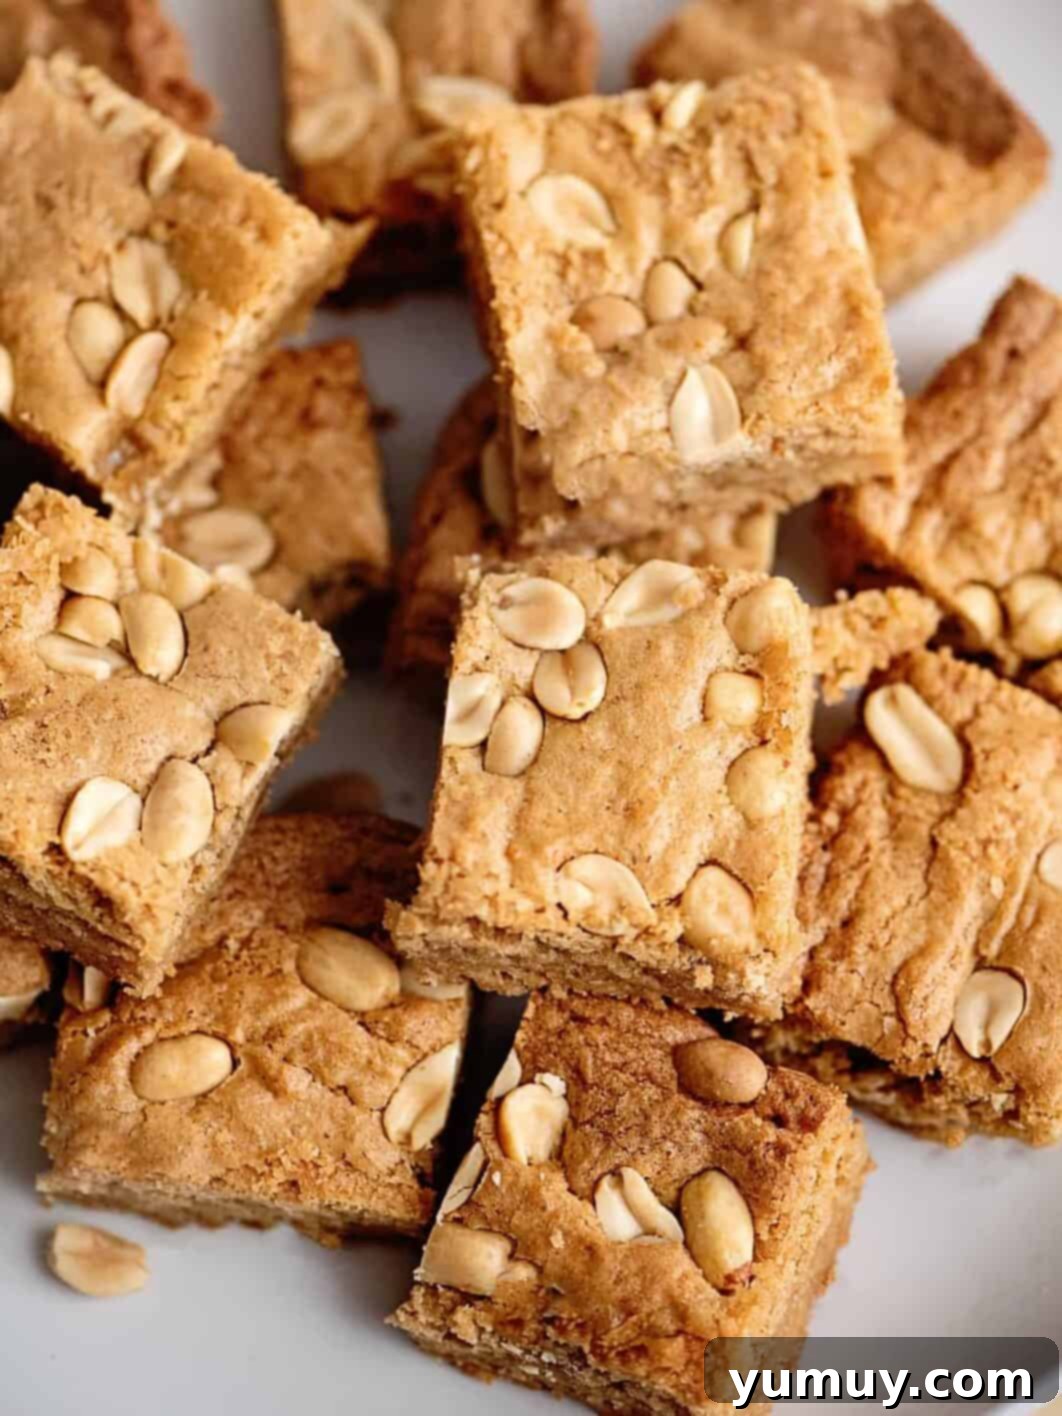
Achieving that coveted bakery-style chewy, dense, and fudgy texture in your peanut butter blondies hinges on one crucial technique: mixing by hand. I cannot emphasize this enough. While stand mixers are convenient for many baking tasks, they are the arch-nemesis of a truly chewy blondie. Overmixing the batter, especially with an electric mixer, incorporates too much air. This excess air creates a lighter, fluffier crumb, transforming your desired dense and chewy blondie into something more akin to a cake. Cakey blondies, while still tasty, lack that signature satisfying chew that defines a perfect bar dessert.
By opting for a spatula and mixing gently by hand, you preserve the integrity of the ingredients and prevent over-aeration. This method ensures the butter, peanut butter, and sugars combine just enough to create a moist, compact batter that bakes into a rich, fudgy bar. It’s a small, seemingly insignificant step that makes an enormous difference in the final outcome. This precise, gentle stirring is a technique widely employed by professional bakers when crafting their signature bar cookies, and it’s one that will elevate your homemade peanut butter blondies from good to absolutely extraordinary.
Classic Chewy Peanut Butter Blondies Recipe
Print Recipe
Leave a Review
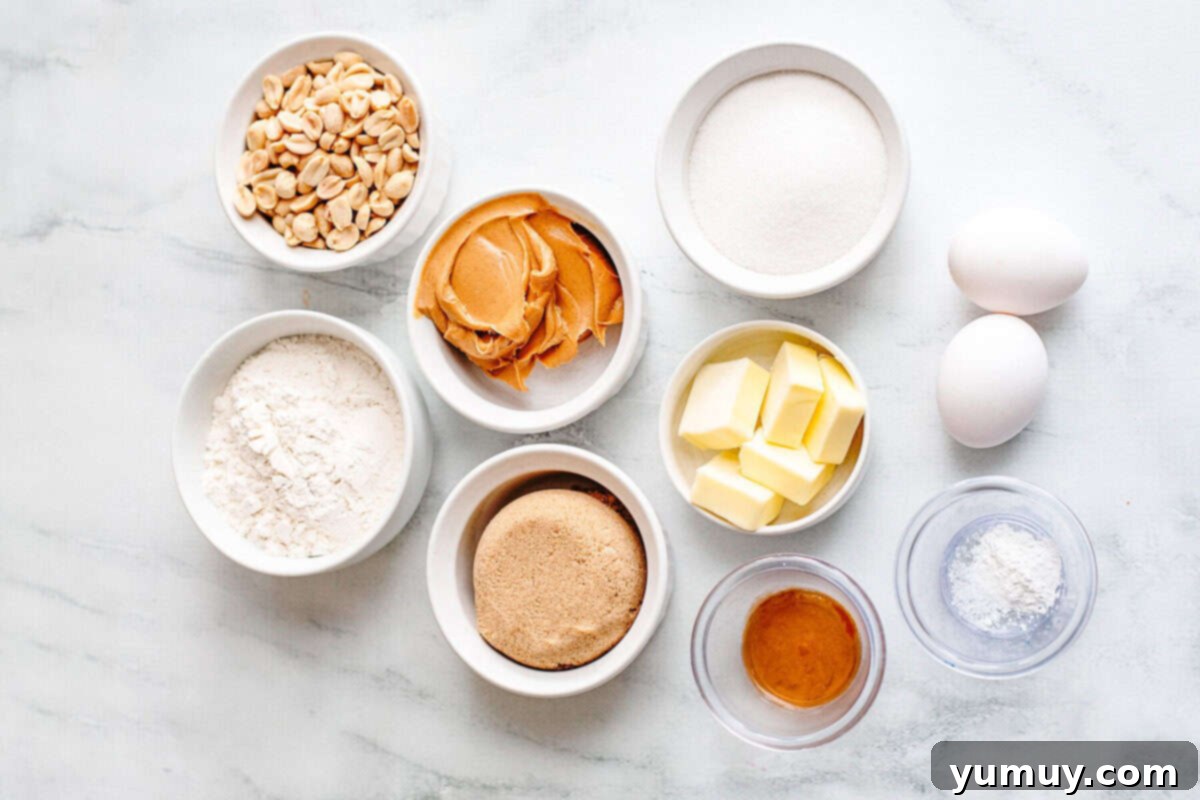
Ingredients for Chewy Peanut Butter Blondies
- ½ cup creamy peanut butter
- 5 tablespoons unsalted butter room temperature*
- ⅔ cup granulated sugar
- ½ cup brown sugar light or dark
- 2 large eggs room temperature
- ½ teaspoon pure vanilla extract
- 1 cup all-purpose flour
- ½ teaspoon baking powder
- ¼ teaspoon kosher salt
- ¼ cup peanuts optional*
Equipment You’ll Need
- Kitchen Scale (optional, for precise measurements)
- 8×8 Baking Pan
- Large Mixing Bowl
- Spatula or Wooden Spoon (for mixing)
- Small Bowl (for dry ingredients)
- Whisk
Step-by-Step Instructions
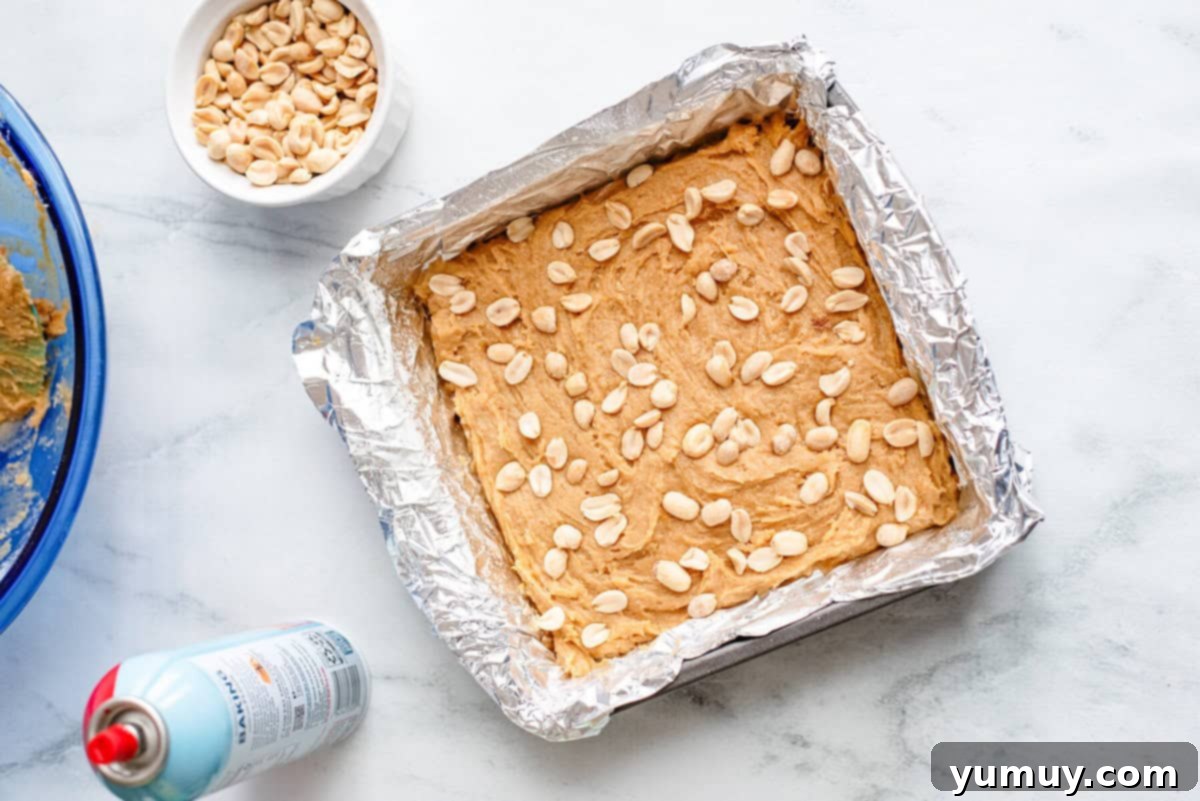
- Prepare Your Pan: Preheat your oven to 350°F (175°C). Prepare an 8×8-inch baking pan by lightly coating it with a nonstick baking spray. For even easier removal of your blondies, you can line the pan with parchment paper or foil, ensuring an overhang on two sides for handles, and then spray the liner as well. Set the prepared pan aside.

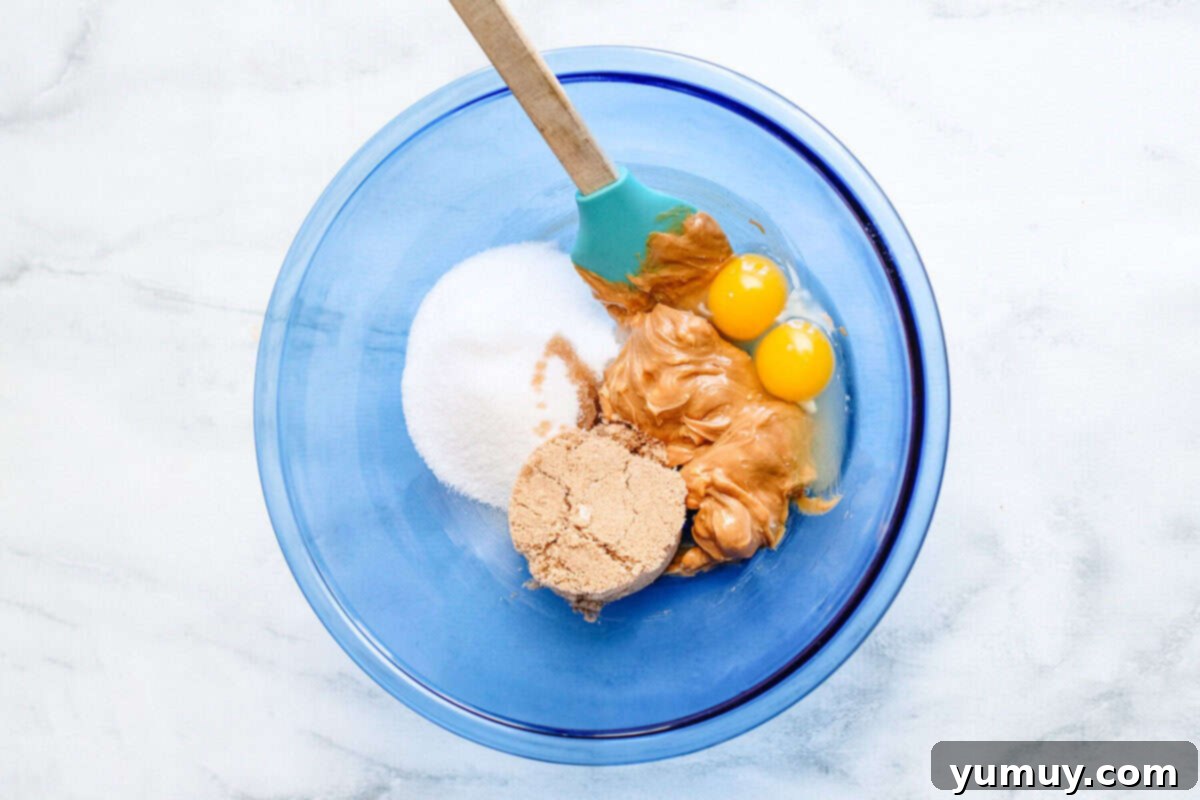
- Combine Wet Ingredients: In a large mixing bowl, combine the creamy peanut butter and the softened, room-temperature unsalted butter. Using a sturdy spatula or wooden spoon, cream them together until they are smooth and well blended. Next, add the granulated sugar, brown sugar (light or dark both work beautifully), room-temperature large eggs, and the pure vanilla extract. Continue to mix by hand until all ingredients are just combined and no streaks of egg or sugar remain. Remember, **avoid using an electric mixer** if you desire that dense, chewy blondie texture. Overmixing will introduce too much air, leading to a cakey result.½ cup creamy peanut butter,
5 tablespoons unsalted butter,
⅔ cup granulated sugar,
½ cup brown sugar,
2 large eggs,
½ teaspoon pure vanilla extract
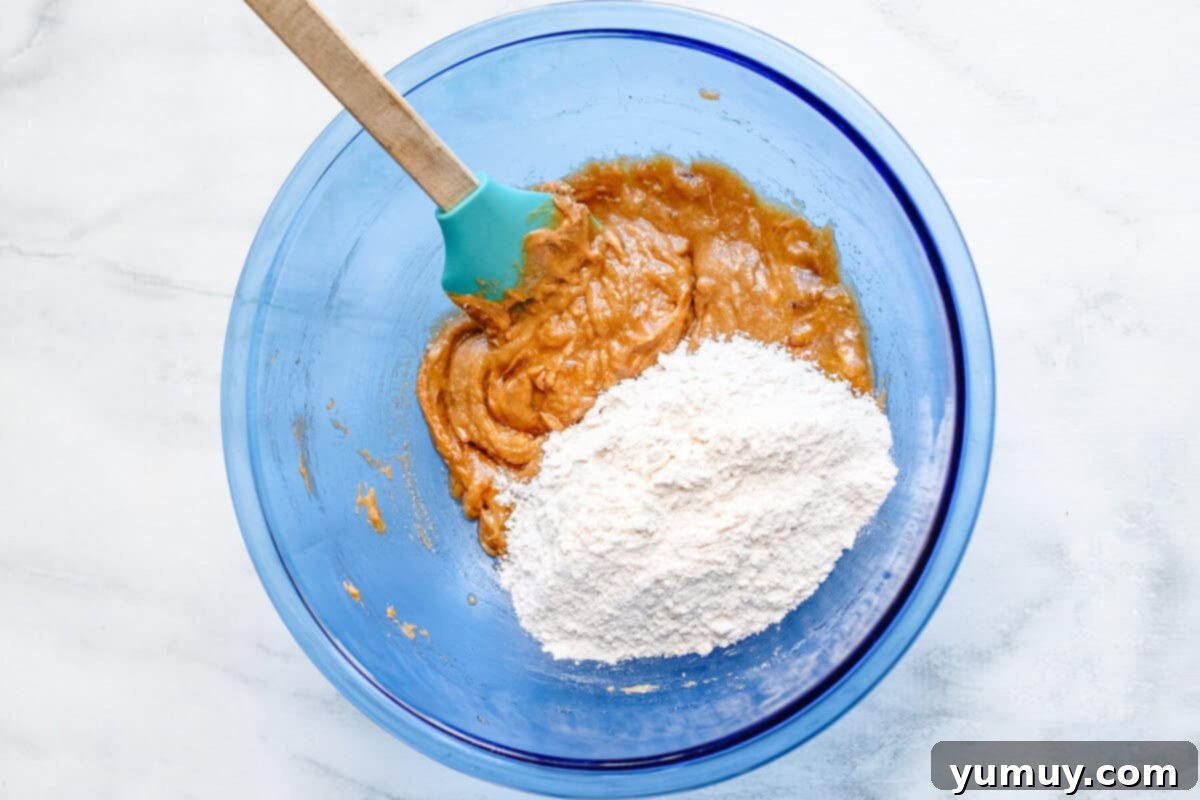
- Incorporate Dry Ingredients & Add Toppings: In a separate small bowl, whisk together 1 cup of all-purpose flour, ½ teaspoon of baking powder, and ¼ teaspoon of kosher salt. This ensures the leavening agent and salt are evenly distributed throughout the flour. Gradually add this dry ingredient mixture into your wet ingredients in the large bowl. Mix gently with your spatula until just combined, stopping as soon as the last streaks of flour disappear. Overmixing at this stage can also contribute to a tougher, less desirable texture. Now is the perfect time to fold in your optional toppings: chopped peanuts, peanut butter chips, or milk chocolate chips will add an extra layer of flavor and texture.1 cup all-purpose flour,
½ teaspoon baking powder,
¼ teaspoon kosher salt,
¼ cup peanuts
- Bake to Perfection & Cool: Pour the blondie batter into your 8×8-inch baking pan and spread it evenly. Bake for 25-30 minutes in the preheated oven, or until a wooden toothpick inserted into the center comes out with moist crumbs, but no wet batter. It’s crucial not to overbake, as this can lead to dry, crumbly blondies instead of delightfully chewy ones. For reference, mine typically achieve perfection in about 27 minutes. Once baked, remove the pan from the oven and allow the blondies to cool completely on a wire rack before attempting to cut them. Cooling completely ensures they set properly and maintain their signature fudgy texture.

Helpful Notes & Tips for Your Blondies
**Beyond chopped peanuts, feel free to get creative with your mix-ins! Great alternatives include walnuts, pecans, mini chocolate chips, butterscotch chips, or colorful M&M’s.
Pro Baking Tips for Success:
- As emphasized, it’s always best to mix the blondie batter by hand using a spatula or wooden spoon. A stand mixer can over-process the ingredients, leading to a lighter, more cake-like texture rather than the desired dense and chewy blondie.
- Ensure your oven is fully preheated to the correct temperature (350°F or 175°C) before placing your blondies inside. An accurately heated oven promotes even baking.
- **Do not overcook them!** Blondies can go from perfectly fudgy to dry and crumbly in just a minute or two. Keep a close eye on them during the last few minutes of baking. The toothpick test should yield moist crumbs, not wet batter, but also not a completely clean toothpick (which indicates overbaking).
- Cooling completely is non-negotiable for the best texture and clean cuts. Warm blondies tend to crumble and be difficult to slice. Patience will be rewarded!
Storage Instructions: To maintain their freshness and delightful texture, store your peanut butter blondies in an airtight container. They will keep well at room temperature for up to 3 days, or you can extend their life by refrigerating them for up to 5 days. For longer storage, wrap them tightly and freeze for up to 3 months.
Calories from Fat 81
@easydessertrecipes
for a chance to be featured.
Detailed Guide: How to Make Peanut Butter Blondies
Crafting these delectable peanut butter blondies is a straightforward process, but paying attention to a few key details will ensure your bars turn out perfectly chewy and full of flavor. Follow these steps for an effortless baking experience:
1. Gather and Prepare Ingredients & Pan
Before you begin mixing, ensure all your ingredients are measured and ready. Bringing butter and eggs to room temperature is vital for a smooth, homogenous batter that incorporates well. Preheat your oven to a precise 350°F (175°C). Prepare an 8×8-inch baking pan by thoroughly coating it with a nonstick baking spray. For an even easier cleanup and removal of the blondies, consider lining the pan with parchment paper or aluminum foil, leaving an overhang on two sides to create “handles.” If using a liner, make sure to spray the liner itself with nonstick spray too. Set the prepared pan aside.
2. Cream the Wet Ingredients
In a large mixing bowl, combine ½ cup of creamy peanut butter with 5 tablespoons of softened, room-temperature unsalted butter. Use a sturdy spatula or a wooden spoon to cream these two together until they are thoroughly blended and smooth. This creates the rich base for your blondies. Next, add in ⅔ cup of granulated sugar, ½ cup of brown sugar (which provides that lovely caramel note and chew), 2 large room-temperature eggs, and ½ teaspoon of pure vanilla extract. Continue mixing by hand until all these wet ingredients are fully combined. As a crucial reminder for achieving that sought-after dense and chewy texture, **do not use an electric mixer** during this stage, as it can over-aerate the batter, resulting in a cakey blondie.
3. Add Dry Ingredients and Optional Toppings
In a separate, smaller bowl, whisk together 1 cup of all-purpose flour, ½ teaspoon of baking powder, and ¼ teaspoon of kosher salt. This ensures the leavening agent and salt are evenly distributed throughout the flour. Gradually add this dry ingredient mixture into your wet ingredients in the large bowl. Mix gently with your spatula until just combined, stopping as soon as the last streaks of flour disappear. Overmixing at this stage can also contribute to a tougher, less desirable texture. Once the batter is ready, you can fold in your choice of optional toppings: an additional ¼ cup of chopped peanuts, peanut butter chips, or milk chocolate chips are fantastic additions that enhance both flavor and texture.
4. Bake to Golden Perfection and Cool
Transfer the prepared blondie batter into your 8×8-inch baking pan and spread it out evenly with your spatula. Place the pan into the preheated 350°F (175°C) oven and bake for approximately 25-30 minutes. The key to perfect blondies is to avoid overbaking. You’ll know they are done when a wooden toothpick inserted into the center comes out with moist crumbs attached, but no wet batter. A completely clean toothpick indicates they’ve been baked too long and might be dry. In my experience, 27 minutes is often the sweet spot. Once baked, remove the pan from the oven and, as tempting as it may be to dig in, allow the blondies to cool completely in the pan on a wire rack. This cooling period is crucial for them to fully set and achieve their ultimate chewy, fudgy consistency, making them easier to cut into clean, delicious squares.
Blondie Variations and Serving Suggestions
While these peanut butter blondies are phenomenal on their own, don’t hesitate to customize them to your liking or experiment with different ways to serve them. Here are some ideas to inspire you:
- Chocolate Peanut Butter Swirl: After spreading the batter in the pan, melt a few tablespoons of chocolate chips and drizzle them over the top. Use a knife or skewer to gently swirl the chocolate into the blondie batter for a visually appealing and delicious marble effect.
- Nutty Crunch: Increase the amount of chopped peanuts or other nuts (like walnuts or pecans) to ½ cup for extra crunch in every bite. Lightly toast them before adding for enhanced flavor.
- Sweet & Salty Combo: A sprinkle of flaky sea salt over the top of the blondies before baking will beautifully contrast the sweetness and highlight the peanut butter flavor.
- Candy Loaded: Fold in some chopped peanut butter cups, mini M&M’s, or even chopped pretzels for a fun texture and flavor twist.
- Ice Cream Sundae: Serve a warm peanut butter blondie square with a scoop of vanilla bean ice cream, a drizzle of chocolate fudge, and a dollop of whipped cream for an ultimate dessert experience.
- Coffee or Milk Pairing: These blondies are incredibly delicious alongside a hot cup of coffee, a cold glass of milk, or even a creamy latte.
- Peanut Butter Glaze: For an extra layer of peanut butter goodness, whisk together powdered sugar, a tablespoon or two of milk, and a spoonful of peanut butter until smooth. Drizzle over cooled blondies.
Storage, Freezing, and Reheating Instructions
Proper storage is key to enjoying your homemade peanut butter blondies for as long as possible. Here’s how to keep them fresh and delicious:
- Room Temperature: Once completely cooled, store leftover peanut butter blondies in an airtight container at room temperature for up to 3 days. This helps maintain their soft, chewy texture.
- Refrigerator: To extend their freshness, place them in an airtight container in the refrigerator for up to 5 days. Chilled blondies can be quite dense and fudgy!
- Freezer: For long-term storage, cut the blondies into individual squares and wrap each tightly in plastic wrap, then place them in a freezer-safe bag or airtight container. They can be stored in the freezer for up to 3 months. This is perfect for meal prepping desserts or having a quick treat on hand.
- Thawing & Reheating: When you’re ready to enjoy frozen blondies, transfer them to the refrigerator to thaw overnight. For a warm, freshly baked experience, gently reheat them in the microwave for about 10-15 seconds, or until just warmed through. Be careful not to overheat, as this can dry them out.
Frequently Asked Questions (FAQ) About Peanut Butter Blondies
Q: What is the difference between a blondie and a brownie?
A: The primary difference lies in the flavor profile. Brownies are chocolate-based, deriving their rich, dark flavor from cocoa powder or melted chocolate. Blondies, on the other hand, are vanilla-based (or, in this case, peanut butter-based!) and typically feature brown sugar, which gives them a caramel-like, buttery, and often chewier profile, resembling a butterscotch or vanilla brownie without the chocolate.
Q: Can I use natural peanut butter for this recipe?
A: It’s generally recommended to use conventional creamy peanut butter (like Jif or Skippy) for baking blondies and cookies, as natural peanut butter (the kind that separates oil) tends to have a different consistency and oil content. This can affect the final texture of your blondies, potentially making them drier or more crumbly. If you do use natural peanut butter, make sure it’s well stirred and smooth.
Q: Why are my blondies cakey instead of chewy?
A: The most common reason for cakey blondies is overmixing the batter. When you beat the ingredients too vigorously or use an electric mixer, you incorporate too much air, which leads to a lighter, more cake-like crumb. For the best chewy texture, mix the batter gently by hand with a spatula or wooden spoon, just until the ingredients are combined.
Q: Can I double this peanut butter blondie recipe?
A: Yes, you can easily double this recipe! If doubling, you’ll want to use a 9×13-inch baking pan. Keep in mind that the baking time might need to be adjusted slightly; it could take a bit longer, so start checking for doneness around the 30-minute mark and add more time as needed.
Q: How do I know when my blondies are done baking?
A: Blondies are done when the edges are lightly golden, and a wooden toothpick inserted into the center comes out with moist crumbs attached, but not wet batter. Crucially, avoid baking until the toothpick comes out completely clean, as this means they are overbaked and will be dry.
Q: Can I add chocolate chips to these peanut butter blondies?
A: Absolutely! Chocolate chips (milk, semi-sweet, or dark) are a fantastic addition to peanut butter blondies. You can fold them into the batter with the dry ingredients, or sprinkle them on top before baking. Peanut butter chips or white chocolate chips also work wonderfully.
More Irresistible Peanut Butter Recipes to Try!
If you’re a true peanut butter enthusiast, your culinary journey doesn’t have to end with these amazing blondies. The world of peanut butter desserts is vast and delightful, offering a range of treats from no-bake wonders to rich, decadent cakes. Dive into some of our other favorite recipes that celebrate the glorious, nutty flavor of peanut butter. Each one is designed to be easy to follow and incredibly rewarding, perfect for satisfying any sweet craving:
No-Bake Peanut Butter Bars
Chocolate Peanut Butter Muffins
Peanut Butter Sheet Cake
Homemade Peanut Butter Cups
Browse All Peanut Butter Recipes
