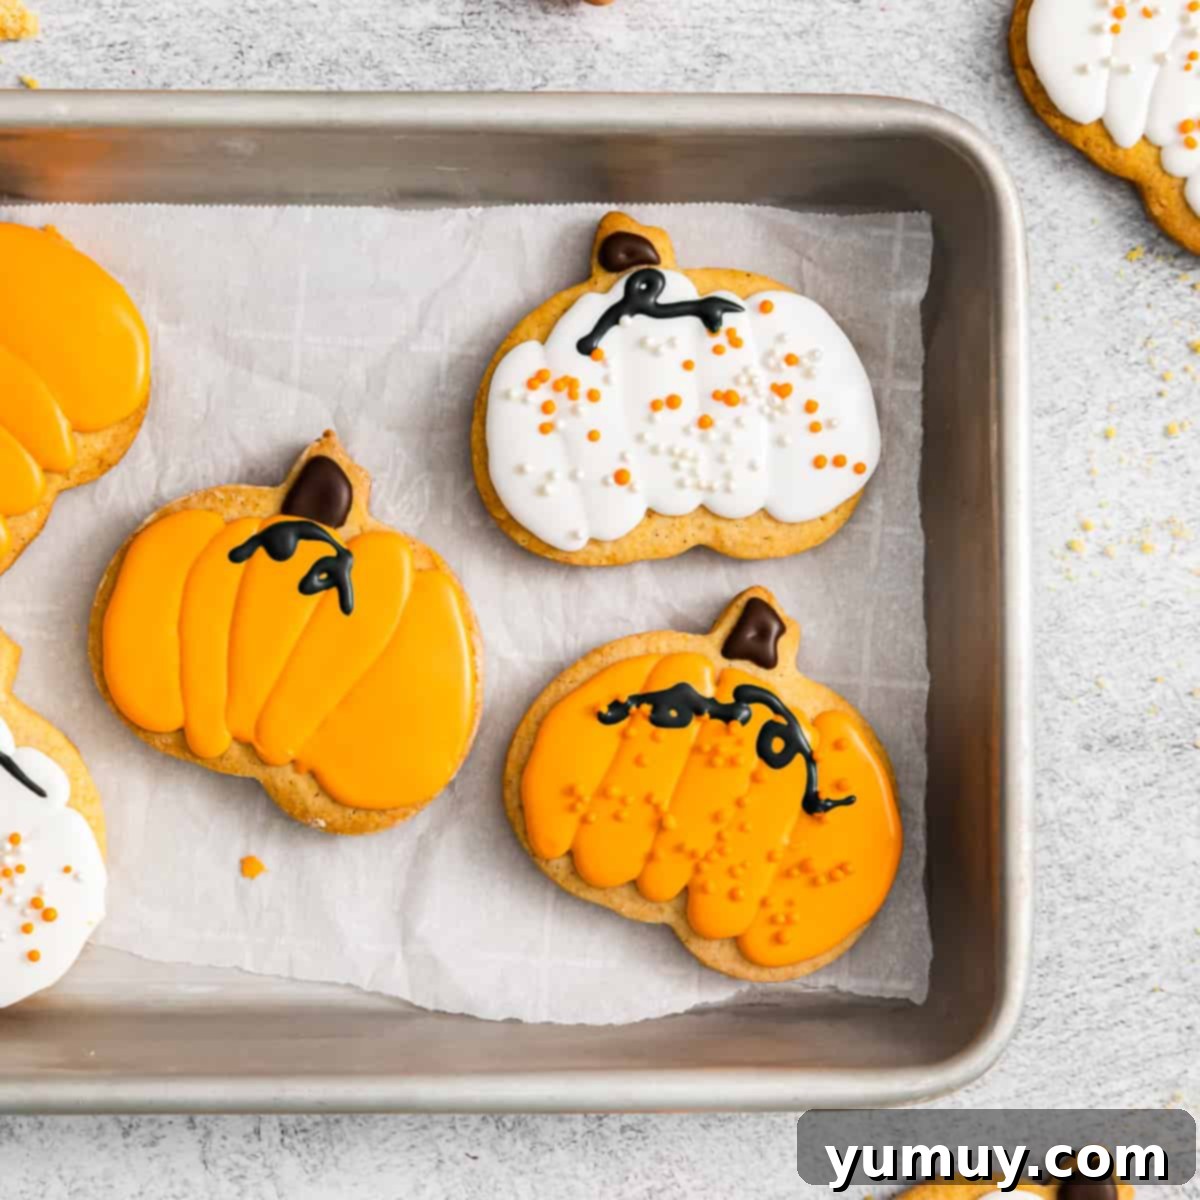
Embrace the cozy spirit of autumn with these delightful **Pumpkin Sugar Cookies**! They don’t just capture the essence of fall in their adorable pumpkin shapes; they deliver an authentic, rich pumpkin flavor in every bite. Crafted with real pumpkin puree and a fragrant blend of pumpkin pie spices, these cookies offer a true taste of the season. They are wonderfully soft yet sturdy, baking up beautifully to hold their intricate designs, making them a joy to decorate with royal icing—and an even greater pleasure to devour. Perfect for fall gatherings, Halloween parties, or simply a comforting treat on a crisp autumn day, these cookies are sure to become a cherished part of your seasonal baking tradition.
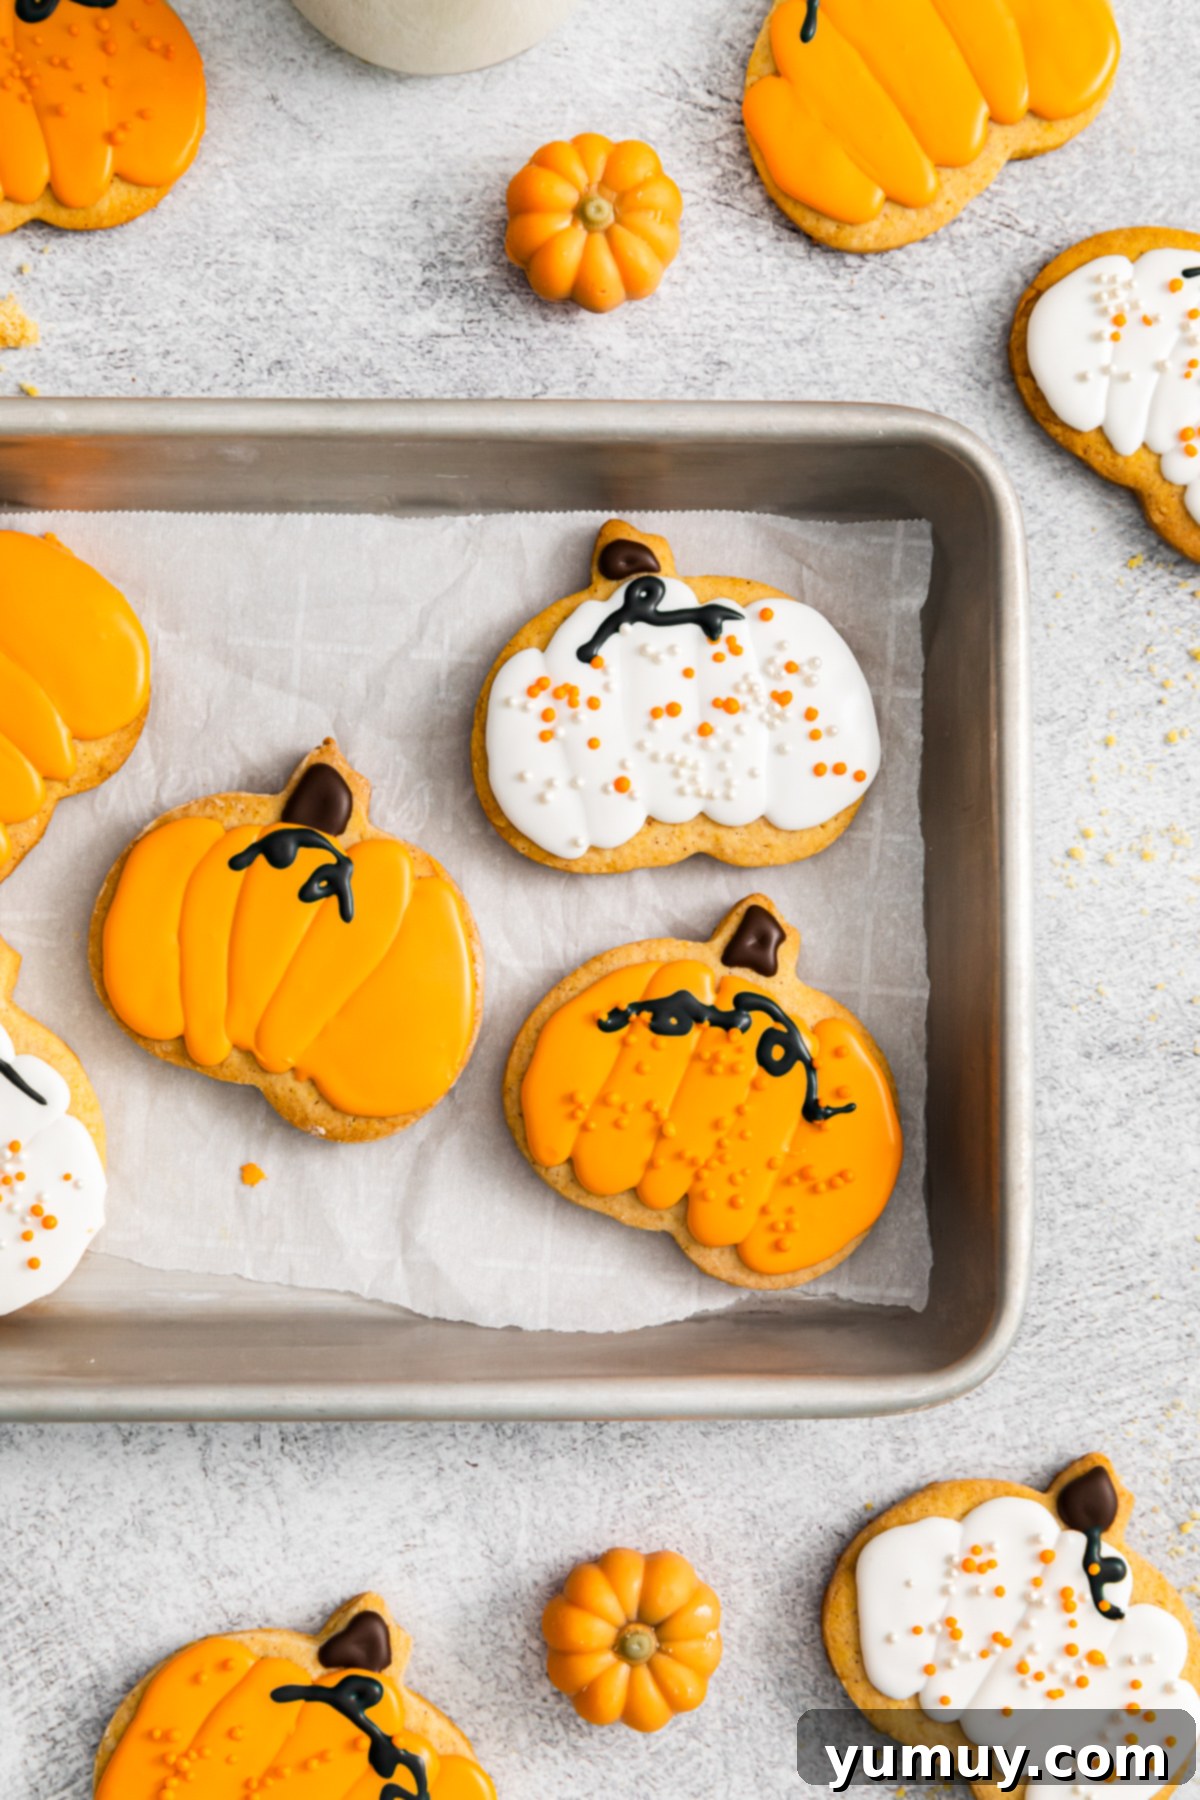
Irresistible Decorated Pumpkin Shaped Sugar Cookies for Fall
Our **pumpkin shaped sugar cookies** are a true celebration of the season, offering both festive appeal and an explosion of flavor. Unlike many traditional sugar cookies that often lack a distinct taste, this recipe builds the pumpkin theme from the inside out. We incorporate genuine pumpkin puree directly into the dough, which not only imparts a lovely subtle orange hue but also ensures the cookies remain incredibly moist and tender. Complementing this, a generous measure of fragrant pumpkin pie spice infuses them with those warm, inviting flavors that are synonymous with autumn.
Beyond their delicious taste, these cookies boast a dough that is exceptionally easy to roll and cut, making them ideal for creating beautifully precise pumpkin shapes of all sizes. Whether you opt for a simple, rustic look or go all out with intricate royal icing decorations, these cookies are robust enough to handle the process. They are so inherently delicious that they can be enjoyed plain, perhaps with a dusting of cinnamon sugar. However, for a truly show-stopping cookie platter that will impress guests and delight family, we encourage you to try your hand at decorating them. The combination of rich flavor and charming appearance makes these pumpkin cookies an unforgettable treat.

The Secret to Perfect Shapes: Why Chilling Your Cookie Dough is Crucial
One of the key secrets to achieving perfectly crisp edges and maintaining the intricate pumpkin shape of these sugar cookies lies in a simple yet vital step: chilling the dough before baking. Because this recipe calls for real pumpkin puree, the dough is naturally softer than many standard sugar cookie recipes. The pumpkin adds moisture, which is fantastic for texture, but can also make the cookies prone to spreading in the oven.
After you’ve rolled out and cut your pumpkin shapes, arrange them on your baking sheets and then place them in the refrigerator for 15-20 minutes (or even the freezer for 10-15 minutes). This chilling period allows the butter in the dough to solidify. When the chilled butter hits the hot oven, it takes longer to melt, providing structure that prevents your beautiful pumpkin shapes from spreading excessively. The result? Cookies with sharp, defined edges and a delightful chewiness that makes them truly picture-perfect every single time. Don’t skip this crucial step for professional-looking results!
Pumpkin Sugar Cookies Recipe
These pumpkin sugar cookies are flavored with, shaped like, and decorated like real pumpkins! So festive for fall!
Prep Time: 20 minutes
Cook Time: 15 minutes
Chill Time: 20 minutes
Total Time: 55 minutes
Yields: 18 cookies (based on a 2-inch cutter)

Ingredients
- 1 cup unsalted butter, room temperature (2 sticks)
- 1 cup granulated sugar
- 1 large egg, room temperature
- ¼ cup pumpkin puree (about 2 ounces)
- 1 tablespoon pure vanilla extract
- 3½ cups all-purpose flour
- 1½ teaspoons baking powder
- 1½ teaspoons pumpkin pie spice
- Royal Icing for frosting (optional)
Equipment
- Kitchen Scale (optional, for precise flour measurement)
- 2 Baking Sheets
- Stand Mixer (or hand mixer)
- Rolling Pin
- 2-inch Pumpkin Cookie Cutter (or desired size)
- Parchment paper
Instructions
- Line 2 large baking sheets with parchment paper and set them aside. This prevents sticking and makes cleanup a breeze.
- In the bowl of a stand mixer fitted with the paddle attachment, beat the softened butter and granulated sugar on medium-high speed until the mixture is light and fluffy, typically for at least 2 minutes. Proper creaming incorporates air, leading to tender cookies.

- Add the large egg, pumpkin puree, and pure vanilla extract to the creamed mixture. Mix until just combined, ensuring to scrape down the sides of the bowl as needed to guarantee a uniformly mixed dough.

- In a separate medium bowl, whisk together the all-purpose flour, baking powder, and pumpkin pie spice. This ensures the leavening agent and spices are evenly distributed throughout the dough.
- With the mixer on low speed, gradually add the dry ingredients to the wet ingredients. Mix just until the dry ingredients are fully incorporated and a dough forms. Be careful not to overmix, as this can lead to tough cookies.

- Turn the cookie dough out onto a lightly floured surface. Using a rolling pin, roll the dough out to an even ¼-inch thick. Use your chosen cookie cutters (a 2-inch pumpkin cookie cutter works perfectly for festive shapes) to cut out the cookies.
- Carefully transfer the cut cookies to the prepared baking sheets, ensuring they are spaced at least 2 inches apart to allow for proper air circulation during baking.

- Place the baking sheets with the cut cookies into the refrigerator or freezer to chill for 20 minutes. This step is crucial for preventing the cookies from spreading and helping them maintain their shape.
- While the dough is chilling, preheat your oven to 375°F (190°C).
- Bake the chilled cookies for 12-15 minutes, or until the edges and bottoms are just barely golden brown. Baking times may vary slightly depending on your oven and cookie size, so keep a close eye on them.

- Once baked, allow the cookies to cool completely on the baking tray before attempting to move or frost them. This allows them to firm up properly.

- Decorate the completely cooled cookies as desired with royal icing or your favorite frosting before serving.

Expert Tips for Perfect Pumpkin Sugar Cookies
- Yield: This recipe typically yields about 18 (2-inch) cookies. The exact number may vary based on the size of your cookie cutter and how efficiently you roll and cut your dough.
- Measuring Flour: Always measure your flour using the spoon-and-level method. Spoon flour lightly into your measuring cup until it overflows, then level it off with the back of a knife. This prevents over-measuring, which can result in dense, tough cookies.
- Avoid Overmixing: Once you add the dry ingredients to the wet, mix only until they are just incorporated. Overmixing develops the gluten in the flour, leading to hard and chewy cookies instead of soft and tender ones.
- Ideal Thickness: For cookies that are both sturdy enough to handle and decorate, yet thin enough to achieve a delightful crunch, aim to roll your cookie dough out to exactly ¼-inch thick.
- Cut Before Baking: For the cleanest and most defined cookie shapes, always cut your cookie dough into shapes before baking. Trying to cut them after baking will result in crumbly, uneven edges.
- The Importance of Chilling: As mentioned, chilling the cut cookies on the baking sheet for 15-20 minutes (or 10-15 minutes in the freezer) is non-negotiable. This solidifies the butter, preventing the cookies from spreading and ensuring they retain their perfect pumpkin outlines.
- Adjust Bake Time for Size: Smaller cookies will bake much faster than larger ones. If you’re using a 1-inch cutter, begin checking for doneness around 10 minutes to prevent overbaking. The edges should be lightly golden.
- Cool Completely Before Frosting: Patience is key here! Ensure your cookies are completely cooled to room temperature before applying any frosting. Warm cookies will cause the frosting to melt, run, and ruin your beautiful decorations.
- Plain Option: If you prefer not to decorate your cookies, consider sprinkling them with cinnamon sugar before baking. A simple mix of 1 tablespoon turbinado sugar and ½ teaspoon ground cinnamon adds a wonderful, fragrant finish.
- Frosting Choices: While we suggest royal icing for its crisp finish and ability to hold intricate designs, feel free to use your favorite buttercream frosting for a softer, richer taste. For a super quick and easy option, a simple glaze made from powdered sugar and milk (starting with 1 cup powdered sugar and 1-2 tablespoons milk) works well too.
- Nutritional Information: Please note that the provided nutritional information is an estimate per cookie and does not include any optional ingredients like frosting.
Make-Ahead: The cookie dough is very forgiving and can be prepared in advance. Store the dough tightly wrapped in plastic wrap in the refrigerator for up to 3 days. For longer storage, freeze the dough for up to 3 months. If frozen, remember to let it thaw overnight in the refrigerator before rolling out, cutting, and baking.
Storage: Once baked and decorated (if applicable), store your pumpkin sugar cookies in an airtight container at room temperature for up to 1 week. If stacking, place parchment or wax paper between layers to protect the frosting. For extended freshness, cookies can be frozen for up to 2 months. Always allow them to thaw completely at room temperature before enjoying.
Author: Becky Hardin
Nutrition Facts
Amount Per Serving (1 cookie)
Calories 230 | Calories from Fat 99
% Daily Value*
- Fat 11g 17%
- Saturated Fat 7g 44%
- Trans Fat 0.4g
- Polyunsaturated Fat 1g
- Monounsaturated Fat 3g
- Cholesterol 37mg 12%
- Sodium 42mg 2%
- Potassium 42mg 1%
- Carbohydrates 30g 10%
- Fiber 1g 4%
- Sugar 11g 12%
- Protein 3g 6%
- Vitamin A 860IU 17%
- Vitamin C 0.2mg 0%
- Calcium 30mg 3%
- Iron 1mg 6%
* Percent Daily Values are based on a 2000 calorie diet.
Did You Make This?
We love seeing what you’ve made! Tag us on social media at
@easydessertrecipes for a chance to be featured.
How to Make Pumpkin Sugar Cookies: A Detailed Step-by-Step Guide
Crafting these festive **pumpkin sugar cookies** is a rewarding experience, and with our detailed step-by-step guide, you’ll achieve perfect results every time. Follow these instructions carefully for cookies that are as delicious as they are beautiful.
1. Prepare Your Baking Station and Cream the Butter
Begin by lining two large baking sheets with parchment paper. This simple step prevents sticking and ensures your cookies lift off easily after baking, making cleanup significantly easier. Set these prepared sheets aside. Next, in the bowl of a stand mixer (or a large bowl with a hand mixer), combine 1 cup of softened unsalted butter with 1 cup of granulated sugar. Beat these two ingredients together on medium-high speed for a minimum of 2 minutes. The goal here is to achieve a light, fluffy, and pale mixture. This creaming process incorporates air into the butter and sugar, which contributes to the cookies’ tender texture and helps them spread evenly during baking. Don’t rush this step; it’s fundamental to the cookie’s final consistency.
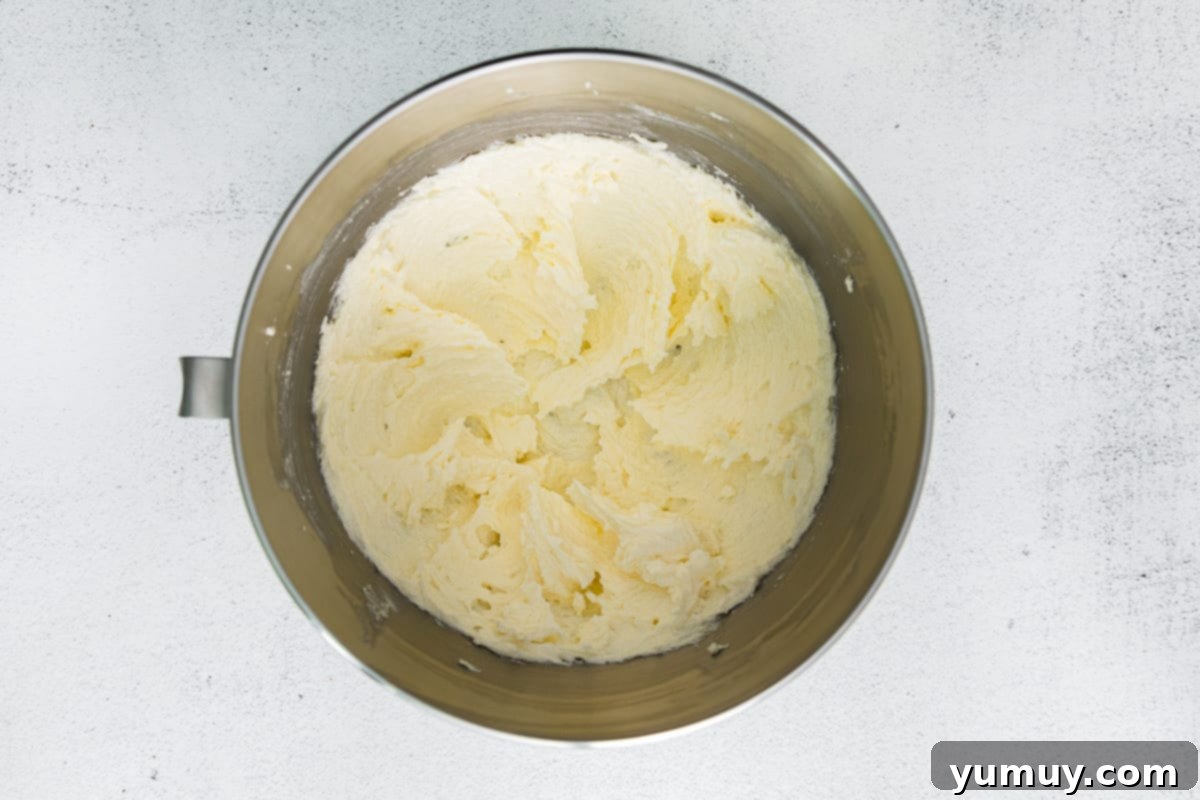
2. Incorporate the Wet Ingredients for Pumpkin Flavor
Once your butter and sugar are perfectly creamed, it’s time to introduce the star flavors. Add 1 large egg (at room temperature for better emulsification), ¼ cup of real pumpkin puree, and 1 tablespoon of pure vanilla extract. Mix these into the creamed mixture on low speed until they are just combined. It’s crucial to periodically scrape down the sides and bottom of the mixing bowl with a spatula. This ensures that all ingredients are fully incorporated and prevents any pockets of unmixed butter or sugar, leading to a consistent and smooth dough. The pumpkin puree not only adds that authentic fall flavor but also contributes to the cookies’ moistness, setting them apart from ordinary sugar cookies.
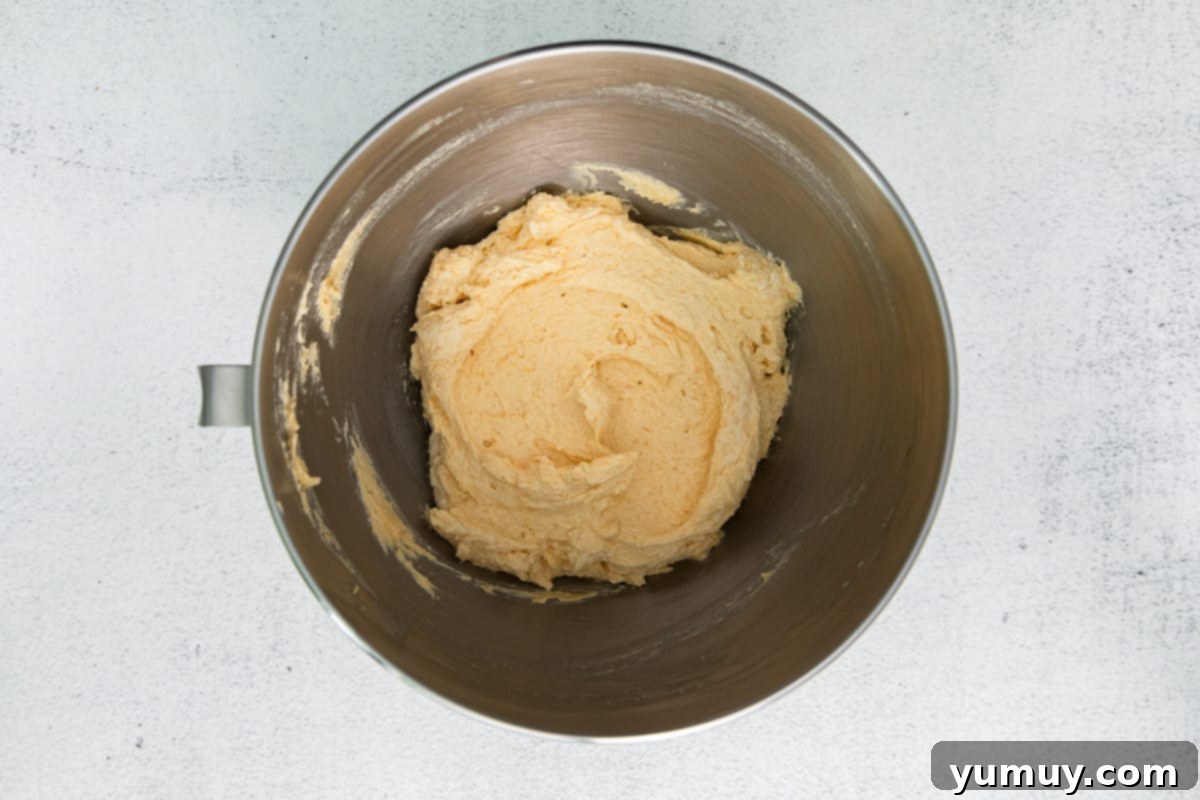
3. Combine Dry Ingredients and Form the Dough
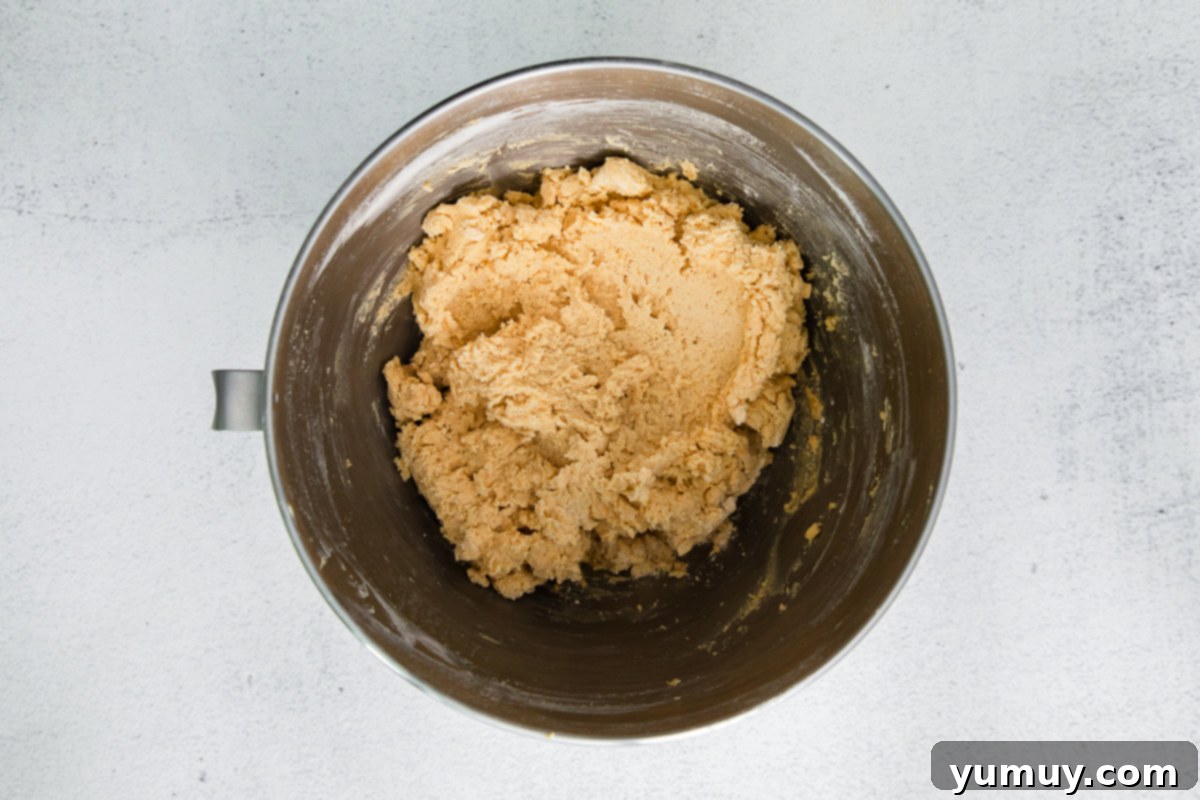
In a separate medium-sized bowl, prepare your dry ingredients. Whisk together 3½ cups of all-purpose flour, 1½ teaspoons of baking powder, and 1½ teaspoons of pumpkin pie spice. Whisking ensures that the leavening agent (baking powder) and spices are evenly distributed throughout the flour, preventing clumps and ensuring a consistent rise and flavor in every cookie. When measuring flour, we highly recommend using the spoon-and-level method to avoid adding too much, which can make your dough dry and your cookies tough. With your mixer on low speed, gradually add the dry ingredients to the wet mixture. Mix just until the flour streaks disappear and the ingredients are incorporated, forming a cohesive dough. Overmixing is the enemy of tender cookies, so stop as soon as it comes together.
4. Roll, Cut, and Chill for Perfect Pumpkin Shapes
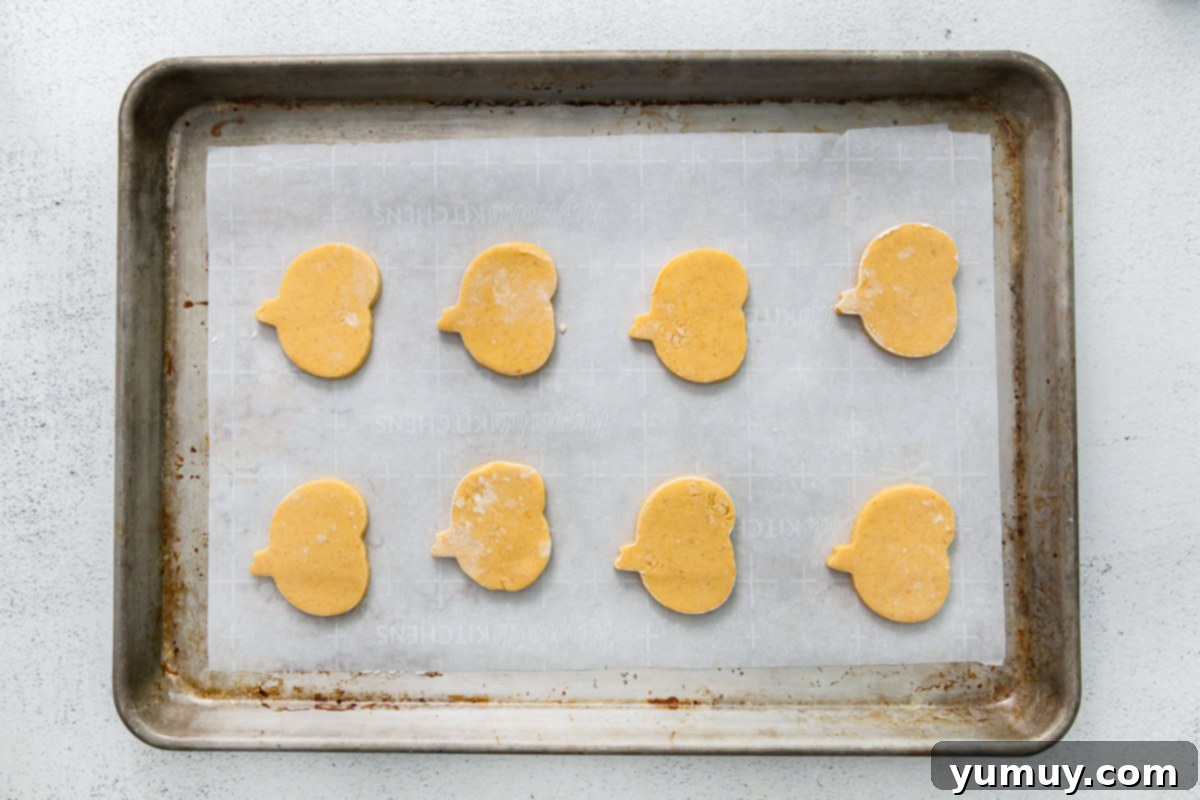
Turn the freshly made cookie dough out onto a lightly floured surface. Using a rolling pin, roll the dough evenly to a thickness of ¼-inch. This particular thickness is ideal because it creates cookies that are sturdy enough to handle and decorate without breaking, yet thin enough to achieve a lovely crunch. Using your preferred cookie cutters (we love a 2-inch pumpkin cookie cutter for this recipe), carefully cut out your shapes. Once cut, gently transfer the cookies to your prepared baking sheets, making sure to leave at least 2 inches of space between each cookie to prevent them from merging during baking. Now, for the critical step: place the baking sheets with the cookies into the refrigerator or freezer to chill for a solid 20 minutes. This chilling period allows the butter to firm up, which is essential for helping the pumpkin cookies retain their crisp edges and distinct shapes as they bake, preventing undesirable spreading.
5. Bake to Golden Perfection
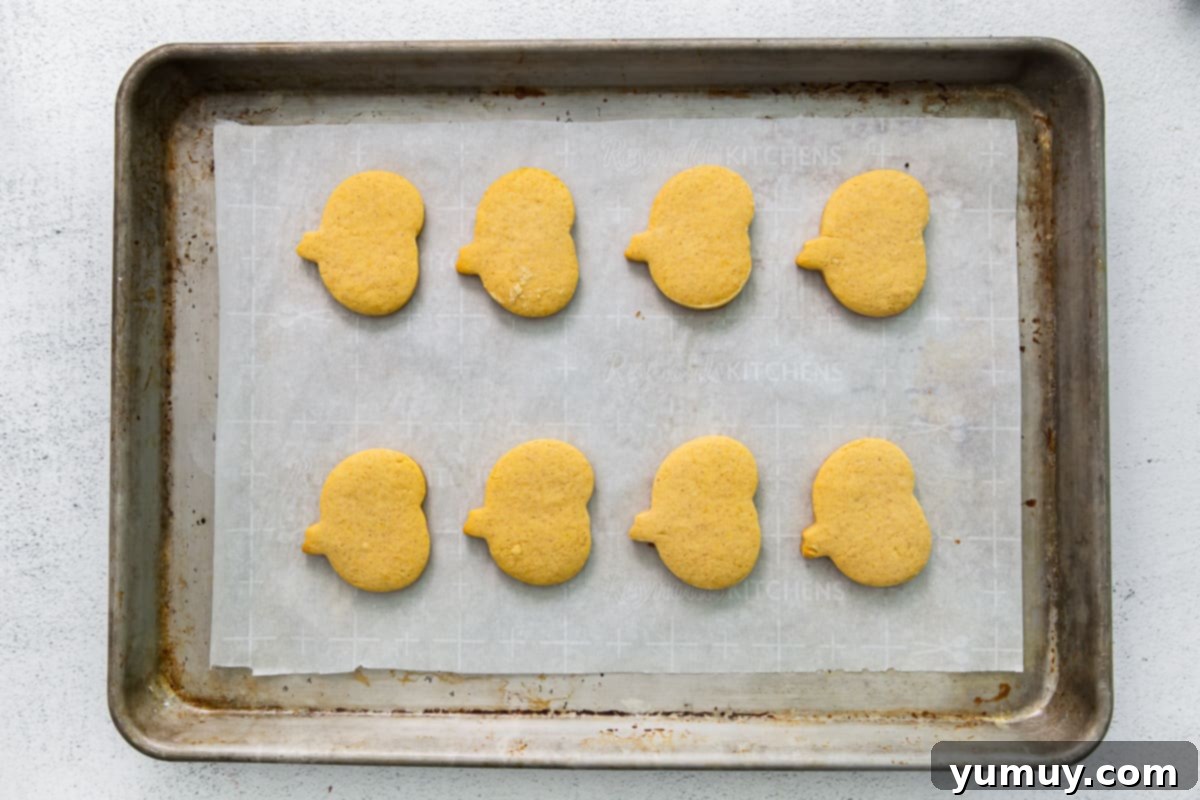
While your beautifully shaped cookie dough is chilling, preheat your oven to 375°F (190°C). This ensures the oven is at the correct temperature when the cookies go in, allowing for consistent baking. Once the oven is ready and the cookies are thoroughly chilled, place the baking sheets in the preheated oven. Bake for approximately 12-15 minutes. The precise baking time can vary depending on your oven and the size of your cookie cutters, so start checking them around the 10-minute mark. Look for the edges and bottoms to be just barely golden brown. It’s important to take care not to overbake these cookies, as this will result in a hard, crumbly texture rather than the desired soft, chewy center with crisp edges.
6. Cool Completely Before Decorating
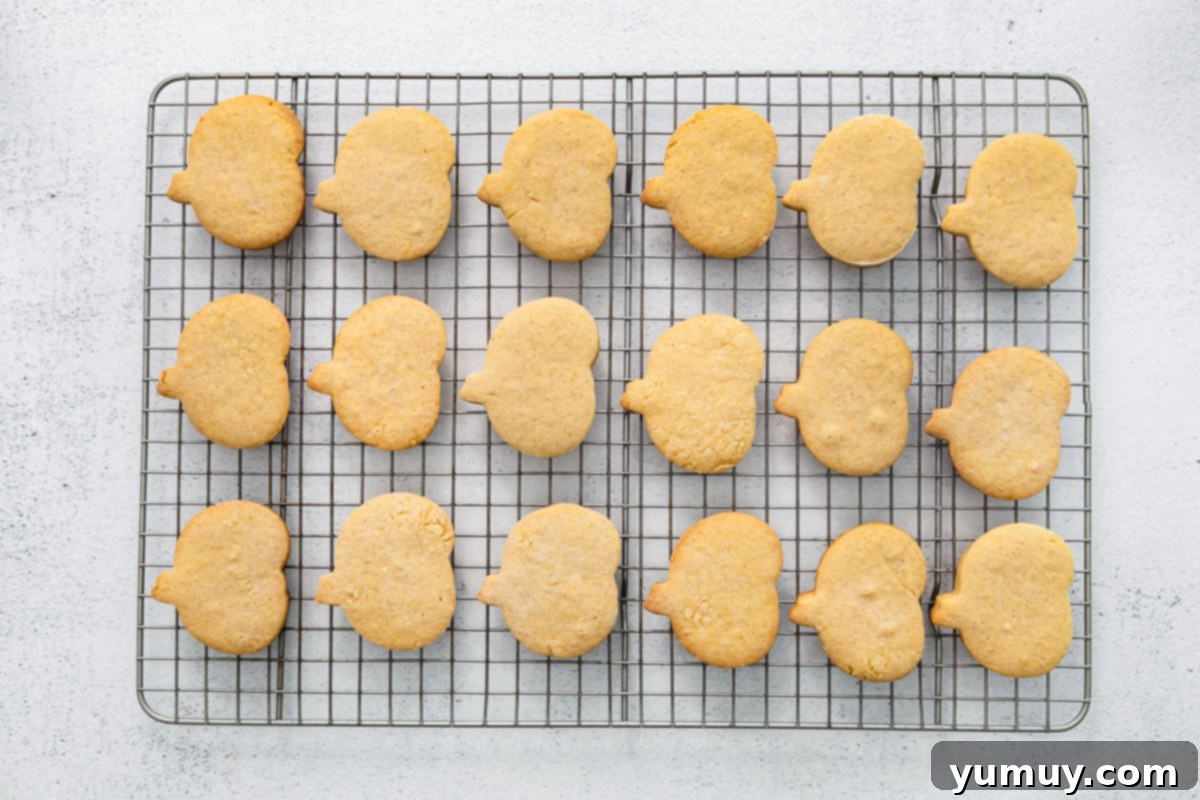
After baking, carefully remove the hot baking sheets from the oven. It’s tempting to move them immediately, but for the best results, allow the cookies to cool completely on the baking tray. Hot cookies are very fragile and prone to breaking. As they cool, they will firm up, making them easier to handle. This complete cooling process is also absolutely essential if you plan on frosting your cookies. Attempting to frost warm cookies will cause your icing to melt and run, ruining your intricate designs. Once fully cooled to room temperature, your pumpkin sugar cookies are ready to be enjoyed as is, or transformed into stunning edible art with royal icing!
Mastering the Art of Decorating Royal Icing Pumpkin Sugar Cookies
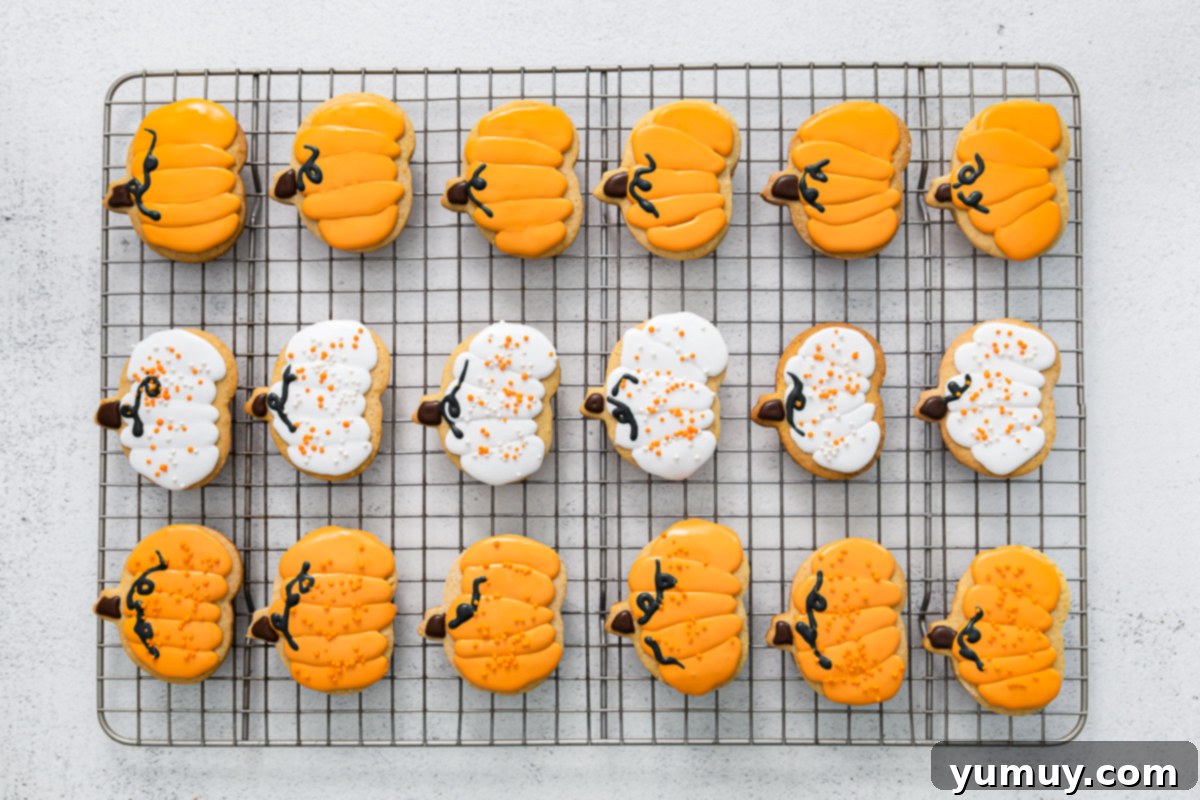
Decorating these pumpkin sugar cookies with royal icing is where the real fun begins and your creativity can shine! Royal icing provides a beautiful, smooth finish that hardens nicely, making these cookies perfect for gifting or displaying. Here’s a detailed guide to achieve those charming pumpkin designs:
- Prepare Your Base Icing: You can either opt for the convenience of store-bought white royal icing, or easily whip up your own. For homemade, combine about 2 cups of powdered sugar with 2-3 tablespoons of milk (start with 2 and add more slowly if needed) until you reach a smooth, pourable but not too thin consistency. The consistency should allow a ribbon of icing to disappear back into the bowl within 5-10 seconds.
- Color and Prepare Pumpkin Icing: To achieve that classic pumpkin orange, take about 2 cups of your prepared royal icing and mix in approximately ½ teaspoon of Pumpkin Orange Americolor Gel Food Coloring. Gel food coloring is preferred over liquid as it provides vibrant color without thinning the icing. Once colored, transfer the orange icing to a piping bag fitted with a very small round tip, such as a Wilton #3. This tip size is perfect for both outlining and flooding.
- Outline and Flood the Pumpkin Body: Start by outlining a thin, vertical oval in the very center of each cookie. This will form the core section of your pumpkin. Immediately “flood” this outlined area by filling it in with more orange icing. Use a clean toothpick or scribe tool to gently spread the icing to the edges and pop any air bubbles, ensuring a smooth surface. Next, outline the curved edge around both the left and right sides of the cookie, creating two more sections. Fill in the outer half of each of these newly outlined edges, being careful to leave about a ¼-inch space of undecorated cookie between the center oval and these outer layers. This gap will give your pumpkin depth.
- Allow to Set and Fill Gaps: Let the first layer of frosting (the center oval and the two outer sections) set completely. This usually takes about 10-15 minutes, depending on humidity. Once the initial frosting has crusted over, carefully fill in the remaining undecorated gaps between the sections with more orange icing. Again, use a toothpick to smooth and even out the surface. Allow this entire orange pumpkin base to set completely, which may take several hours or even overnight for the icing to fully harden. This prevents colors from bleeding into one another.
- Add the Pumpkin Stem: For the finishing touch, create the pumpkin stems. Take about 2 tablespoons of royal icing and mix in 1-2 drops of Brown Americolor Gel Food Coloring until you achieve a natural brown shade. Transfer this brown icing to another piping bag fitted with a very small tip. Carefully draw a small stem at the top center of each pumpkin cookie. You can make them straight or slightly curved for added character. Allow these stems to set completely before handling or storing the cookies.
How to Properly Store Your Pumpkin Sugar Cookies
Proper storage is key to maintaining the freshness and deliciousness of your decorated pumpkin sugar cookies. Once your cookies are completely cool and any royal icing decorations have fully hardened (this can take several hours or overnight), transfer them to an airtight container. If you need to stack the cookies, place a sheet of parchment paper or wax paper between each layer to protect the delicate frosting designs from smudging or sticking. These cookies will stay fresh at room temperature for up to 1 week. For longer storage, you can freeze them for up to 2 months. To freeze, arrange the cooled, decorated cookies in a single layer on a baking sheet and flash freeze for about 30 minutes until solid. Then, transfer them to an airtight freezer-safe container, again using parchment paper between layers. When you’re ready to enjoy them, simply let them thaw at room temperature. They’ll taste just as fresh as the day you baked them!
Frequently Asked Questions About Pumpkin Sugar Cookies
Can I use canned pumpkin pie filling instead of pumpkin puree?
No, it’s very important to use 100% pure pumpkin puree, not pumpkin pie filling. Pumpkin pie filling contains added spices, sugar, and sometimes other ingredients that will alter the flavor and consistency of your cookie dough. Pure pumpkin puree is just cooked, mashed pumpkin and provides the natural moisture and flavor needed for this recipe.
My cookies spread too much! What went wrong?
The most common reasons for cookies spreading are: 1) The butter was too soft or even melted. Ensure your butter is at room temperature but still firm enough to hold its shape. 2) The dough wasn’t chilled sufficiently. Chilling the cut cookies is crucial to solidify the butter and prevent spreading. 3) The oven temperature was too low. An underheated oven can cause the butter to melt before the flour sets, leading to flatter cookies. Make sure your oven is preheated properly, perhaps even using an oven thermometer to verify.
Can I make these cookies gluten-free?
While this recipe uses all-purpose flour, you might be able to substitute it with a 1:1 gluten-free baking flour blend that contains xanthan gum. However, results can vary, and you might need to adjust the amount of liquid slightly or chill the dough for a bit longer. It’s always a good idea to test a small batch first.
What if I don’t have pumpkin pie spice?
No problem! You can easily make your own pumpkin pie spice blend. Combine 1 teaspoon ground cinnamon, ¼ teaspoon ground nutmeg, ¼ teaspoon ground ginger, and a pinch of ground cloves or allspice. This blend will perfectly replicate the warm, aromatic flavors needed for these cookies.
Recipe Variations to Customize Your Pumpkin Cookies
While these **pumpkin sugar cookies** are perfect as is, you can always experiment with variations to suit your taste or occasion. Here are a few ideas:
- Spice it Up: For an extra kick, add a pinch of black pepper or cardamom to your pumpkin pie spice blend. Or, for a more intense spice flavor, increase the amount of pumpkin pie spice by ½ teaspoon.
- Citrus Zest: Incorporate 1 teaspoon of orange or lemon zest into the dough when you add the wet ingredients. Citrus complements pumpkin beautifully and adds a bright note.
- Chocolate Chip Pumpkins: Gently fold in ½ cup of mini chocolate chips or white chocolate chips into the dough at the very end of mixing for a delightful textural and flavor contrast.
- Maple Glaze: Instead of royal icing, consider a simple maple glaze. Whisk together 1 cup powdered sugar, 2-3 tablespoons maple syrup, and 1-2 tablespoons milk until smooth. This adds another layer of autumnal flavor.
- Nutty Crunch: If you enjoy nuts, finely chop some pecans or walnuts and sprinkle them on top of the cookies before baking (or gently press them into the dough).
- Cream Cheese Frosting: For a less traditional but incredibly delicious frosting, a classic cream cheese frosting pairs wonderfully with the pumpkin flavor. Just ensure your cookies are completely cool before frosting.
More Pumpkin Dessert Recipes to Try!
Pumpkin Madeleines
Pumpkin Spice Cookies
Pumpkin Biscotti
Pumpkin Brownies
Explore All Pumpkin Recipes
