Step into a world of pure nostalgia with these incredible Orange Creamsicle Cookies! If you grew up cherishing the creamy, citrusy bliss of a classic dreamsicle, then prepare to be utterly obsessed with every single bite of these soft, chewy, and intensely flavorful cookies. This recipe is my dedicated effort to recreate that iconic, melt-in-your-mouth experience in a baked treat, and I promise you, it absolutely delivers.
What’s the secret to capturing that magical creamsicle essence? It’s a delightful combination of vibrant orange Jell-O for a bold, zesty citrus punch and real vanilla ice cream, which lends an unmatched richness and creates an unbelievably soft, tender crumb. These cookies aren’t just a dessert; they’re a trip down memory lane, bursting with bright, sweet, and undeniably delicious flavor. Get ready to bake a batch of pure joy that will have everyone asking for your secret!

Orange Creamsicle Cookies: A Nostalgic Flavor Journey
Inspired by the long-standing success of my orange creamsicle cupcakes, I knew I had to translate this beloved summer flavor into another easy dessert format: cookies! The concept might seem a bit unconventional at first, but trust me, the duo of orange Jell-O mix and vanilla ice cream is absolutely key to perfectly recreating that nostalgic orange creamsicle flavor in a wonderfully chewy cookie.
The dry Jell-O powder is more than just a flavor enhancer; it’s a magic ingredient that infuses the cookies with a bright, intense citrus taste and a beautiful, recognizable pastel orange hue. It’s truly what makes these cookies scream “creamsicle.” As for the vanilla ice cream, it’s my secret weapon for achieving that coveted soft and rich texture. By substituting some of the traditional butter, sugar, and eggs with ice cream, we introduce extra moisture, a luscious richness, and delicate vanilla undertones, culminating in that creamy, dreamy creamsicle experience you remember so fondly. A touch of cornstarch in the dough further ensures these cookies bake up incredibly soft and chewy, while also helping them maintain their perfect, round shape every time. Together, these ingredients transform a simple cookie into an extraordinary, memory-filled delight.

The Importance of Chilling the Dough for Perfect Cookies
For cookies that are consistently soft, chewy, and hold their shape beautifully, chilling the dough is a non-negotiable step. While it might add a few minutes to your prep time, it’s absolutely worth the wait! Allowing your orange creamsicle cookie dough to chill for at least 15 minutes before baking performs several crucial functions.
Firstly, chilling gives the cornstarch and the unique moisture from the ice cream ample time to fully hydrate the flour. This hydration process is essential for creating a tender, chewy crumb and preventing the cookies from spreading too much in the oven, ensuring they maintain their appealing, thick shape. Secondly, chilling allows the flavors, especially the vibrant orange from the Jell-O and zest, to deepen and meld together, resulting in a more pronounced and harmonious taste in every bite. This resting period helps the dough firm up, making it easier to handle and less sticky when rolling. So, resist the urge to skip this step; a perfectly chilled dough is the key to achieving those picture-perfect, deliciously flavored orange creamsicle cookies.

Orange Creamsicle Cookies Recipe
Get a hit of nostalgia with these dreamy cookies made with Jell-O mix and ice cream that taste just like an Orange Creamsicle!
Ingredients
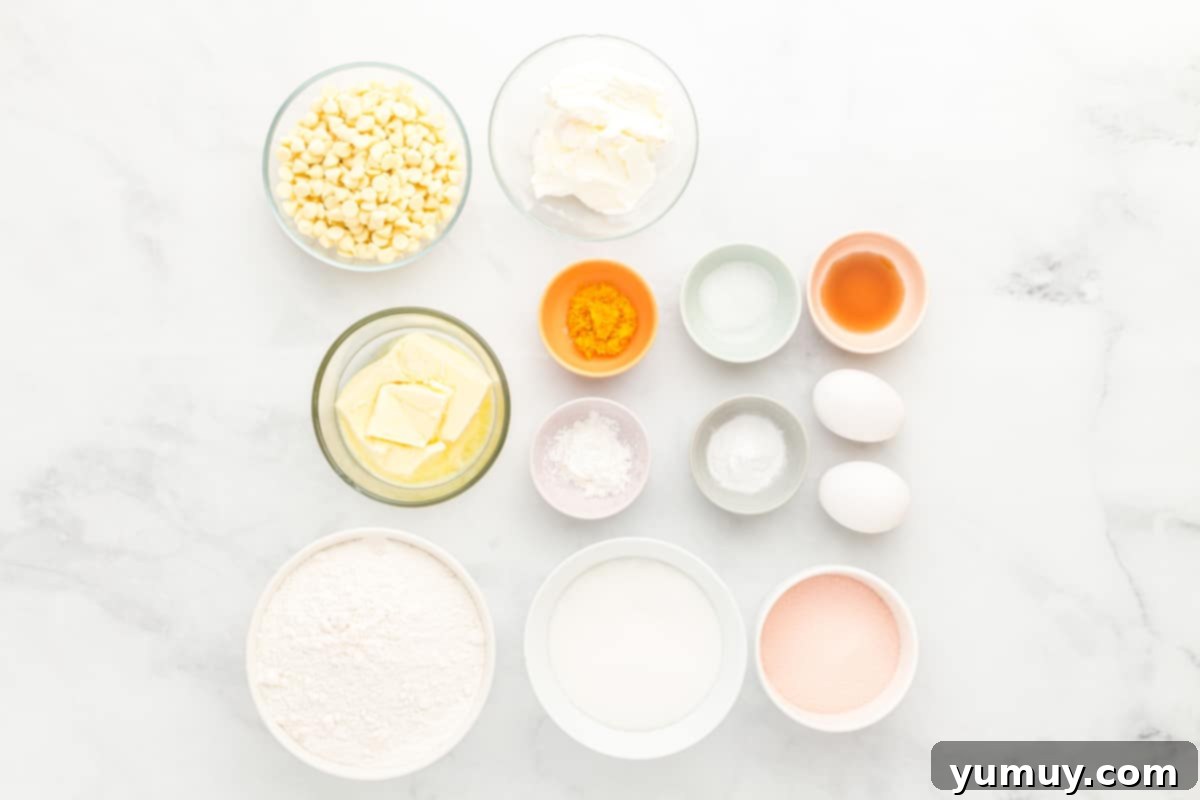
- 3 cups all-purpose flour
- 2 teaspoons cornstarch
- 1½ teaspoons baking soda
- 1¼ cups granulated sugar
- ½ cup salted butter (slightly melted, 1 stick)
- 2 large eggs (room temperature)
- 1 teaspoon pure vanilla extract (optional)
- 3 ounces orange Jell-O mix (1 box)
- ½ cup vanilla ice cream
- 1 tablespoon orange zest (from 1 orange)
- 1½ cups white chocolate chips (divided)
Equipment
- Kitchen Scale (optional)
- Hand Mixer
- 2 Baking Sheets
- Cookie Portion Scoop
Instructions
In a medium bowl, whisk the flour, cornstarch, and baking soda together. Set the dry mixture aside for now.

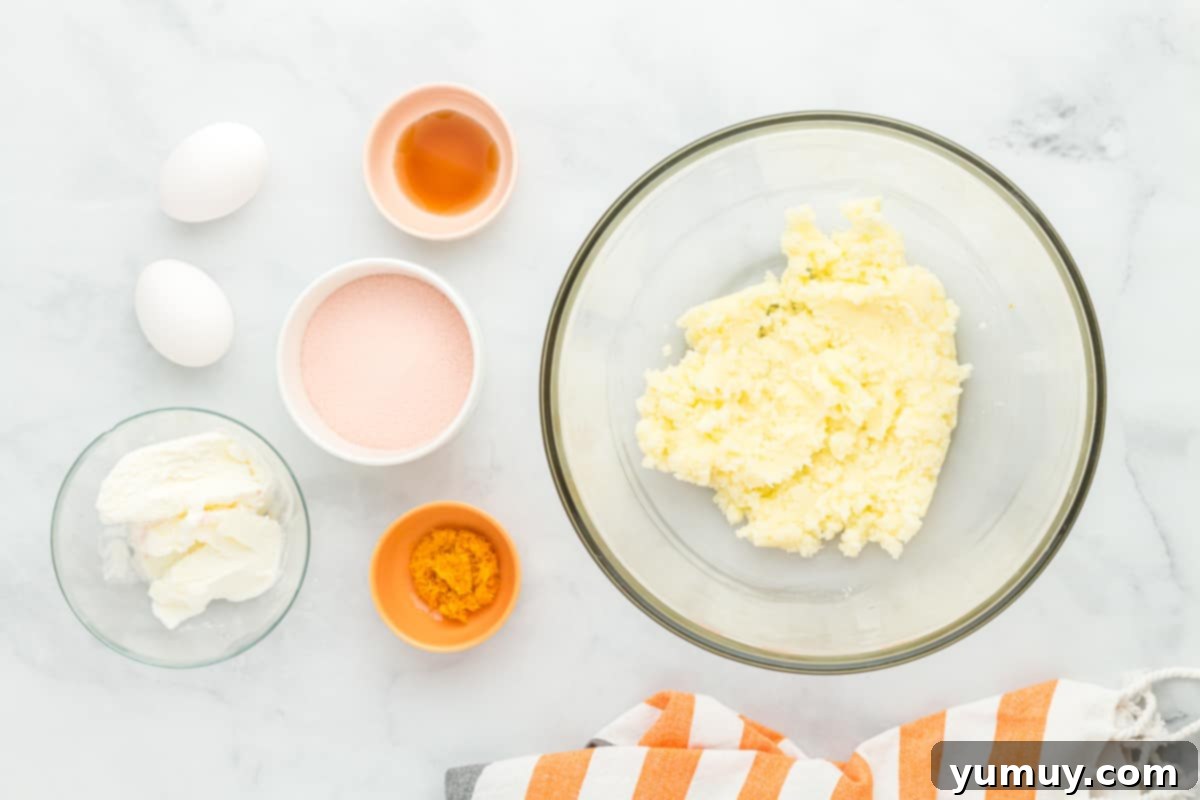
In a separate large bowl, using a hand mixer, beat the granulated sugar and butter together on high speed until well combined, about 2 minutes. The mixture will look a bit crumbled but that’s okay – it will come together more in the next step.

Beat the eggs and vanilla (on high) into the butter mixture until light and a bit fluffy, about 1 minute.
Beat the orange Jell-O powder, ice cream, and orange zest (on high speed) into the wet mixture until well combined, about 1 minute.

Add the flour mixture into the wet mixture and beat on low just until combined (until you no longer see streaks of white flour). Do not overmix.

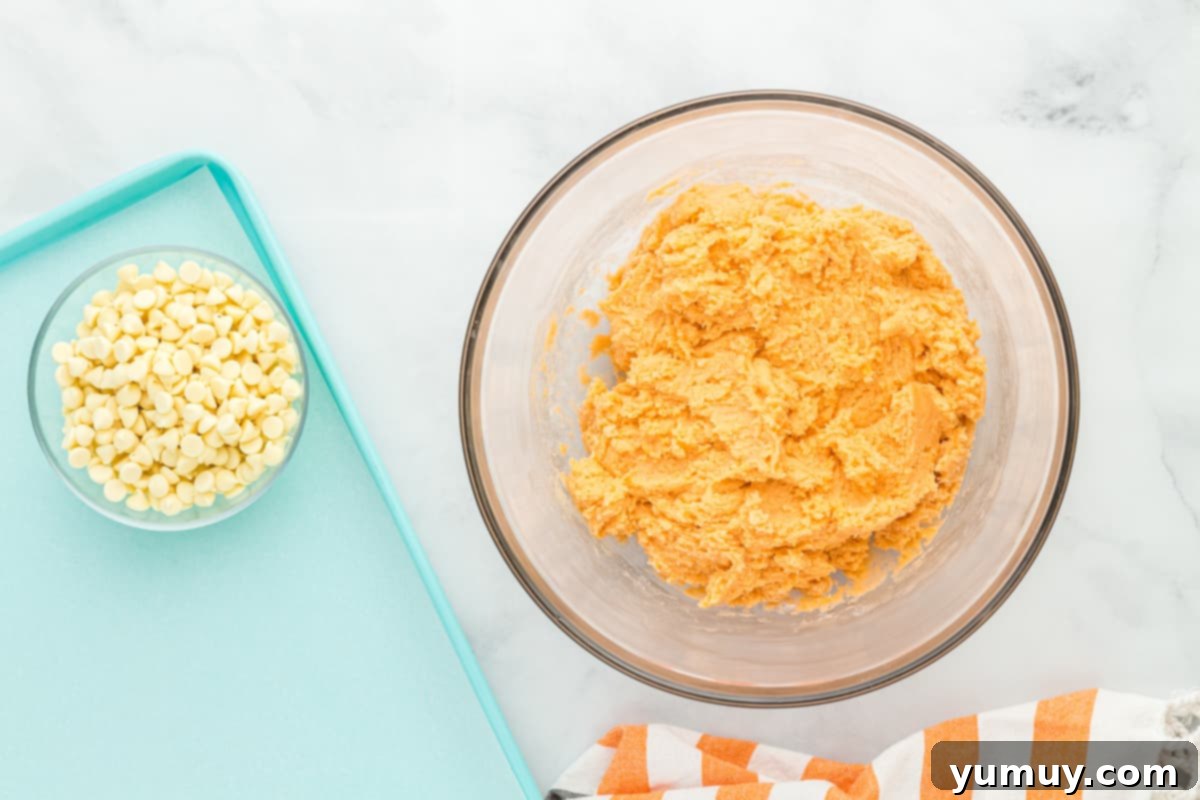
Use a spatula (not the electric mixer) to gently fold in 1¼ cups of the white chocolate chips (set aside the remaining ¼ cup of white chocolate chips for now). It’s important to not use the electric mixer for this step. If the dough is over mixed, the cookies won’t be soft and chewy.
Line a baking sheet with parchment paper.
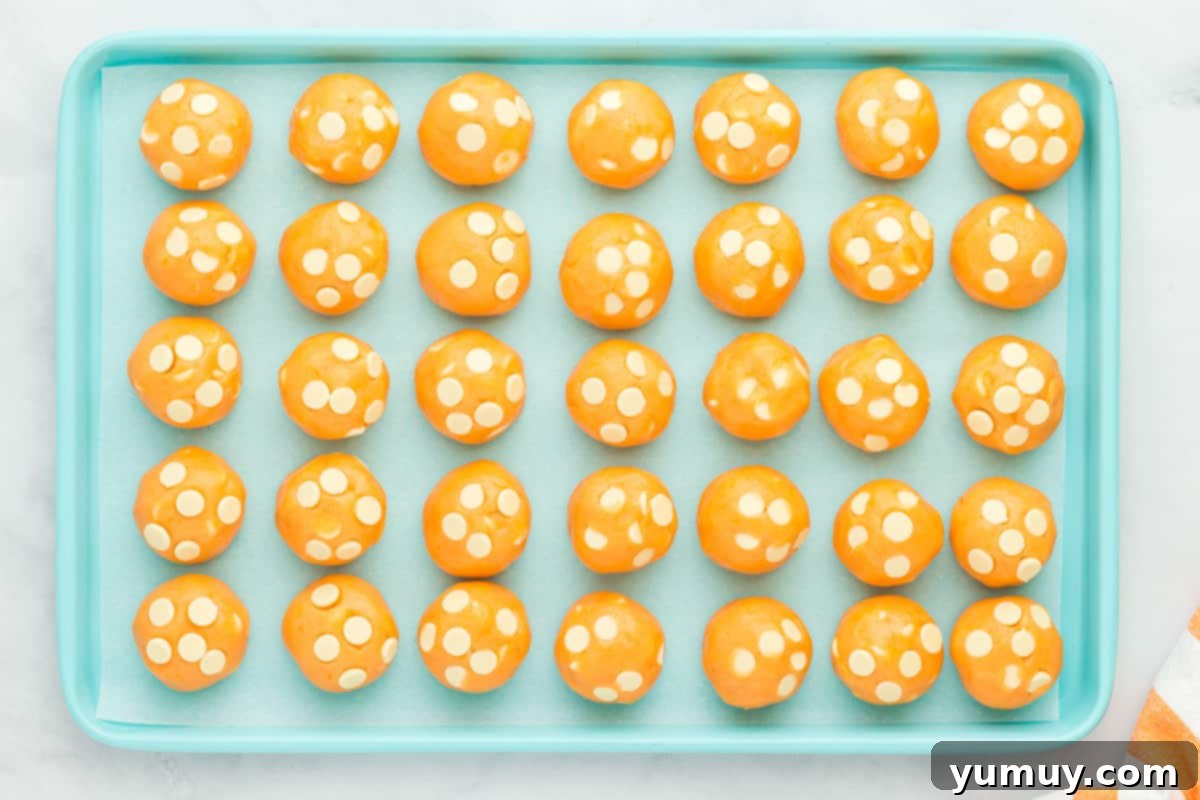
Using a 2-tablespoon sized cookie scoop, scoop balls of cookie dough onto the parchment lined baking sheet. These cookie dough balls will be about 30 grams each. The cookies can be close together for this step but not touching or they’ll stick together.
Use your hands to roll the cookies into round balls. This cookie dough will be really sticky. Spray your hands lightly with nonstick spray so the cookie dough balls don’t get stuck to your hands. Top the cookie dough balls with the remaining ¼ cup of the white chocolate chips.

Place the tray of unbaked cookies in freezer for 15 minutes. Freezing the cookies before baking helps to prevent the cookies from spreading too much during baking.
Preheat oven to 350°F (175°C).
Line a second baking sheet with parchment paper, take some cookies out of the freezer then place those cookies on the baking sheet. Cookies should be at least 2 inches from each other on the baking sheet to allow a bit of space for spreading. It is important to only bake one tray of cookies at a time to ensure an even baking temperature for all cookies. Leave the rest of the cookies in the freezer until you are ready to bake them.
Place one tray of cookies into the oven to bake. Bake each tray of cookies for 12-13 minutes. The baked cookies will look slightly undercooked on the tops but they’ll continue to bake on the hot tray after you remove them from the oven. You don’t want to overbake the cookies or they won’t be soft and chewy.

Let cookies cool for 10 minutes on the hot baking tray before removing to wire rack to cool completely.
Notes and Tips for Success
- Ensure you use regular, sugar-sweetened Jell-O mix, not sugar-free. Sugar-free varieties will alter the texture and taste significantly.
- Add the Jell-O mix as a dry ingredient directly into the dough. Do not prepare it according to package directions.
- While white chocolate chips are recommended for their creamy contrast, feel free to use milk, dark, or semisweet chocolate if you prefer.
- Experiment with other mix-ins! Chopped nuts, dried cranberries, or even mini marshmallows could be delicious. Keep the total amount of mix-ins to about 1½ cups.
- Venture beyond orange! Swap the orange Jell-O for other fruit flavors like strawberry, blackberry, peach, lemon, raspberry, or cherry. For an extra flavor boost, replace the orange zest with ½ teaspoon of a matching flavor extract, or simply stick with vanilla extract for a more subtle touch.
- Chilling the cookie dough is crucial! This step prevents excessive spreading and ensures a perfectly chewy texture. Don’t skip it.
- Bake only one tray of cookies at a time for optimal and even baking. This ensures consistent heat distribution and prevents uneven cooking.
Storage Instructions
Storage: Store these delightful orange creamsicle cookies in an airtight container at room temperature for up to 3 days. For extended freshness, keep them in the refrigerator for up to 5 days, or freeze them for up to 1 month. If frozen, allow them to thaw at room temperature before indulging.
You can also prepare the cookie dough up to 3 days in advance and store it in an airtight container in the refrigerator until you’re ready to bake. To freeze raw cookie dough balls, lay them flat in a single layer on a baking sheet and freeze for 2 hours. Then, transfer them to an airtight container or freezer bag. When baking from frozen, add an additional 2 minutes to the baking time.
Nutrition Facts
Orange Creamsicle Cookies Recipe
Amount Per Serving (1 cookie)
Calories from Fat 45
* Percent Daily Values are based on a 2000 calorie diet.
How to Make Orange Creamsicle Cookies: A Detailed Walkthrough
Creating these delightful orange creamsicle cookies is a straightforward process, even for beginner bakers. Follow these simple steps for perfect results every time:
Step 1: Prepare Your Ingredients and Dry Mix. Begin by gathering all your ingredients. Allow your eggs to come to room temperature and slightly melt the salted butter. Don’t forget to zest your orange for that fresh, aromatic boost! In a medium-sized mixing bowl, combine 3 cups of all-purpose flour, 2 teaspoons of cornstarch, and 1½ teaspoons of baking soda. Whisk these dry ingredients thoroughly until they are well combined. Set this mixture aside for now.
Step 2: Cream the Butter and Sugar. In a separate, large mixing bowl, add 1¼ cups of granulated sugar and ½ cup of slightly melted salted butter. Using a hand mixer, beat these two ingredients together on high speed for approximately 2 minutes, or until they are well combined and lightened in color. The mixture might appear a bit crumbly at this stage, which is perfectly normal. It will smooth out as more wet ingredients are added.
Step 3: Incorporate Wet Ingredients. Add the 2 large room-temperature eggs and 1 teaspoon of pure vanilla extract (if using) to the creamed butter and sugar mixture. Beat on high speed for about 1 minute, until the mixture becomes light and somewhat fluffy. Next, add the 3 ounces of dry orange Jell-O powder, ½ cup of vanilla ice cream, and 1 tablespoon of fresh orange zest. Continue to beat on high speed for another minute, ensuring all these components are thoroughly combined into a smooth, vibrant orange batter.

Step 4: Form the Dough and Add Chocolate Chips. Gradually add the reserved flour mixture to the wet ingredients. Beat on low speed just until everything is combined and you no longer see any streaks of white flour. Be careful not to overmix the dough, as this can lead to tough cookies. Switch to a spatula (avoiding the electric mixer for this step) and gently fold in 1¼ cups of the white chocolate chips. Overmixing at this stage can also compromise the soft and chewy texture we’re aiming for. Set aside the remaining ¼ cup of white chocolate chips for topping.
Step 5: Shape and Chill the Cookies. Line a baking sheet with parchment paper. Using a 2-tablespoon-sized cookie scoop (each ball should be about 30 grams), scoop portions of cookie dough onto the prepared baking sheet. While the cookies can be placed somewhat close together at this stage, ensure they are not touching to prevent them from sticking. The dough will be quite sticky, so lightly spray your hands with nonstick cooking spray to help roll each scoop into a neat, round ball. Press the remaining ¼ cup of white chocolate chips onto the tops of the cookie dough balls for a beautiful finish. Place the tray of unbaked cookies into the freezer for 15 minutes. This crucial chilling step helps prevent the cookies from spreading too much during baking, ensuring they retain their perfect shape and chewiness.
Step 6: Bake to Perfection. While your cookie dough is chilling, preheat your oven to 350°F (175°C). Line a second baking sheet with fresh parchment paper. Take a portion of the chilled cookie dough balls from the freezer and arrange them on the new baking sheet, ensuring each cookie is at least 2 inches apart to allow for proper spreading. It’s important to bake only one tray of cookies at a time to maintain a consistent oven temperature and achieve even baking results across all cookies. Keep the remaining dough in the freezer until you are ready to bake subsequent batches.
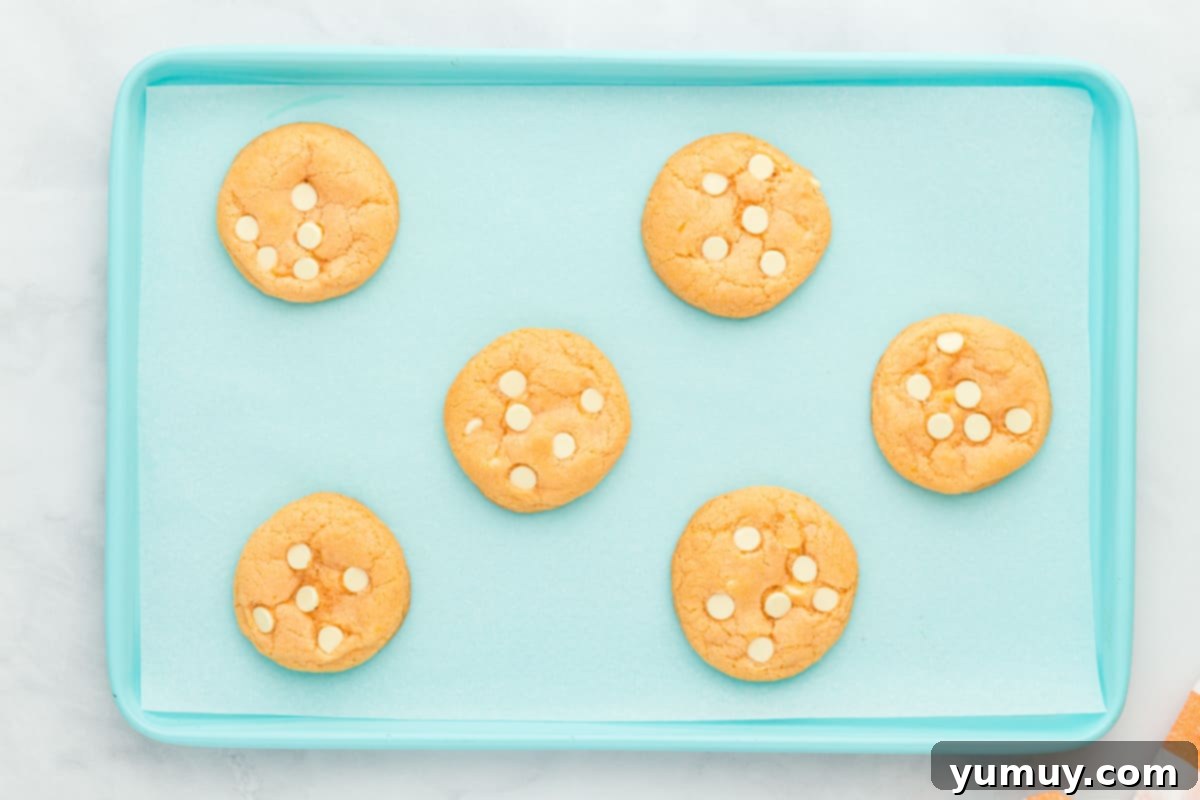
Place one tray of cookies into the preheated oven and bake for 12-13 minutes. Don’t worry if the tops appear slightly undercooked; they will continue to set on the hot baking tray after removal from the oven. Overbaking will result in dry, tough cookies, so err on the side of slightly underdone for that ideal soft and chewy texture. Once baked, allow the cookies to cool on the hot baking tray for 10 minutes before transferring them to a wire rack to cool completely. This cooling period on the hot tray further contributes to their perfect texture.
How to Store Your Orange Creamsicle Cookies
Proper storage is key to keeping your delicious orange creamsicle cookies fresh and delightful. Here’s how to best store them, whether baked or as dough:
- Baked Cookies at Room Temperature: Once fully cooled, store your baked cookies in an airtight container at room temperature for up to 3 days. They will remain wonderfully soft and chewy.
- Baked Cookies in the Refrigerator: For slightly longer freshness, transfer baked cookies to an airtight container and store them in the refrigerator for up to 5 days. Allow them to come to room temperature before serving for the best texture and flavor.
- Freezing Baked Cookies: These cookies freeze beautifully! Place cooled cookies in a single layer on a baking sheet and freeze until solid (about 1-2 hours). Then, transfer them to a freezer-safe airtight container or heavy-duty freezer bag. They can be stored in the freezer for up to 1 month. Thaw at room temperature before enjoying.
- Preparing and Storing Dough in Advance: You can prepare the cookie dough up to 3 days ahead of time. Store it in an airtight container in the refrigerator. When you’re ready to bake, simply scoop and proceed with the chilling and baking steps.
- Freezing Raw Cookie Dough Balls: This is a fantastic time-saver! Scoop the cookie dough into balls as instructed, then place them in a single layer on a parchment-lined baking sheet. Freeze for about 2 hours, or until solid. Once frozen, transfer the dough balls to a freezer-safe airtight container or a Ziplock bag. They can be stored for up to 3 months. When baking from a frozen state, you may need to add an extra 2 minutes to the baking time.
Frequently Asked Questions About Orange Creamsicle Cookies
Can I use sugar-free Jell-O mix?
No, it’s highly recommended to use regular, sugar-sweetened Jell-O mix for this recipe. Sugar-free varieties contain different ingredients that can significantly affect the texture and outcome of the cookies, leading to a less desirable result.
Do I need to prepare the Jell-O mix before adding it to the dough?
Absolutely not! The Jell-O mix should be added dry, straight from the box, into the wet ingredients. Do not prepare it by adding water or boiling, as this will ruin the consistency of your cookie dough.
What if I don’t have a hand mixer?
While a hand mixer makes the creaming process quicker and easier, you can certainly make these cookies with a stand mixer or even by hand with a sturdy whisk and a lot of elbow grease. Just ensure the butter and sugar are thoroughly creamed, and the wet ingredients are well incorporated.
Why is my cookie dough so sticky?
The dough for these orange creamsicle cookies is designed to be on the stickier side, thanks to the ice cream content which adds extra moisture and contributes to the soft, chewy texture. Spraying your hands lightly with nonstick cooking spray before rolling the balls will help immensely with handling the dough without it sticking.
Can I substitute the white chocolate chips?
Yes, you can! While white chocolate chips perfectly complement the creamsicle flavor, feel free to use milk chocolate, dark chocolate, or even semi-sweet chocolate chips if you prefer. You could also experiment with other mix-ins like chopped nuts, dried cranberries, or a combination, ensuring the total mix-ins amount to about 1½ cups.
How important is chilling the dough?
Chilling the dough is a critical step for these cookies. It helps prevent them from spreading too much during baking, allows the flavors to deepen, and contributes to that ideal soft and chewy texture. Don’t skip this step – even 15 minutes makes a big difference!
My cookies look slightly underbaked when I take them out. Is that normal?
Yes, it’s perfectly normal and desired! The cookies should look slightly underbaked on top when you remove them from the oven. They will continue to bake and set on the hot baking sheet for the first 10 minutes of cooling. This method ensures they remain incredibly soft and chewy, rather than dry and crisp.
More Cookie Recipes to Try!
Cool Whip Cookies
Brownie Mix Crinkle Cookies
Jello Cookies
Chocolate Pudding Cookies
Browse All Cookies


