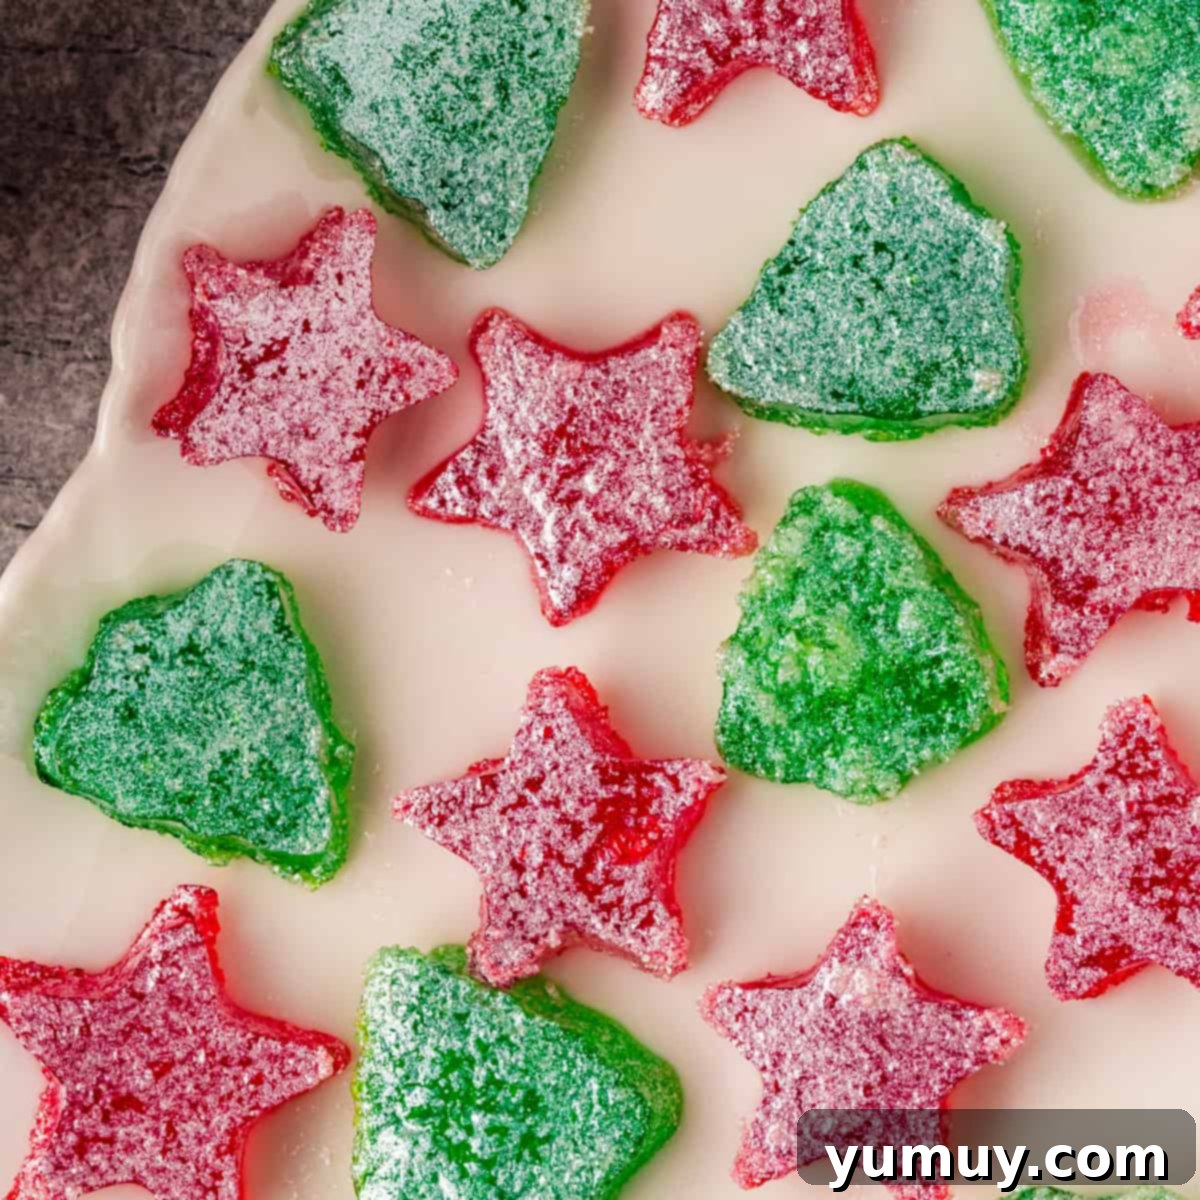
As the holiday season draws near, few things evoke the spirit of Christmas quite like vibrant, homemade treats. Among the most cherished traditions in our home is the creation of these delightful Christmas gumdrops. Bursting with festive red and green colors, these chewy candies are more than just a dessert; they’re an experience. Perfect for involving the whole family, this easy homemade gumdrop recipe transforms simple Jell-O into an enchanting holiday candy. The joy of mixing flavors, watching them set, and then cutting out whimsical shapes with your children creates lasting memories, making these red and green gumdrops a true highlight of our festive celebrations.

Why Make Homemade Christmas Gumdrops?
There’s an undeniable charm to homemade holiday treats, and these Jell-O gumdrops are no exception. Beyond the sheer delight of their vibrant colors and sweet, chewy texture, making your own gumdrops offers numerous advantages. Firstly, it’s a fantastic activity for families, especially during the bustling holiday season. Kids adore helping with the mixing, pouring, and especially the shape-cutting, fostering a sense of accomplishment and creative fun. Secondly, homemade candies allow you to control the ingredients, offering a more wholesome alternative to store-bought versions. You can easily adjust the sweetness or enhance the flavors, tailoring them perfectly to your family’s preferences. These easy Christmas candy treats are also incredibly versatile; they make charming gifts, delightful additions to a festive dessert table, or simply a fun snack to enjoy by the fireplace. The simple ingredients and straightforward process make this one of the best Christmas gumdrop recipes for beginners and seasoned bakers alike, promising delicious results every time.
The process of crafting these festive red and green gumdrops is surprisingly similar to preparing regular Jell-O, making it an approachable project for all skill levels. With just a few basic ingredients and a bit of patience for setting, you’ll have a batch of irresistibly chewy candies ready to be coated in sparkling sugar. The transformation from liquid gelatin to firm, candy-like morsels is quite magical, captivating young and old alike. My children eagerly anticipate this annual tradition, finding immense joy in shaping and decorating each piece. This recipe isn’t just about creating a dessert; it’s about crafting cherished memories and embracing the festive spirit through the simple pleasure of DIY gumdrops.
Essential Ingredients for Your Christmas Gumdrops Recipe
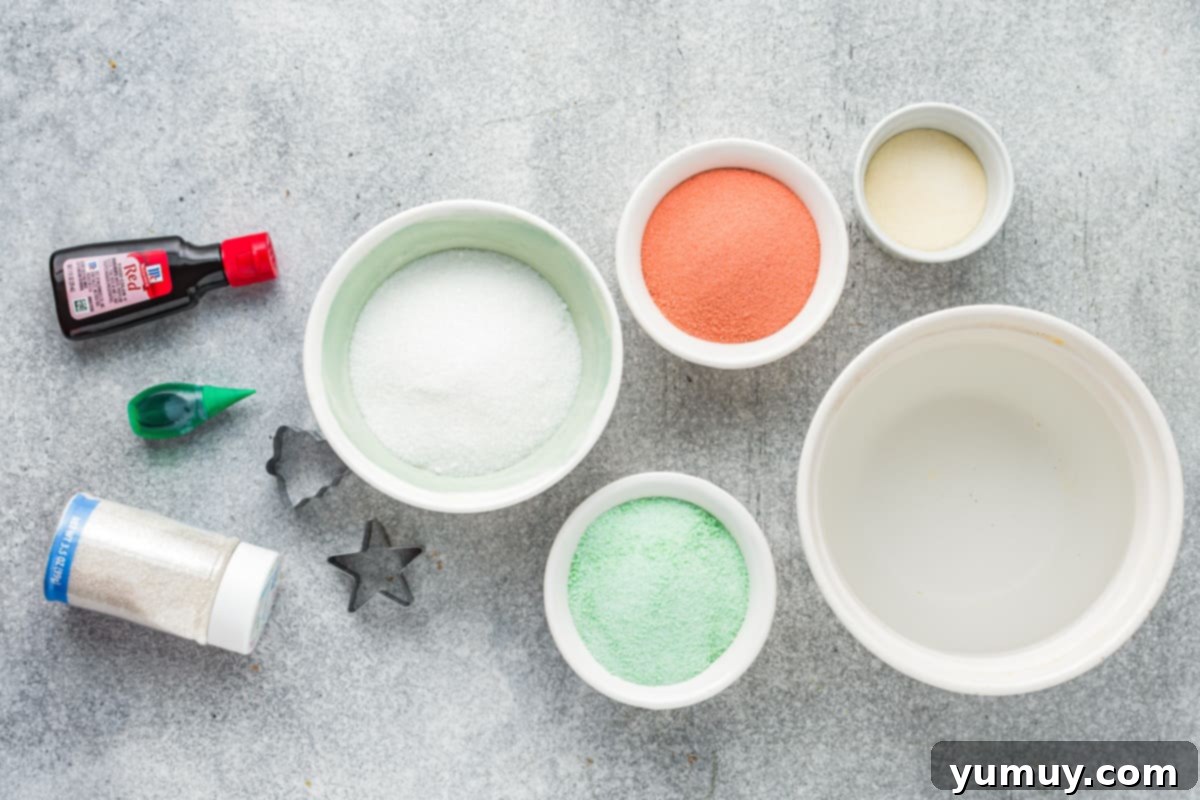
- KNOX Unflavored Gelatine: This is the crucial ingredient that gives our gumdrop candy its signature chewy texture and helps it solidify into firm shapes. We’ll use two ¼-ounce envelopes, divided, to ensure the perfect consistency.
- Granulated Sugar: Beyond the sweetness already provided by the Jell-O, granulated sugar adds an extra layer of deliciousness to the gumdrops. It helps balance the flavors and contributes to the candy’s overall structure.
- Cherry Jell-O: This provides the vibrant red color and a sweet, fruity flavor to half of your Christmas gumdrops. Feel free to substitute with any other red-colored Jell-O flavor you prefer, such as strawberry or raspberry, for a slight variation.
- Lime Jell-O: For the festive green hue and a zesty counterpart, lime Jell-O is ideal. Like the cherry flavor, you can swap this for any green Jell-O variety that suits your taste buds.
- Red and Green Food Coloring: While the Jell-O provides plenty of color, a few drops of food coloring are optional but highly recommended to intensify the festive red and green, making your gumdrop candy truly pop.
- Coarse Sugar: This is used for coating the finished gumdrops, adding a delightful sparkle and a pleasant textural crunch that contrasts beautifully with the soft, chewy interior. It’s the final touch that makes these candies irresistible.
- Water: Essential for blooming the gelatin and dissolving the Jell-O and sugar. Ensure you have the specified amounts divided for the different steps.
Storing Your Festive Christmas Gumdrops
Proper storage is key to keeping your homemade Christmas gumdrops fresh and delicious. Once they are fully set and coated, transfer them to an airtight container. They will keep beautifully in the refrigerator for up to 1 week, maintaining their chewy texture and vibrant flavors. For longer preservation, these gumdrops can also be frozen for up to 3 months. To enjoy them after freezing, simply let them thaw overnight in the refrigerator. They can be served cold for a refreshing treat or at room temperature, where their flavors become even more pronounced. Always store them in a single layer or separated by parchment paper to prevent sticking.
Expert Tips for Perfect Homemade Gumdrops
- Embrace Flavor and Color Variety: While cherry and lime are classic Christmas gumdrop choices, don’t hesitate to experiment! Any Jell-O flavor and corresponding food coloring can be used to suit different holidays or personal preferences. Imagine orange for Halloween or blue for a winter wonderland theme.
- The Art of “Blooming” Gelatin: Blooming gelatin is a crucial step for achieving the right texture. It means allowing the unflavored gelatin to soften in cold water without stirring. This rehydrates the gelatin granules, preventing lumps and ensuring it dissolves smoothly when heated. Let it sit for 2 minutes, then stir gently. If it needs a little extra help dissolving, a quick 10-second zap in the microwave can do the trick.
- Managing Moisture: After setting, your gumdrops might have a slight amount of surface liquid, which will naturally dry out over time. Before rolling them in coarse sugar, you can gently pat them dry with a paper towel. This ensures the sugar adheres better and gives a cleaner finish.
- Creative Shaping: Cookie cutters are fantastic for creating fun, festive shapes like stars and Christmas trees. Ensure your cutters are clean and lightly oiled or dusted with a little cornstarch to prevent sticking. For even more variety, you can pour the liquid gelatin mixture into silicone molds (before refrigerating) to create intricate designs without cutting. Just make sure the molds are placed on a stable surface for chilling.
- Patience is a Virtue: The setting time is vital. Allow the gelatin sheets to chill in the refrigerator for at least 2 hours, or even longer (up to 4 hours or overnight), until they are very firm and dry. This extra time ensures the gumdrops hold their shape well and have that desirable chewy consistency.
- Even Sugar Coating: When coating with coarse sugar, make sure each gumdrop is fully covered. You can do this by placing a handful of gumdrops in a bowl with sugar and gently tossing them, or by rolling each piece individually. A thorough coating not only adds flavor and crunch but also helps prevent sticking.
- Troubleshooting Sticky Gumdrops: If your gumdrops feel overly sticky even after coating, it could be due to humidity or insufficient drying time. You can try letting them air dry on a parchment-lined baking sheet for a few hours before storing, or add a little extra coarse sugar when serving.
Christmas Gumdrops Recipe
30 minutes
2 hours 30 minutes
2 hours
60 gumdrops
Ingredients
- 2½ cups water divided
- ½ ounce KNOX unflavored gelatine (2 (¼-ounce) envelopes), divided
- 6 ounces cherry flavored Jell-O (1 package)
- 6 ounces lime flavored Jell-O (1 package)
- 6 tablespoons granulated sugar divided
- Red and green food coloring optional, for vivid colors
- 1 cup coarse sugar for coating
Equipment
- Kitchen Scale (optional, for precise measurements)
- 2 8×8 Baking Pans
- Parchment Paper
- Nonstick Cooking Spray
- Small Microwave-Safe Bowls
- Whisk or Spoon
- Mini Cookie Cutters (Christmas-themed shapes are ideal)
Instructions
- Prepare your baking pans by lining two 8×8-inch baking pans with parchment paper. Ensure the paper overhangs slightly on the sides to easily lift the gelatin later. Lightly spray the parchment paper with nonstick cooking spray and set the pans aside.
- To bloom the gelatin, pour ¼ cup of cold water into a small bowl. Carefully sprinkle one envelope (¼ ounce) of unflavored gelatin evenly over the water. Do NOT stir at this point. Let the gelatin sit undisturbed for 2 minutes to allow it to absorb the water and soften. Repeat this process with another ¼ cup of water and the second envelope of unflavored gelatin in a separate small bowl. Keep these two gelatin mixtures separate. After 2 minutes, you can gently stir each mixture. If needed, microwave each bowl for 10 seconds to fully dissolve any remaining gelatin granules. Set both bowls aside.
- In a large microwave-safe bowl, heat the remaining 2 cups of water until it comes to a rolling boil. Carefully remove the hot water from the microwave. Divide the boiling water evenly into two separate small bowls, with 1 cup of hot water in each bowl.
- Prepare the Jell-O mixtures: Sprinkle the entire 6-ounce package of cherry Jell-O into one bowl of hot water. In the second bowl of hot water, sprinkle the entire 6-ounce package of lime Jell-O. Stir each mixture separately until the Jell-O powder is completely dissolved and no granules remain. Then, add 3 tablespoons of granulated sugar to each bowl of Jell-O mixture and stir again until the sugar is fully dissolved.

- Combine and chill: Take one of the bowls of bloomed unflavored gelatin and stir it into the cherry Jell-O mixture until thoroughly combined. If you desire a more intense red color, add a few drops of red food coloring and mix. Carefully pour this red gelatin mixture into one of the prepared 8×8-inch baking pans. Repeat this entire step with the lime Jell-O mixture and the remaining bloomed unflavored gelatin, adding green food coloring if desired, and pour it into the second prepared baking pan. Place both pans in the refrigerator and chill until the gelatin is very firm and dry to the touch. This crucial setting process can take 2 to 4 hours, or even overnight, depending on your refrigerator. The firmer the set, the easier they will be to cut.

- Cut the gumdrops: Once the gelatin is completely firm, remove the pans from the refrigerator. Gently lift the parchment paper with the hardened Jell-O sheets out of the baking pans and place them on a clean, hard surface like a cutting board. Using Christmas-themed cookie cutters (such as stars, trees, or bells) or a sharp knife to cut into small cubes, carefully cut out your gumdrop shapes. If the gelatin is slightly damp, gently pat it dry with a paper towel before cutting.

- Coat in sugar: Pour the 1 cup of coarse sugar into a shallow bowl. Take each cut gumdrop piece and roll it thoroughly in the coarse sugar until it is evenly coated on all sides. This adds a beautiful sparkle and a delightful crunch.

- Arrange and serve: Once coated, place the finished gumdrops on a serving platter or a baking sheet lined with fresh parchment paper.
- Final storage: Store the Christmas gumdrops in an airtight container in the refrigerator until you are ready to serve them. Enjoy your homemade holiday candy!
Notes
Becky Hardin
Did You Make This?
We love seeing what you’ve made! Tag us on social media at
@easydessertrecipes for a chance to be featured.
Detailed Steps to Make Your Festive Christmas Gumdrops
Creating these festive red and green gumdrops is a fun and rewarding process. Follow these step-by-step instructions for perfect, chewy holiday candy that everyone will love.
Step 1: Prepare the Gelatin Mixtures
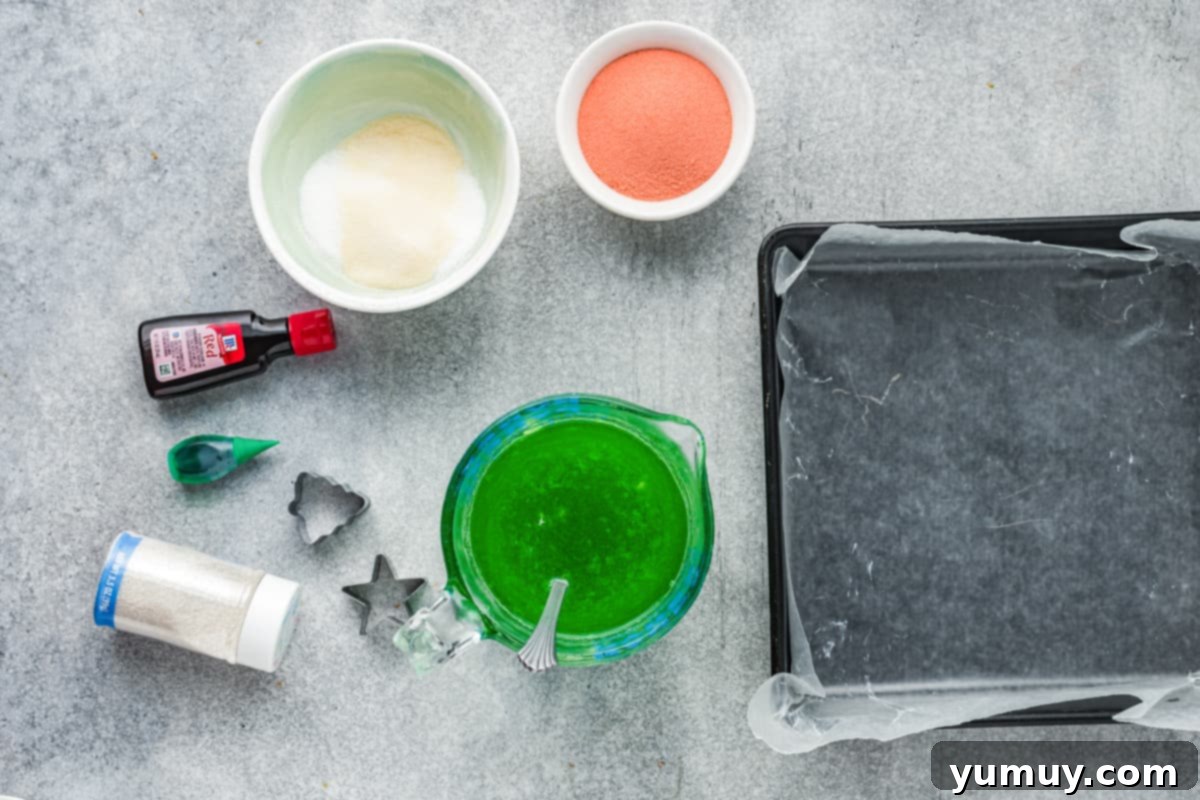
Begin by meticulously lining two 8×8-inch baking pans with parchment paper, ensuring a slight overhang to facilitate easy removal later. Lightly spray the parchment with nonstick cooking spray; this critical step prevents sticking and ensures your gumdrops lift cleanly. Set these prepared pans aside for now.
In two separate small bowls, pour ¼ cup of cold water into each. Carefully sprinkle one ¼-ounce envelope of KNOX unflavored gelatin over the water in each bowl. It’s important not to stir at this stage. Allow the gelatin to “bloom” for 2 minutes. Blooming is the process where gelatin granules absorb liquid, softening and rehydrating before heating. This prevents lumps and ensures a smooth final texture. After 2 minutes, you can gently stir the bloomed gelatin in each bowl. If any granules remain, microwave each bowl for just 10 seconds to fully dissolve them. Set both bowls of bloomed gelatin aside.
Next, in a large microwave-safe bowl, heat 2 cups of water until it reaches a vigorous boil. Carefully remove the hot water from the microwave and divide it equally into two other small, heat-safe bowls, placing 1 cup of boiling water in each. Into one bowl, sprinkle the entire 6-ounce package of cherry Jell-O, stirring continuously until it’s completely dissolved. In the second bowl, add the 6-ounce package of lime Jell-O, stirring until dissolved. Finally, add 3 tablespoons of granulated sugar to each Jell-O mixture, stirring until the sugar is fully integrated. This extra sugar boosts the sweetness and contributes to the gumdrop candy’s chewy consistency.
Step 2: Set the Gelatin
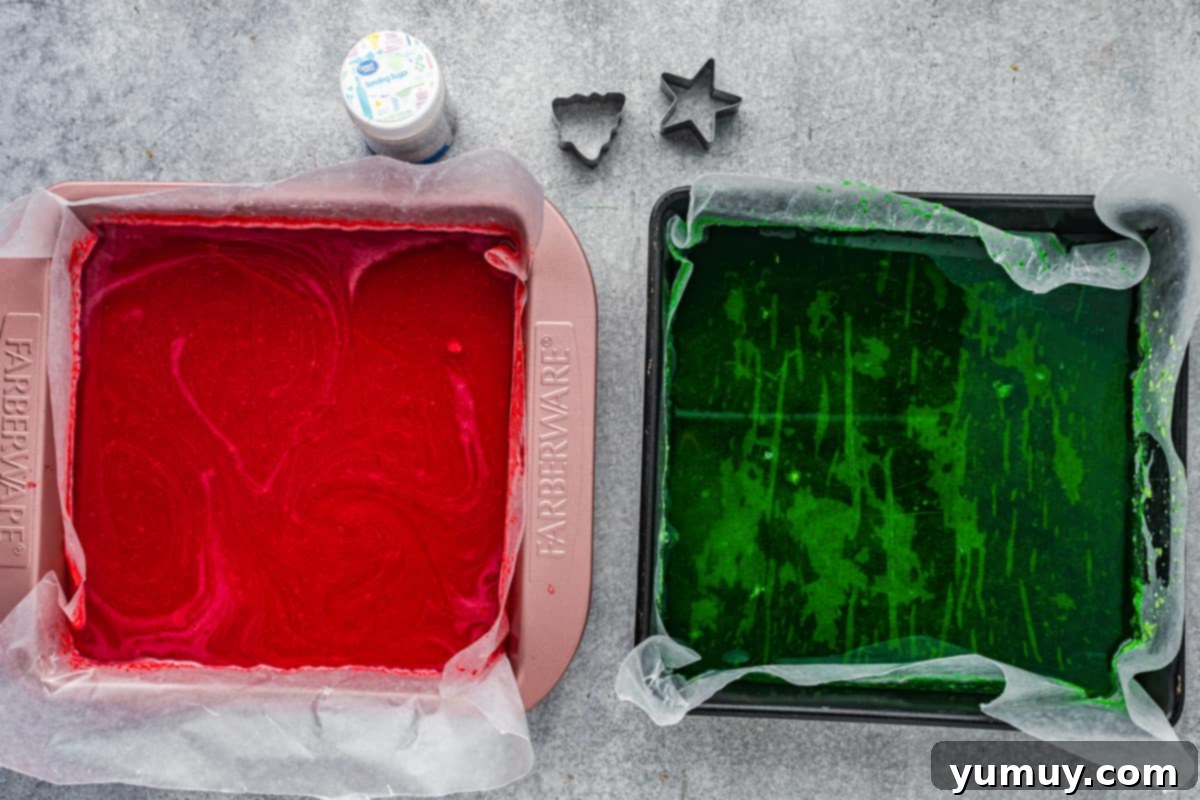
Now, it’s time to bring everything together. Take one of your bowls of bloomed unflavored gelatin and stir it into the cherry Jell-O mixture until it’s seamlessly combined. For a more intense, vibrant red, add a few drops of red food coloring at this point and mix well. Once fully blended, carefully pour this bright red gelatin mixture into one of your prepared 8×8-inch baking pans. Place it gently into the refrigerator.
Repeat this exact process for the lime Jell-O mixture: stir in the remaining bloomed unflavored gelatin, add a few drops of green food coloring if desired for extra vibrancy, and then pour it into the second prepared baking pan. Immediately transfer this pan to the refrigerator alongside the red one. The chilling process is crucial. You want these gelatin sheets to set hard and firm, which will take a minimum of 2 hours, but often benefits from 3 to 4 hours, or even chilling overnight. The goal is a very jellied, somewhat drier texture, which is characteristic of traditional gumdrop candy. Resist the urge to cut them before they are fully firm!
Step 3: Cut the Gum Drops
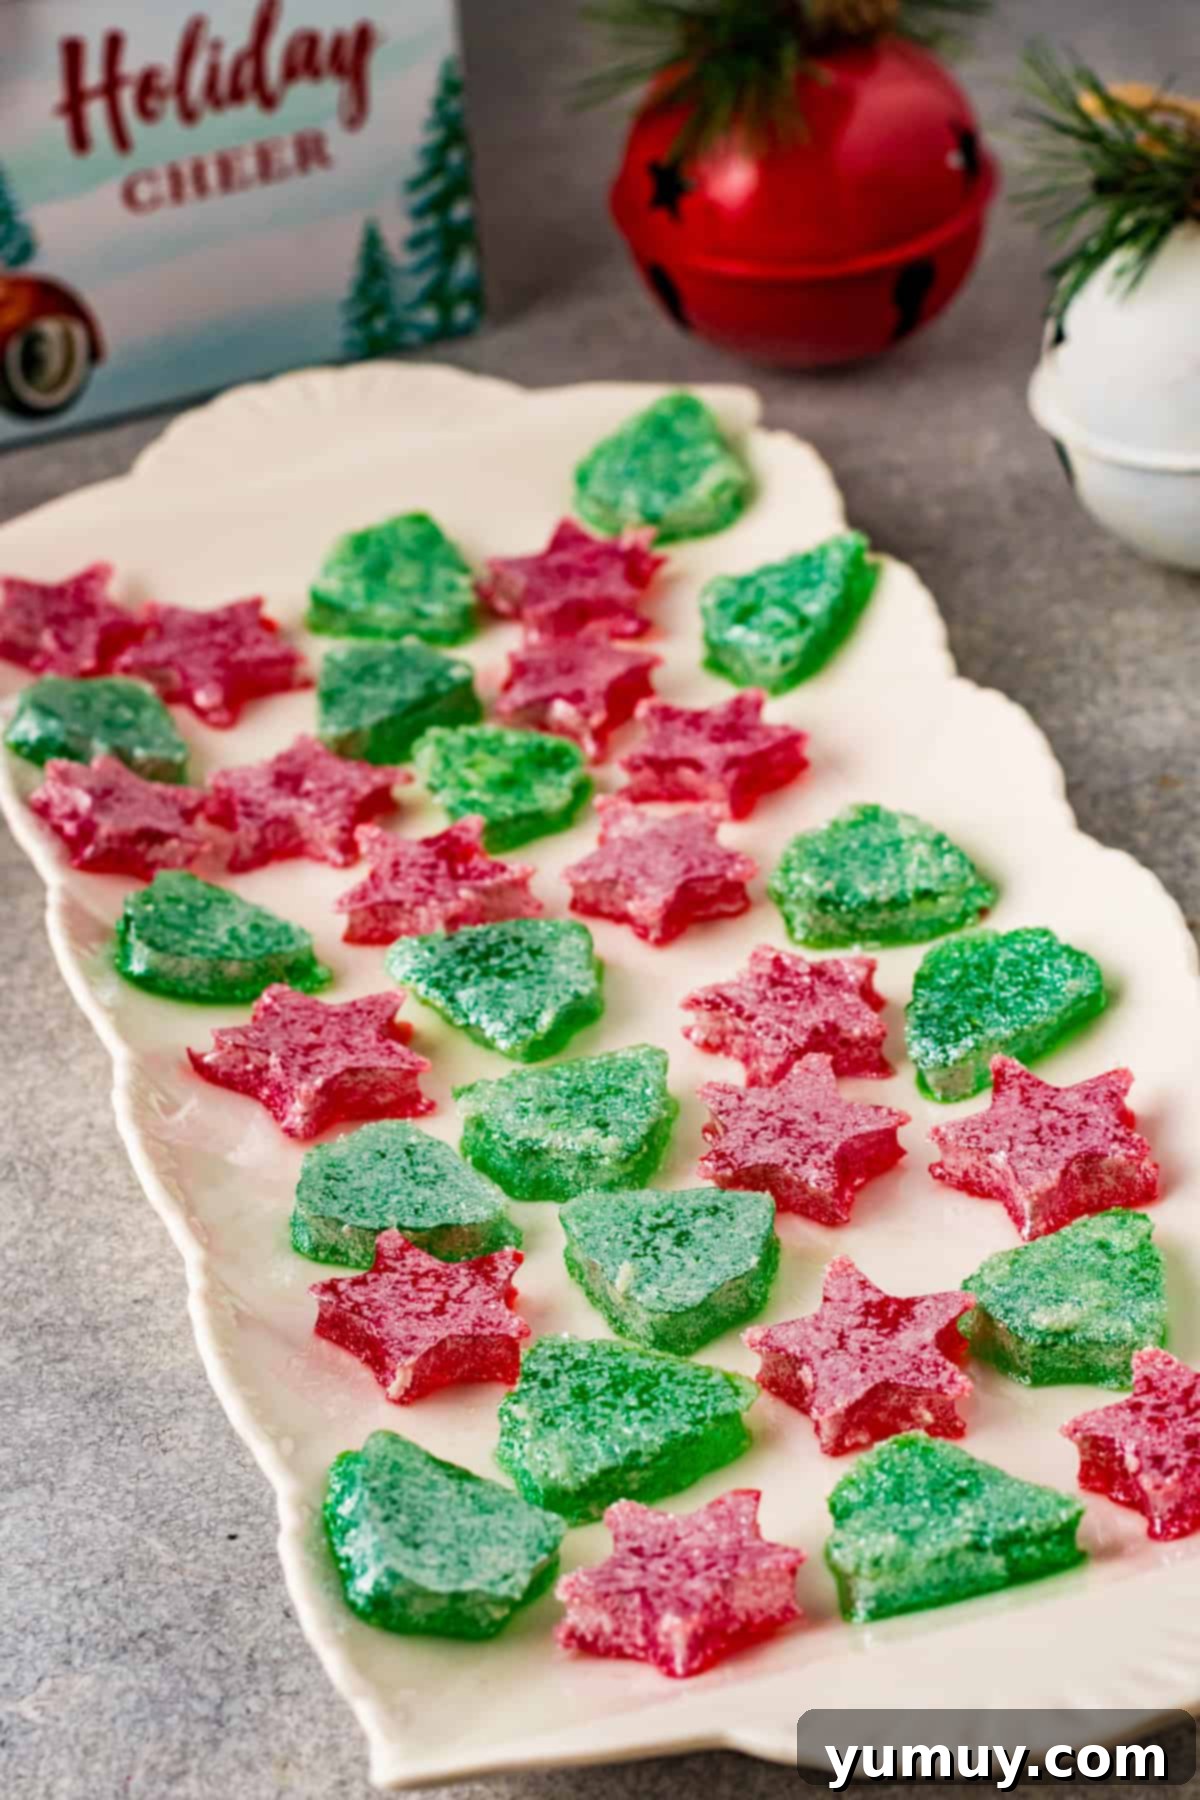
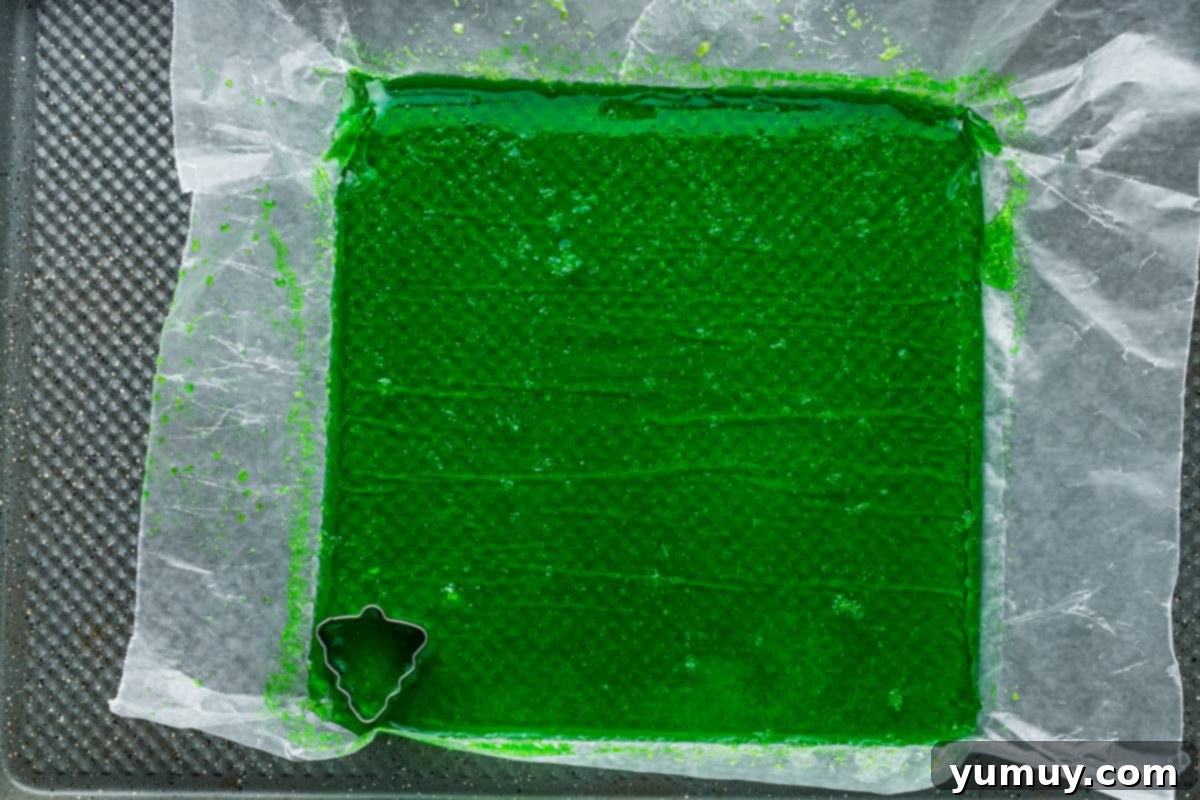
Once your gelatin sheets are perfectly firm and dry, remove the baking pans from the refrigerator. Grasping the parchment paper overhang, carefully lift each hardened Jell-O sheet out of its pan and place it on a clean, hard surface, such as a cutting board. This allows for easier and more precise cutting. Now comes the fun part: shaping your Christmas gumdrops! Use your favorite Christmas-themed cookie cutters – think stars, Christmas trees, snowflakes, or bells – to press firmly and cut out individual gumdrop shapes. If you don’t have cookie cutters, a sharp knife will work perfectly to cut the sheets into small, uniform cubes. If the gelatin surface feels a little sticky, a quick, gentle pat with a paper towel can help ensure clean cuts. Get creative with your shapes and enjoy the visual transformation of the plain sheets into festive candies.
Step 4: Candy the Gum Drops
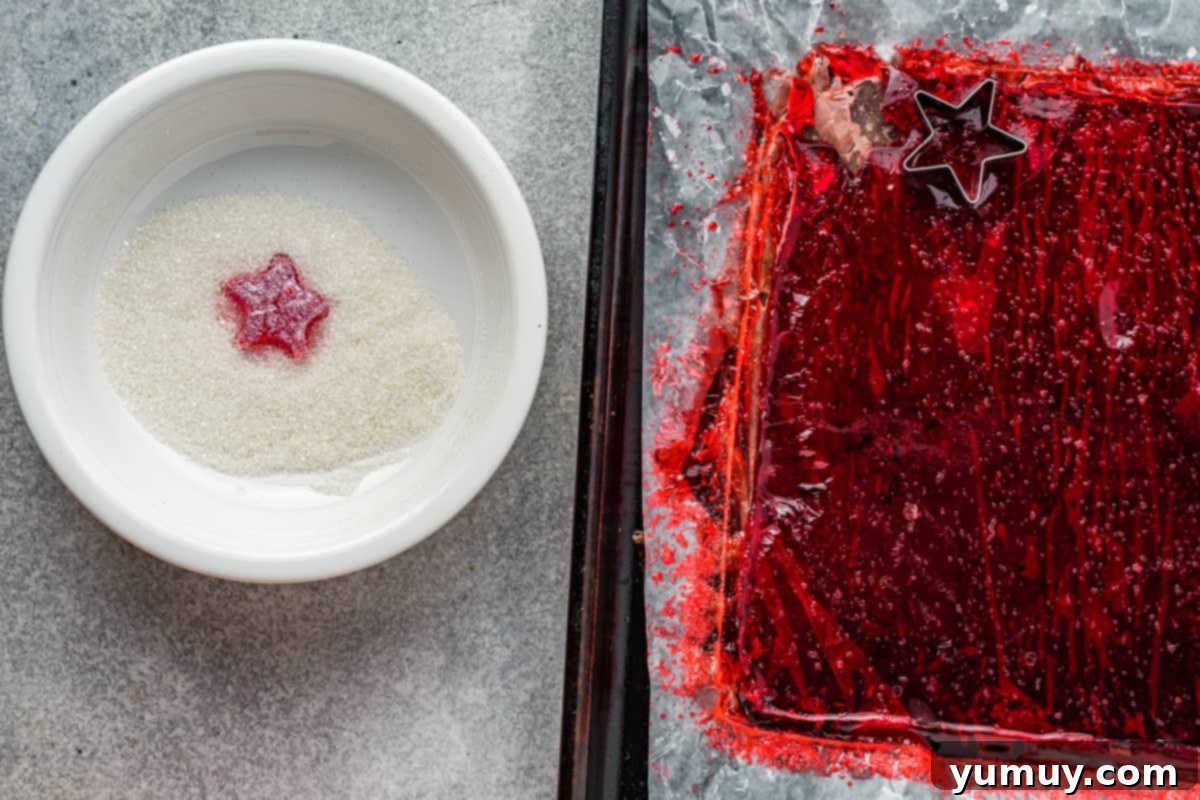
To give your gumdrops their characteristic sparkle and irresistible texture, it’s time for the sugar coating. Pour 1 cup of coarse sugar into a shallow bowl. Take each cut gumdrop piece and individually roll it in the coarse sugar, ensuring it’s thoroughly coated on all sides. The coarse sugar not only adds a beautiful glimmer that catches the light, making them even more appealing, but it also provides a pleasant crunch that perfectly complements the chewy interior. This step also helps prevent the gumdrops from sticking together. Once coated, arrange your sparkling Christmas gumdrops on a serving platter or a fresh piece of parchment paper-lined baking sheet. Store them in an airtight container in the refrigerator until you’re ready to share these delightful holiday treats with family and friends. The vibrant colors and sweet taste are sure to bring smiles to everyone’s faces!
Frequently Asked Questions About Homemade Gumdrops
Can I use sugar-free Jell-O for this recipe?
Yes, you can absolutely use sugar-free Jell-O. However, keep in mind that the texture might be slightly different, and you may want to adjust the amount of added granulated sugar to your taste. The primary goal is to achieve the correct gelatin-to-water ratio for setting.
How long do homemade gumdrops last?
When stored in an airtight container in the refrigerator, your homemade Christmas gumdrops will stay fresh for up to 1 week. If you plan to make them further in advance, they can be frozen for up to 3 months. Just be sure to thaw them in the refrigerator overnight before serving.
Why are my gumdrops too sticky?
Stickiness can be a common issue if the gelatin hasn’t fully dried or if there’s too much humidity. Ensure your gelatin sheets are very firm and slightly dry before cutting. After coating with coarse sugar, you can let them air dry on a parchment-lined tray for a few hours. A slightly heavier coating of coarse sugar can also help.
Can I make these gumdrops without food coloring?
Absolutely! The Jell-O itself provides plenty of color. The food coloring is purely optional and used only to enhance the vibrancy of the red and green gumdrops for a more striking visual appeal. They will taste just as delicious without it!
What kind of cookie cutters should I use?
For a truly festive look, use small Christmas-themed cookie cutters like stars, Christmas trees, gingerbread men, or bells. Mini cookie cutters work best for bite-sized gumdrop candy. If you don’t have any, simply use a sharp knife to cut the gelatin sheets into small squares or rectangles.
Can I add other flavors like extracts?
You can certainly experiment with adding a few drops of flavoring extracts, such as peppermint or vanilla, to your Jell-O mixtures for an extra dimension of taste. Just add them after the Jell-O and sugar have dissolved, before pouring into the pans. Start with a small amount and taste to ensure it’s not too overpowering.
More Festive Candy Recipes to Sweeten Your Holidays!
Discover More Christmas Candy Delights!
Christmas Crack (Chocolate Cracker Toffee)
Christmas Cream Cheese Mints
Homemade Peppermint Patties
Homemade Turtle Candies
Browse All Candy Recipes
There’s truly nothing quite like the magic of homemade Christmas gumdrops to add a touch of whimsy and joy to your holiday season. This simple yet rewarding gumdrop candy recipe allows you to create beautiful, chewy treats that are perfect for sharing, gifting, or simply enjoying with your loved ones. We hope you and your family have as much fun making these vibrant red and green gumdrops as we do. Happy holidays and happy baking!
