Christmas Wreath Cake: Your Ultimate Festive Centerpiece
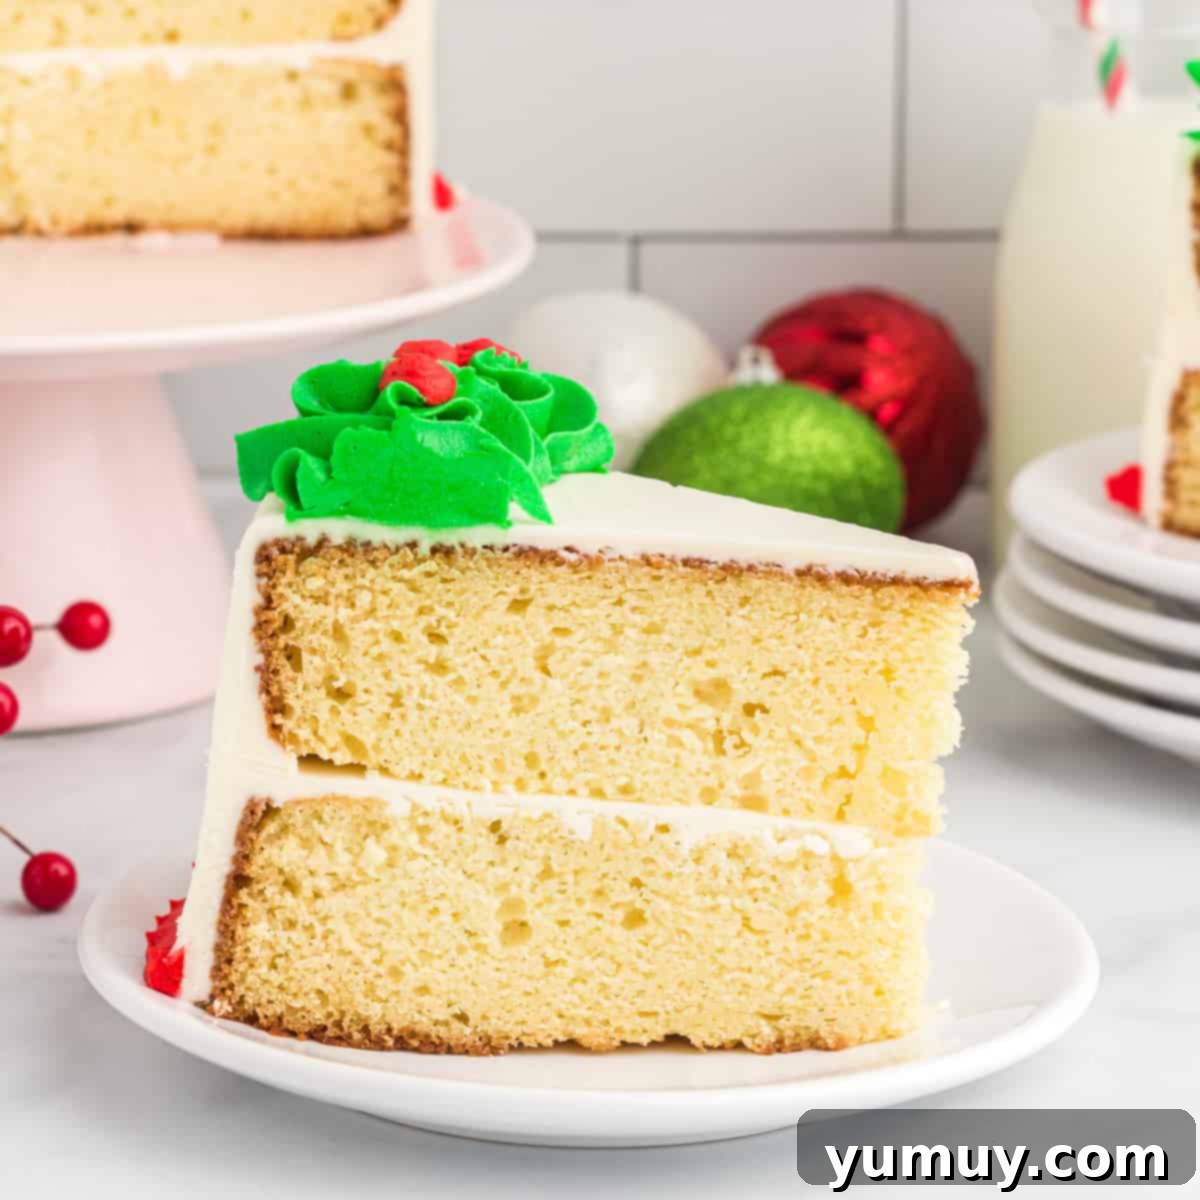
Embrace the magic of the holiday season with a dessert that’s as enchanting to behold as it is delightful to taste: our stunning Christmas Wreath Cake. This exquisite creation transforms a simple vanilla cake into a festive masterpiece, crowned with lush vanilla buttercream artfully decorated to resemble a classic Christmas wreath. It’s not just a cake; it’s the perfect, heartwarming centerpiece that will undoubtedly captivate your guests and add a touch of elegant charm to any holiday celebration, making your festive table truly unforgettable.
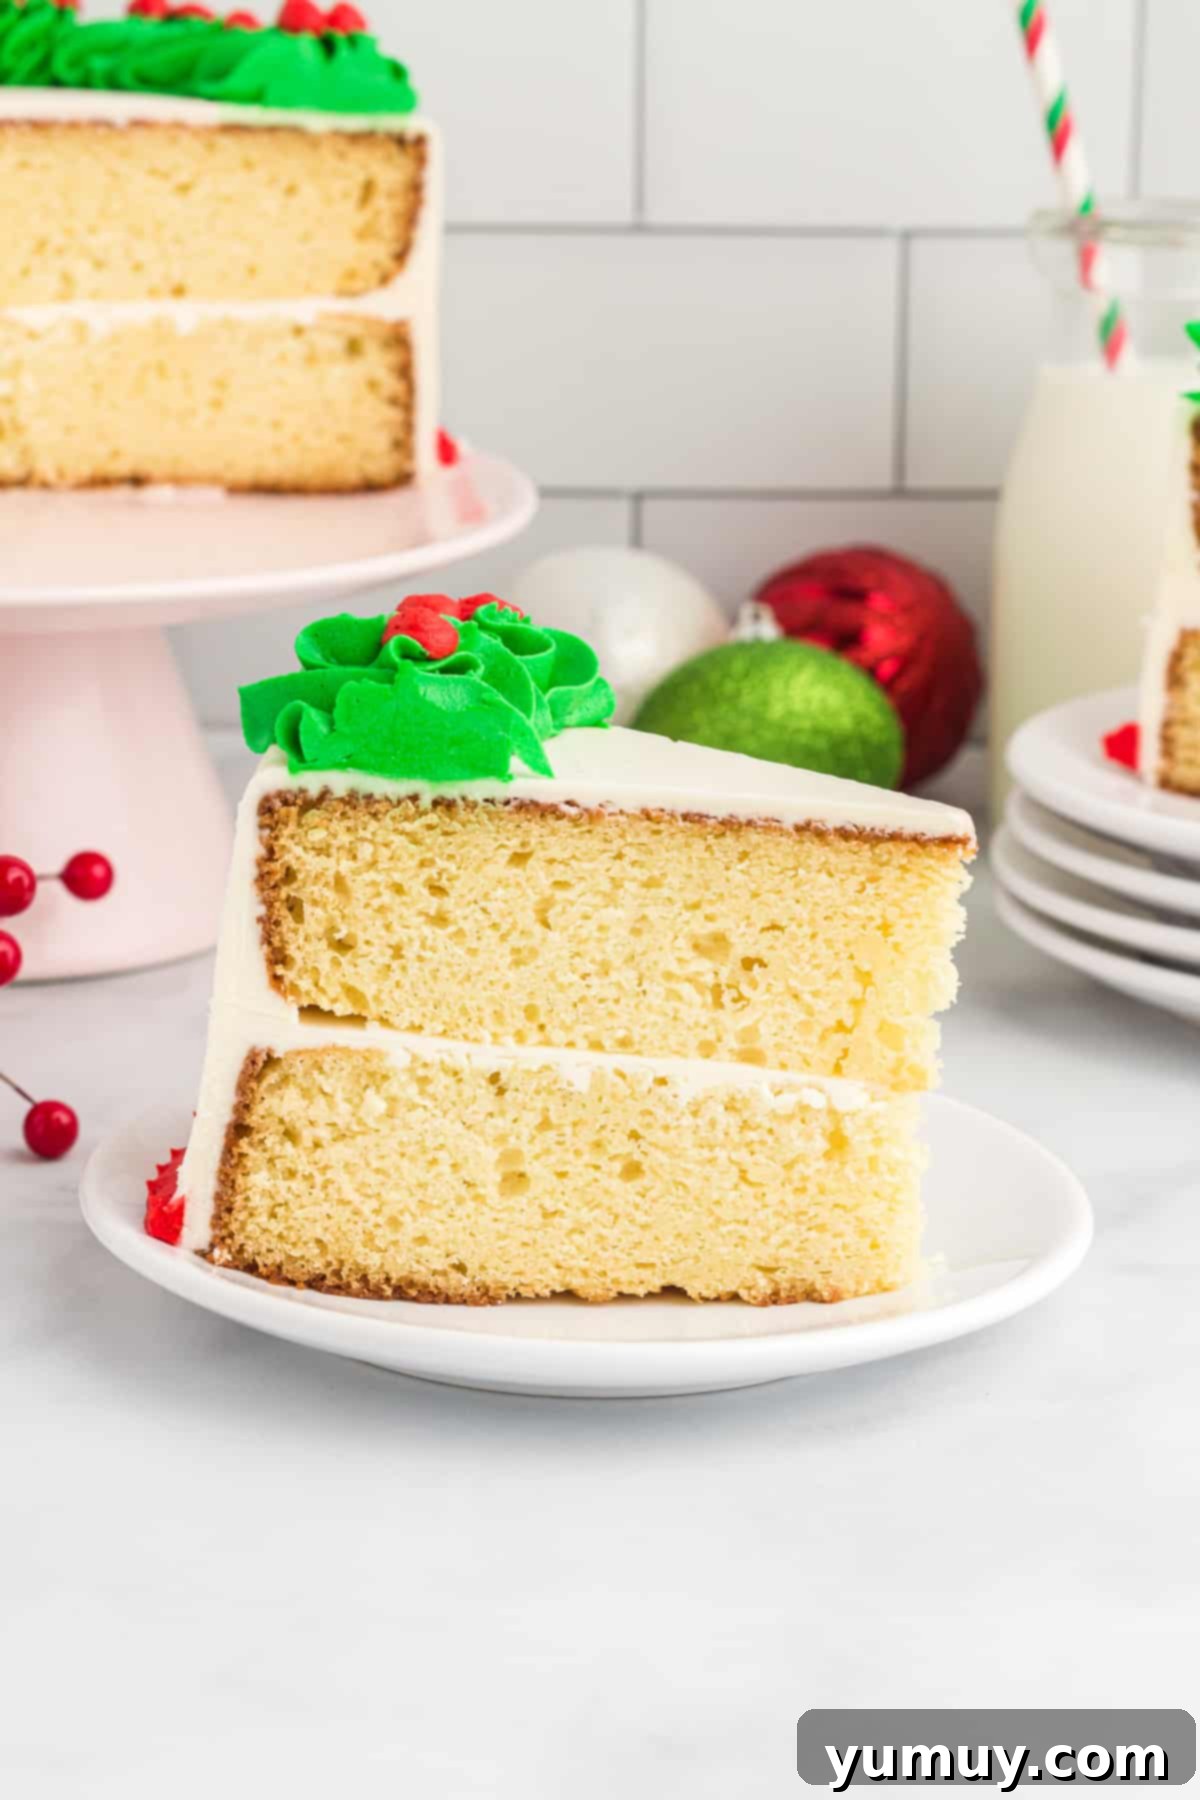
Nothing evokes the spirit of Christmas quite like a beautifully decorated holiday cake, and this Christmas Wreath Cake delivers on all fronts. Beyond its captivating appearance, this recipe is designed for ease and guaranteed success. We start with a high-quality white cake mix, but elevate it to extraordinary levels of moisture and tenderness with a secret ingredient: full-fat sour cream. This simple addition transforms an ordinary box mix into a rich, decadent cake that tastes completely homemade. Layered with a quick and easy-to-make buttercream frosting, the cake achieves a luscious texture and balance of sweetness. The final touch, a vibrant, edible wreath crafted from buttercream, is surprisingly straightforward to create, and we’ll guide you through every step to crown your holiday dessert with festive perfection.
A Deep Dive into Our Christmas Wreath Cake Ingredients
Each component of this Christmas Wreath Cake plays a crucial role in creating its delectable flavor and moist texture. Understanding the purpose of each ingredient will not only enhance your baking experience but also help you achieve the best possible results.
For the Cake Layers: Building the Foundation of Flavor
- White Cake Mix: Our shortcut to an effortless yet delicious cake. While often overlooked, a good quality cake mix provides a reliable base, ensuring a consistent crumb and texture with minimal fuss. This allows you to focus more on the decorating artistry.
- Unsalted Butter (Melted): Butter is key for both moisture and richness. Unlike vegetable oil, butter imparts a superior flavor and a finer crumb, contributing to the cake’s tender structure. Melting it ensures it fully incorporates into the batter, distributing flavor evenly.
- Large Eggs (Room Temperature): Eggs are essential binders, providing structure and stability to the cake. Using room temperature eggs helps them emulsify better with the other ingredients, leading to a smoother batter and a more uniform, tender cake.
- Pure Vanilla Extract: This isn’t just a flavoring; it’s a foundation. Pure vanilla extract adds warmth, depth, and a classic aromatic sweetness that complements the white cake mix and enhances all other flavors. Do not skimp on quality here.
- Full-Fat Sour Cream (Room Temperature): Our star “secret ingredient” for ultimate moisture. The fat and acidity in sour cream break down tough gluten strands, resulting in an incredibly tender and moist crumb. Using it at room temperature prevents shocking the batter and promotes better blending. Greek yogurt can be a suitable alternative for similar benefits.
- Milk (Room Temperature): Milk adds necessary liquid to the batter, creating a smooth consistency and contributing to the cake’s overall moisture. Any type of milk can be used, including dairy-free options, offering flexibility to suit dietary needs.
For the Buttercream Frosting: The Sweet and Creamy Crown
- Powdered Sugar: The backbone of our buttercream. Powdered sugar (also known as confectioners’ sugar) dissolves easily, ensuring a smooth, grit-free frosting. Its fine texture is essential for creating a stable and pipeable buttercream that holds its shape beautifully.
- Unsalted Butter (Slightly Melted): For the frosting, butter provides the creamy, rich base. Slightly softened (not fully melted) butter is crucial for achieving the light, fluffy texture characteristic of good buttercream. It whips up with the sugar to create volume and a luxurious mouthfeel.
- Pure Vanilla Extract: Just like in the cake, vanilla extract in the frosting enhances the overall sweetness and provides a delightful aromatic quality, making the buttercream irresistible.
- Green Gel Food Coloring: This is what transforms a portion of our white buttercream into the vibrant green of a festive wreath. Gel food coloring is concentrated, meaning you need only a small amount to achieve vivid colors without altering the frosting’s consistency.
- Red Gel Food Coloring: Used to create the bright, cheerful red berries and bow that adorn our Christmas wreath. Like the green, gel coloring ensures intense color payoff with minimal addition.
The Essential Equipment for Your Festive Bake
Having the right tools on hand will streamline your baking process and help you achieve professional-looking results with your Christmas Wreath Cake. Here’s a list of key equipment you’ll need:
- Kitchen Scale (optional but recommended): For precise division of cake batter, ensuring even layers that bake uniformly. This is a game-changer for consistent results.
- Two 8-inch Round Cake Pans: Essential for baking two perfectly sized cake layers that will form the foundation of your dessert.
- Parchment Paper: For lining the bottom of your cake pans, guaranteeing easy release and preventing sticking.
- Nonstick Cooking Spray: An extra layer of protection to ensure your cakes slide out effortlessly.
- Large Mixing Bowl: For combining your cake batter and whipping your buttercream.
- Hand Mixer (or Stand Mixer): Indispensable for creating light, airy cake batter and fluffy, smooth buttercream.
- Large Serrated Knife: Perfect for leveling your cooled cake layers to create a flat, stable surface for stacking and frosting.
- Food-Safe Plastic Wrap: For chilling your cake layers, which is crucial for firming them up before frosting.
- Cake Board or Cake Plate: The base for assembling and presenting your finished cake.
- Piping Bag(s): For applying the green wreath and red berry decorations with precision.
- Wilton 1M Piping Tip: Creates the beautiful “rose” swirls or star designs for the green wreath.
- Wilton #12 Piping Tip: Ideal for piping small, round dots for the red berries and crafting a neat bow.
Crafting Your Christmas Wreath Cake: Step-by-Step Instructions
Transforming these simple ingredients into a stunning Christmas Wreath Cake is an enjoyable process. Follow these detailed instructions to ensure every step is executed perfectly, resulting in a show-stopping dessert.
Christmas Wreath Cake Recipe
Ingredients
For the Cake
- 15.25 ounces white cake mix (1 box)
- 9 tablespoons unsalted butter melted (1⅛ sticks)
- 2 large eggs room temperature
- 2 teaspoons pure vanilla extract
- ¾ cup full-fat sour cream room temperature
- ¼ cup milk room temperature
For the Frosting
- 5 cups powdered sugar
- 1½ cups unsalted butter slightly melted (3 sticks)
- 1 tablespoon pure vanilla extract
- Green gel food coloring
- Red gel food coloring
Equipment
- Kitchen Scale (optional)
- 2 8-inch Round Cake Pan
- Hand Mixer
- Piping Tip Set
Instructions
For the Cakes
- Preheat oven to 350°F (175°C). Prepare two 8-inch round cake pans by spraying them thoroughly with nonstick spray and lining the bottoms with parchment paper. This preparation ensures your cakes release easily and bake beautifully. Set them aside.
- In a large bowl, combine the white cake mix, melted unsalted butter, large eggs, pure vanilla extract, full-fat sour cream, and milk. Mix until just combined, being careful not to overmix, as this can lead to a dense cake. Divide the cake batter evenly between your two prepared cake pans. For perfectly uniform layers, use a kitchen scale to ensure each pan receives the same amount of batter (approximately 397 grams or 14 ounces per pan). Even distribution helps the cakes bake at the same rate and rise to equal heights.15.25 ounces white cake mix, 9 tablespoons unsalted butter, 2 large eggs, 2 teaspoons pure vanilla extract, ¾ cup full-fat sour cream, ¼ cup milk

- Bake the cakes in the preheated oven for 33-35 minutes, or until a wooden toothpick inserted into the center of a cake comes out clean. This indicates they are fully cooked.
- Once baked, remove the cakes from the oven and allow them to cool in their pans for 15 minutes. This cooling period helps them firm up slightly before you attempt to remove them. After 15 minutes, carefully invert them onto wire racks to cool completely to room temperature. It’s crucial they are completely cool before the next steps.
- Once the cakes have cooled to room temperature, use a large serrated knife to carefully slice off the domed tops from both cakes. This creates flat, even surfaces, which are essential for stable stacking and a neat appearance.
- Cover both flattened cake layers completely in food-safe plastic wrap. Refrigerate them for at least 2 hours. This chilling step is vital: it firms up the cake layers, making them much easier to handle and less prone to crumbling or breaking when you begin frosting. Cold cakes are much sturdier.
For the Frosting
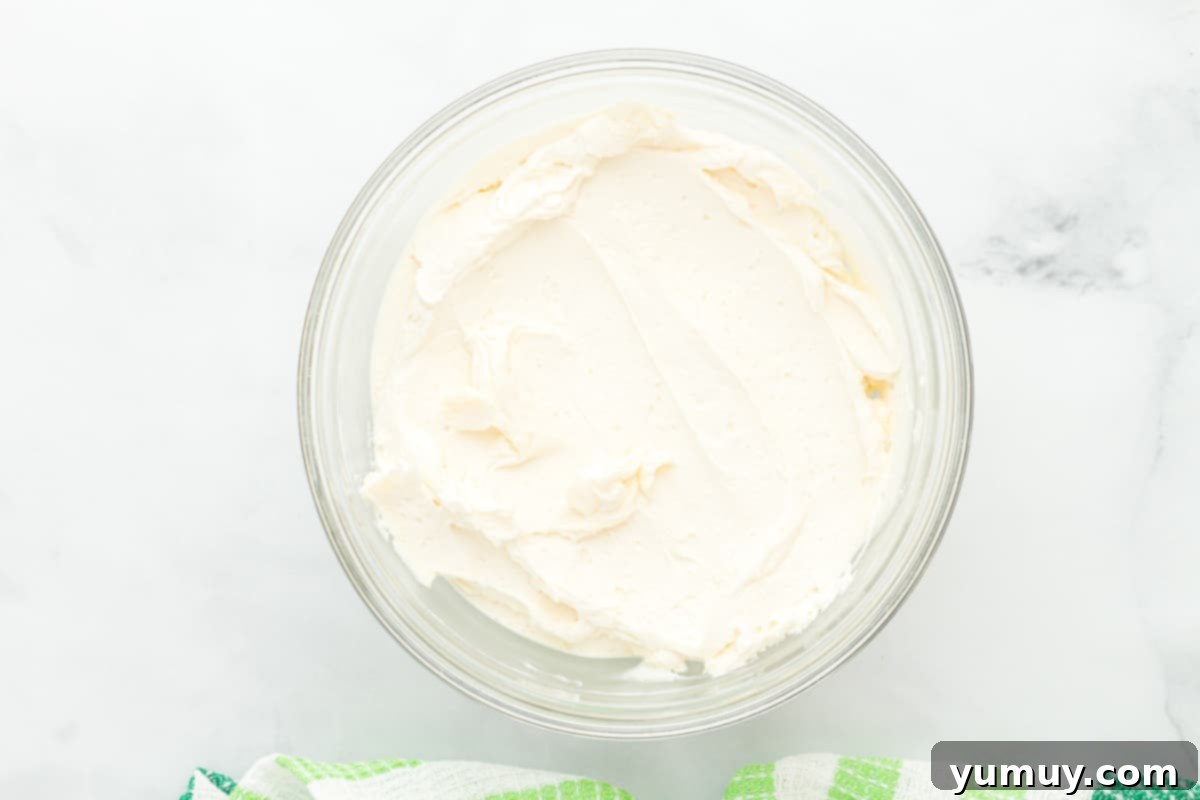
- In a large bowl, using a hand mixer (or stand mixer with paddle attachment), combine the powdered sugar, slightly softened unsalted butter, and pure vanilla extract. Beat on high speed for about 5 minutes, or until the frosting is incredibly light, fluffy, and smooth. The consistency should be firm enough to hold its shape when piped through an icing tip, yet soft enough to spread smoothly onto the cake without tearing it.5 cups powdered sugar, 1½ cups unsalted butter, 1 tablespoon pure vanilla extract

For Assembly
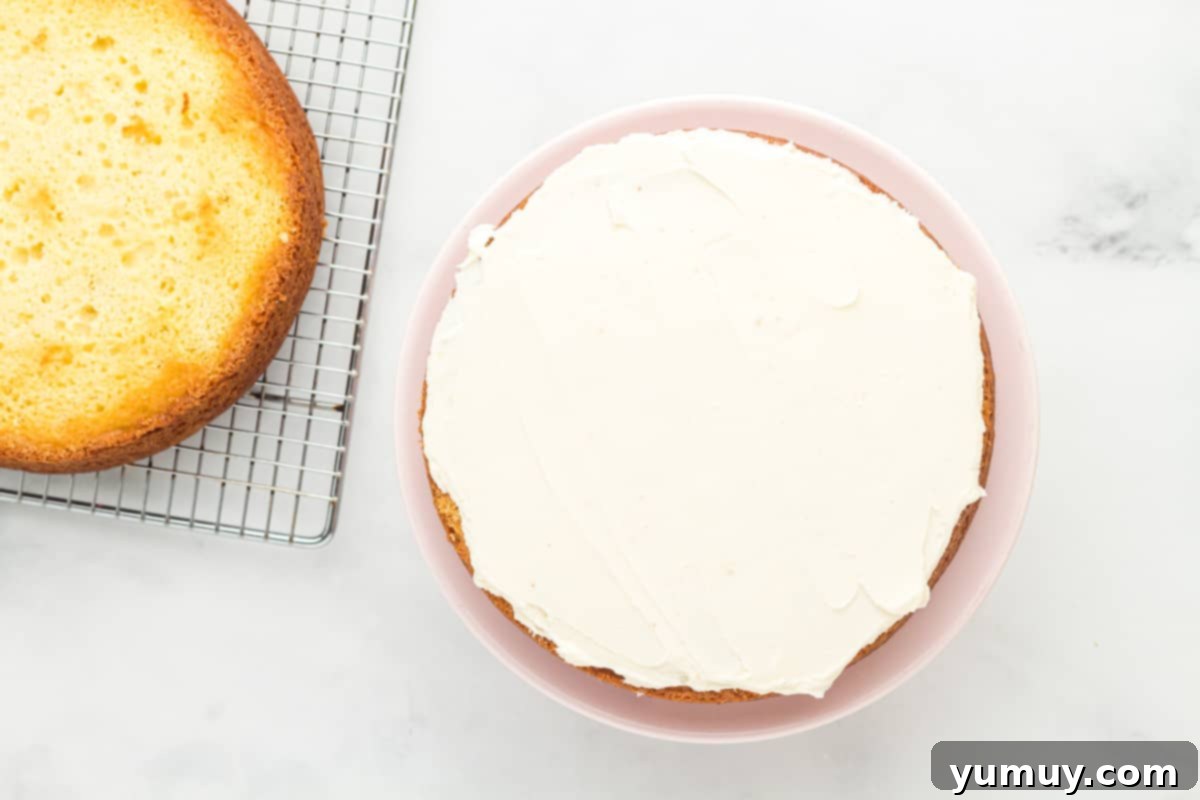
- To secure your cake, place a thin layer of frosting (about 2 tablespoons) in the center of your chosen cake board or serving plate. Place one cooled cake layer (with the cut, flat side facing upwards) directly on top of this frosting base. This thin layer acts as an edible adhesive, preventing your cake from sliding during transport or serving.
- Generously spread another layer of frosting evenly over the top of the first cake layer. Then, carefully place the second cake layer on top, ensuring the bottom (uncut) side is facing upwards for a perfectly flat and stable top surface. You now have a classic two-layer cake ready for its exterior finish.

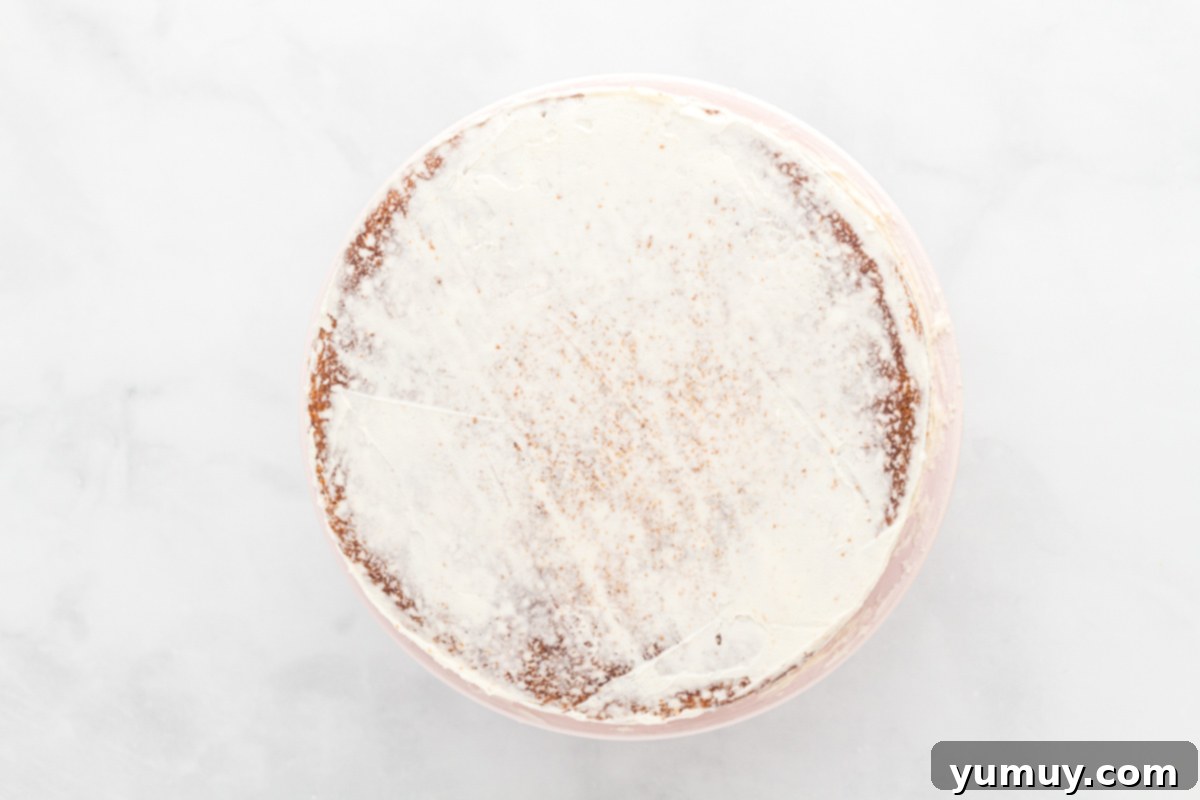
- Apply a very thin, even layer of frosting all around the top and sides of the stacked cake. This is known as a “crumb coat,” and it’s a critical step. The crumb coat acts as a barrier, sealing in any loose cake crumbs and preventing them from showing up in your final, smooth layer of frosting. It creates a clean canvas for decoration.

- Place the crumb-coated cake in the freezer for about 10-15 minutes. This short chill time allows the crumb coat to firm up, making it easier to apply the final layer of frosting without disturbing the sealed crumbs.
- Remove the cake from the freezer. Now, apply a second, thicker, and perfectly smooth layer of white frosting to the top and sides of the cake. Take your time to spread this layer as smoothly and evenly as possible; this will be the background for your wreath decoration.
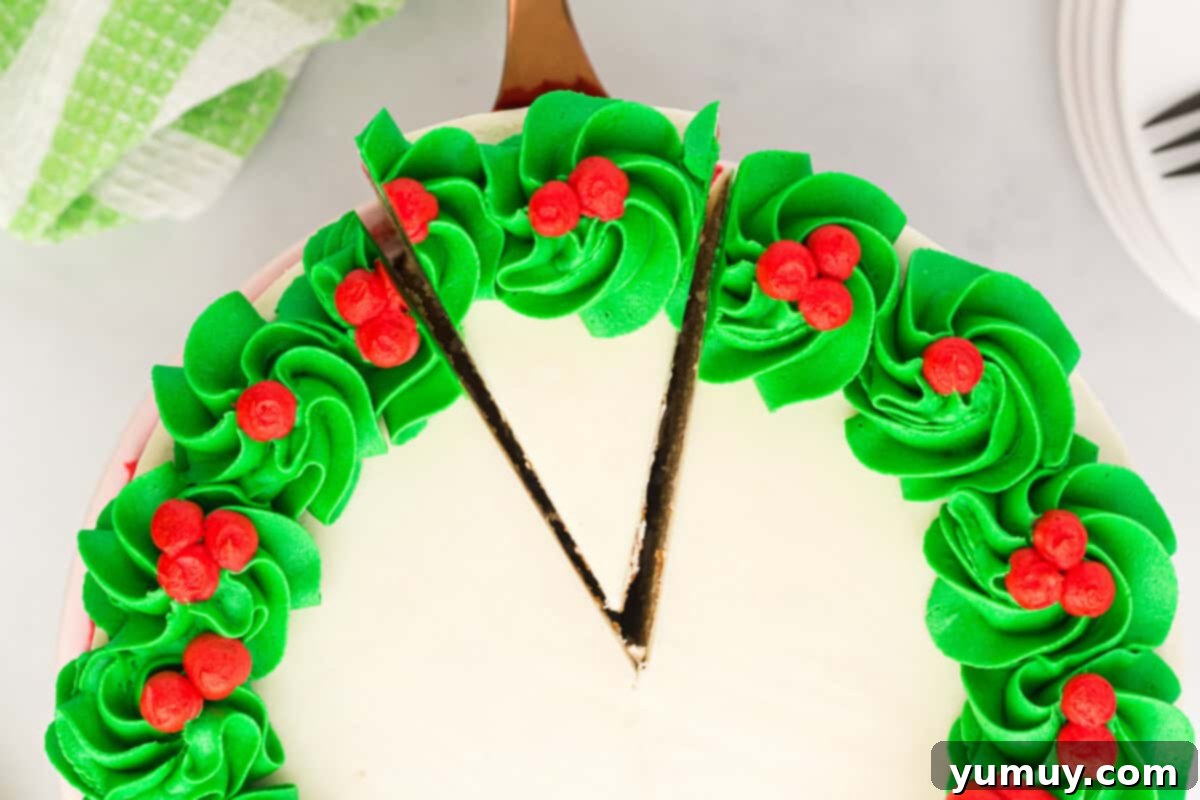
- Separate about 1½ to 2 cups of the remaining white frosting into a separate bowl. Add green gel food coloring, mixing until you achieve your desired vibrant holiday green. Transfer this green frosting to a piping bag fitted with a Wilton 1M piping tip (or a star tip). Pipe round green “roses” or continuous star swirls around the entire top border of the cake, forming the lush base of your Christmas wreath.Green gel food coloring
- Take about ½ cup of white frosting in another separate bowl and color it with red gel food coloring to create a rich, festive red. Transfer this red frosting to a piping bag fitted with a Wilton #12 tip (or a small round tip). Pipe small, round red dots, resembling “berries,” artfully interspersed among the green wreath. At the top of your wreath, pipe a festive red bow. For an extra touch of detail, you can also pipe small round dots of red icing around the very bottom outer edge of the cake.Red gel food coloring

Notes
Calories from Fat 333
@easydessertrecipes
for a chance to be featured.
Baking the Perfect Layers
The journey to a perfect Christmas Wreath Cake begins with baking flawless cake layers. Precision in this stage ensures a structurally sound and delicious base for your festive decorations.
First, preheat your oven to 350°F (175°C). Prepare two 8-inch round cake pans by coating them thoroughly with nonstick spray and lining the bottoms with parchment paper. This vital step ensures your cakes will not stick and will release cleanly after baking. In a large mixing bowl, combine the white cake mix, melted unsalted butter, large room temperature eggs, pure vanilla extract, room temperature full-fat sour cream, and room temperature milk. Mix these ingredients just until they are fully incorporated and the batter is smooth. Be cautious not to overmix, as excessive blending can develop the gluten too much, leading to a tougher, denser cake. For beautifully even layers, divide the batter precisely between the two prepared pans, aiming for about 397 grams (14 ounces) in each. A kitchen scale can be incredibly helpful for this, ensuring both cakes bake evenly and achieve identical heights.
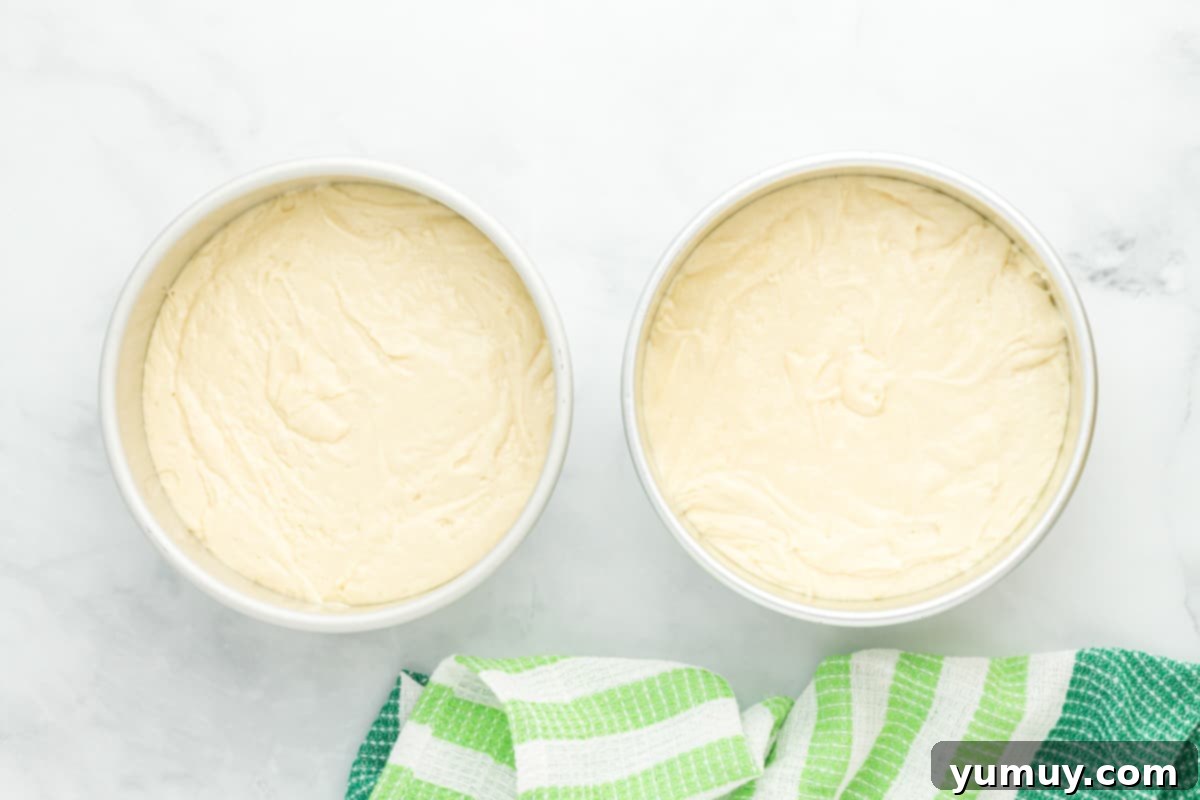
Bake the cakes for 33-35 minutes, or until a wooden toothpick inserted into the center emerges clean. This is the ultimate test to confirm doneness. Once baked, remove the pans from the oven and let the cakes cool within their pans for 15 minutes. This initial cooling allows the cakes to firm up slightly, making them less fragile. After 15 minutes, carefully invert them onto wire racks to cool completely to room temperature. Patience is key here; frosting a warm cake will cause the buttercream to melt and slide off. Once fully cooled, use a large serrated knife to level the tops of both cakes, creating perfectly flat surfaces. This critical step ensures your layers stack neatly and your finished cake looks professionally assembled. Finally, wrap each leveled cake layer tightly in food-safe plastic wrap and refrigerate for at least 2 hours. Chilling firms the cakes, significantly reducing the risk of crumbling or breakage during the frosting process.
Whipping Up Velvety Buttercream
The quality of your buttercream frosting is paramount to a delightful Christmas Wreath Cake. This simple recipe yields a light, fluffy, and perfectly pipeable frosting.
In a large bowl, combine the powdered sugar, slightly softened unsalted butter, and pure vanilla extract. Using a hand mixer (or a stand mixer fitted with the paddle attachment), begin beating on low speed until the sugar and butter are just combined, then increase to high speed. Beat vigorously for about 5 minutes. During this time, the mixture will transform into a wonderfully light, airy, and fluffy buttercream. The ideal consistency is crucial: it should be firm enough to hold its shape when piped (essential for the intricate wreath design) but soft enough to spread smoothly onto the cake without resistance or tearing the delicate cake layers. If your frosting seems too stiff, you can add a tiny splash of milk (about half a teaspoon at a time) and beat again until it reaches the desired consistency. Conversely, if it’s too soft, add a tablespoon or two of extra powdered sugar and beat until thickened.
Assembling Your Masterpiece
With your perfectly baked and chilled cake layers and velvety buttercream ready, it’s time to assemble your Christmas Wreath Cake. This stage requires a steady hand and attention to detail for a professional finish.
Begin by placing a thin layer of approximately 2 tablespoons of frosting in the very center of your chosen cake board or serving plate. This acts as an adhesive to keep your cake securely in place. Carefully position one of your chilled cake layers (cut side facing upwards) directly on top of this frosting base. Next, apply a generous, even layer of buttercream over the top of this first cake layer. This is the filling that will add another burst of flavor and moisture between your cake layers. Gently place the second cake layer on top, ensuring the bottom (uncut) side is facing upwards. This creates a beautifully flat and stable top surface for frosting and decorating, giving your two-layer cake a polished look.
Now, it’s time for the crucial crumb coat. Apply a very thin, uniform layer of frosting around the entire top and sides of the stacked cake. This “crumb coat” is essential for capturing any loose cake crumbs and preventing them from showing up in your final layer of frosting, ensuring a clean and pristine finish. Once the crumb coat is applied, place the cake in the freezer for about 10-15 minutes. This brief chill allows the crumb coat to firm up and set, making it much easier to apply the subsequent, smoother layer of frosting without disturbing the trapped crumbs. This step is a small effort that makes a huge difference in the overall appearance of your cake.
The Art of Decorating Your Christmas Wreath
The most exciting part is bringing your Christmas Wreath Cake to life with vibrant, festive decorations. This is where your creativity shines!
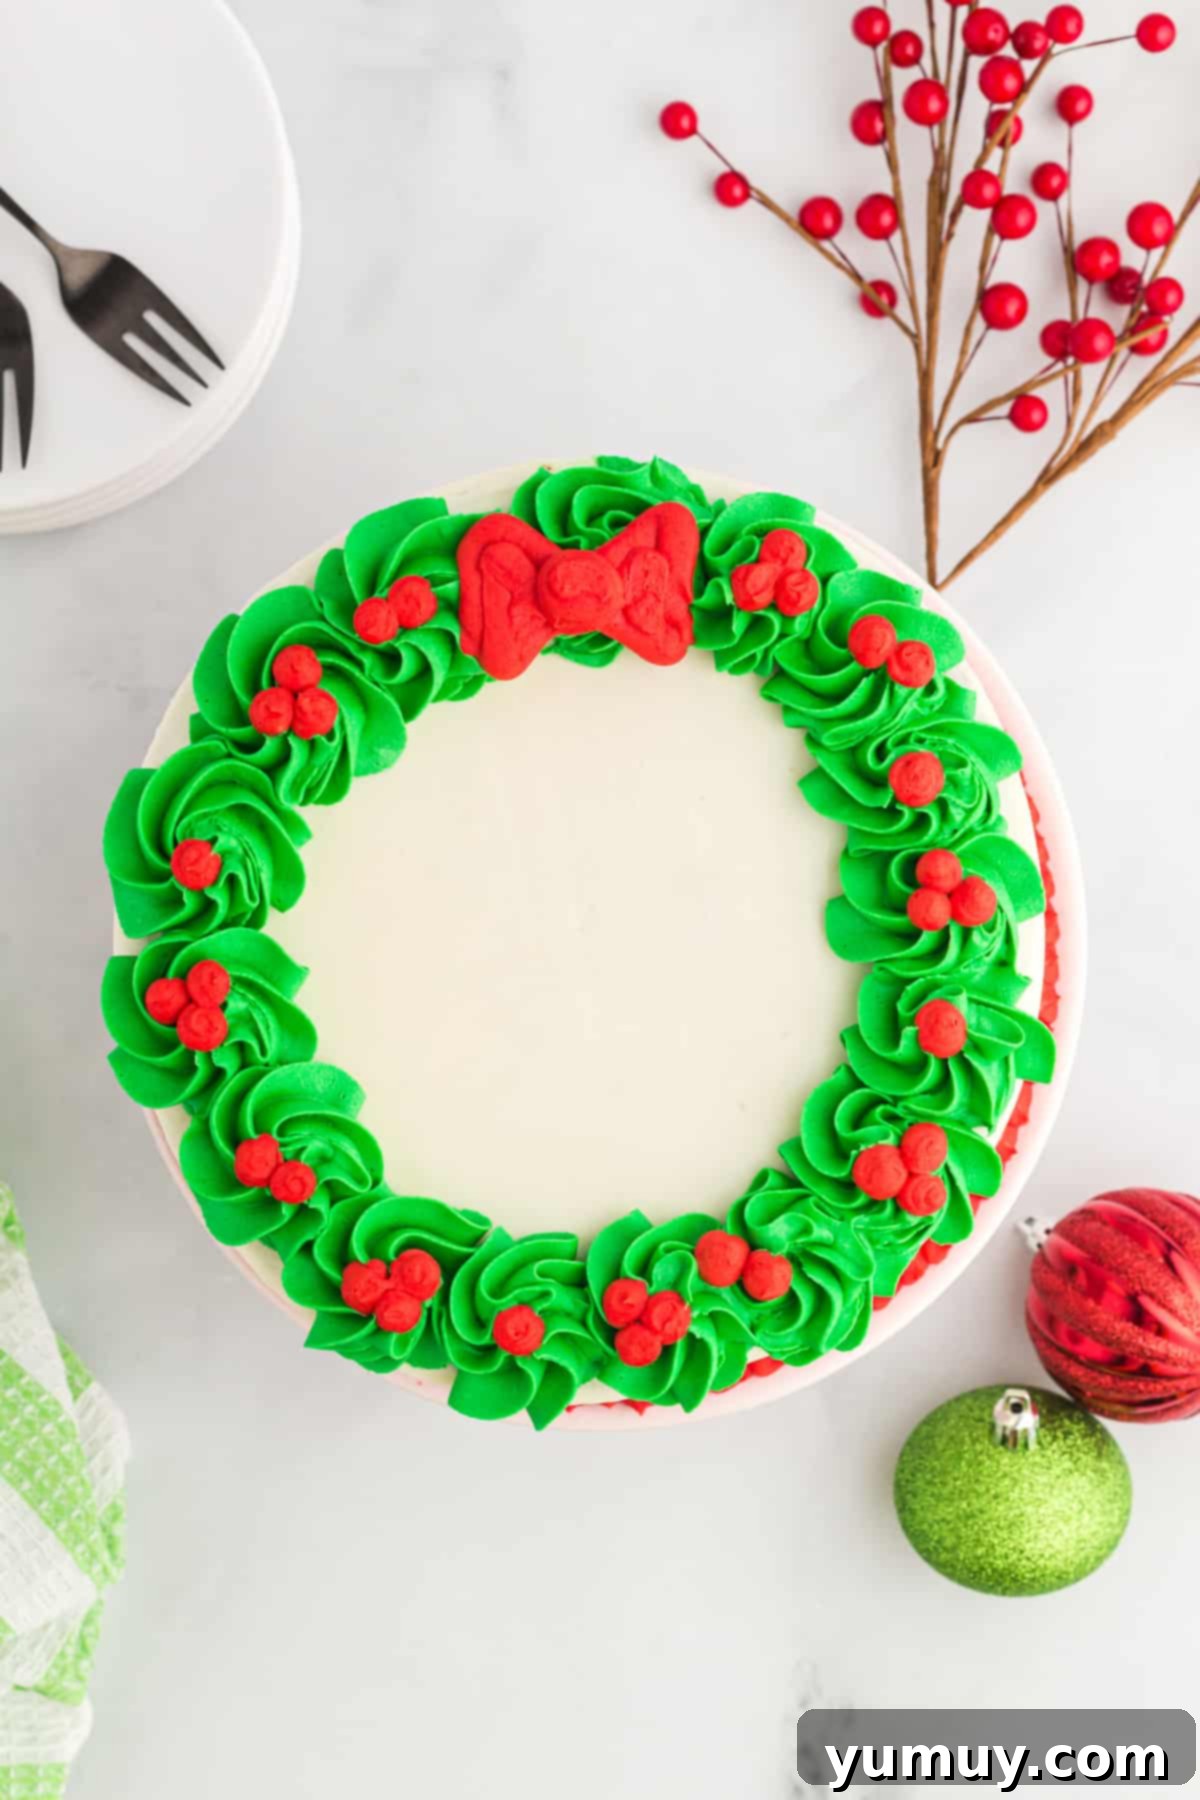
Remove your crumb-coated cake from the freezer. Apply the second, final layer of white frosting evenly to the top and sides of the cake. Take your time to spread this layer as smoothly as possible; this will be the pristine “snowy” background for your colorful wreath. Next, scoop about 1½ to 2 cups of the remaining white frosting into a separate bowl. Add several drops of green gel food coloring, mixing thoroughly until you achieve a rich, deep holiday green. Transfer this green frosting to a piping bag fitted with a Wilton 1M piping tip (or any large open star tip). Carefully pipe round green “roses” or continuous star swirls around the entire top outer edge of the cake, creating the lush, full shape of your Christmas wreath. Experiment with your piping technique to create varied textures, mimicking real foliage.
For the festive accents, take approximately ½ cup of white frosting and color it with red gel food coloring until you achieve a bright, cheerful red. Transfer this red frosting to a piping bag fitted with a Wilton #12 tip (or a small round tip). Pipe small, distinct round red dots evenly across your green wreath, creating the illusion of glistening “berries.” To complete the look, pipe a delicate red bow at the very top center of your buttercream wreath. For an extra touch of charm and visual balance, you can also pipe a series of small red dots or a continuous line of red icing around the bottom outer edge of the entire cake. Step back and admire your beautiful, edible Christmas Wreath Cake, ready to impress!
Expert Tips for Christmas Wreath Cake Success
Achieving a show-stopping Christmas Wreath Cake is easy with a few insider tips. These expert recommendations will help you ensure a moist cake, perfect frosting, and a flawless presentation:
- Room Temperature Ingredients are Non-Negotiable: Always ensure your butter, eggs, milk, and sour cream are at room temperature before you begin. This allows them to emulsify properly, creating a smooth, lump-free batter and an incredibly light, fluffy frosting. Cold ingredients can cause the batter to curdle and the frosting to be stiff.
- Do Not Overmix the Cake Batter: Mix your cake batter just until the ingredients are combined and no dry streaks remain. Overmixing develops gluten, which can lead to a dense, tough, and dry cake. A light hand results in a tender, moist crumb.
- Cool Cakes Completely Before Frosting: This is a golden rule in baking. Attempting to frost a warm cake will inevitably lead to melted, sliding frosting and a messy result. Ensure your cake layers are completely cool to the touch, and ideally chilled, before you even think about applying buttercream.
- Utilize the Crumb Coat: Don’t skip the crumb coat! This thin first layer of frosting traps any loose cake crumbs, preventing them from mixing into your final, visible layer of frosting. It creates a clean, smooth canvas for your decorations.
- Chill Between Frosting Layers: Just a quick 10-15 minute chill in the freezer after the crumb coat, and again after applying the final white layer, will firm up the frosting. This makes handling the cake easier and ensures crisp, clean lines for your decorative piping.
- The Right Food Coloring Makes a Difference: For vibrant, true-to-life red and green hues, gel food coloring is highly recommended over liquid food coloring. Gel colors are concentrated, so you need less product to achieve intense shades, which prevents thinning out your frosting. Brands like Chefmaster Liqua-gel (specifically “Super Red” and “Leaf Green”) deliver excellent results.
- Piping Bag Alternatives: If you don’t have a dedicated piping tip set or piping bags, a sturdy Ziploc bag can be a great substitute. Simply snip a small corner off the bag to create an opening, and you can pipe your frosting manually.
- Practice Makes Perfect: If you’re new to piping, take a small amount of colored frosting and practice on a piece of parchment paper or a plate. You can scrape it back into the bowl and reuse it. This helps you get a feel for the pressure and movement before decorating the actual cake.
Storage and Freshness: Enjoying Your Cake Longer
To ensure your beautiful Christmas Wreath Cake remains as delicious as it is stunning, proper storage is essential. Here’s how to keep it fresh for days:
For immediate enjoyment, store leftover Christmas Wreath Cake in an airtight container at room temperature for up to 3 days. If your home is particularly warm, or for longer freshness, transfer the cake to the refrigerator, where it will stay delicious for up to 5 days. Ensure the container is truly airtight to prevent the cake from drying out or absorbing refrigerator odors. For extended storage, this cake freezes beautifully. Wrap individual slices or the entire cake (if well-covered with plastic wrap and then foil) and place in an airtight freezer-safe container for up to 1 month. When you’re ready to enjoy, simply transfer the frozen cake to the refrigerator and allow it to thaw overnight. Bring it to room temperature before serving for the best flavor and texture.
Festive Flavor Variations and Creative Decorations
While the classic vanilla cake and buttercream are a winning combination, feel free to get creative with your Christmas Wreath Cake! Here are some ideas to customize it and make it uniquely yours:
- Cake Flavor Swaps:
- Chocolate Delight: Use a chocolate cake mix and chocolate buttercream for a rich, decadent version.
- Red Velvet Twist: A classic holiday favorite, red velvet cake with cream cheese frosting (then piped green and red) would be spectacular.
- Gingerbread Spice: Add ground ginger, cinnamon, and nutmeg to your white cake mix, and perhaps a touch of molasses, for a warm, spicy flavor.
- Frosting Flavor Enhancements:
- Peppermint Burst: Add a few drops of peppermint extract to the buttercream for a refreshing minty twist, perfect for the holidays.
- Almond Essence: A dash of almond extract can provide a sophisticated, nutty undertone to the vanilla buttercream.
- Orange Zest: Incorporate finely grated orange zest into the frosting for a bright, citrusy note that pairs beautifully with vanilla.
- Creative Decoration Ideas:
- Sugared Cranberries and Rosemary: For a more natural and elegant look, adorn your green wreath with sparkling sugared cranberries and small sprigs of fresh rosemary to mimic pine needles.
- Edible Glitter or Sprinkles: Add a dusting of edible glitter or festive red and green sprinkles over the wreath for extra sparkle.
- Candy Canes: Crush candy canes and sprinkle them over the cake or use small whole candy canes as decorative elements around the base or on top.
- Fondant Accents: If you’re feeling ambitious, use pre-made red or white fondant to cut out delicate holly leaves or small bows to place on the wreath.
- Different Piping Tips: Experiment with various star tips, leaf tips, or even a grass tip to create different textures and depths for your green wreath.
Why This Cake is the Perfect Holiday Centerpiece
The Christmas Wreath Cake is more than just a dessert; it’s a celebration of holiday cheer and the joy of sharing. Its vibrant colors, festive design, and irresistible flavor make it an ideal centerpiece for any holiday gathering. Imagine the smiles it will bring as guests gather around your table, admiring its beauty before savoring its deliciousness. It’s an easy recipe that truly wows, allowing you to spend less time stressing in the kitchen and more time creating cherished memories with loved ones. This holiday season, let this exquisite cake be the star of your dessert table, bringing warmth, beauty, and festive cheer to all who gather.
More Festive Dessert Recipes to Spark Your Holiday Joy
Letter to Santa Cake
Christmas Cheesecake
Grinch Cupcakes
Cornflake Wreaths
Browse All Christmas Desserts
